In this article, I will share with you 3 techniques that transformed my landscape painting. Landscape painting is a captivating art form that allows artists to bring the beauty of nature to life on canvas. However, many aspiring painters find themselves struggling to achieve the desired results.
If you’re an artist grappling with challenges such as capturing accurate tonal values, creating a sense of atmospheric depth, or mixing colors to achieve the right saturation, you’re not alone. As a self-taught artist, I’ve faced these same hurdles on my journey to improve my landscape painting skills.
Through persistent practice and exploration, I discovered three key techniques that revolutionized my approach to landscape painting. These methods not only addressed the common issues I encountered but also dramatically enhanced the overall quality of my work. By incorporating these techniques into my artistic process, I experienced a rapid improvement in my paintings, transforming them from flat and lifeless to vibrant and engaging representations of the natural world.
In this blog post, I’ll share three game-changing techniques that can transform your landscape painting skills. Whether you’re a beginner looking to establish a strong foundation or an intermediate artist aiming to refine your craft, these methods will help you overcome common obstacles and elevate your artwork to new heights.
The Power of Transformation in Landscape Painting
Before we dive into the specific techniques, it’s essential to understand that improving your landscape painting skills is a journey. Each artist’s path is unique, but by applying these proven methods, you can accelerate your progress and achieve more satisfying results in your work. The techniques I’m about to share address fundamental aspects of landscape painting, including:
- Mastering tonal values to create depth and dimension
- Capturing atmospheric perspective for a sense of distance and space
- Mixing colors effectively to achieve the desired saturation and mood
By focusing on these critical elements, you’ll be able to breathe life into your landscapes, creating artwork that not only captures the essence of a scene but also evokes emotion in your viewers. Let’s explore these transformative techniques that will take your landscape painting skills to the next level.
Start with Sketching
The Overlooked Foundation of Great Landscapes
You might think that sketching before painting is an obvious step, but surprisingly, many artists skip this crucial phase. I was once among those who dove straight into painting without any preliminary sketching. For years, I painted landscapes on and off, always drawn to the beauty of natural scenes. However, it wasn’t until a significant life change that I truly began to focus on improving my craft.
When I turned 30 and moved to New Zealand, I reignited my passion for painting. The breathtaking scenery of my new home inspired me to create numerous mountain scenes, landscapes, and seascapes. Despite my enthusiasm, I found myself struggling with two key aspects: achieving depth in my paintings and creating compelling compositions. After a few years, I felt my artistic growth had stagnated, and I knew I needed guidance to break through this plateau.
Seeking Mentorship and Discovering a Game-Changer
In my quest for improvement, I contacted several artists, hoping for advice or mentorship. While most of my attempts went unanswered, I was fortunate to connect with Andrew Tischler, an experienced artist who became my mentor. This relationship proved invaluable, culminating in a visit to Melbourne, Australia, where I had the opportunity to observe and learn from Andrew’s painting process firsthand.
The Power of Sketching

During our interactions, Andrew posed a simple yet profound question: “Do you do sketches before you start your paintings?” I felt somewhat embarrassed admitting that I didn’t. His advice was clear and immediate: Get a sketchbook and start sketching. Following this guidance, I incorporated sketching into my artistic routine, and the results were transformative. My paintings began to improve significantly, primarily due to enhanced composition.
Sketching serves multiple purposes in the landscape painting process:
- Composition Planning: Quick sketches allow you to experiment with different layouts and focal points before committing to a full painting.
- Value Study: Sketching helps you understand and map out the values in a landscape – the range of lights and darks that create depth and dimension.
- Simplification: By sketching, you learn to distill complex scenes into their essential elements, leading to stronger, more focused paintings.
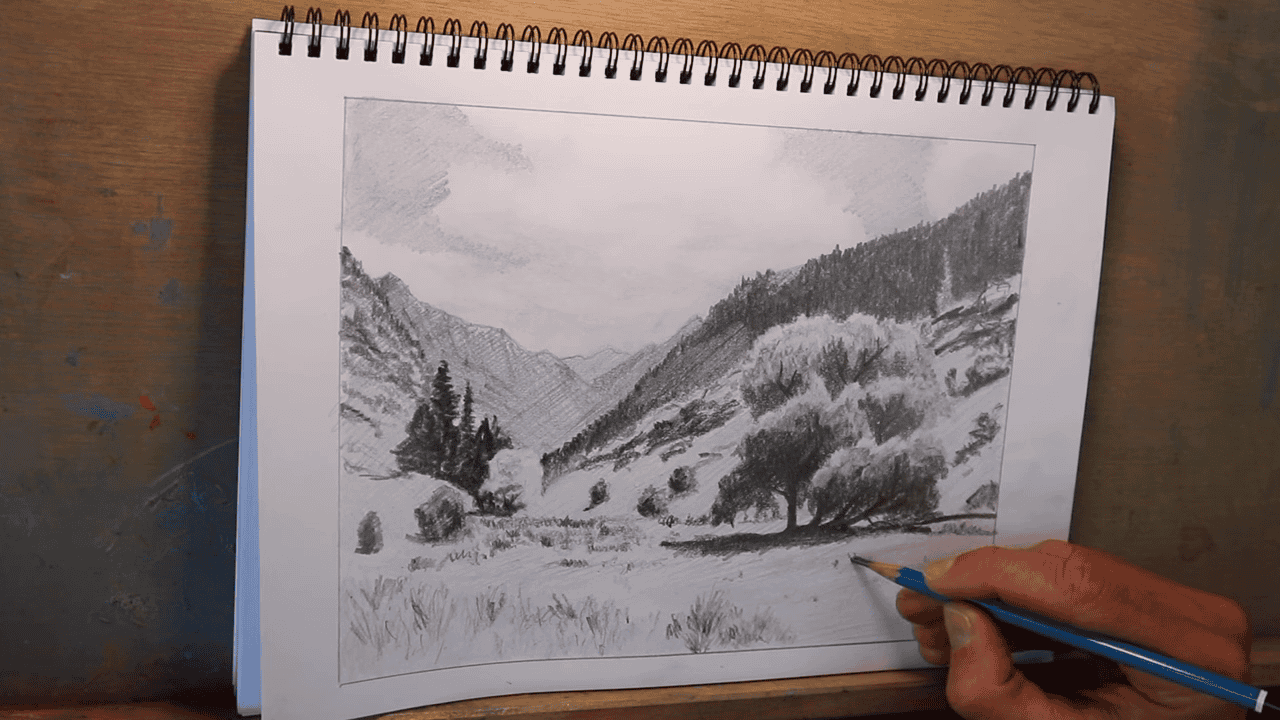
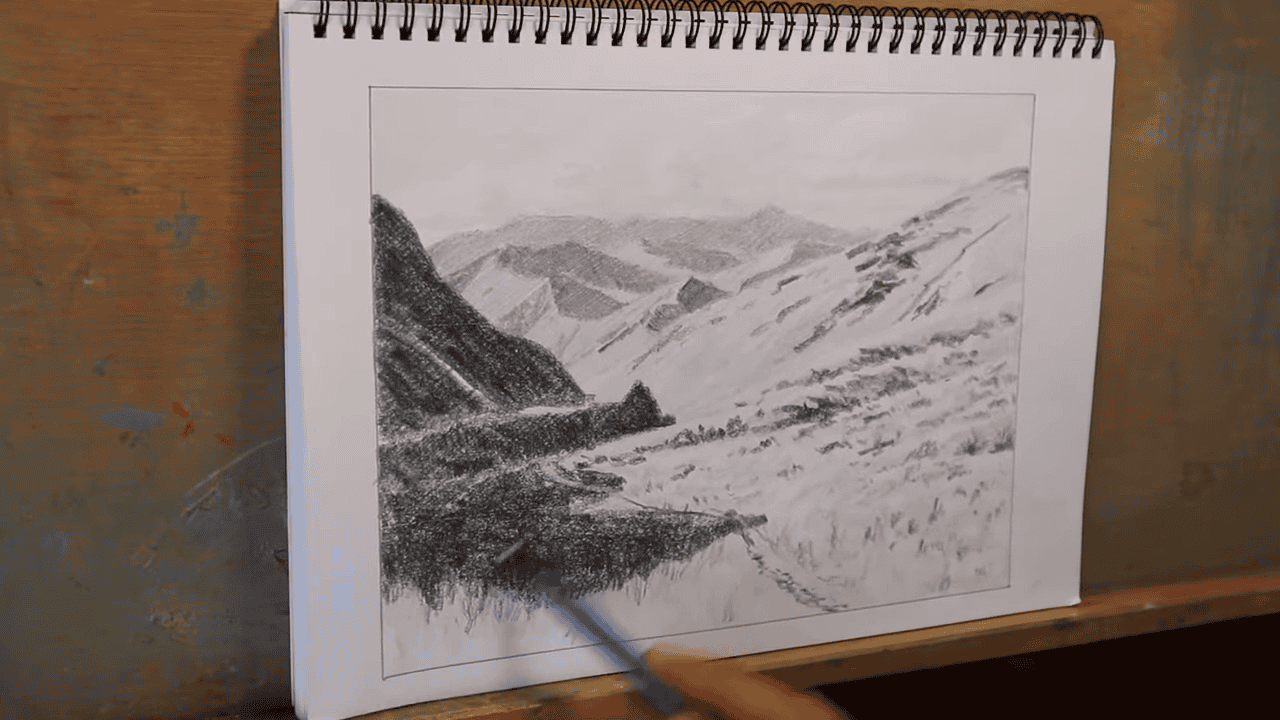
Understanding Values Through Sketching
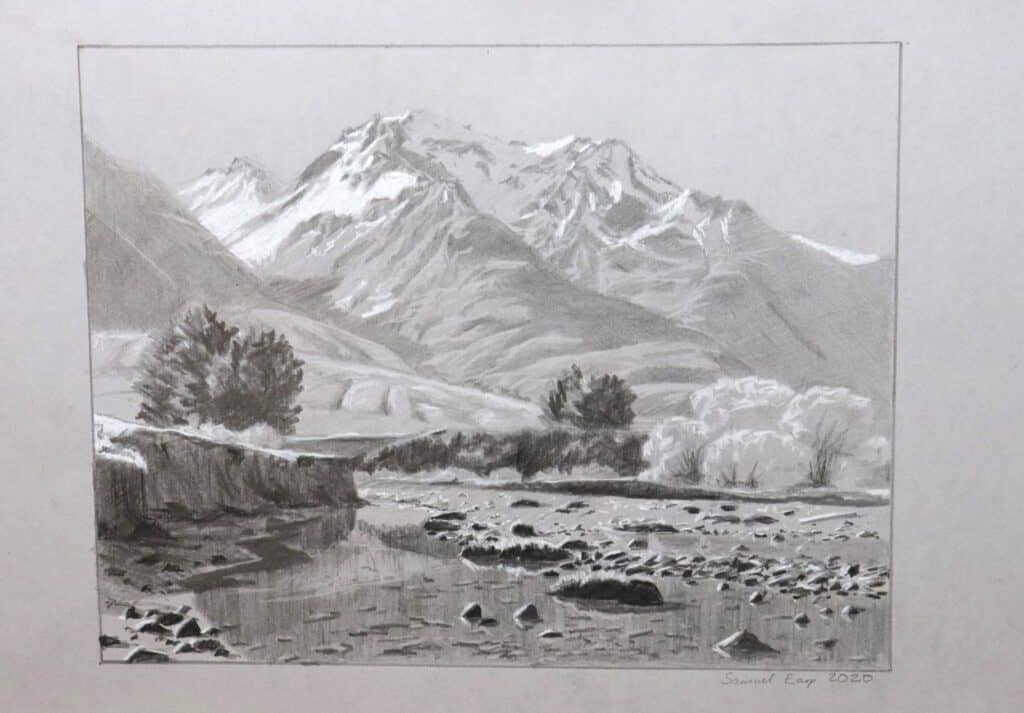
One of the most significant benefits of sketching is its ability to help you grasp the concept of values in a landscape. Value refers to the lightness or darkness of a subject, and it plays a crucial role in creating depth and atmosphere in your paintings. Typically, the foreground of a landscape contains the most extreme values – the darkest darks and the lightest lights. As landforms recede into the distance, this value range narrows, with both darks and lights becoming more muted.
Pencil sketches are an excellent tool for identifying and mapping out these value relationships. By working in grayscale, you can focus solely on light and dark without the distraction of color, allowing you to establish a solid foundation for your painting.
Incorporating Sketching into Your Process
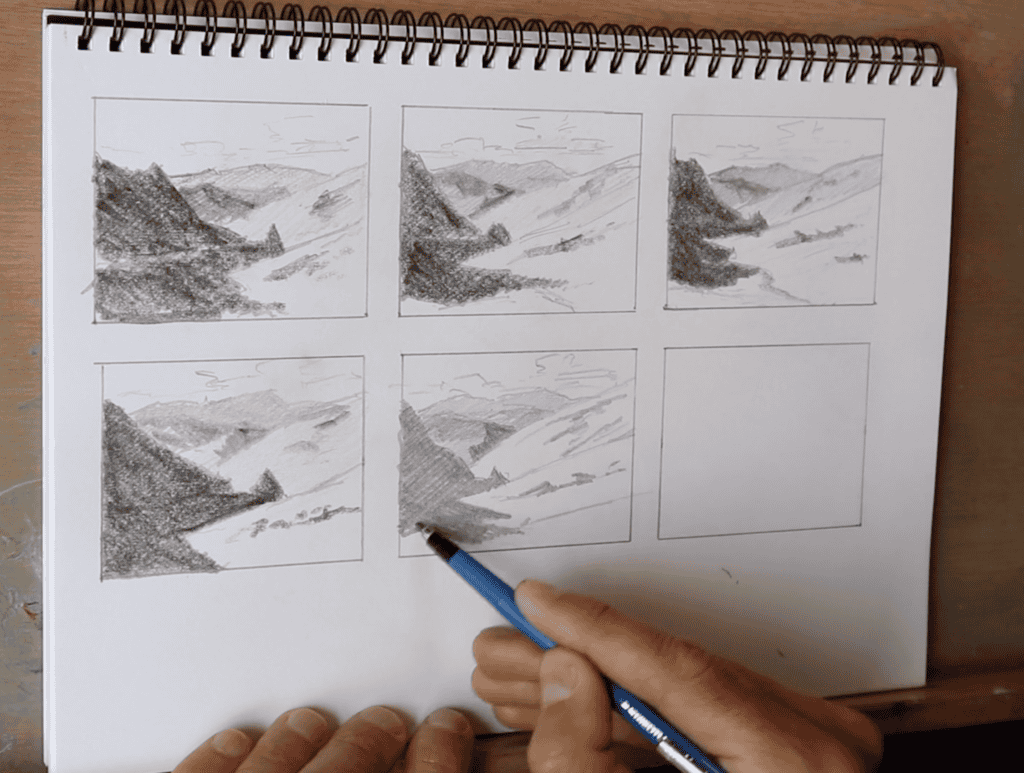
To integrate sketching into your artistic practice, start with quick thumbnail sketches. These small, rough drawings typically take about ten minutes and allow you to explore multiple composition ideas rapidly. Here’s how to approach thumbnail sketching:
- Use a small sketchbook or divide a larger page into smaller sections.
- Focus on basic shapes and values rather than details.
- Experiment with different arrangements of elements.
- Pay attention to the balance of light and dark areas.
By making sketching an integral part of your landscape painting process, you’ll likely see significant improvements in your composition, depth perception, and overall artistic output. Remember, the time invested in preliminary sketches often leads to more successful and satisfying final paintings.
These sketches serve as invaluable references for the next stage of the painting process.
Paint Dark Values and Shadows First
The Foundation of Depth and Structure
One of the most transformative techniques I’ve learned in my landscape painting journey is to begin with the dark values and shadows. This approach, which I now consider fundamental to my process, provides a solid foundation for creating depth, structure, and accurate color relationships in your paintings.
The Progression of Shadows in Landscape
When I start a painting, I always refer back to my preliminary pencil sketch. This sketch serves as a roadmap for the values in my composition. The key is to understand and replicate the progression of shadows from background to foreground:
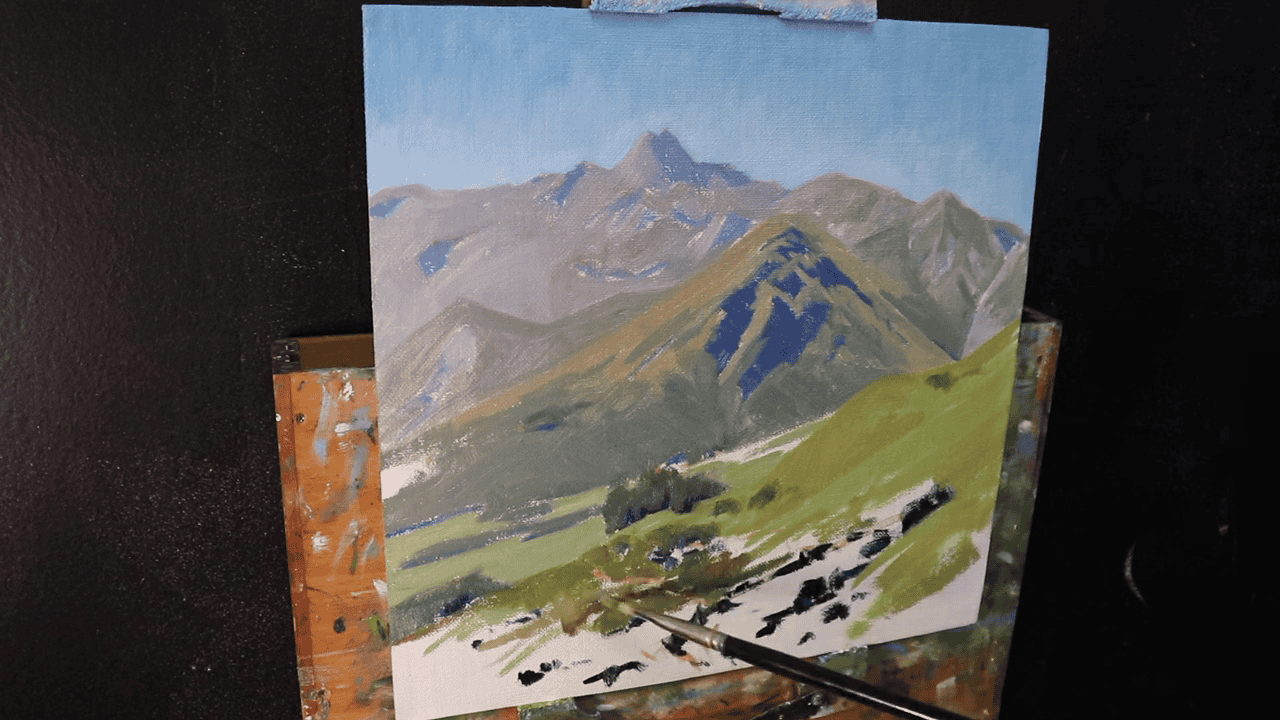
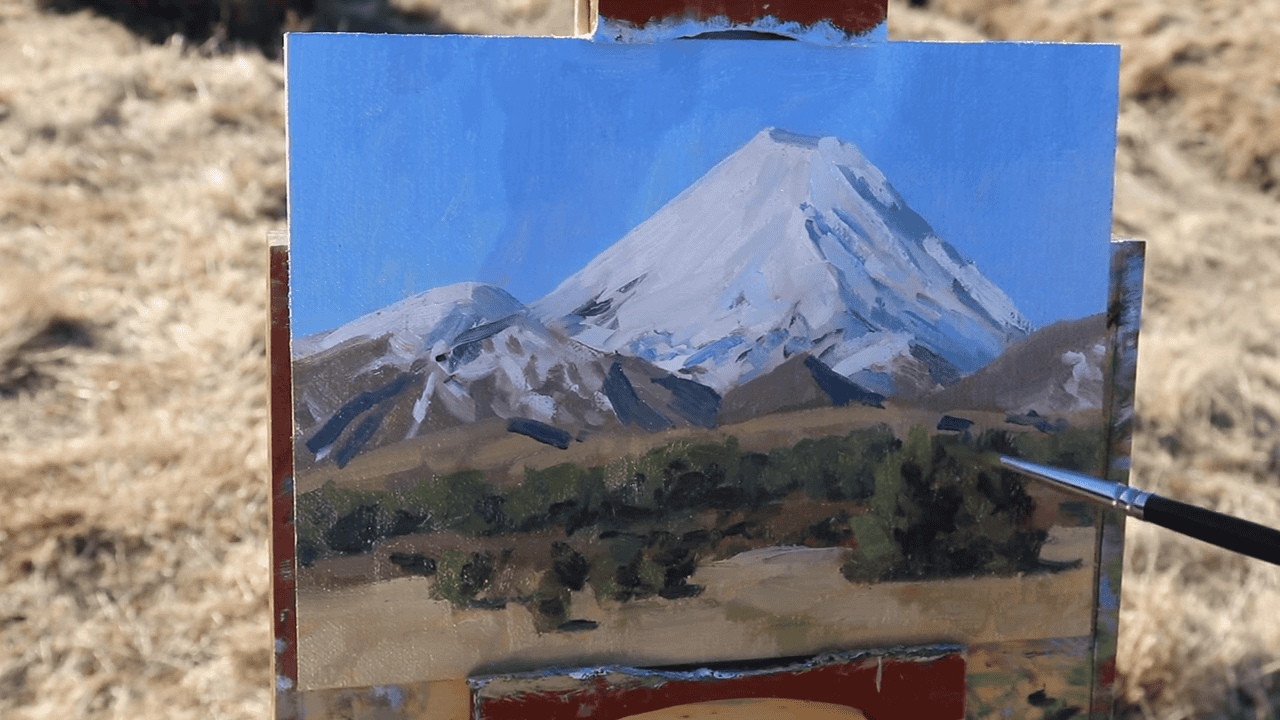
- Distant Mountains: Begin with the farthest elements in your landscape. In mountain scenes, the distant peaks have the lightest shadows. These subtle values help create the illusion of atmospheric perspective.
- Mid-ground Elements: As you move forward in the landscape, the shadows in the mid-ground become increasingly darker. This gradual darkening of values helps to create a sense of depth and distance in your painting.
- Foreground: The foreground, especially elements like trees and vegetation, typically contains the darkest values in your composition. These strong darks anchor the painting and provide a stark contrast to the lighter background elements.
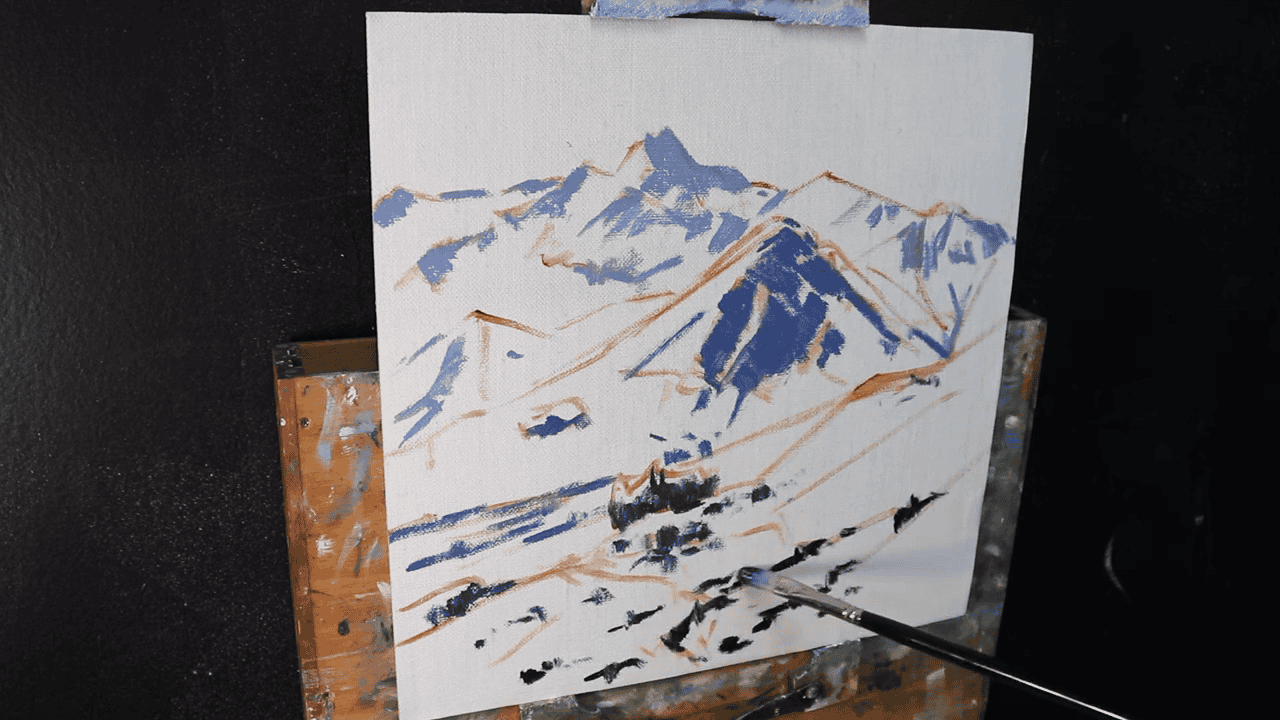
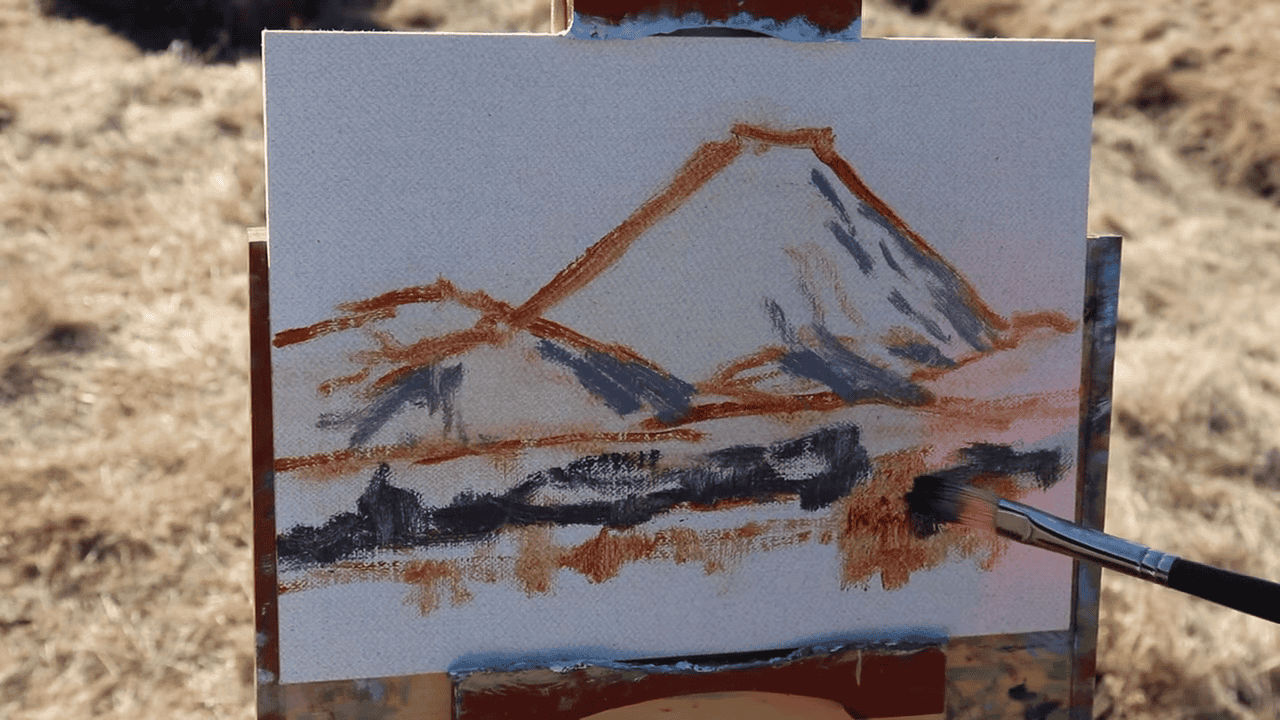
Evolving Technique: Starting with the Darkest Darks
It’s important to note that as artists, our techniques often evolve with experience. While I initially approached painting by progressing from background to foreground, I’ve since refined my method. Now, I begin by painting the darkest darks first, using the white of the canvas as a guide for tonality.
This approach allows me to establish the most extreme values immediately, creating a strong foundation for the entire composition. After laying in these darkest areas, I then work on the other dark and mid-tone values.
This revised technique helps me to more accurately judge the relationships between different values in the painting, ensuring a more cohesive and dynamic final result. Remember, there’s no one “correct” way to paint – it’s about finding the method that works best for you and allows you to achieve your desired outcome.
Benefits of the Dark-to-Light Approach
Painting dark values and shadows first offers several advantages:
- Simplified Light Areas: By establishing the dark areas early, it becomes much easier to paint the lighter areas afterward. The contrast is already set, allowing you to focus on subtle variations in the light.
- Accurate Color Saturation: This method helps in getting the saturation, or chroma, of colors correct. When you start with the darkest values, you can more easily judge the intensity of the colors you add subsequently.
- Structural Integrity: Dark values often define the structure of a landscape. By painting these first, you establish a strong compositional framework for your painting.
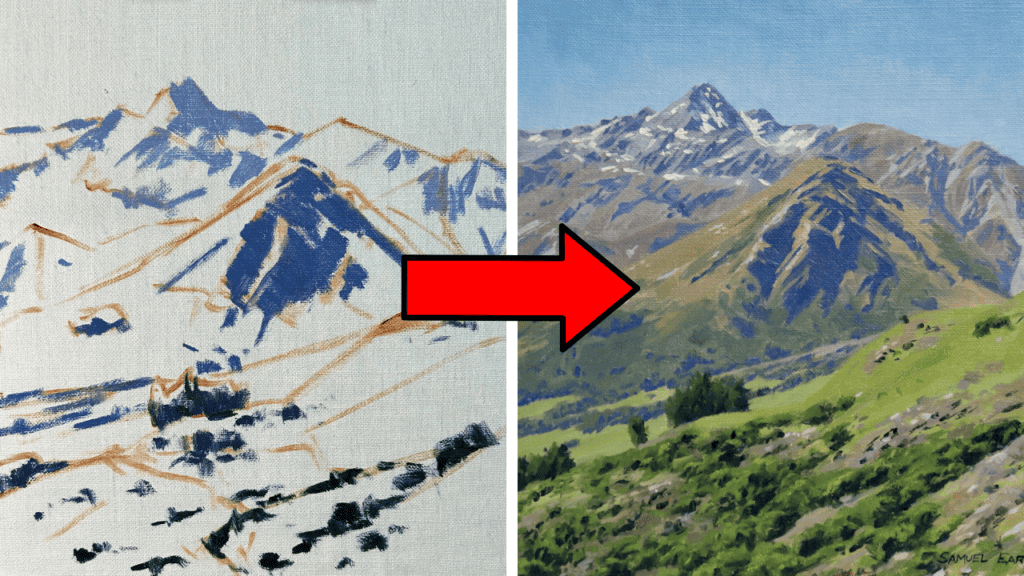
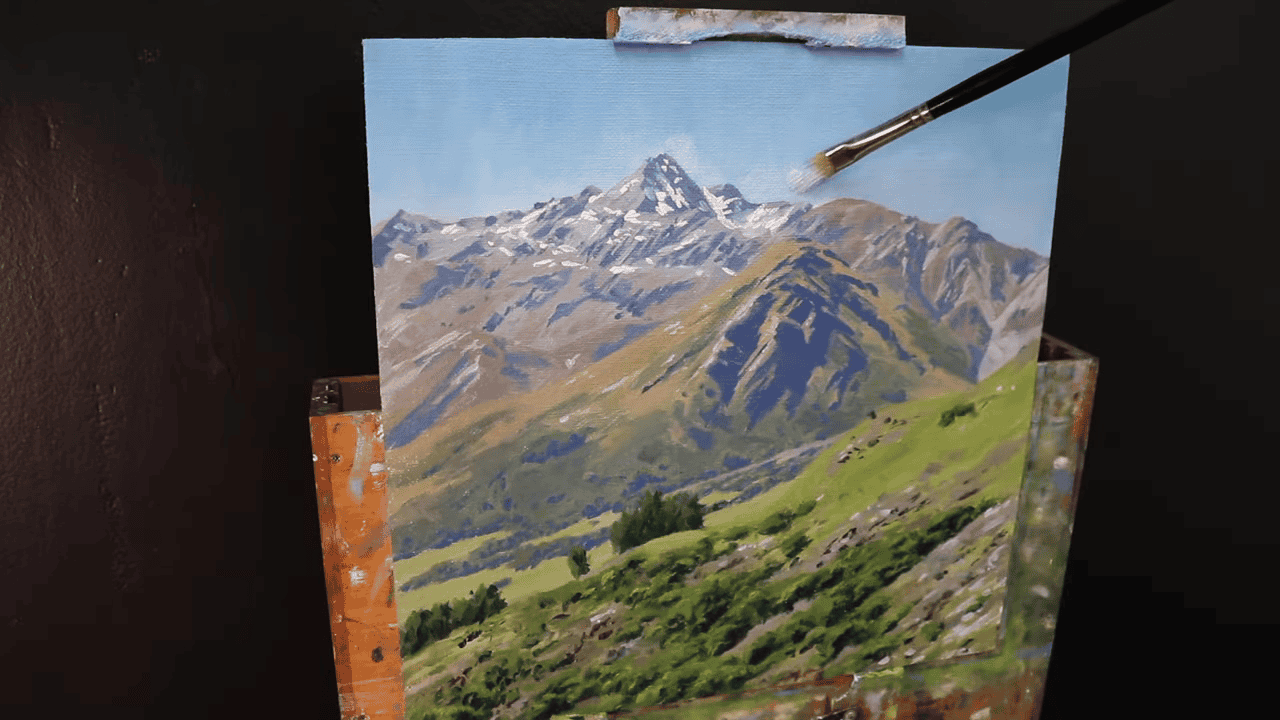
A Real-World Example
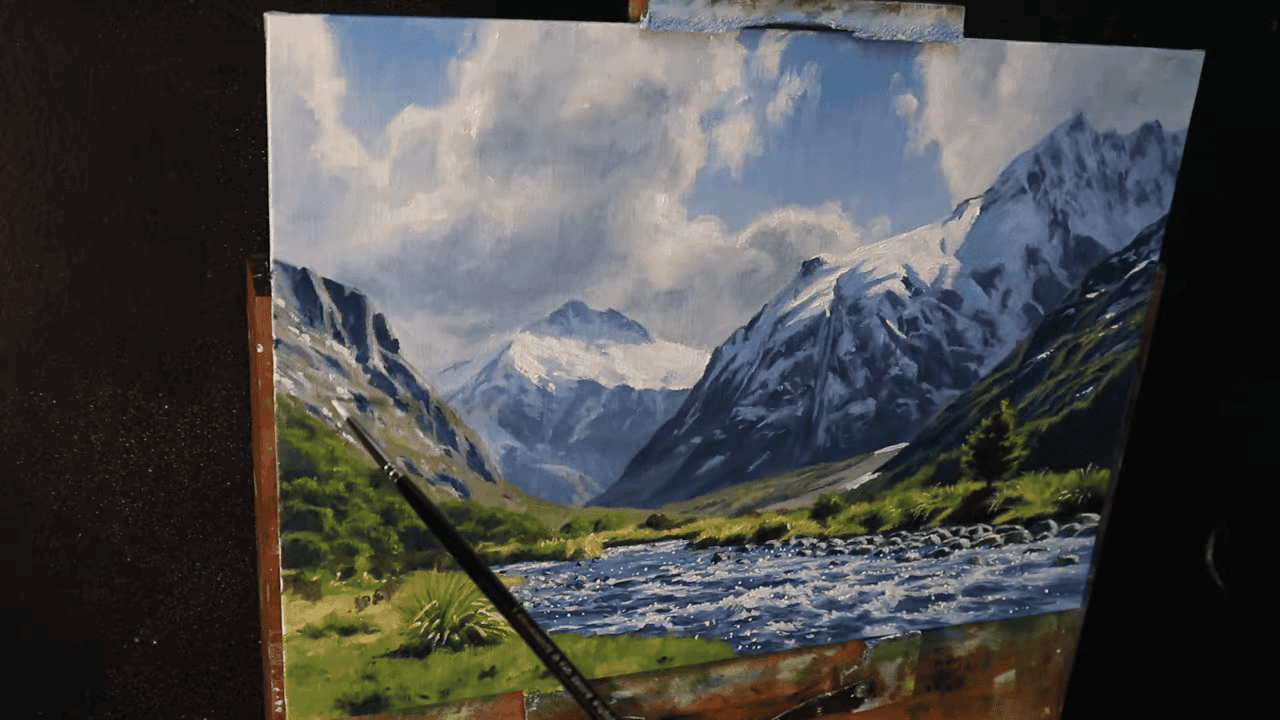
To illustrate this technique, I’ve applied this method to a painting of one of my favorite scenes in New Zealand, featuring Mount Talbot.

Practical Application and Learning from Masters
Plein Air Insights
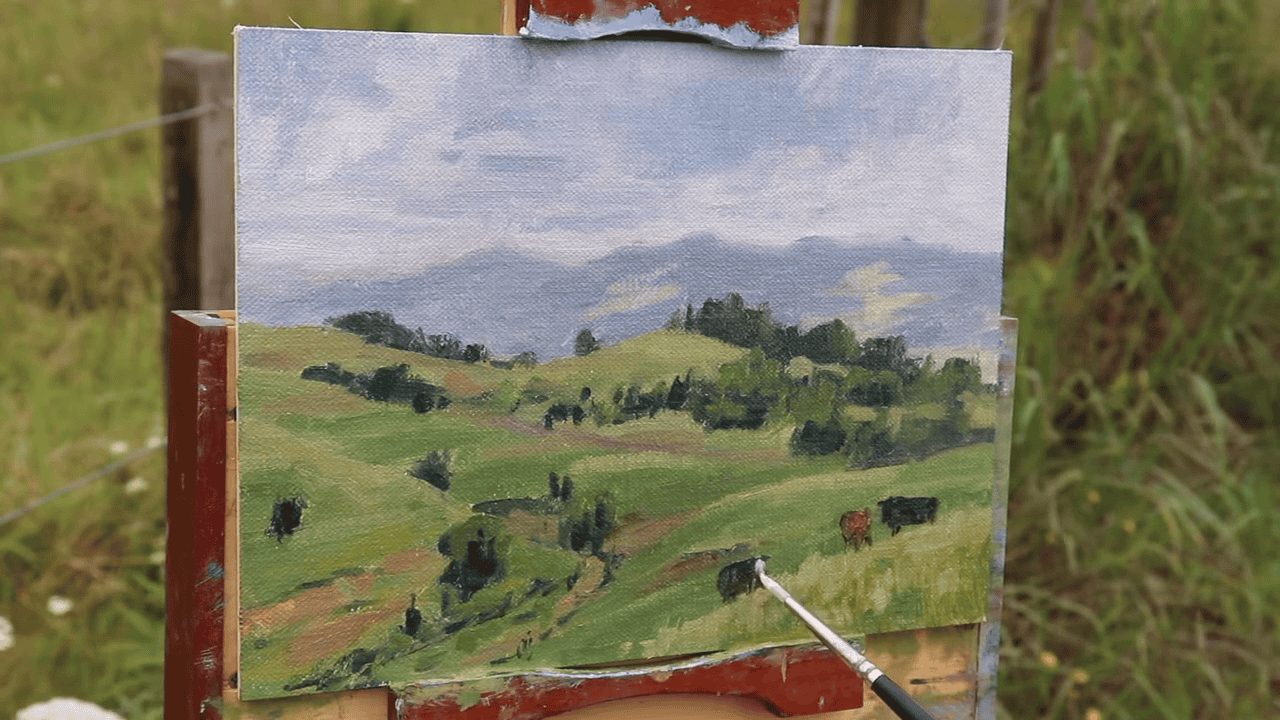
I had the fortune of learning this technique through plein air (outdoor) painting sessions with a group of talented artists, including John Crump, a renowned plein air painter in New Zealand. Observing John’s process was enlightening – he consistently starts with the dark values in his paintings.
This approach is particularly valuable in outdoor settings where lighting conditions can change rapidly. By establishing the dark values early, you create a stable foundation for your painting, even if the environment shifts unexpectedly.
Studio and Outdoor Versatility
After learning this technique, I’ve successfully adapted it for both my outdoor and studio work. The method provides a more structured and manageable painting process, regardless of the setting. In the studio, it allows for a methodical approach to building up a landscape, while in plein air situations, it offers a way to quickly capture the essence of a scene before light conditions change.
Incorporating the Technique into Your Practice
To adopt this dark-to-light approach in your own painting:
- Start with a value sketch to map out your darks and lights.
- Begin your painting with the darkest values, working from background to foreground.
- Gradually introduce lighter values, always referring back to your initial sketch.
- Pay attention to how the darkness of shadows progresses from distant to near elements.
- Use the established dark areas as a reference for judging the saturation and brightness of your lighter colors.
By consistently applying this technique, you’ll likely find that your landscapes gain more depth, structure, and overall coherence. Remember, like any skill in art, this method becomes more natural and effective with practice.
Use a Limited Color Palette
The Power of Simplicity in Color
When you’re embarking on your landscape painting journey, it might seem counterintuitive, but using fewer colors can actually simplify the painting process and lead to more cohesive results. A limited color palette offers several advantages: it enhances your understanding of color mixing, promotes color harmony throughout your painting, and helps you develop a more consistent style.
The Benefits of a Limited Palette
- Improved Color Mixing Skills: With fewer colors at your disposal, you’re forced to mix and create a wider range of hues. This practice deepens your understanding of color relationships and improves your ability to achieve desired tones.
- Enhanced Color Harmony: When you use a limited set of colors, you’re more likely to create a harmonious painting. The colors you mix will inherently share some common pigments, leading to a more unified overall look.
- Consistency Across Paintings: A consistent palette can help you develop a recognizable style, as your works will share a similar color profile.
- Simplified Decision-Making: With fewer options, you spend less time deciding which color to use and more time focusing on other aspects of your painting, such as composition and value.
My Journey to a Simplified Palette
Starting with Abundance
Like many artists, I began my painting journey with an extensive array of colors. I thought having more options would make it easier to capture the diverse hues I saw in landscapes. However, I soon realized that this abundance of choice was often more of a hindrance than a help.
The Realization and Reevaluation
Over time, I noticed that having too many colors on my palette was creating confusion and making it challenging to achieve color harmony in my paintings. This realization led me to reevaluate my approach to color.
I began to experiment with mixing colors and found that I could create many of the hues I needed from a smaller set of base colors. This discovery was a turning point in my artistic process.
The Evolution of My Palette
Through experimentation and practice, I gradually reduced my palette to about seven or eight colors plus titanium white. This simplified approach not only made the painting process easier but also significantly enhanced the overall quality and coherence of my landscapes.
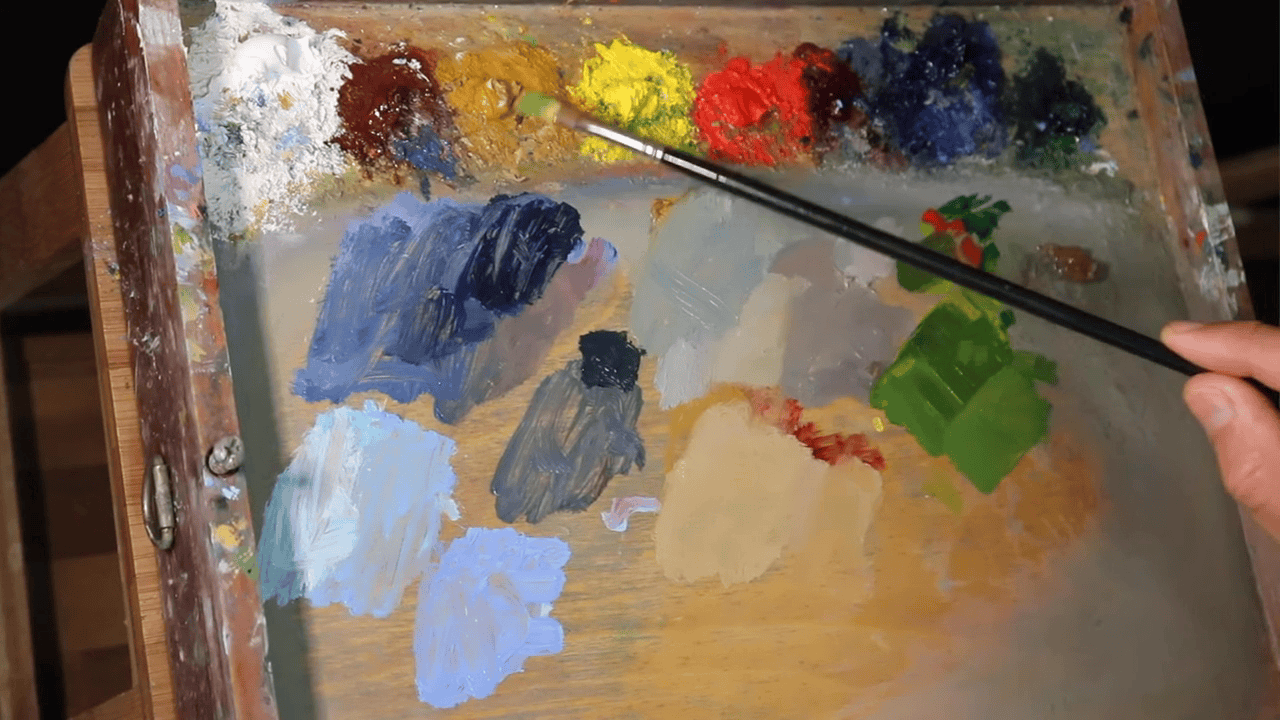
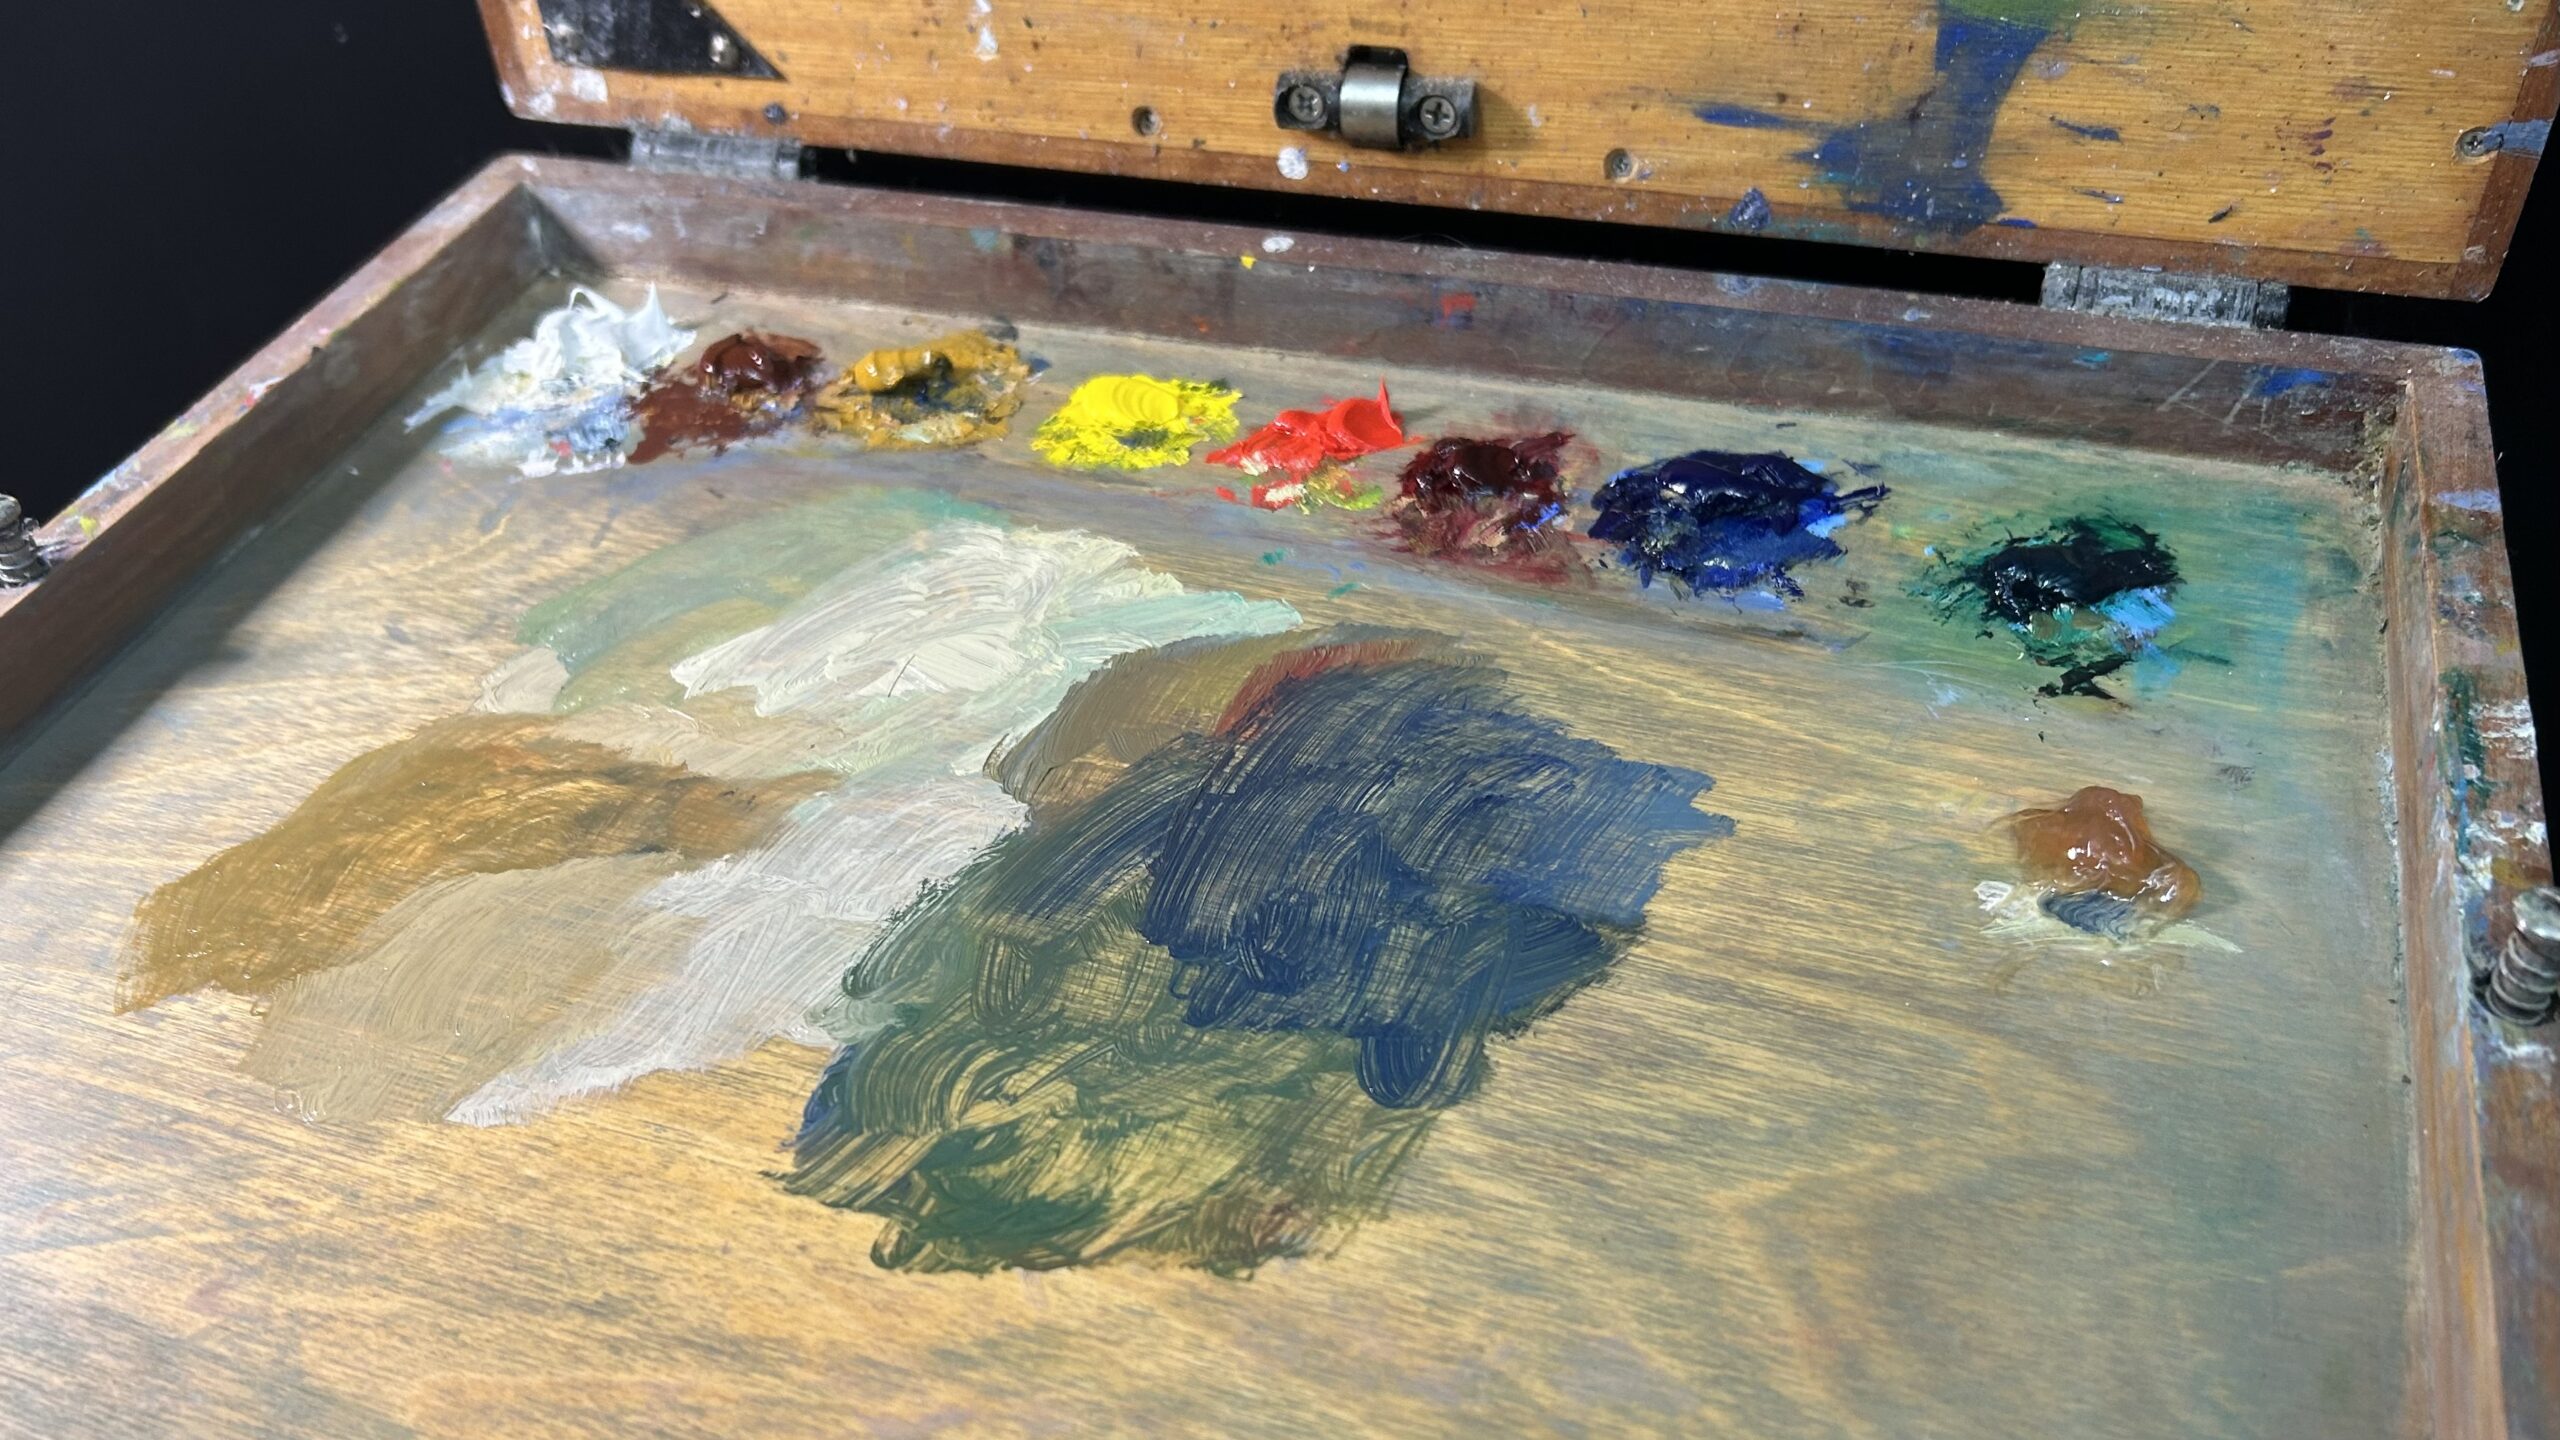
My Go-To Limited Palette
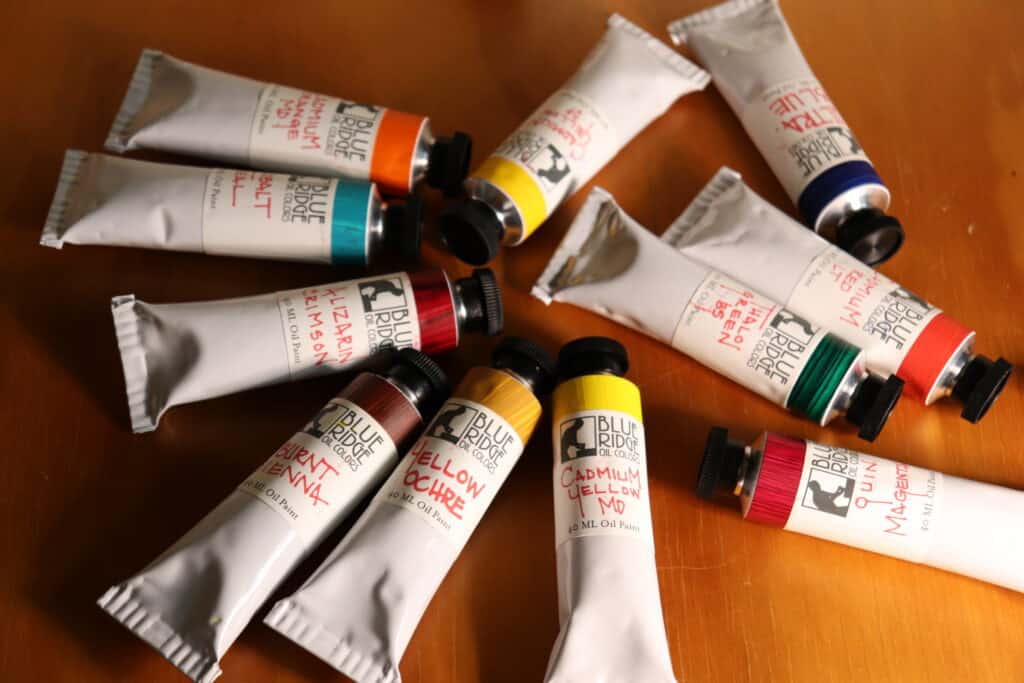
After much experimentation, I’ve settled on the following oil colors as my core palette:
- Titanium White
- Burnt Sienna
- Yellow Ochre
- Cadmium Yellow
- Cadmium Red Light
- Alizarin Crimson
- Ultramarine Blue
- Phthalo Green
I also sometimes use cobalt teal and quinacridone magenta.
Adapting the Limited Palette Approach
Remember, the specific colors in a limited palette can vary based on personal preference and the types of scenes you typically paint. Don’t be afraid to experiment with different combinations to find what works best for you.
As you grow more comfortable with a limited palette, you may find that you can create even more complex and nuanced landscapes than you could with a wider range of colors. This approach encourages creativity and pushes you to truly understand color relationships, ultimately leading to stronger, more harmonious paintings.
Conclusion
Transforming Your Landscape Painting Journey
The three techniques we’ve explored in this blog post – incorporating sketching, starting with dark values, and using a limited color palette – have the potential to revolutionize your approach to landscape painting. These methods were game-changers in my own artistic journey, and I’m confident they can have a similar impact on your work.
Let’s recap the key takeaways:
- Start with Sketching: Preliminary sketches help you plan your composition, understand values, and simplify complex scenes. This foundational step can dramatically improve the overall structure and depth of your paintings.
- Paint Dark Values and Shadows First: Beginning with the darkest areas of your landscape creates a solid framework for your painting. This approach helps establish depth, makes it easier to judge color relationships, and provides a stable base, especially useful in changing light conditions.
- Use a Limited Color Palette: Simplifying your color choices can lead to more harmonious paintings, improve your color mixing skills, and help you develop a consistent style. Don’t let a vast array of paint tubes overwhelm you – often, less is more.
Putting It All Together
By integrating these techniques into your painting process, you’re likely to see significant improvements in various aspects of your work:
- Enhanced composition and depth perception
- More accurate representation of light and shadow
- Greater color harmony and coherence
- Improved efficiency in your painting process
- A more distinctive and consistent personal style
Remember, mastering these techniques takes time and practice. Don’t be discouraged if your first attempts don’t yield immediate dramatic results. Like any skill, landscape painting improves with consistent effort and reflection.
Your Next Steps
If you’re feeling inspired to take your landscape painting to the next level, here are some suggestions for your next steps:
- Practice Regularly: Set aside time each week to sketch and paint, focusing on implementing these new techniques.
- Experiment: Try different limited-color palettes or challenge yourself to complete a painting using only four or five colors.
- Study Nature: Spend time observing landscapes in person, paying close attention to how light, shadow, and color interact in natural settings.
- Join a Community: Consider joining a local art group or online community where you can share your work, get feedback, and learn from other artists.
- Explore Further Resources: If you’re just starting out or looking for more structured guidance, I invite you to check out my free eBook, “Beginner’s Guide to Painting Landscapes.” This resource offers a comprehensive blueprint and methodology for approaching your paintings, building on the techniques we’ve discussed here.
Final Thoughts
Remember, every artist’s journey is unique. These techniques have been transformative for me and many others, but don’t be afraid to adapt them to suit your own style and vision. The most important thing is to keep painting, keep learning, and enjoy the process of bringing landscapes to life on your canvas.
Thank you for joining me in exploring these powerful landscape painting techniques. I hope this blog post has inspired you and provided valuable insights to enhance your artistic practice.
Happy painting!
