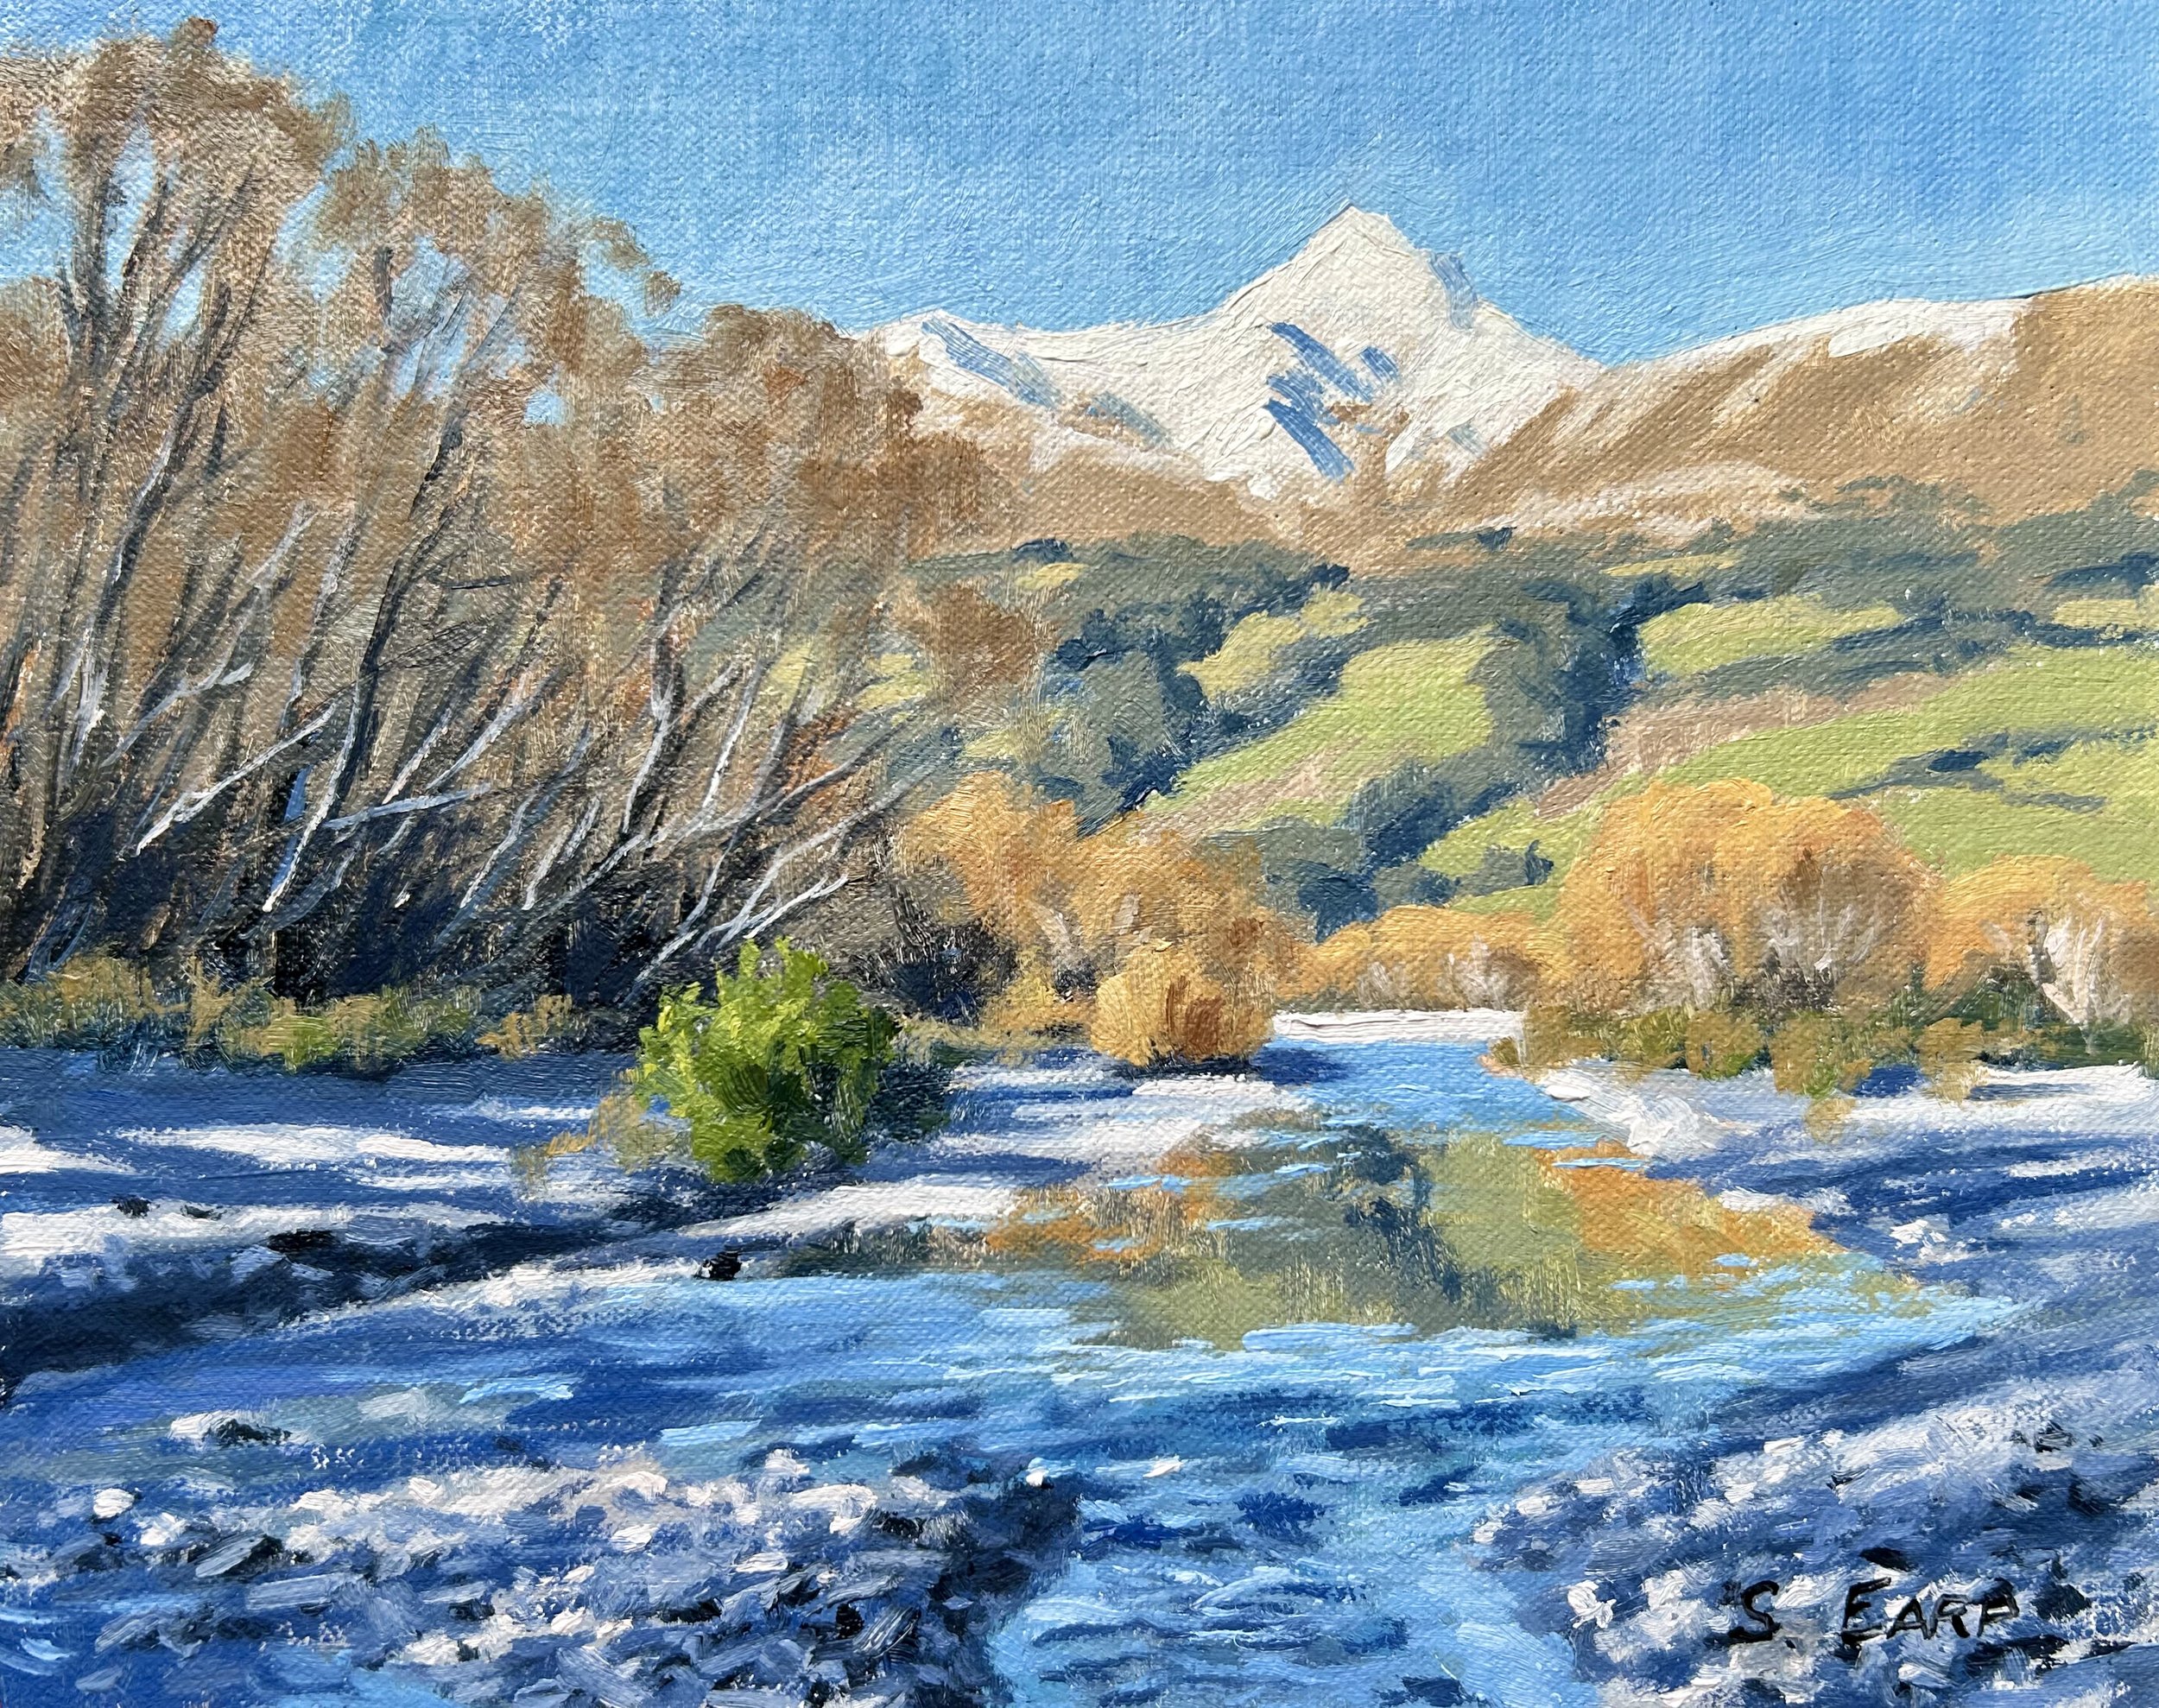
I show you how to paint a mountain landscape in this painting demonstration. This painting is inspired by the mountains in southern New Zealand.
Suitable for oils and acrylics.
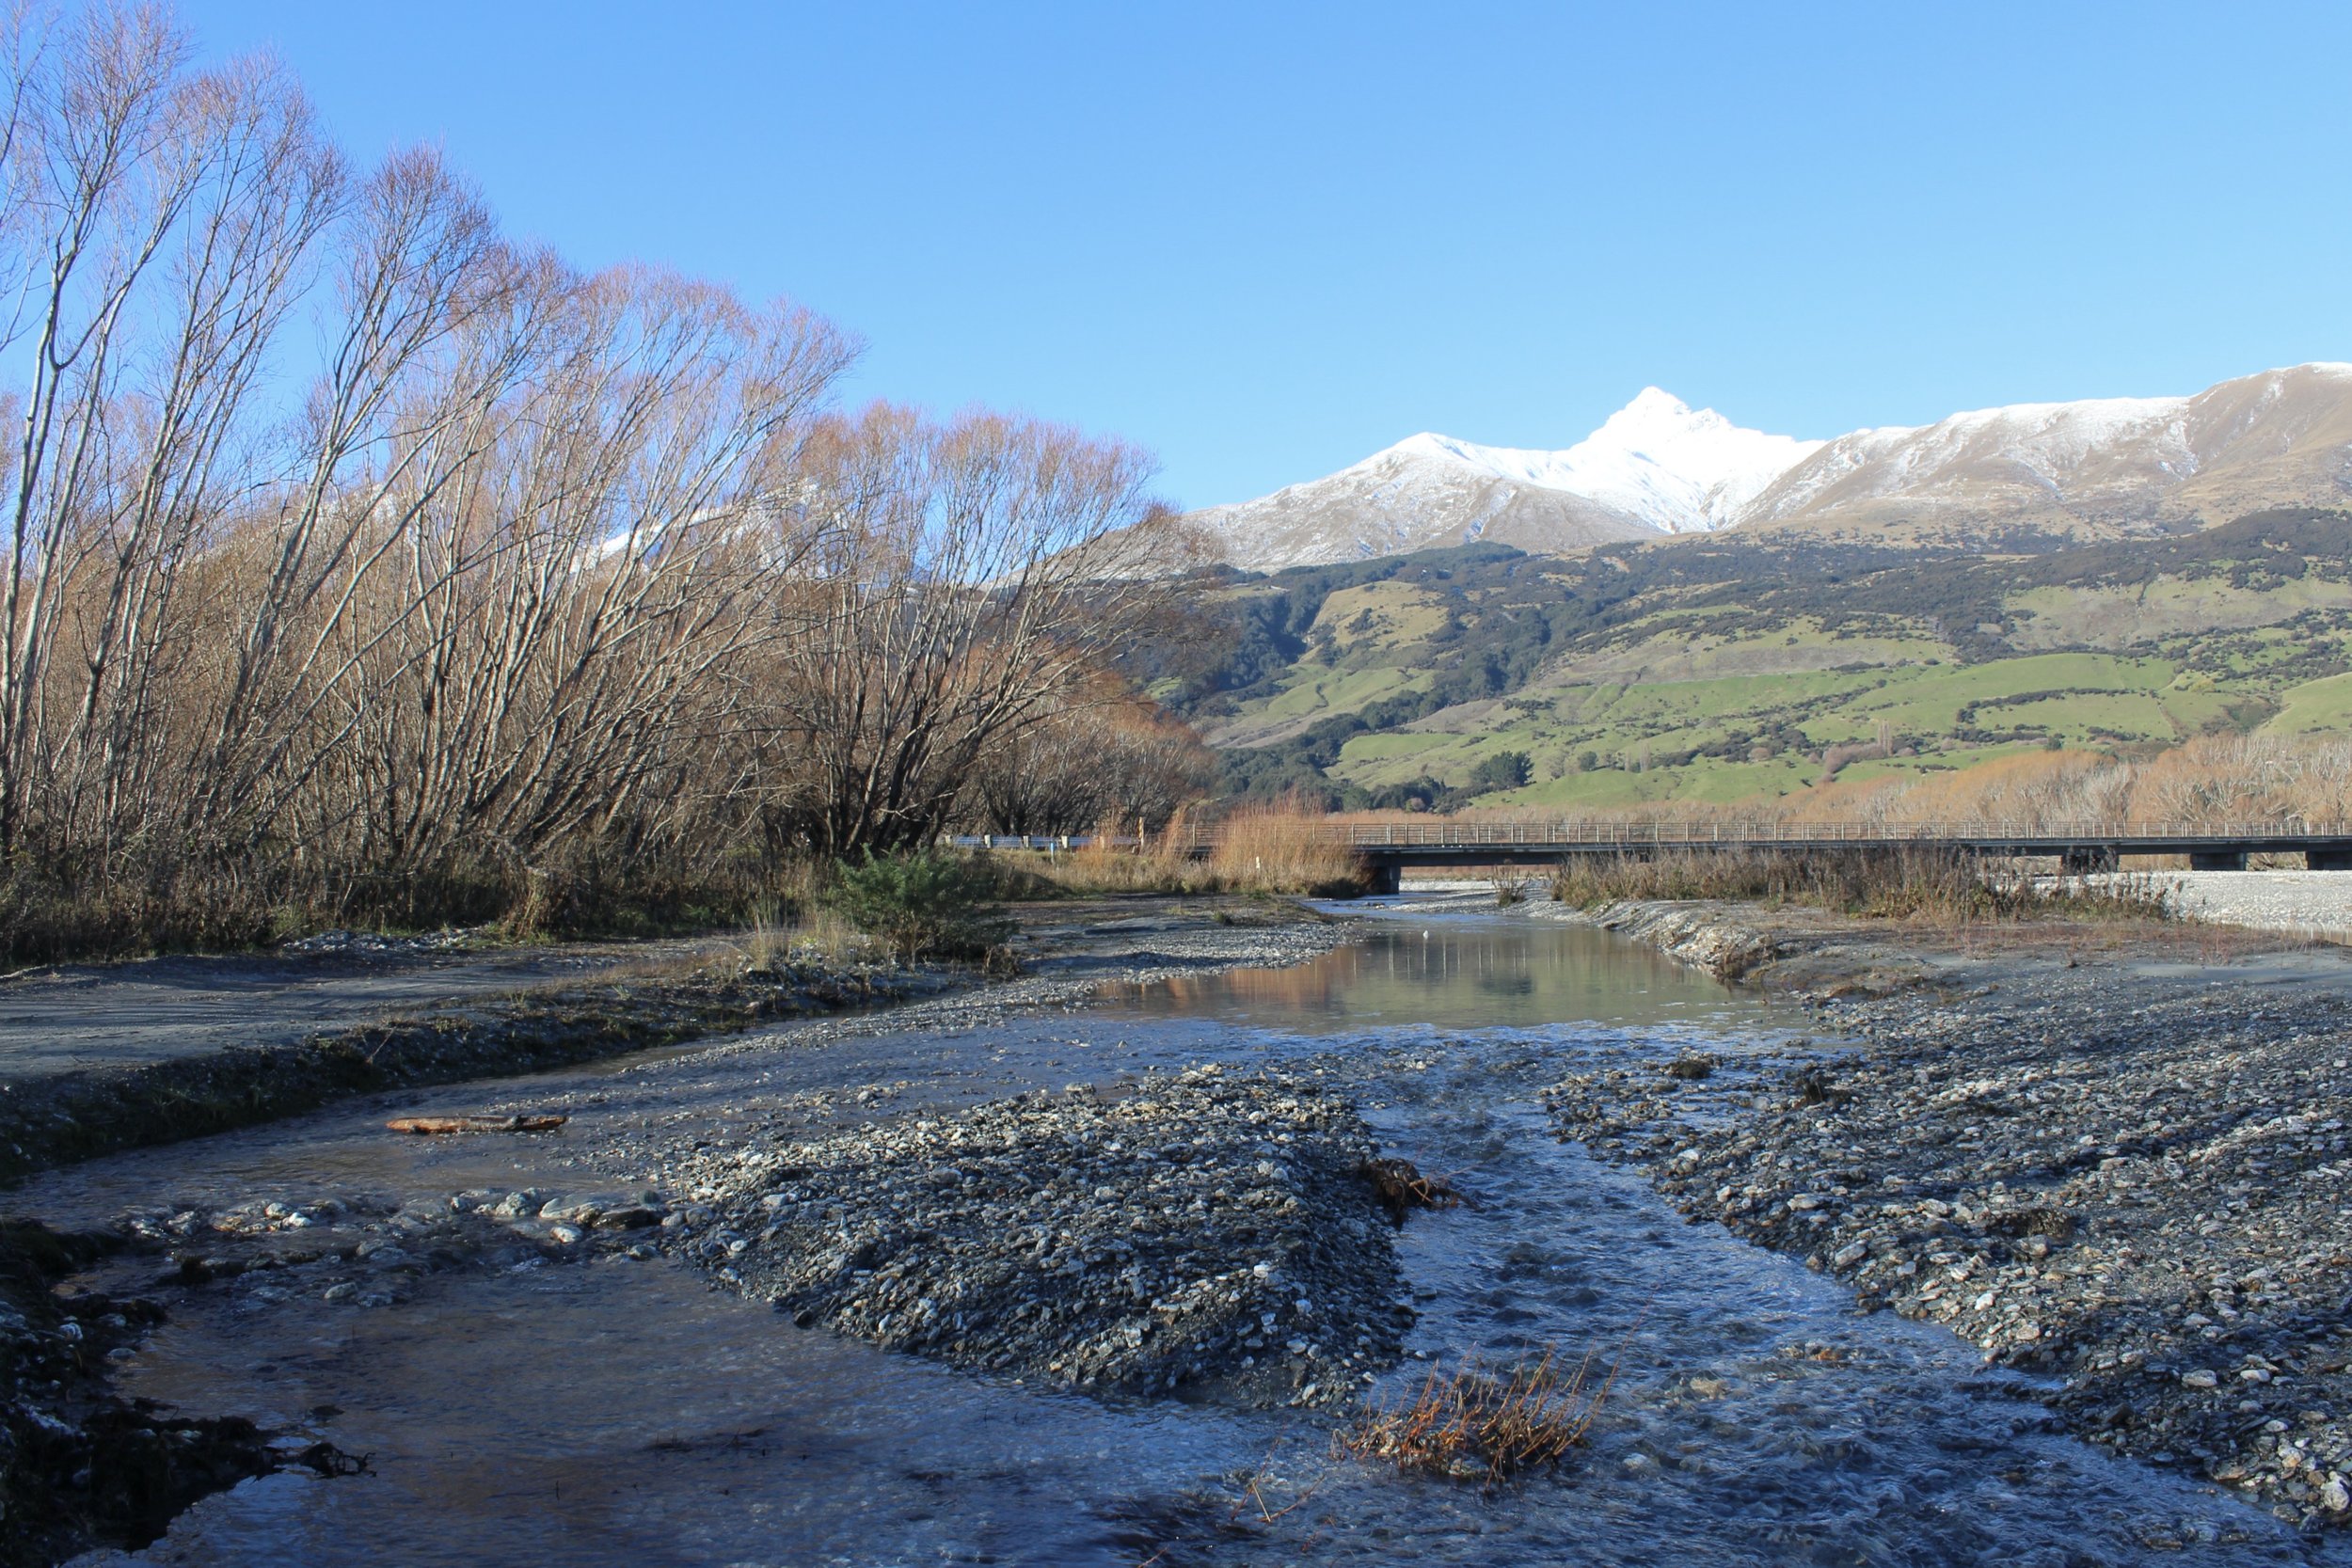
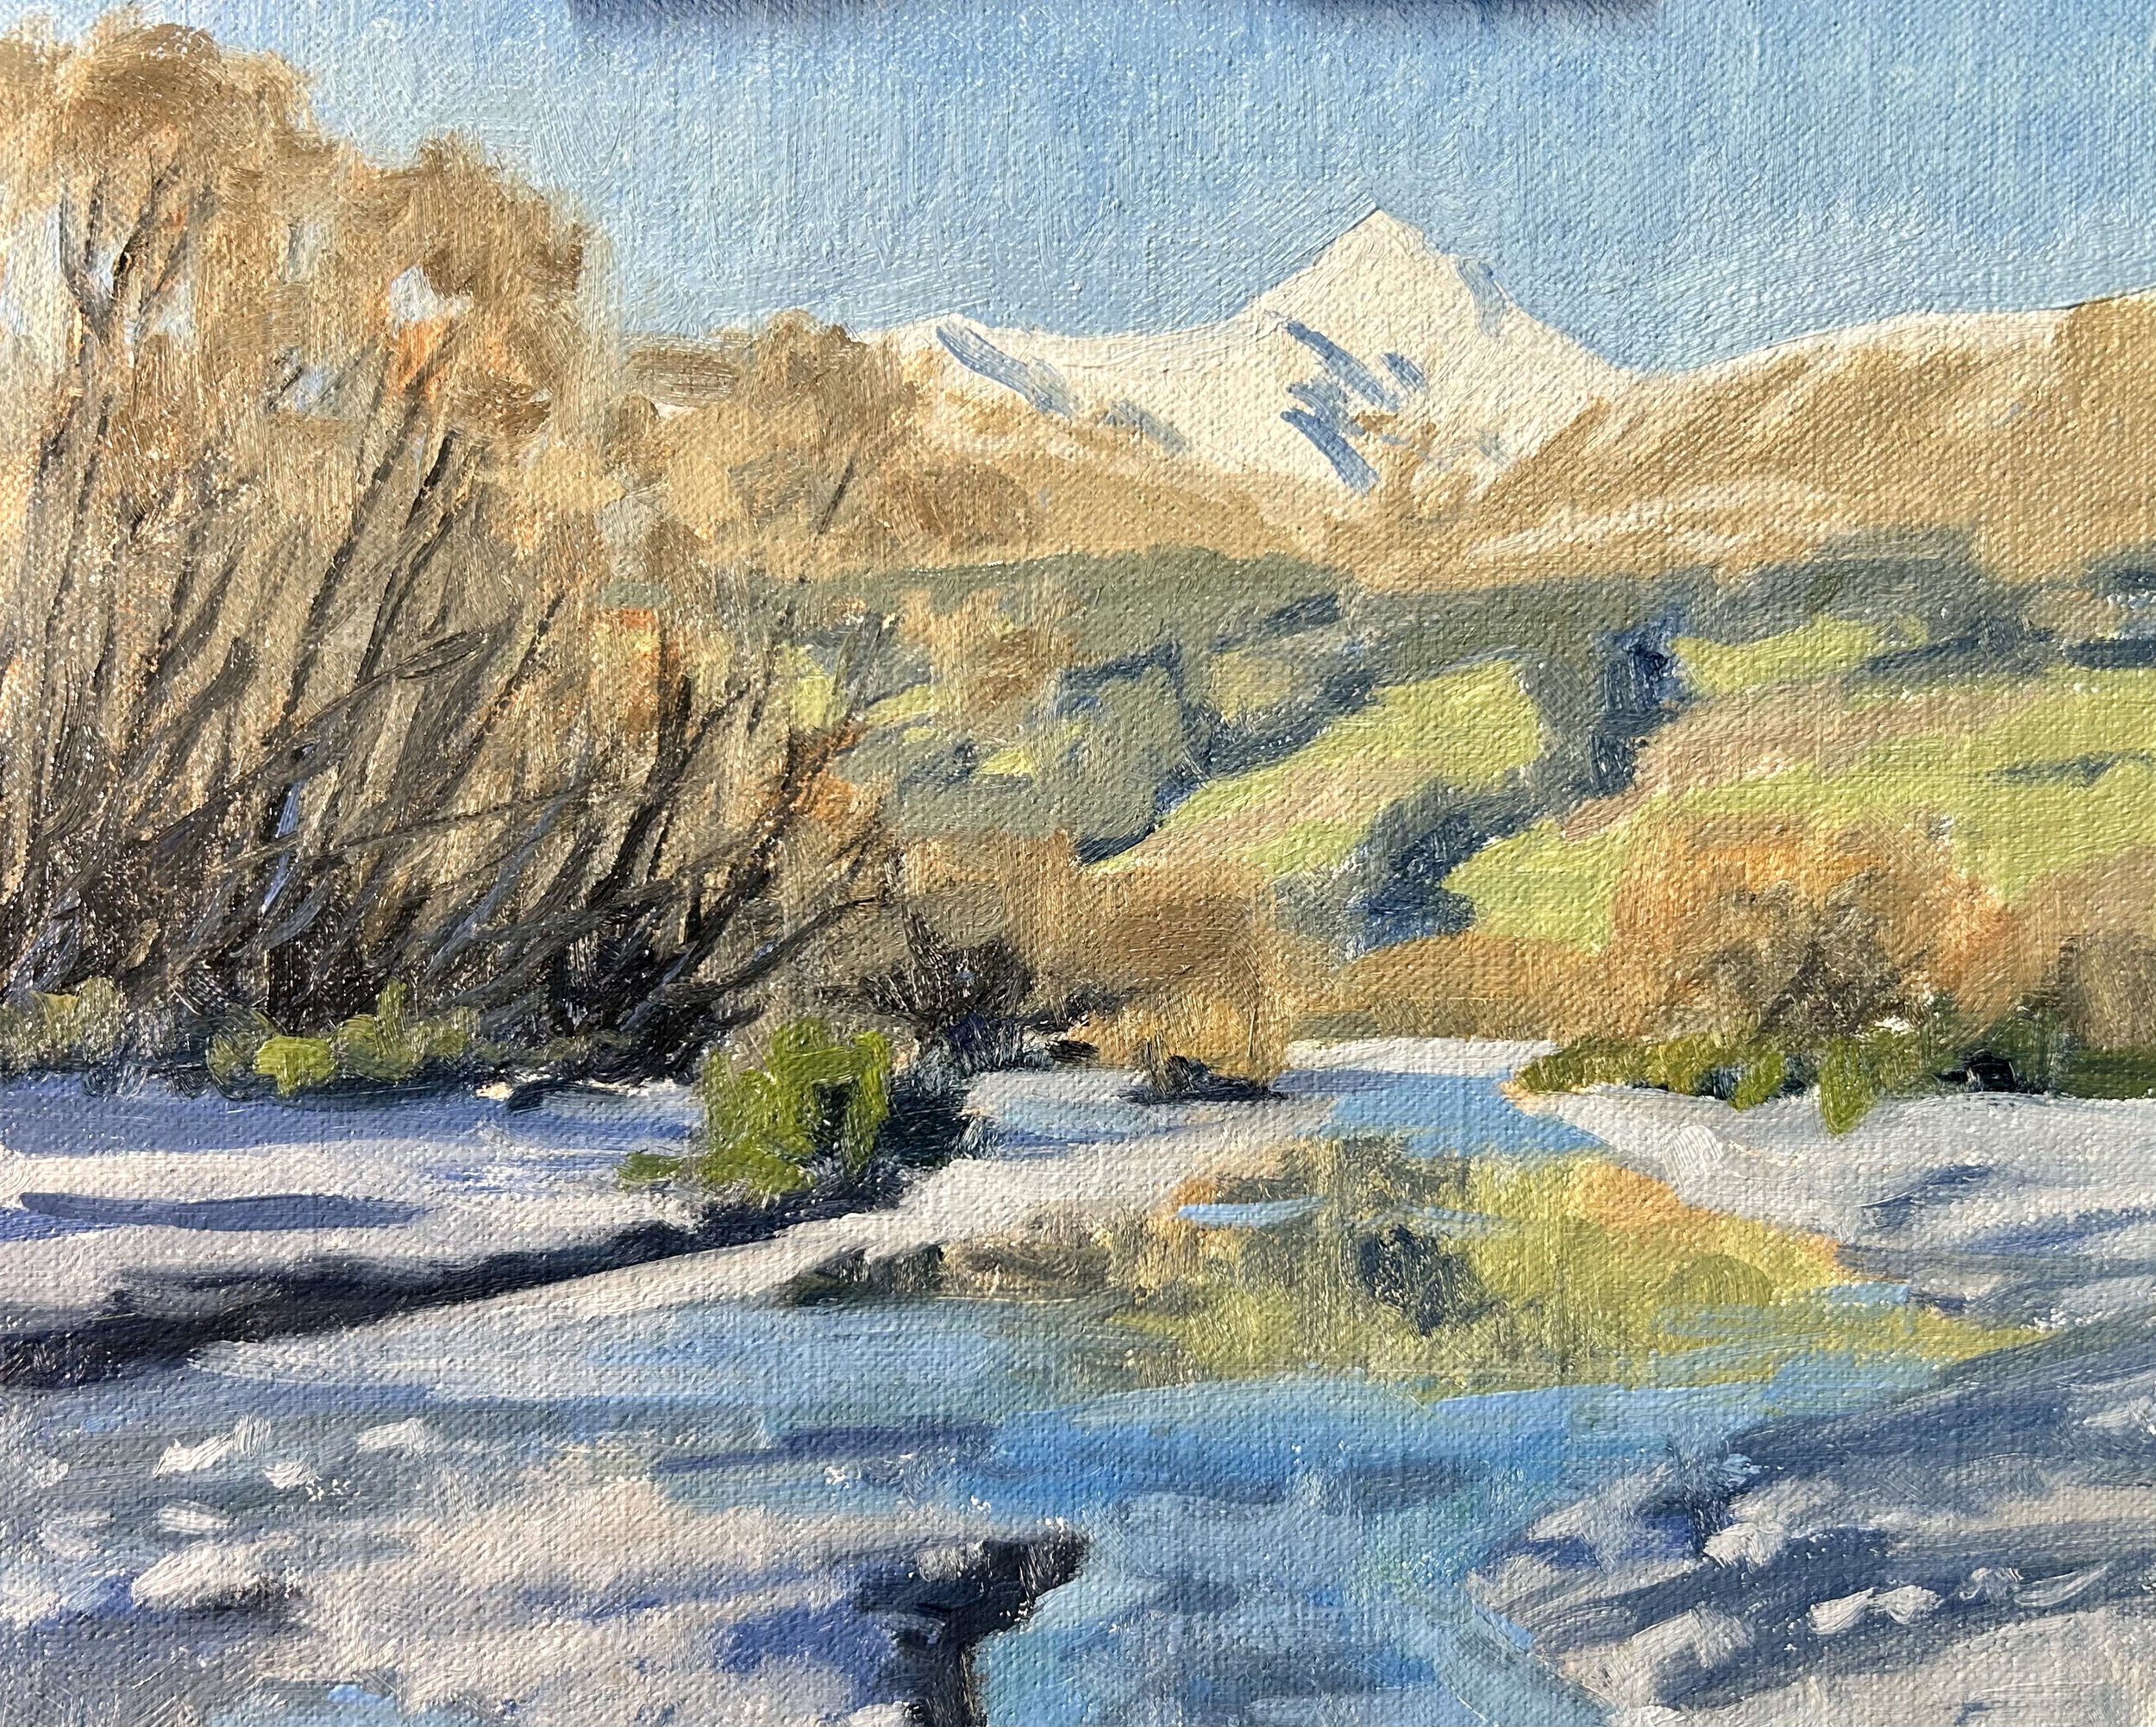
Reference Photo
Please feel free to use or copy this photo if you would like to have a go at painting this art work.
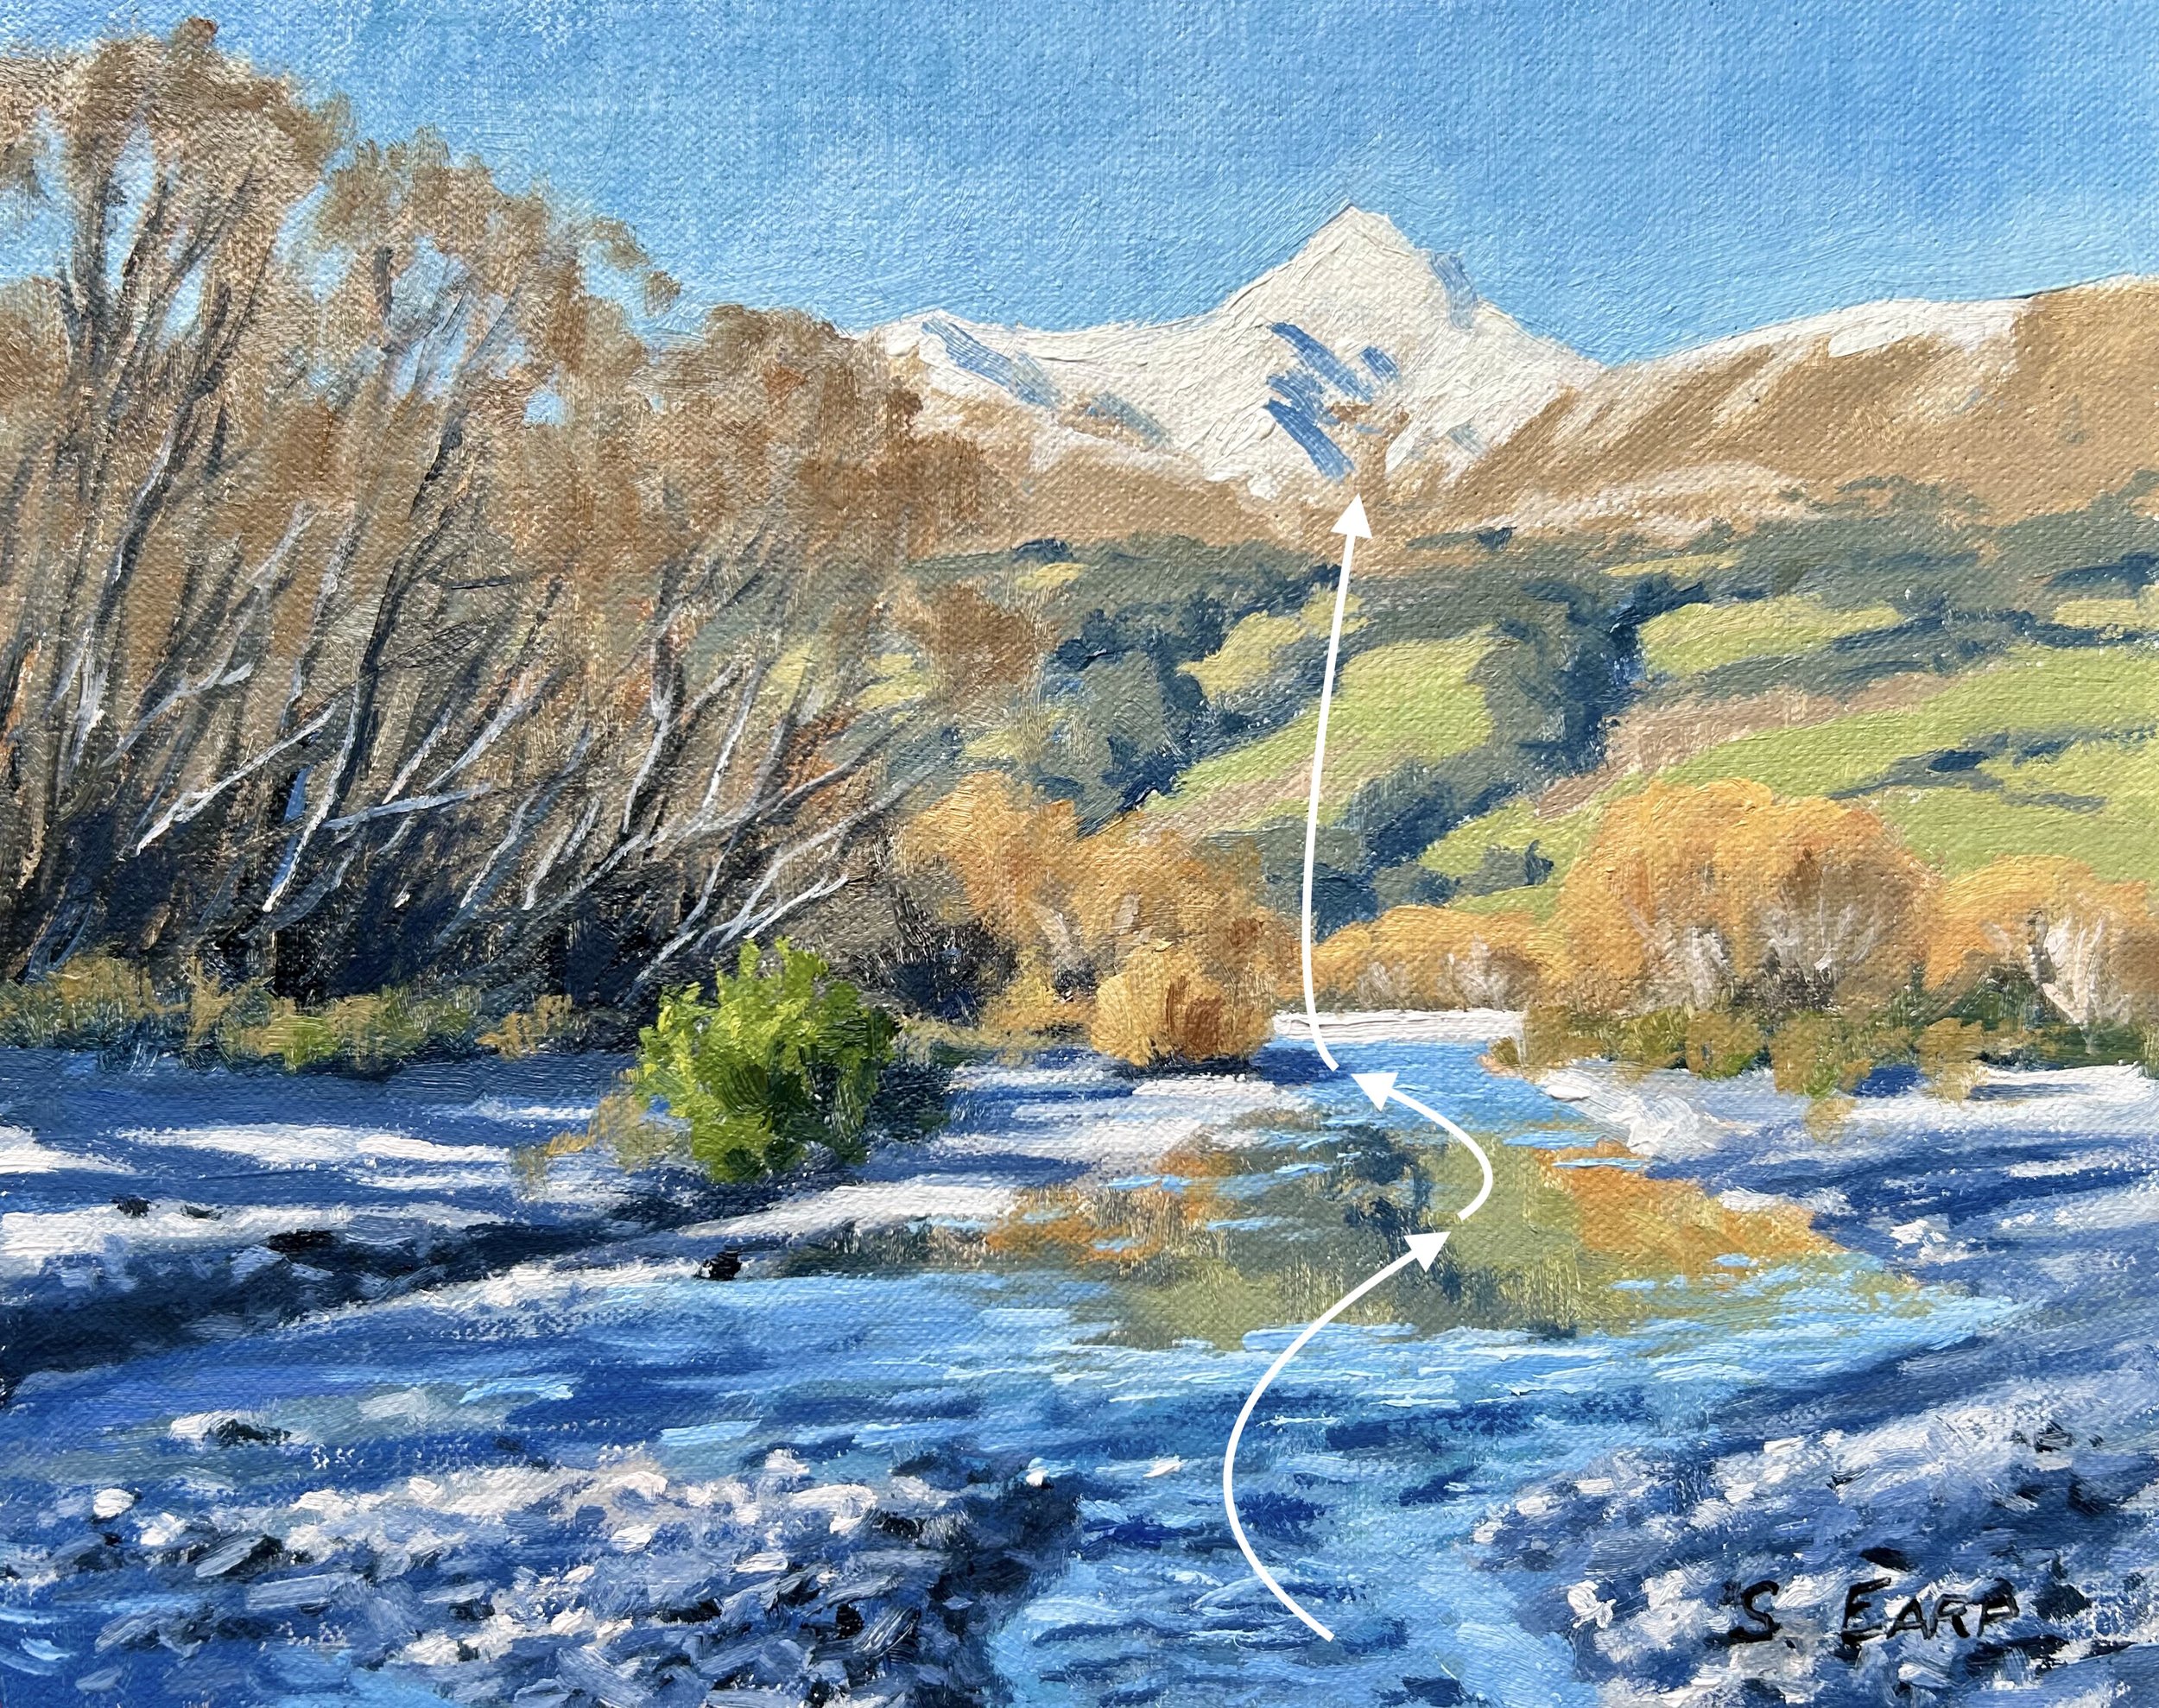
Composition
This composition incorporates an ‘S’ or ‘compound curve’ composition where the river is leading the eye towards the willow trees in the mid-ground and up towards the mountain summit. This painting also incorporates a lower horizon in order to make a feature of the mountain.
Art Tip: Never have your horizon line in the middle where it divides the canvas into two equal parts as this will cause disharmony in the composition. Either have a low or high horizon line in the composition.
Colours
I painted this artwork using oil paint and the colours I used in this painting are as follows:
- Titanium white
Burnt sienna
- Yellow ochre
- Cadmium yellow
- Cadmium red
- Alizarin crimson
- Ultramarine blue
- Phthalo green
Brushes
Here is a list of the brushes I used in this painting:
- No.5 flat
- No.3 flat
- No.2 flat
- No.3 filbert
- No.1 round
- No.0 round
Painting Demonstration
I painted this artwork on oil-primed, medium-weave Belgian linen that is mounted to a panel. The painting itself measures 8” x 10”.
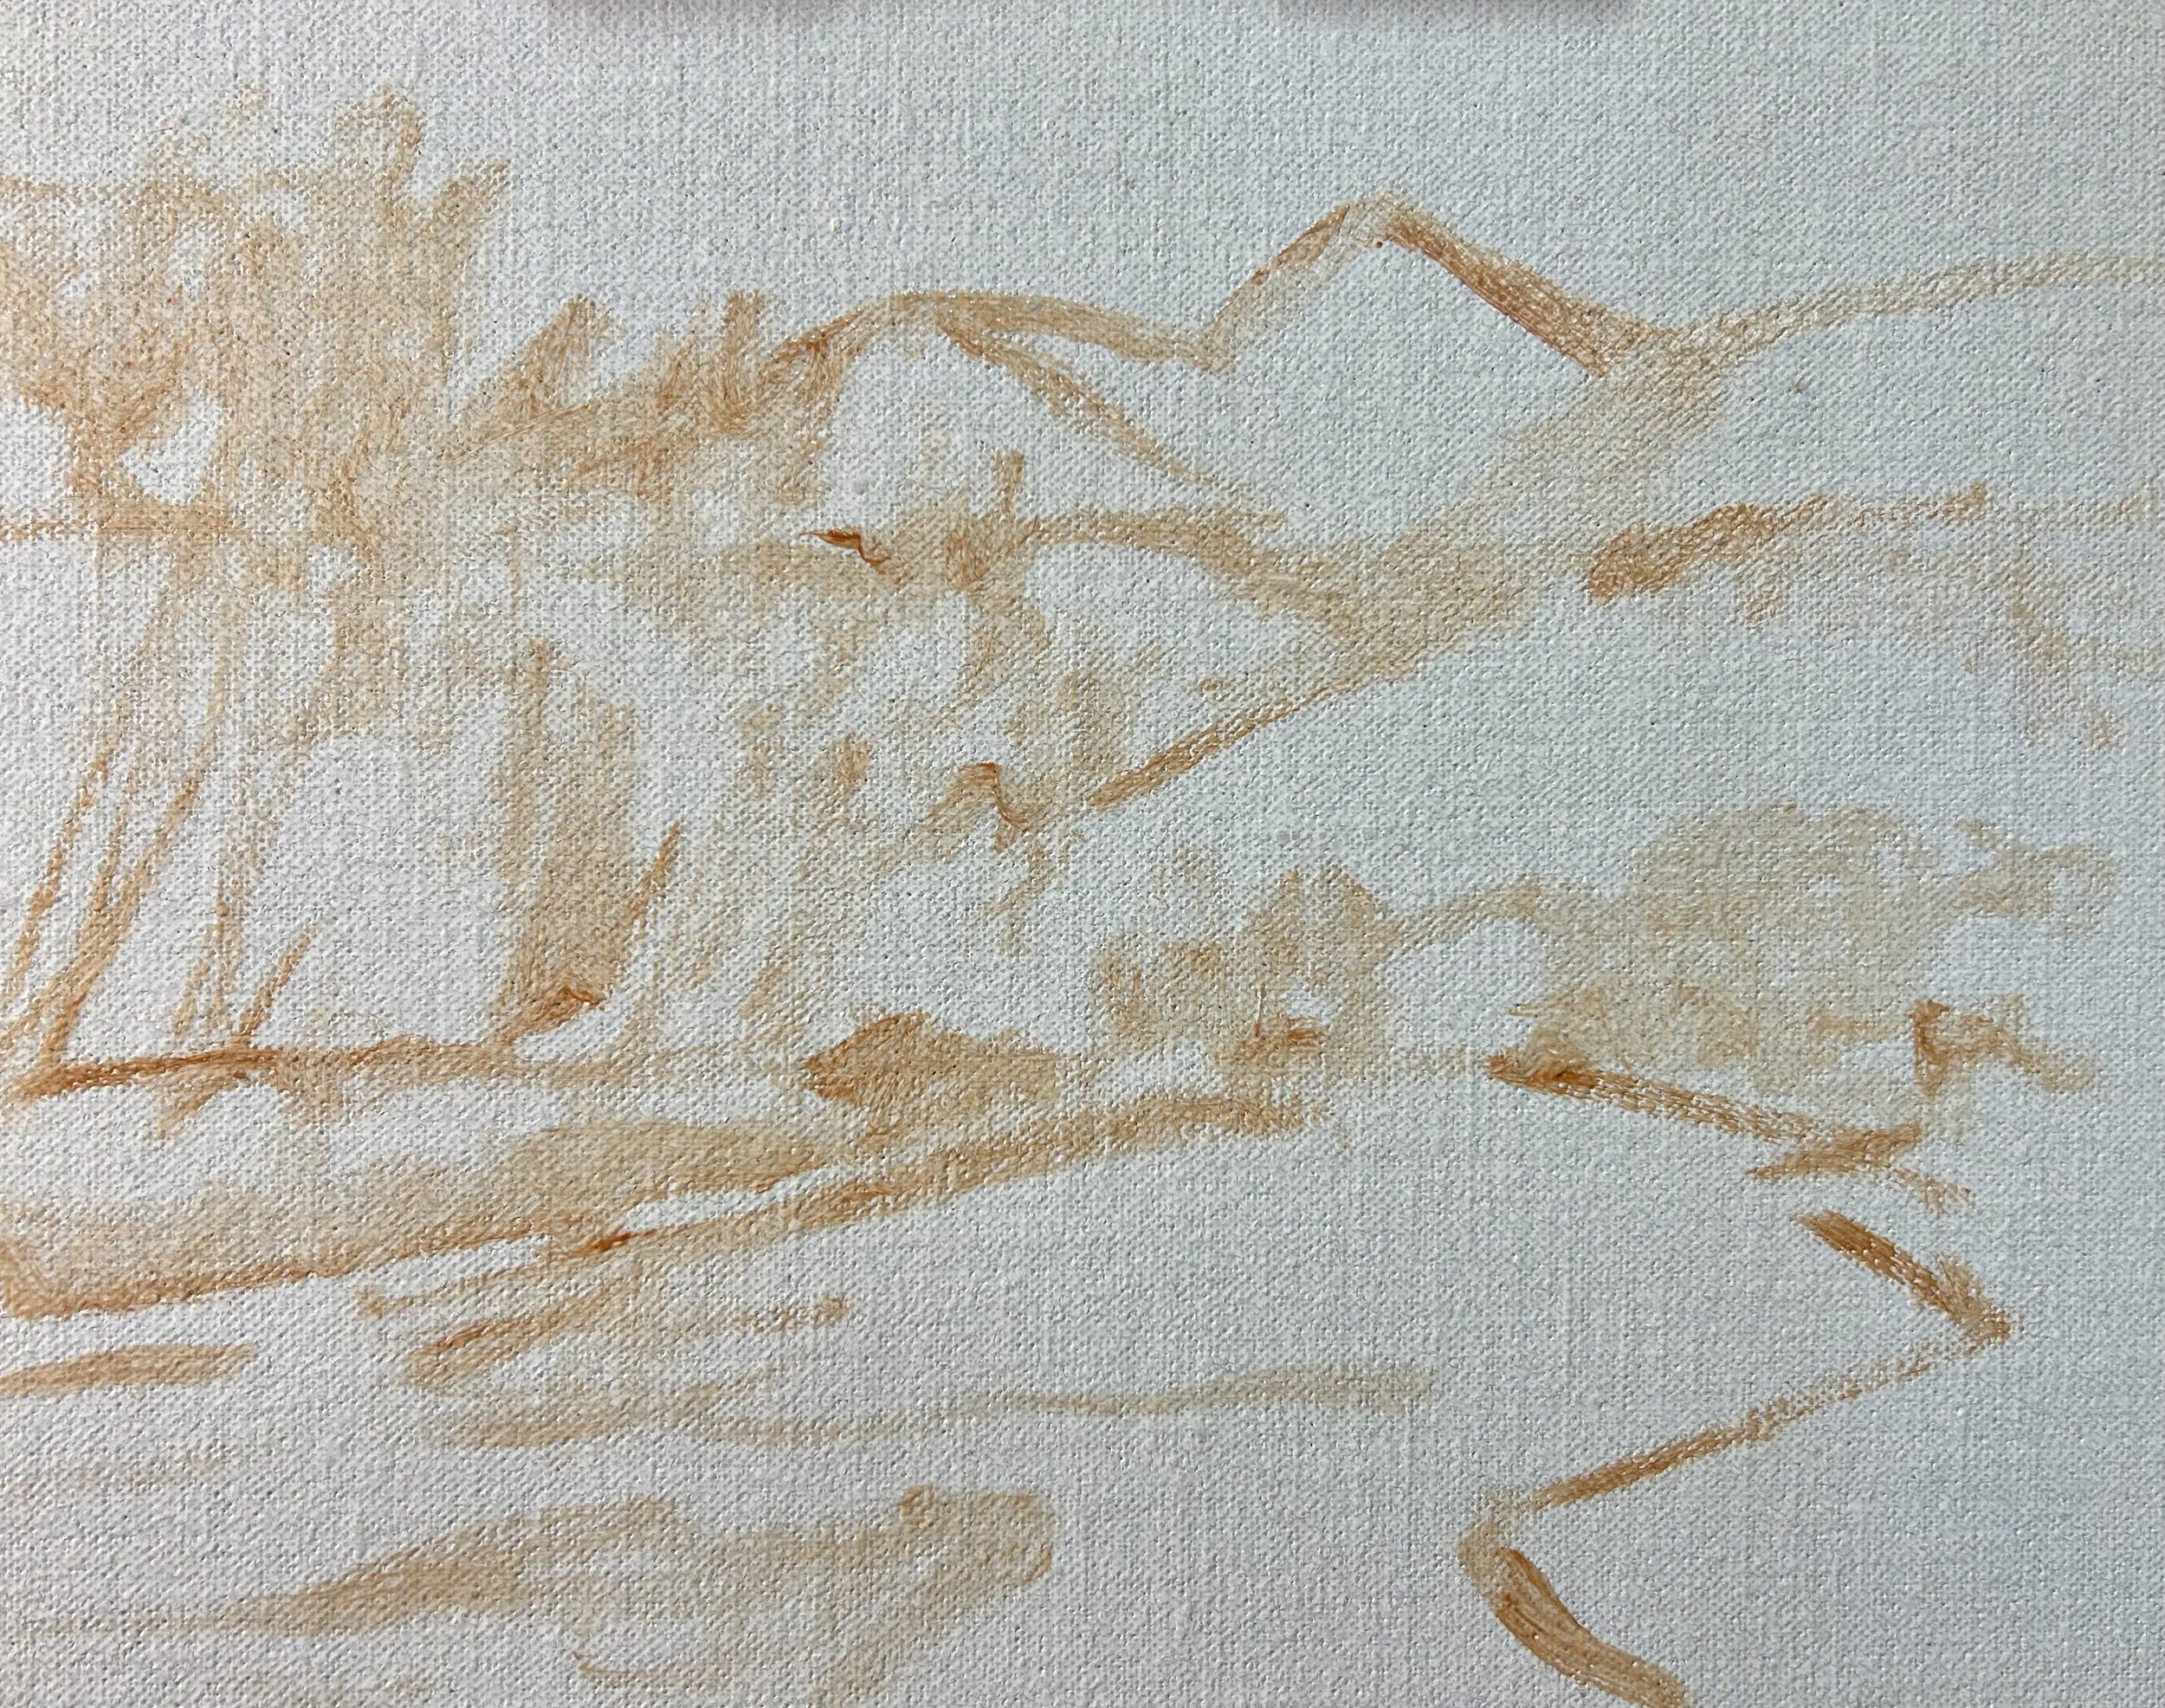
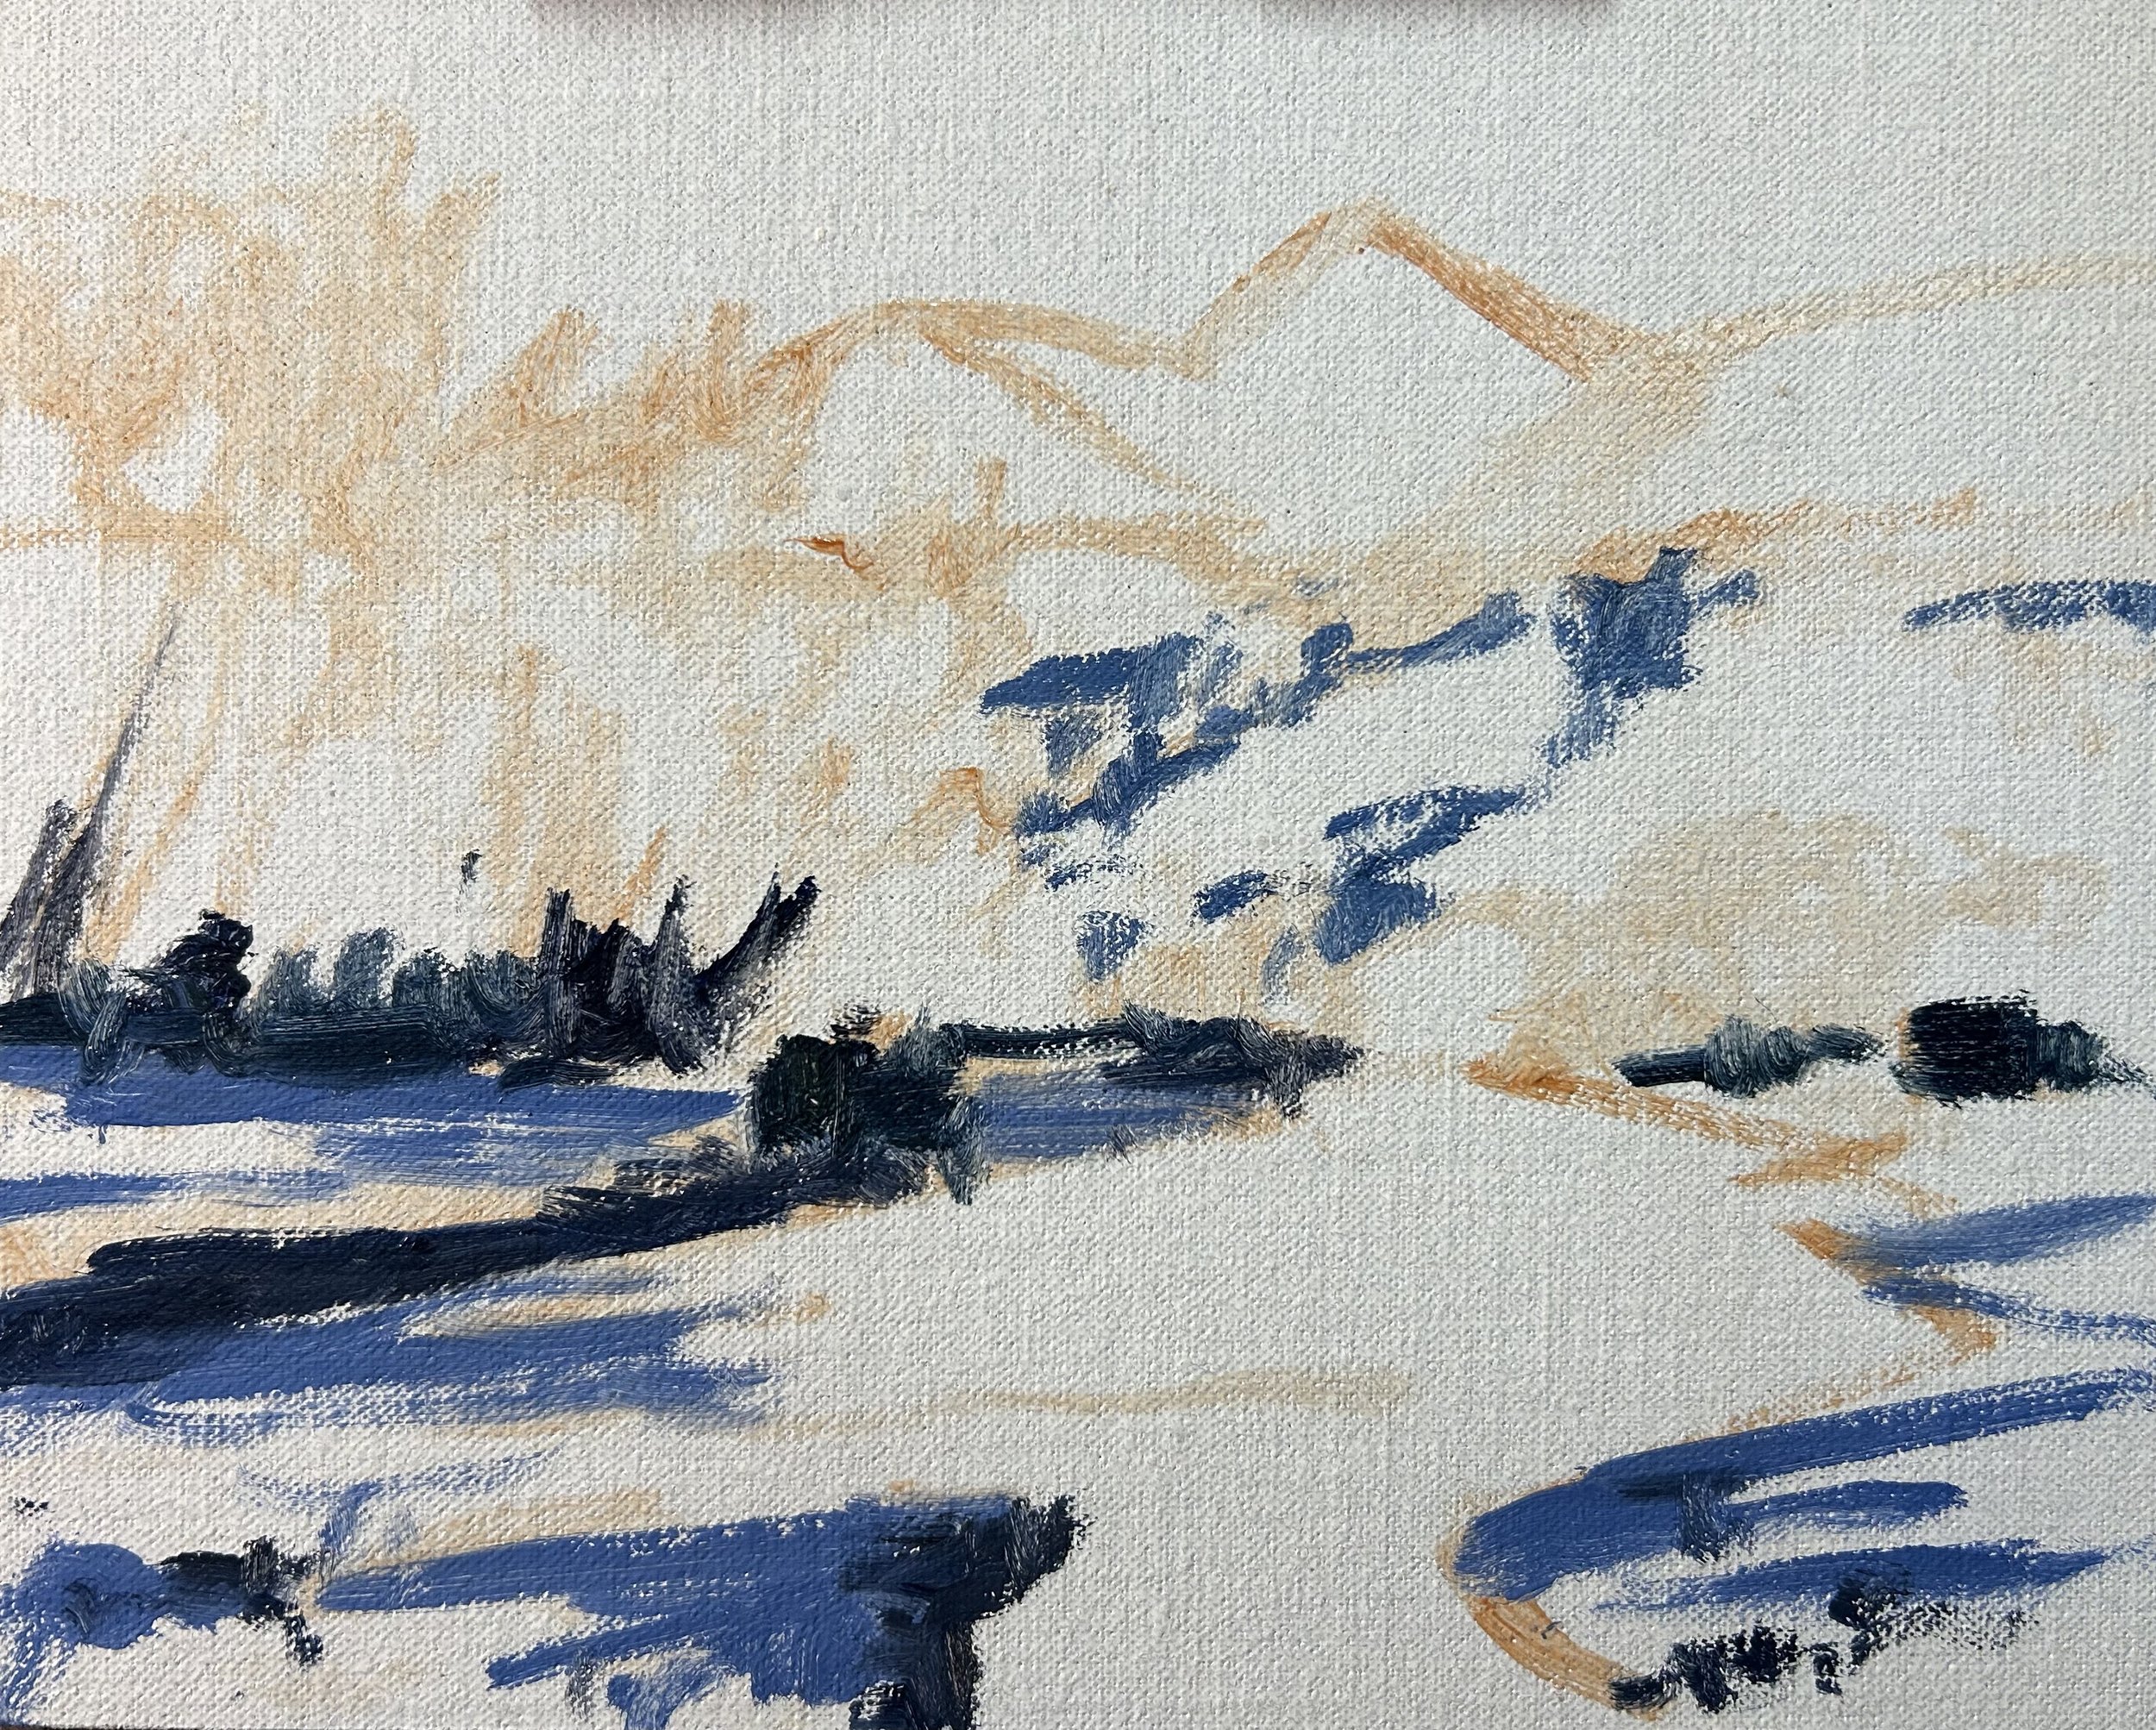
I sketched the composition using a No.1 round brush with burnt sienna mixed with Liquin Original (Liquin). I am using Liquin as a medium to thin the paint and it also has the advantage of speeding up the drying time.
I begin by painting the major shadows in the scene. The light source is coming from the left side of the painting and so there are shadows along the banks of the river that are being cast by the willow trees. There are also occlusion shadows in the lower section of the willow tree stands.
The banks of the river have some deeper shadows and there are also some shadows in the trees growing on the mountain slopes.
I mixed the shadow colours using ultramarine blue, burnt sienna, titanium white and a little alizarin crimson. For the distant shadows, I used more titanium white in my mix as these shadows are lighter in value compared with the much darker shadows in the foreground. I used the same colours in the foreground but with less or no titanium white in the mix.
Art Tip: Paint Your Dark Values and Shadows First
Whenever I start a painting I always identify where the dark values and shadows are first in the scene I am painting. Value refers to how light or dark a subject is and by painting in the dark values first I personally find it is much easier to create atmospheric perspective in my paintings. It also makes it easier to add the areas in light and to get the saturation of your colours correct once you have painted your dark values.
Using a No.5 flat brush I roughly mark in the canopies of the willow trees. I used a mix of yellow ochre, alizarin crimson, titanium white and a little ultramarine blue to reduce the saturation of the colour. The lower section of the stand of willow trees is darker in value with a low chroma colour and for this, I added more ultramarine blue into my mix.
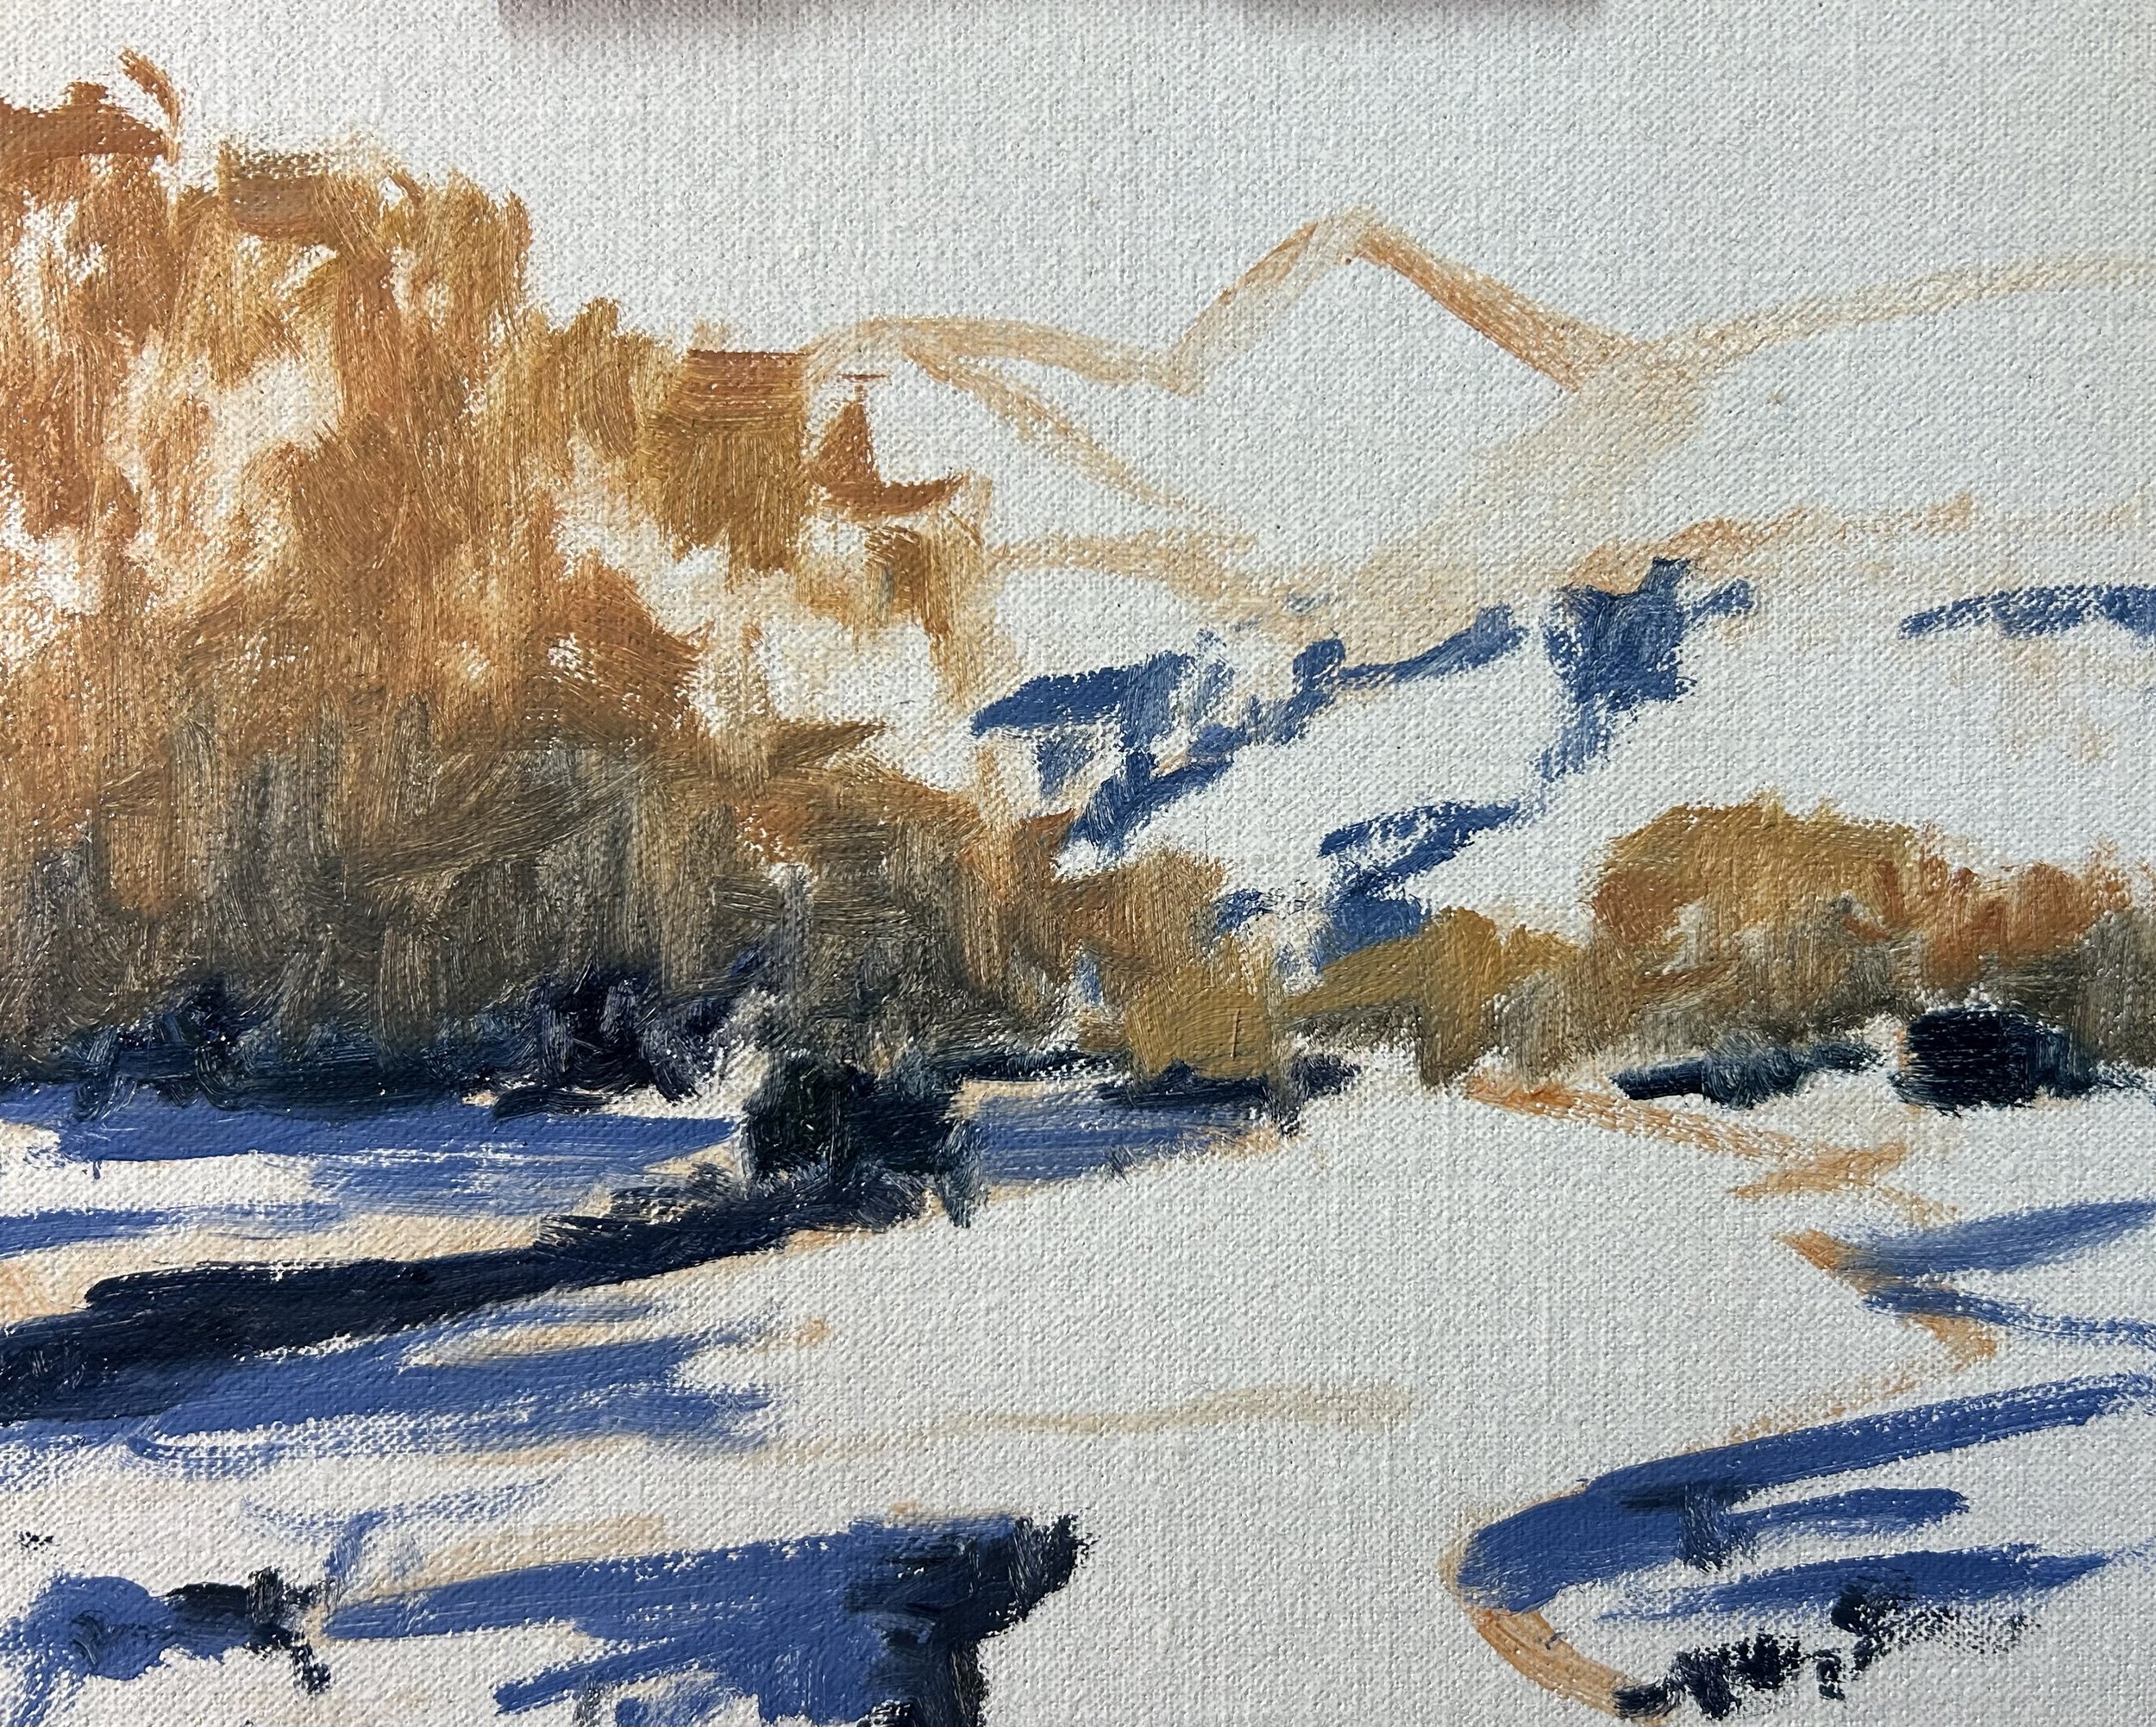
Next, I begin painting some of the vegetation on the mountain which includes bushes and shrubs as well as the tussock grass growing on the upper section of the mountains. it is important that I use low chroma colours here so that these elements sit back in the landscape.
For the bushes and shrubs, I use a mix of yellow ochre, burnt sienna, ultramarine blue and titanium white. I use the same colours for the tussock grass on the mountain however I use only a small amount of ultramarine blue with yellow ochre and titanium white being the more dominant colours in the mix.

I paint the sky using a mix of ultramarine blue, titanium white and a little phthalo green. Skies are some of the lightest values to be found in the landscape.
I mix the greens of the grass on the hill using a mix of yellow ochre, cadmium yellow, ultramarine blue and titanium white which serve as the base for my greens. I then mixed in a little phthalo green and some alizarin crimson to make the greens look more natural.
I use the colours that I used for the vegetation on the mountain to paint the reflections in the still areas of the water.
I begin marking the main stems and branches of the willow trees using a varying mix of ultramarine blue, burnt sienna, titanium white and alizarin crimson.
The blocking-in stage of the painting is nearly complete and I next work on the foreground areas of the painting. I’m not worried about details at this stage of the painting process as this artwork overall is more loose and gestural with a little bit of detail.
The water in the foreground is reflecting the sky and so I use the same colours, a mix of ultramarine blue, titanium white and a little phthalo green.
I paint the dappled light effect along the banks of the river using a mix of ultramarine blue, burnt sienna, titanium white and alizarin crimson. The titanium white and burnt sienna are the dominant colours in the mix and it is a light value colour. The banks of the river are composed of silt, sand and small to medium-sized rocks from the mountains.
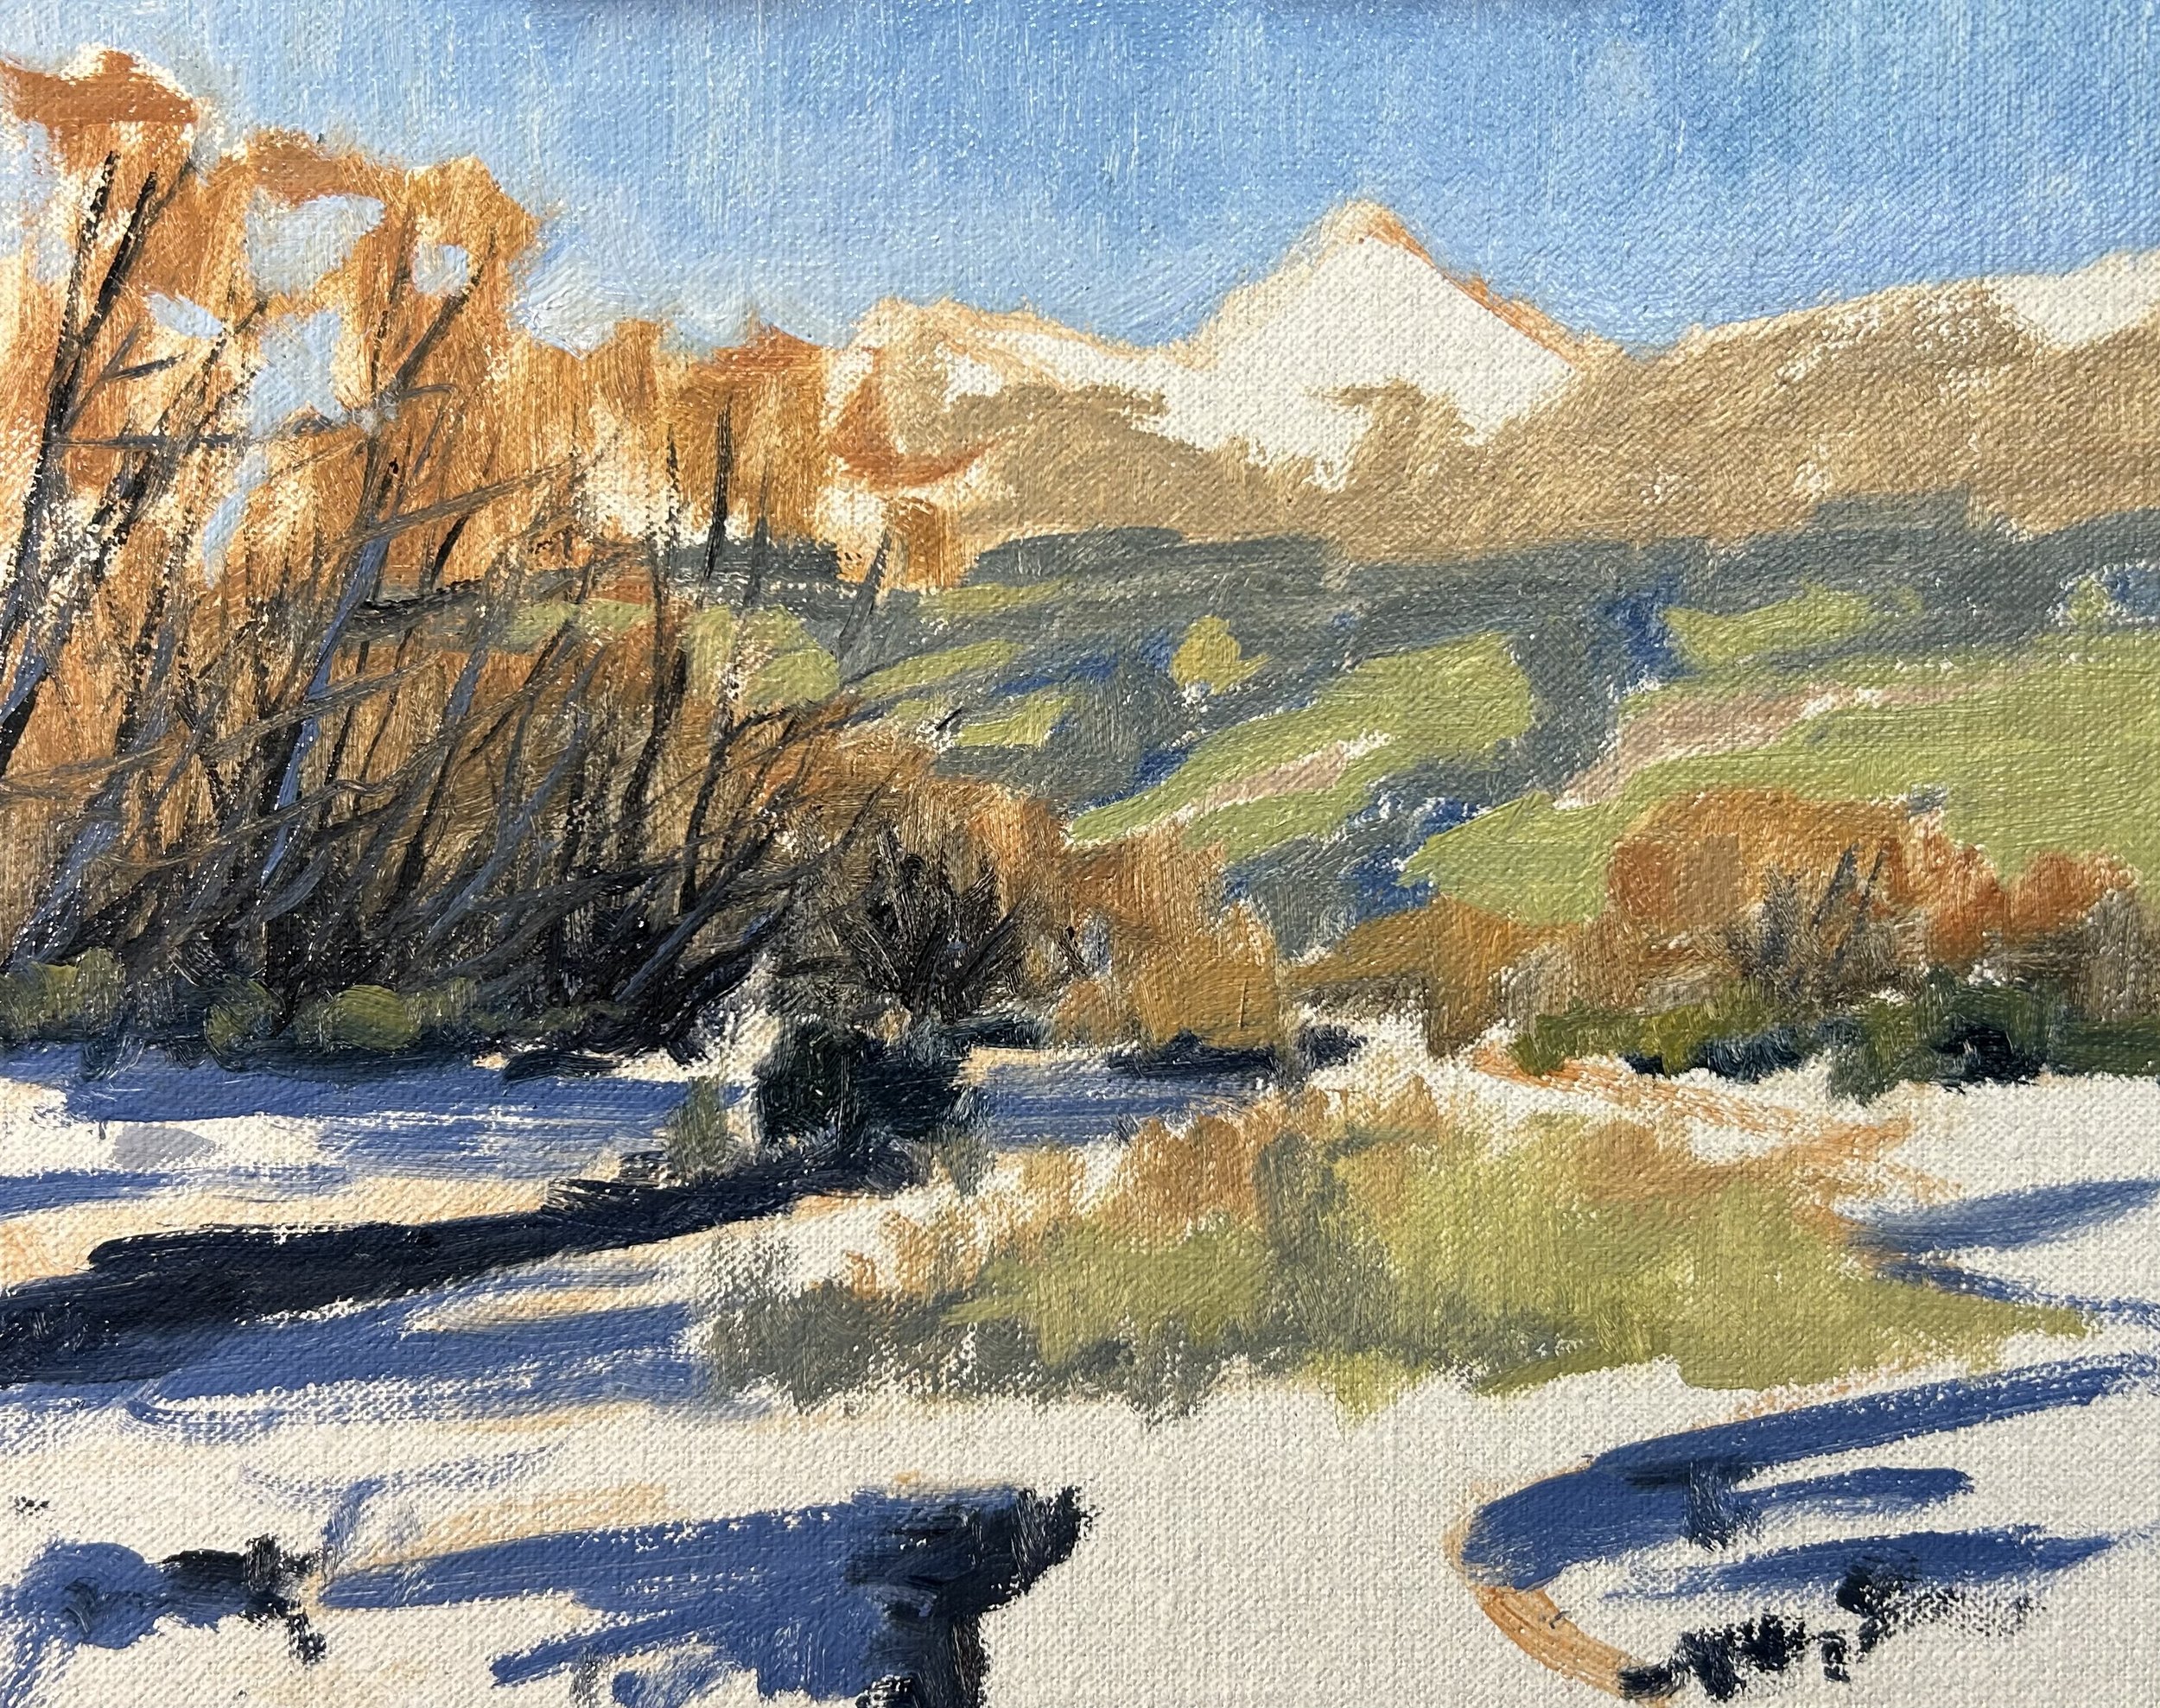
I complete the blocking-in stage of the painting by adding a little more detail to the willow trees. I also restate the dark values in the painting and generally tidy up areas where the canvas underneath is exposed. This is the stage of the painting where you want to check that your colours and values are working.
I paint the snow on the mountain using a mix of titanium white with a little burnt sienna mixed in.
It is here that I allowed the painting to dry so that I could then add some details to it.
Adding Details and Finishing The Painting
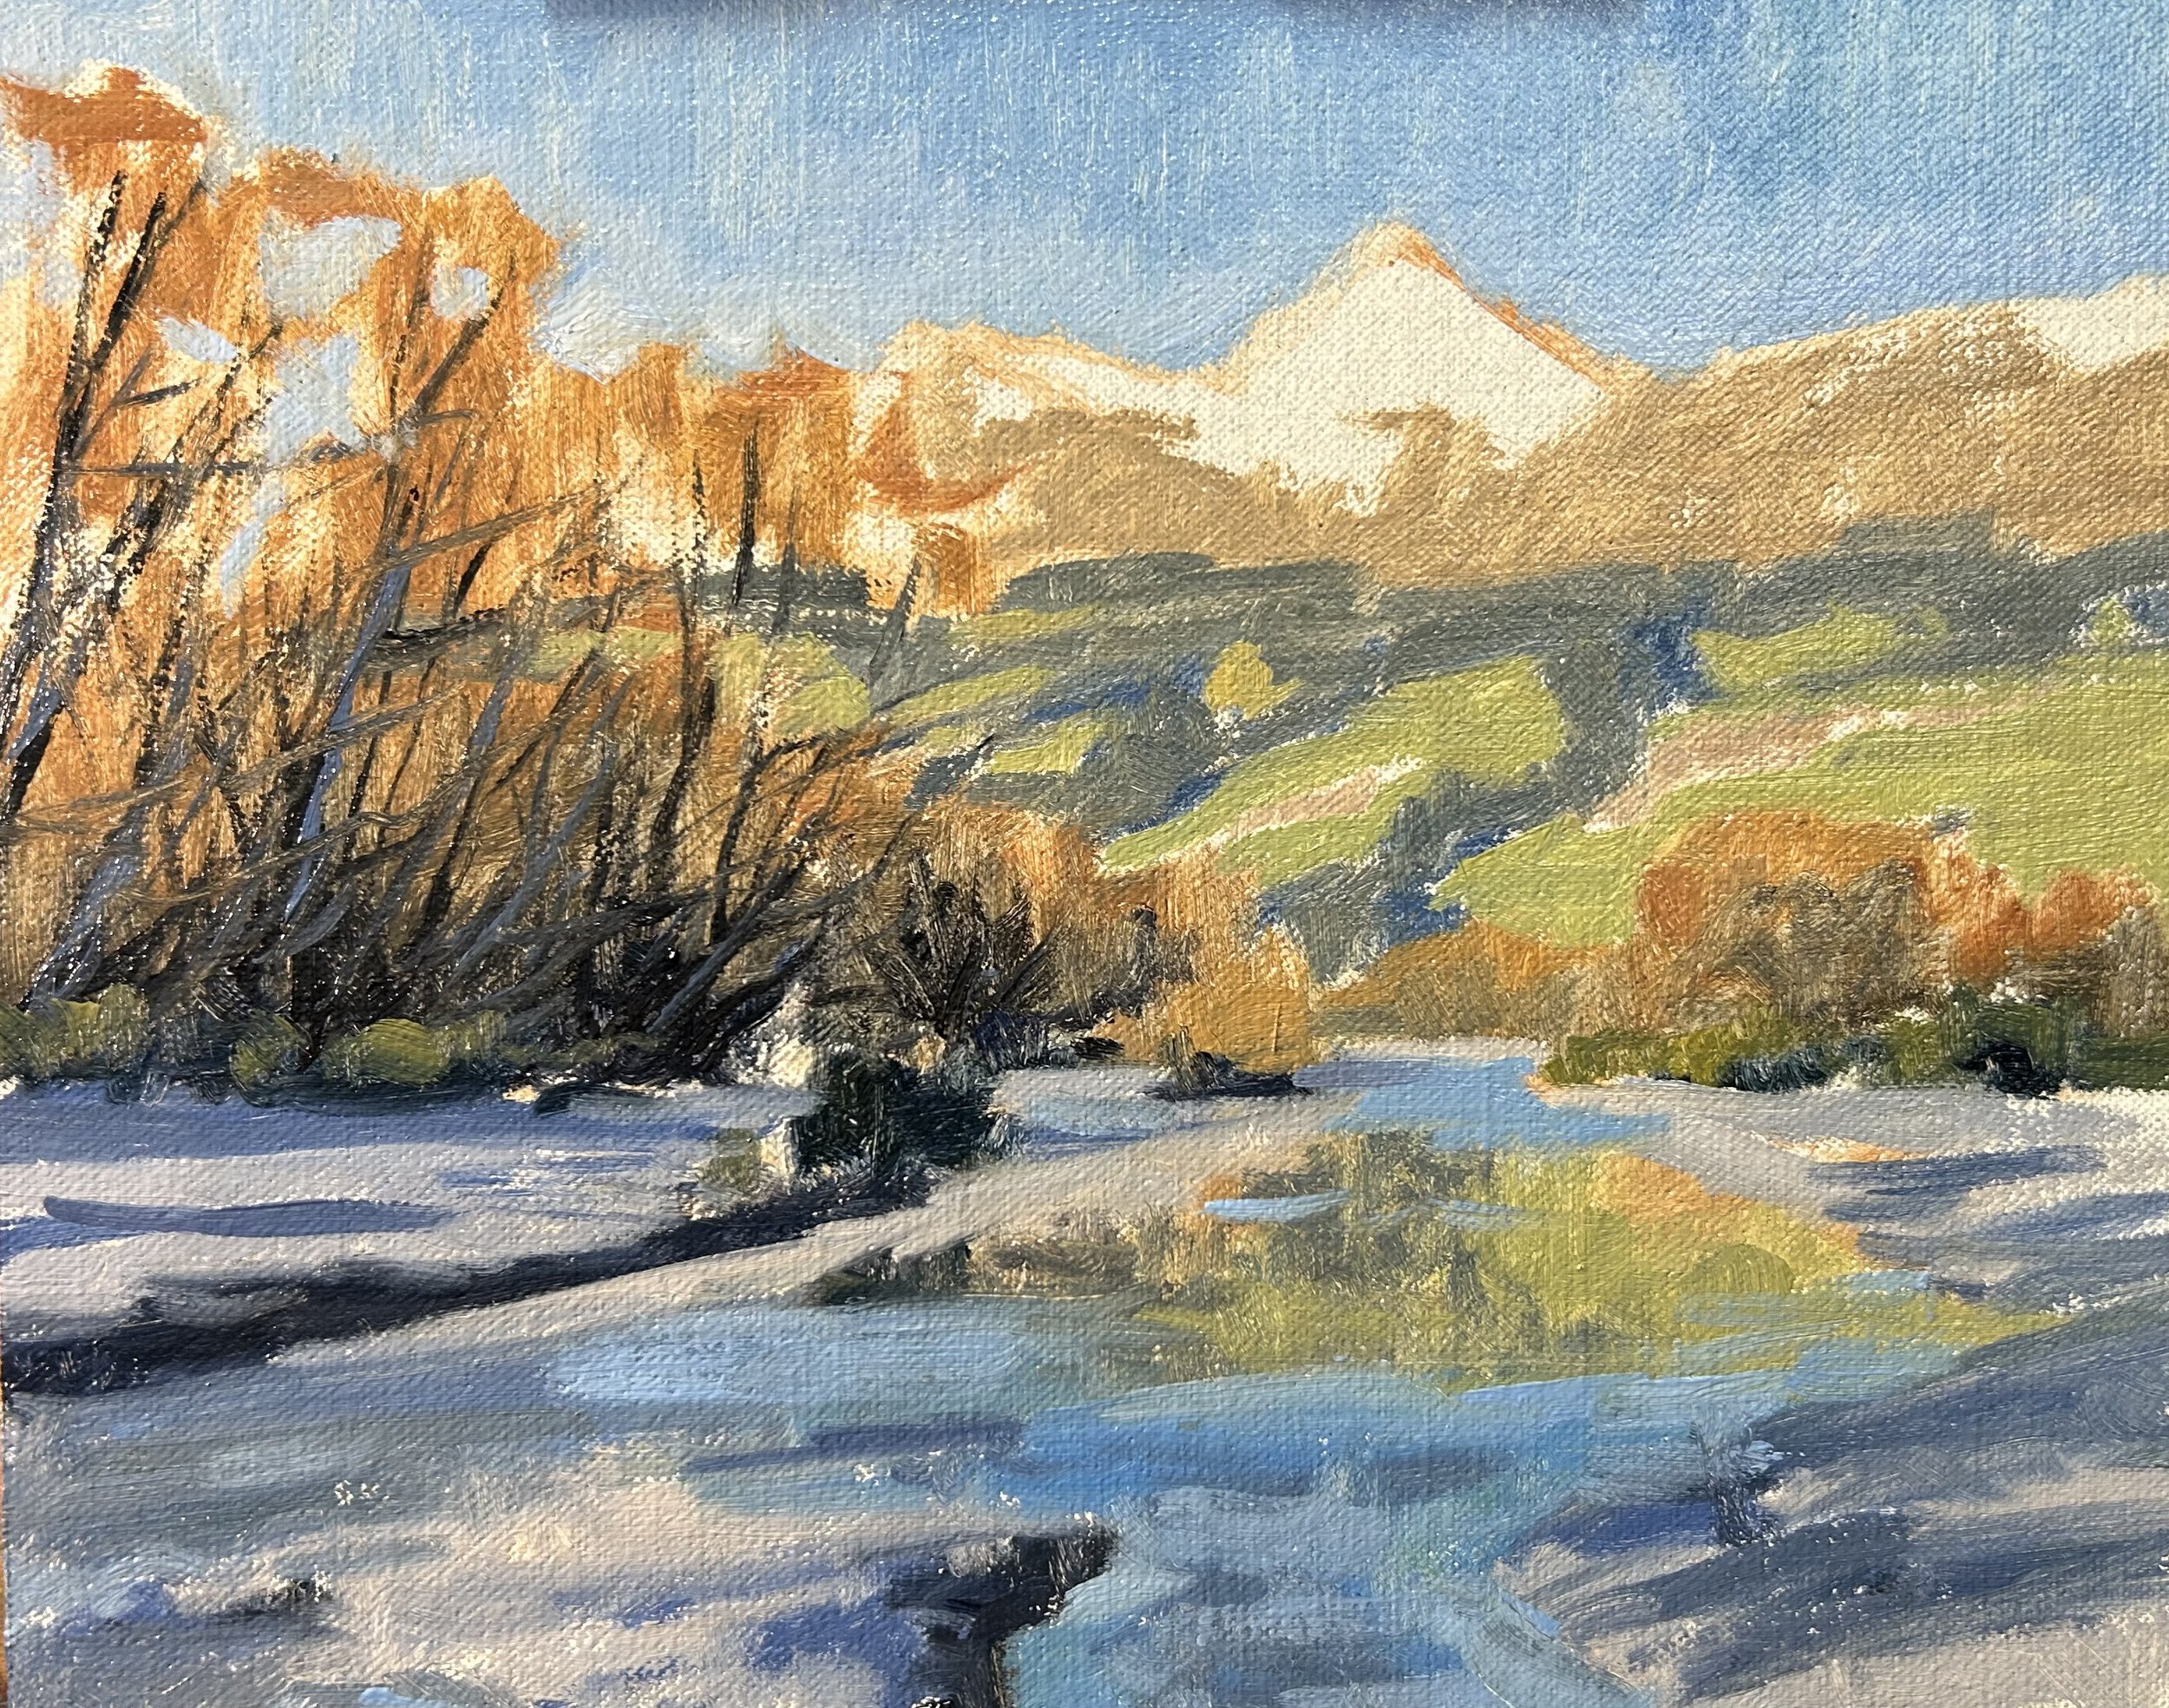
I spent two sessions on this painting and on the second session I focused on adding details and building up the form of the trees, water and the background mountain. In general, I used the same colours that I used during the blocking-in stage however I was adding lighter value colours to many areas of the painting including the tree canopies and the snow on the mountain.
The main area of work that was carried out in the second session of this painting was to paint the suggestion of stones and pebbles along the river bank in the foreground of the painting. I again used the same colours that I used during the blocking-in stage and rather than painting every single stone and pebble I used loose brushwork to create the illusion of lots of stones using a No.3 filbert brush.
I added more detail to the river, painting the ripples in the water and I finished the painting by adding details to the stems and branches in the willow trees.

Final Note
I hope you enjoyed this written painting demonstration, however, I have only scratched the surface as there is way more to this painting. Check out the painting tutorial video where I show you how to paint this scene, available on my Patreon channel.
