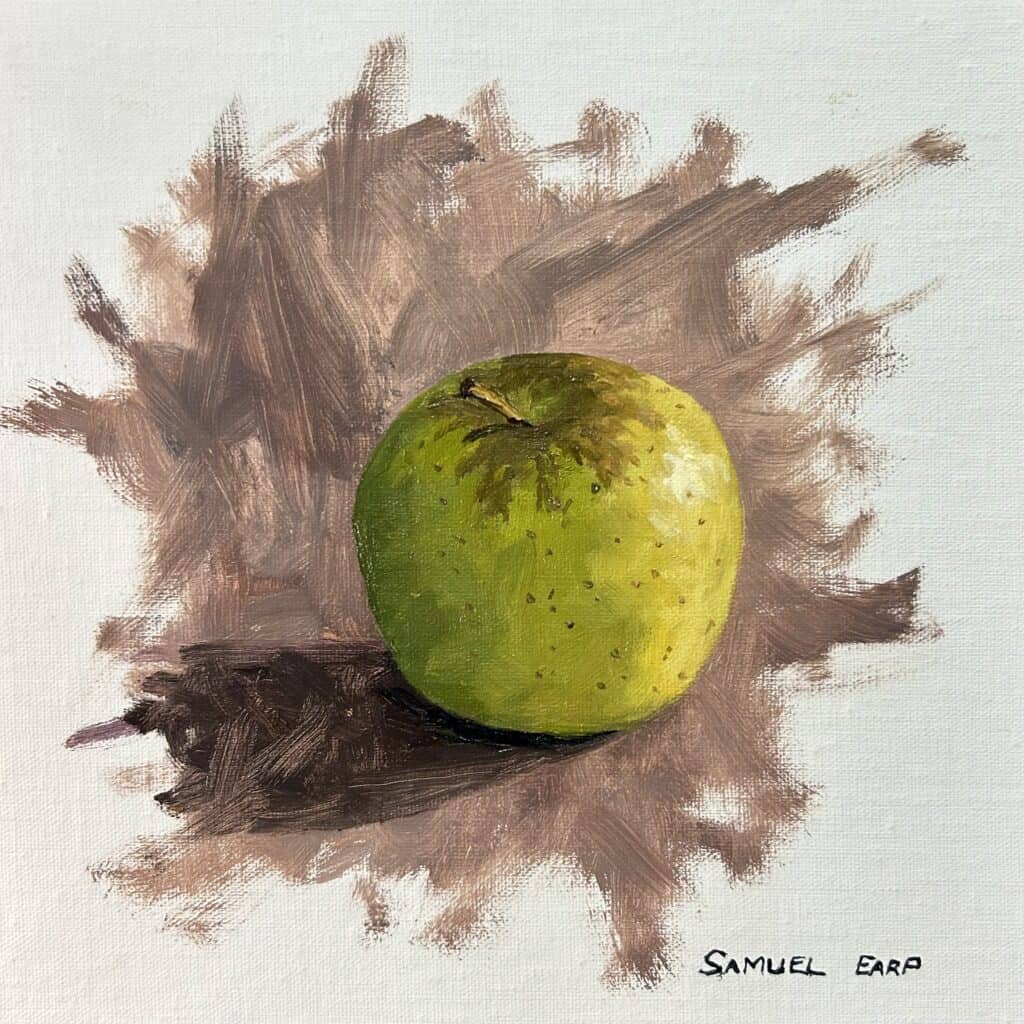
Still-life painting offers artists an excellent opportunity to study objects up close, capturing their forms, colors, and textures on canvas. In this art tutorial, we will explore the world of still-life painting and how to paint a simple yet captivating subject: an apple.
Whether you’re a beginner artist or looking to refine your painting skills, this step-by-step guide will walk you through creating a vibrant and realistic still-life painting. So grab your brushes, palette, and canvas, and let’s dive into this art tutorial on painting an apple!
Bookmark this post on Pinterest!
Reference Photo
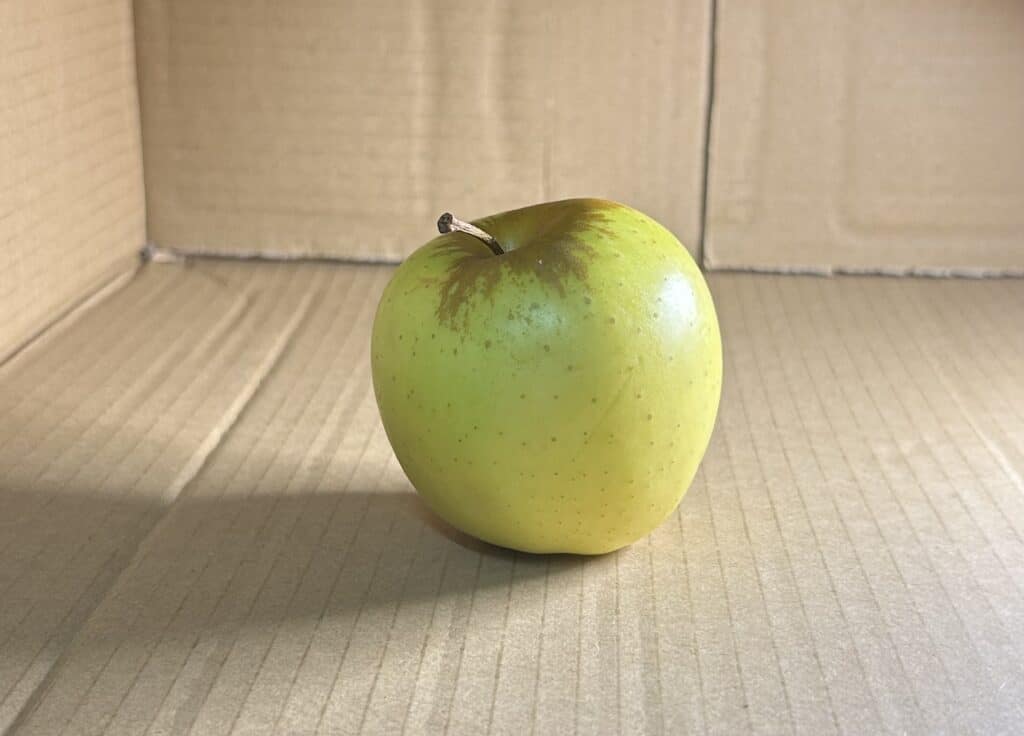
Whilst I painted this still life painting from life, I still took some reference photos. Feel free to use these photos if you would like to paint this yourself.
Setting Up Your Still Life
Create a Lightbox
Consider the lighting in your workspace and the overall atmosphere you want to convey in your painting.
I created a lightbox for my still life using a cardboard box with a hole cut out in the side. I then set up a ring light next to it so the light could shine through the opening.
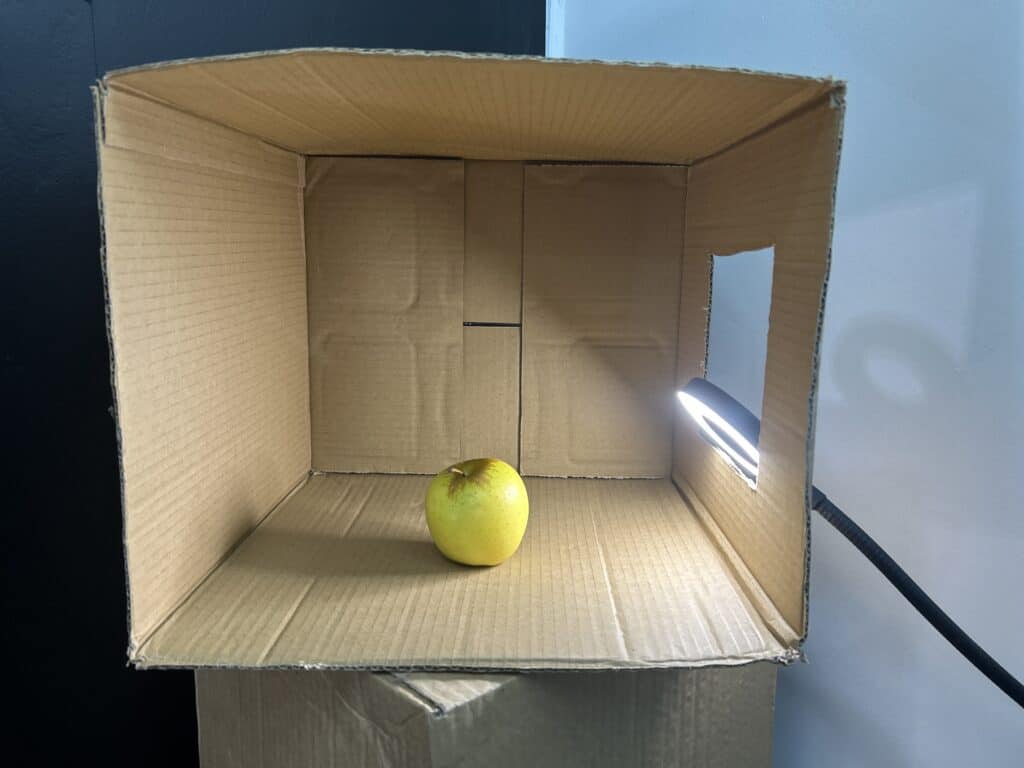
I am painting an apple for this simple still life, and the ring light I used will cast a good amount of light on the apple to create some highlights, halftones, and shadows.
Composition
In this artwork, I have placed the apple right of center within the composition. I painted this apple from life; however, I took a reference photo just in case the apple spoiled before I had a chance to finish the painting.
Sketching
Generally, suppose I am painting a landscape or a seascape, for example, before painting. In that case, it’s important to sketch out your composition first. This will help you plan out the placement of each object and ensure that the proportions are correct.
Things to Avoid in Composition
Never have your focal area in the middle of the composition, as this causes a displeasing static in the painting.
Learn More About Composition
If you would like to learn more about composition, check out this article:
5 Composition Ideas to Improve Your Landscape Painting
Gather Your Materials
Before we begin, gather the necessary materials for your still-life painting. You will need the following:
- Canvas or Canvas board
- Oil or acrylic paints
- Brushes
- Palette for mixing colors
- Palette knife (optional for texture)
- Easel, table easel or pochade box
- Still life setup: a fresh apple, a tablecloth, a cardboard box or backdrop, and good lighting

Choosing the Right Brushes and Colors
Colors Used
I painted this still life artwork using oil paint and the colors I used in this particular painting are as follows:
- Titanium white
- Burnt sienna
- Yellow ochre
- Cadmium yellow
- Cadmium red
- Alizarin crimson
- Ultramarine blue
- Phthalo green
Brushes
Here is a list of the brushes I used in this painting:
- No.5 flat
- No.3 flat
- No.2 flat
- No.3 filbert
- No.1 round
- No.0 round
Painting Your Still Life
Step 1: Sketching the Composition on Your Canvas
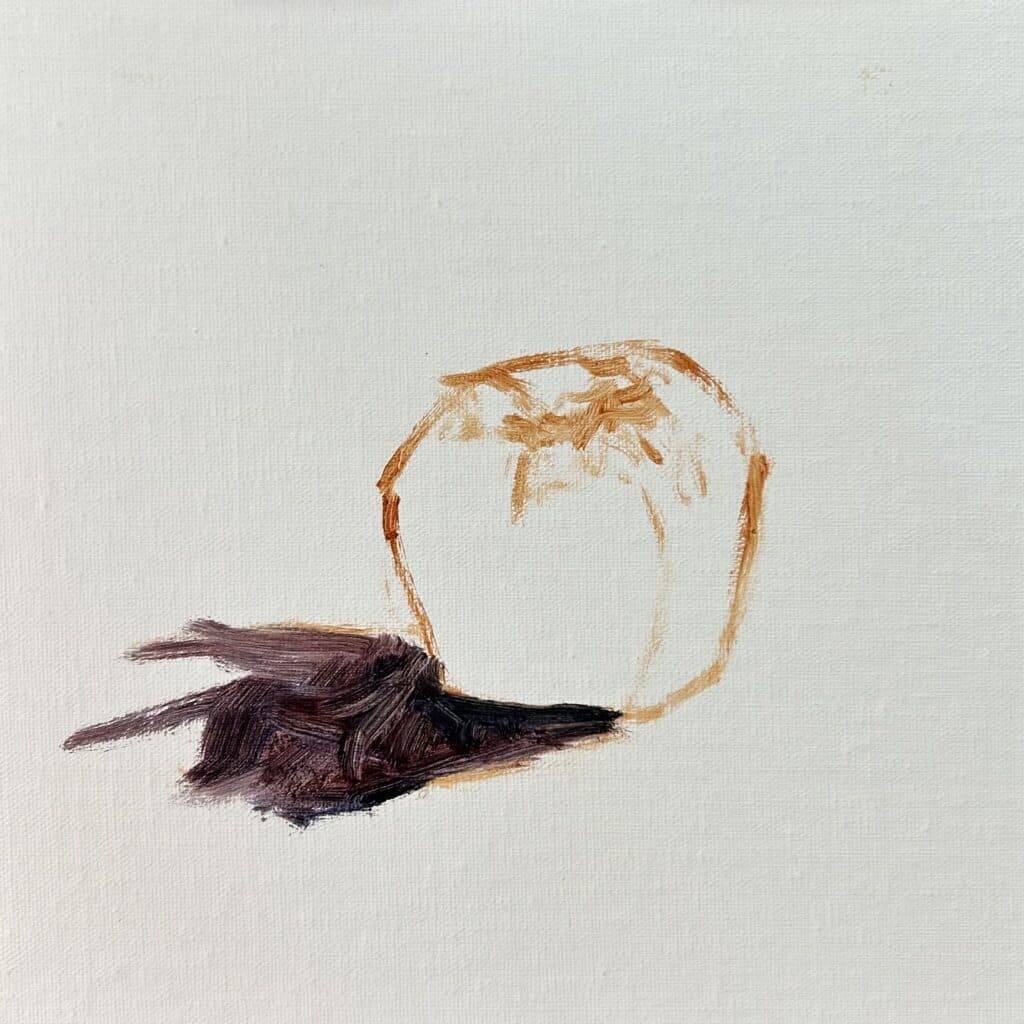
I am painting on an 8″ x 8″ medium weave Belgian linen mounted to a panel, so this is a small painting, so ideal if you are a beginner.
I sketched out my composition using burnt sienna mixed with Liquin Original, a blend that helps to speed up the drying time and thins out the paint.
I began painting the cast shadow from the application using a mix of ultramarine blue, burnt sienna, a little alizarin crimson, and titanium white.
I apply the paint with a No.5 bristle flat brush.
Step 2: Blocking-In the Painting
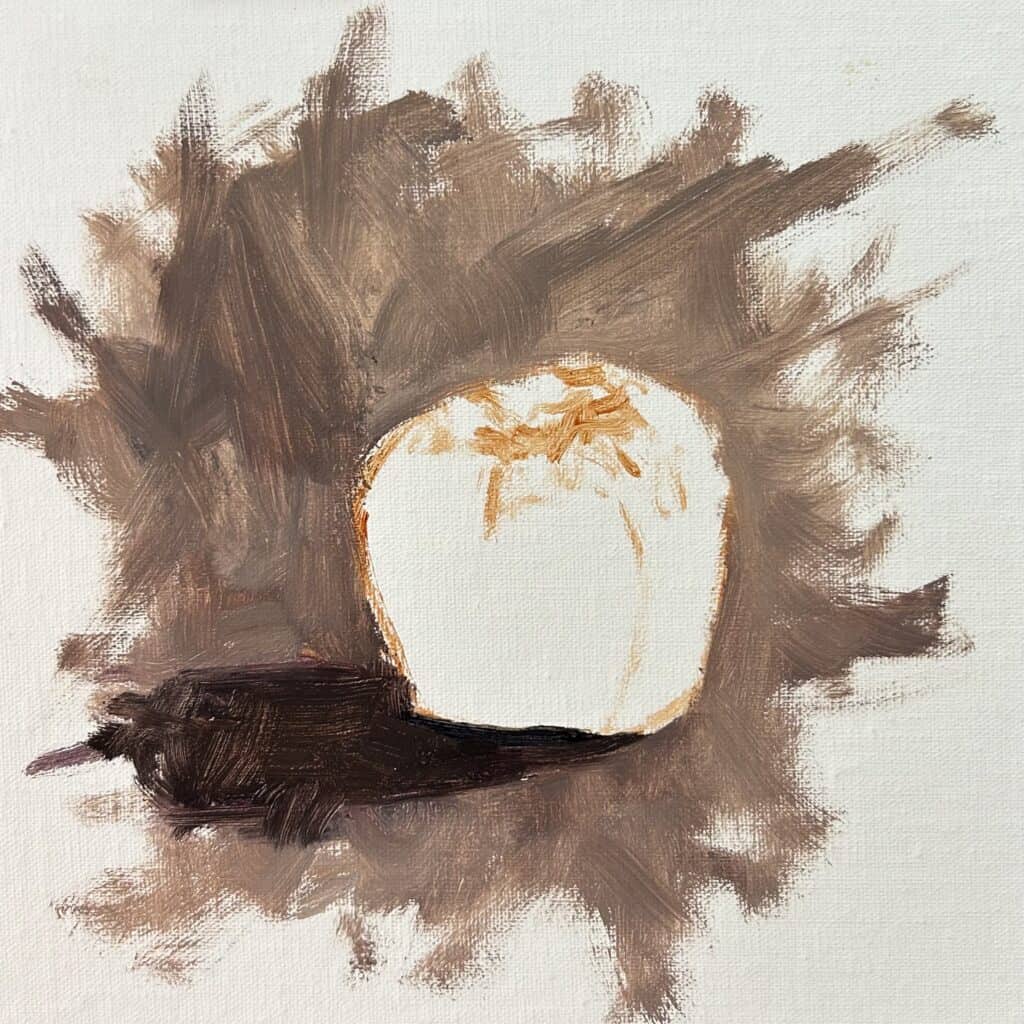
Now I am into blocking in the painting, and next, I paint the background. I’ve used a mix of ultramarine blue with burnt sienna, alizarin crimson and a little titanium white.
The value of the background color is lighter than the shadow being cast from the apple. I have also used more burnt sienna and alizarin crimson in my color mix as these two colors contain red which will complement the green of the apple.
I have created a stylized, unfinished look to the background to add interest to my still-life painting.
Step 3: Painting the Shadows
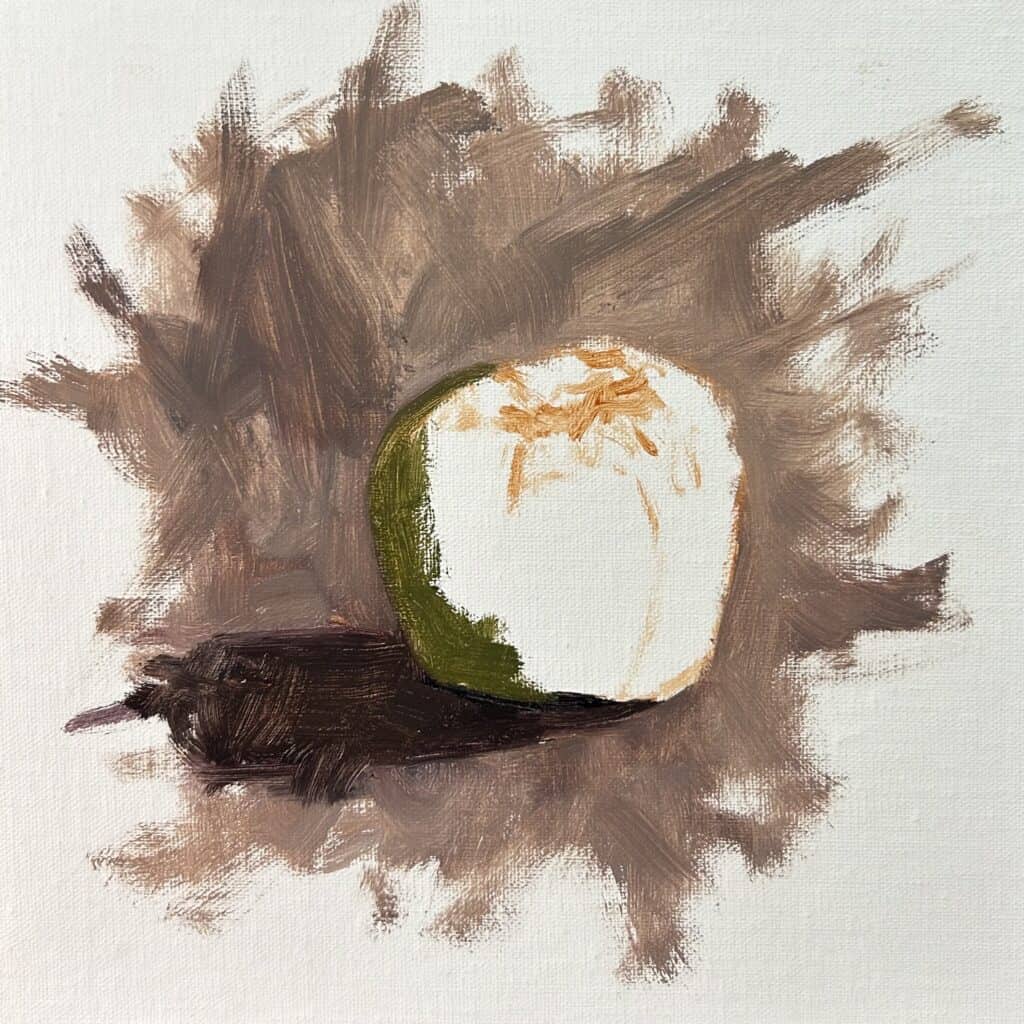
First, I paint the shadow in the apple using a mix of yellow ochre, ultramarine blue, cadmium yellow, titanium white, and a little alizarin crimson.
Step 4: Painting the Halftones and Light Colors
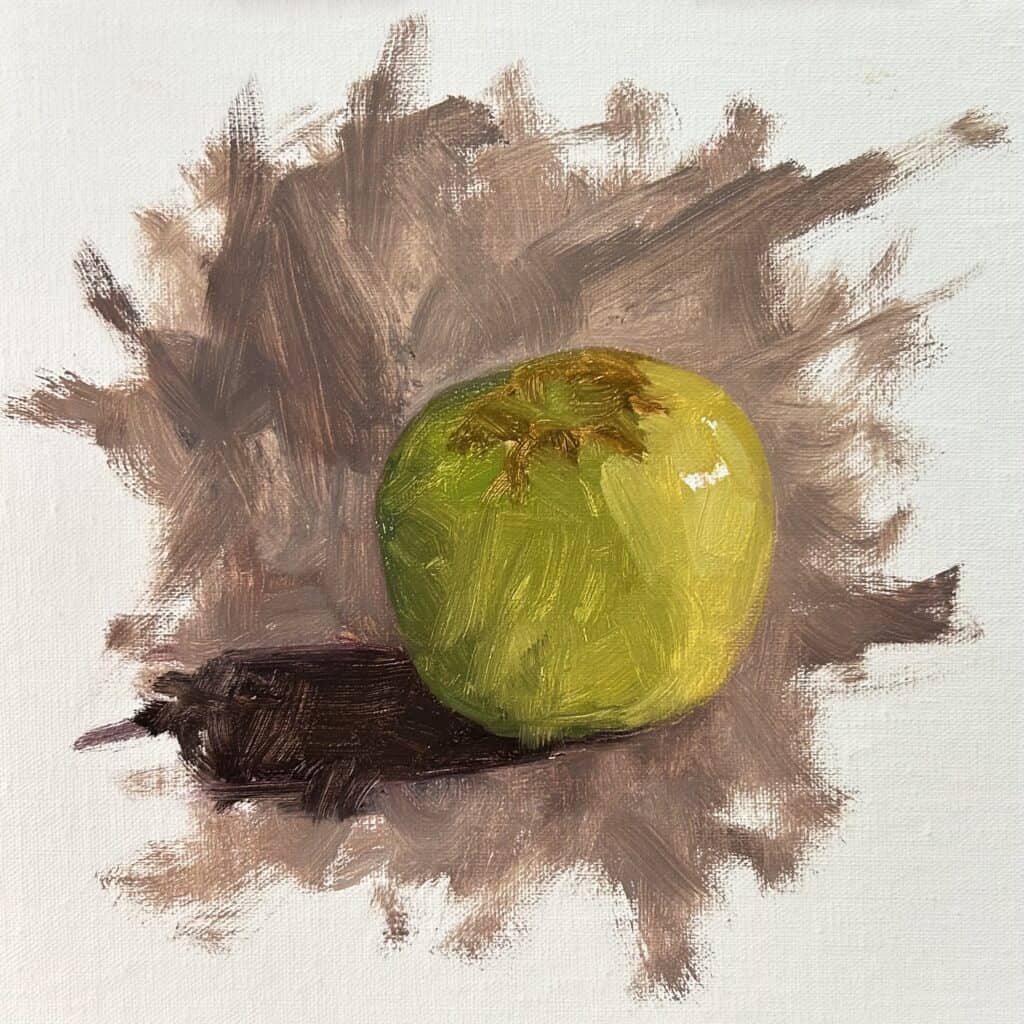
I mix the greens for the halftones in the apple using yellow ochre, ultramarine blue, cadmium yellow, titanium white and a little cadmium red light. There is also a tiny amount of phthalo green in the mix.
The cadmium red light will help desaturate the green a little, as red is the opposite of green on the color wheel.
To paint the area of the apple in full light, I used the same colors as I did for the green halftones; however, there is more titanium white and cadmium yellow in the mix.
Step 5: Painting the Markings on the Apple
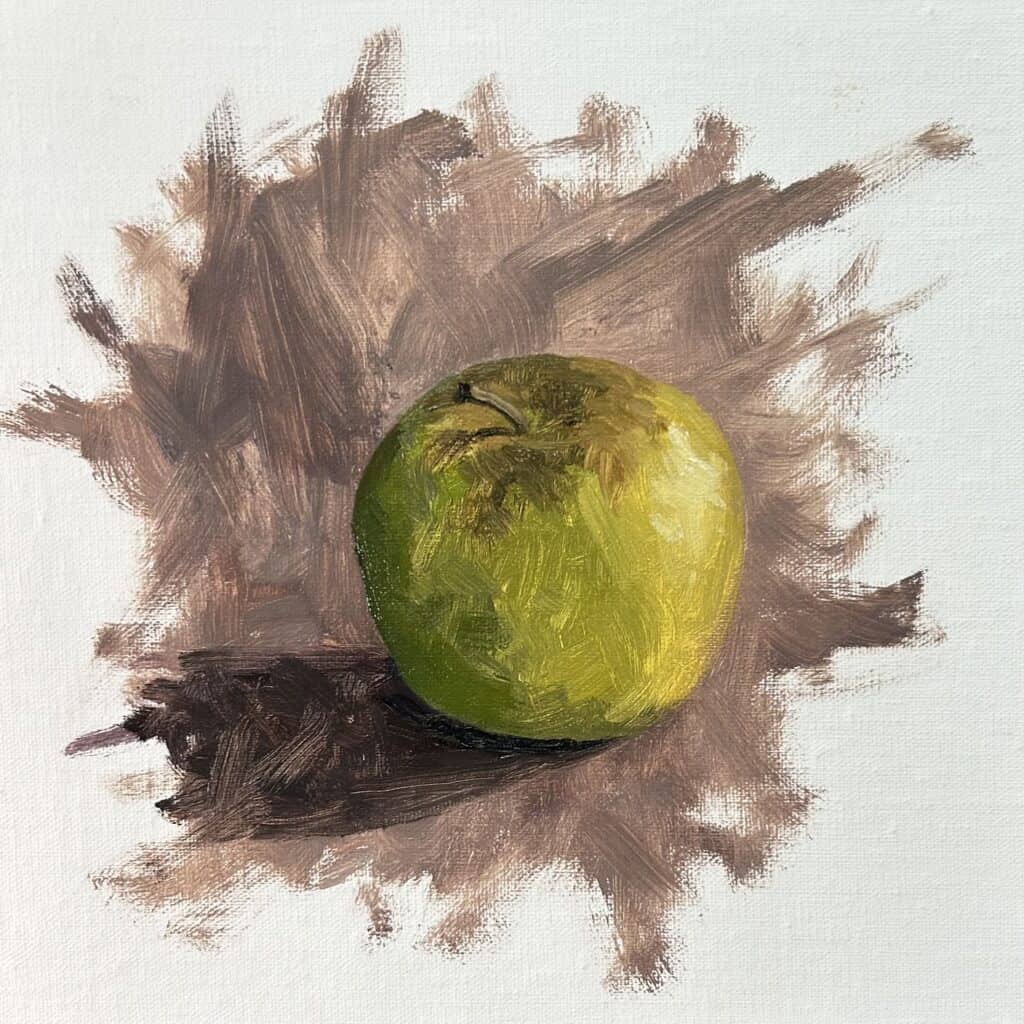
I paint the greenish-brown markings on the apple using a varying mix of burnt sienna, yellow ochre, ultramarine blue, and titanium white. I can even add a little cadmium yellow into the mix for the markings in the whole light.
I have mainly used No.3 bristle flat brushes to paint the apple as the bristles help to create texture within the paint.
At this point in the painting, I allowed it to dry so that I could then add some details to it.
Step 6: Refining the Painting
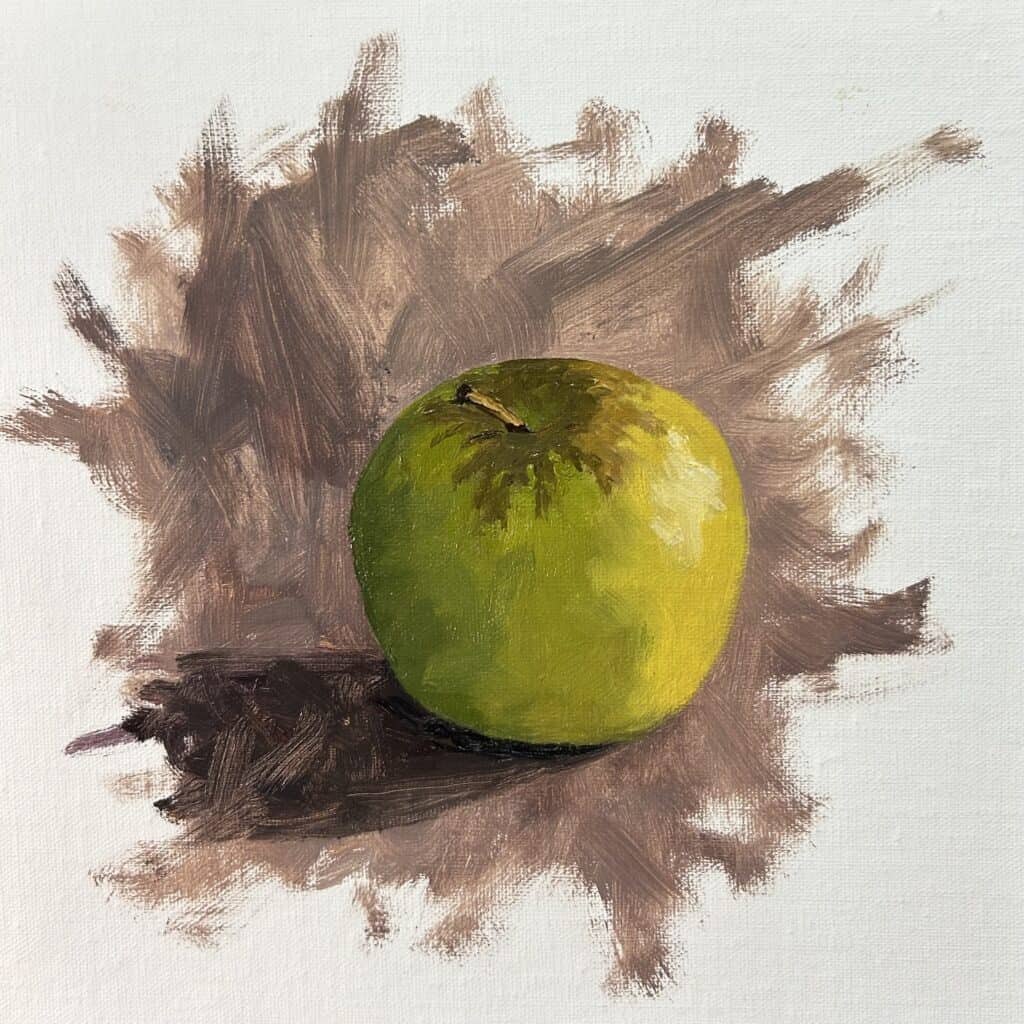
Once the base colors are in place and dry, it’s time to add details and texture to the apple. Observe the contours, highlights, and subtle transitions in color.
I added more layers of paint to the main body of the apple, essentially using the same colors I used during the blocking-in stage. I blend in on the canvas the transition zones between the shadow area, halftones and the area of the apple in the full light.
I mark-in the highlighted area on the apple using the green mix with more titanium white and cadmium yellow added. Make sure the value of this color mix is light.
Step 7: Final Details
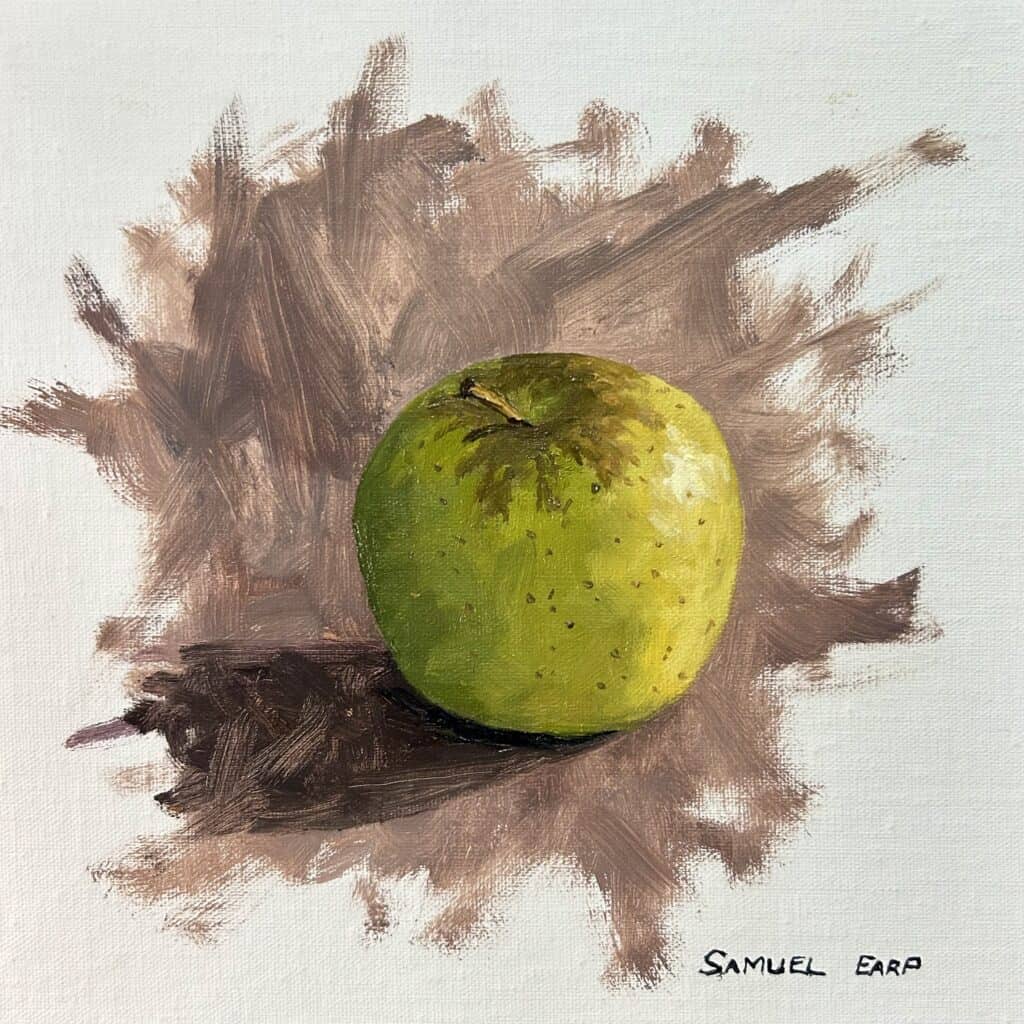
I finished the painting by adding details to the brown markings at the top of the apple using varying combinations of yellow ochre, ultramarine blue, burnt sienna, titanium white and a little cadmium yellow.
Use smaller brushes to add fine lines and highlights to give the apple a three-dimensional appearance.
I use the same color mix to mark a few spots on the apple using a No.0 synthetic pointed round brush.
I added the highlight to the apple with a mix of titanium white with a bit of cadmium yellow.
Step 8: Finishing The Painting
Take a step back and assess your painting. Make any necessary adjustments to the colors, values, and details. Refine the shape of the apple and add any additional elements to enhance the still-life composition.
Pay attention to the background and foreground, ensuring they complement the apple and create visual interest. Once you’re satisfied with your painting, let it dry completely.
Conclusion
Congratulations on completing your simple still-life painting of an apple! This art tutorial taught you the step-by-step process of creating a vibrant and realistic still-life masterpiece.
Remember, the key to successful still-life painting lies in careful observation, capturing the subtle details, and mastering the play of light and shadow. So, embrace your creativity, practice regularly, and explore the endless possibilities of still-life painting. Happy painting!
Thank you for reading. If you enjoyed this painting tutorial, check out this one:
HOW TO PAINT A STILL LIFE IN 9 STEPS
Watch the YouTube Video
If you enjoyed this blog post check out the YouTube video tutorial where I show you how to paint this still life.
