
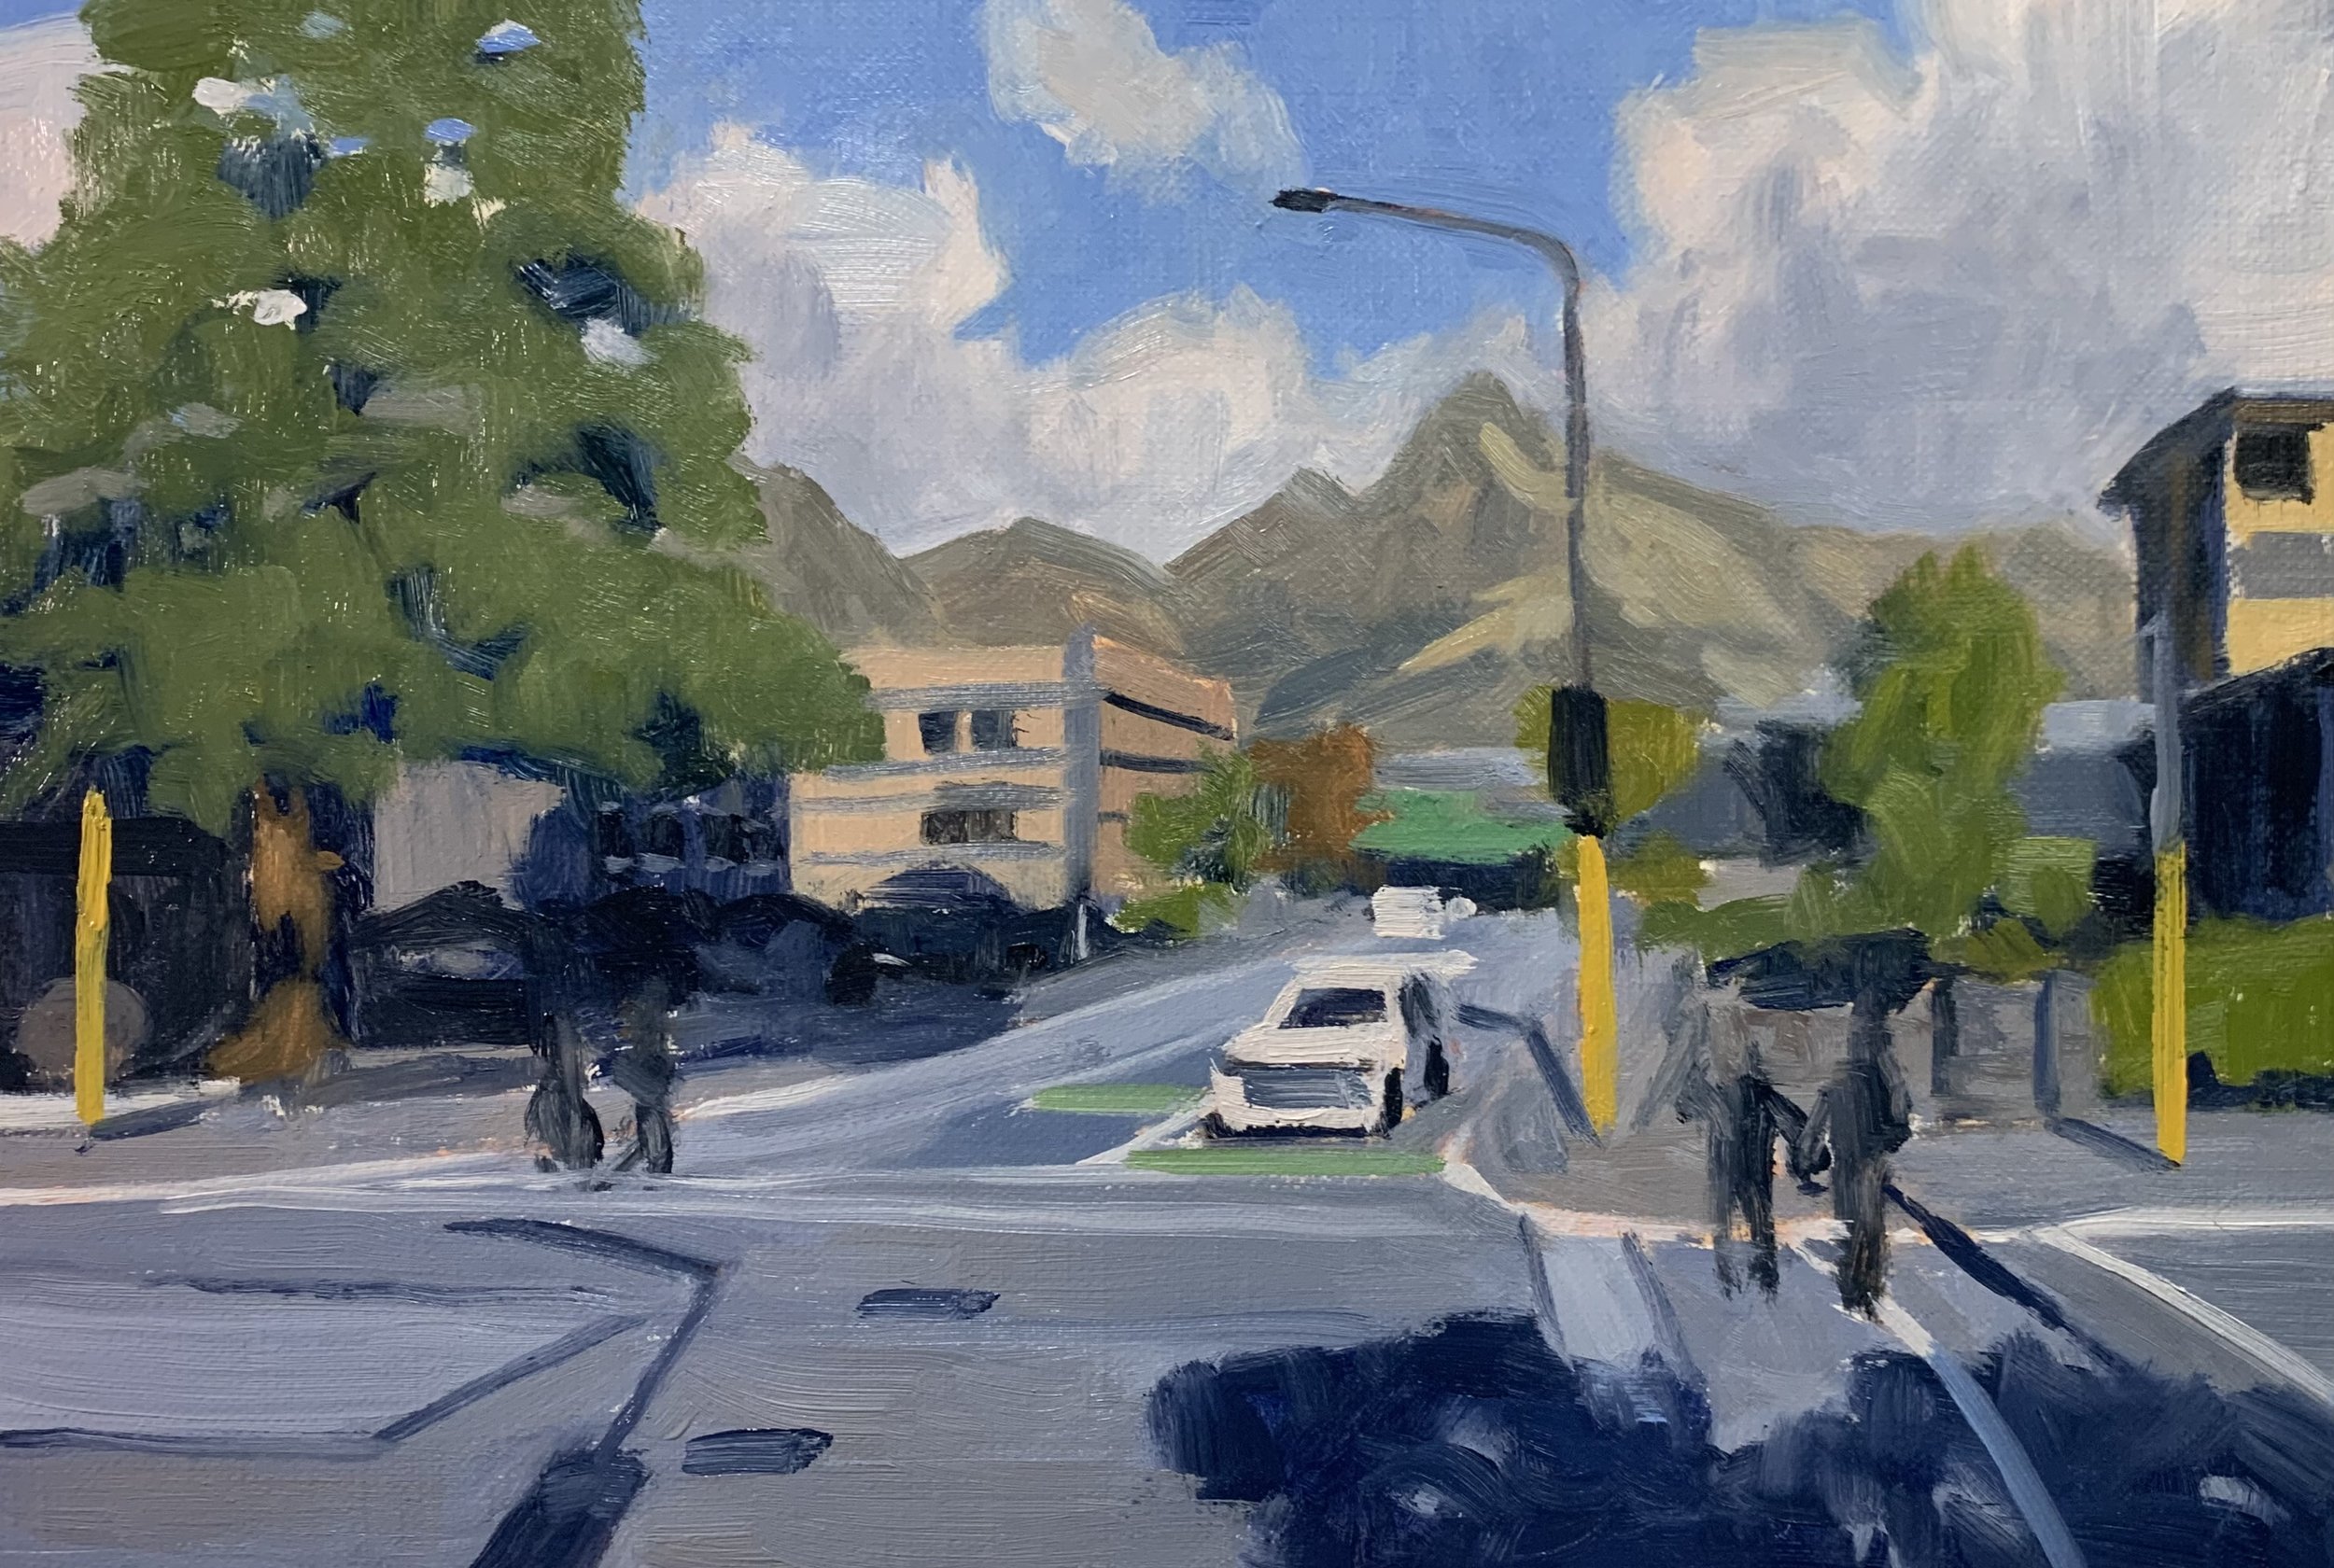
In this article, I show you how to paint a street scene in this painting demonstration. This painting is inspired by the town centre of Queenstown, New Zealand.
Suitable for oils and acrylics.
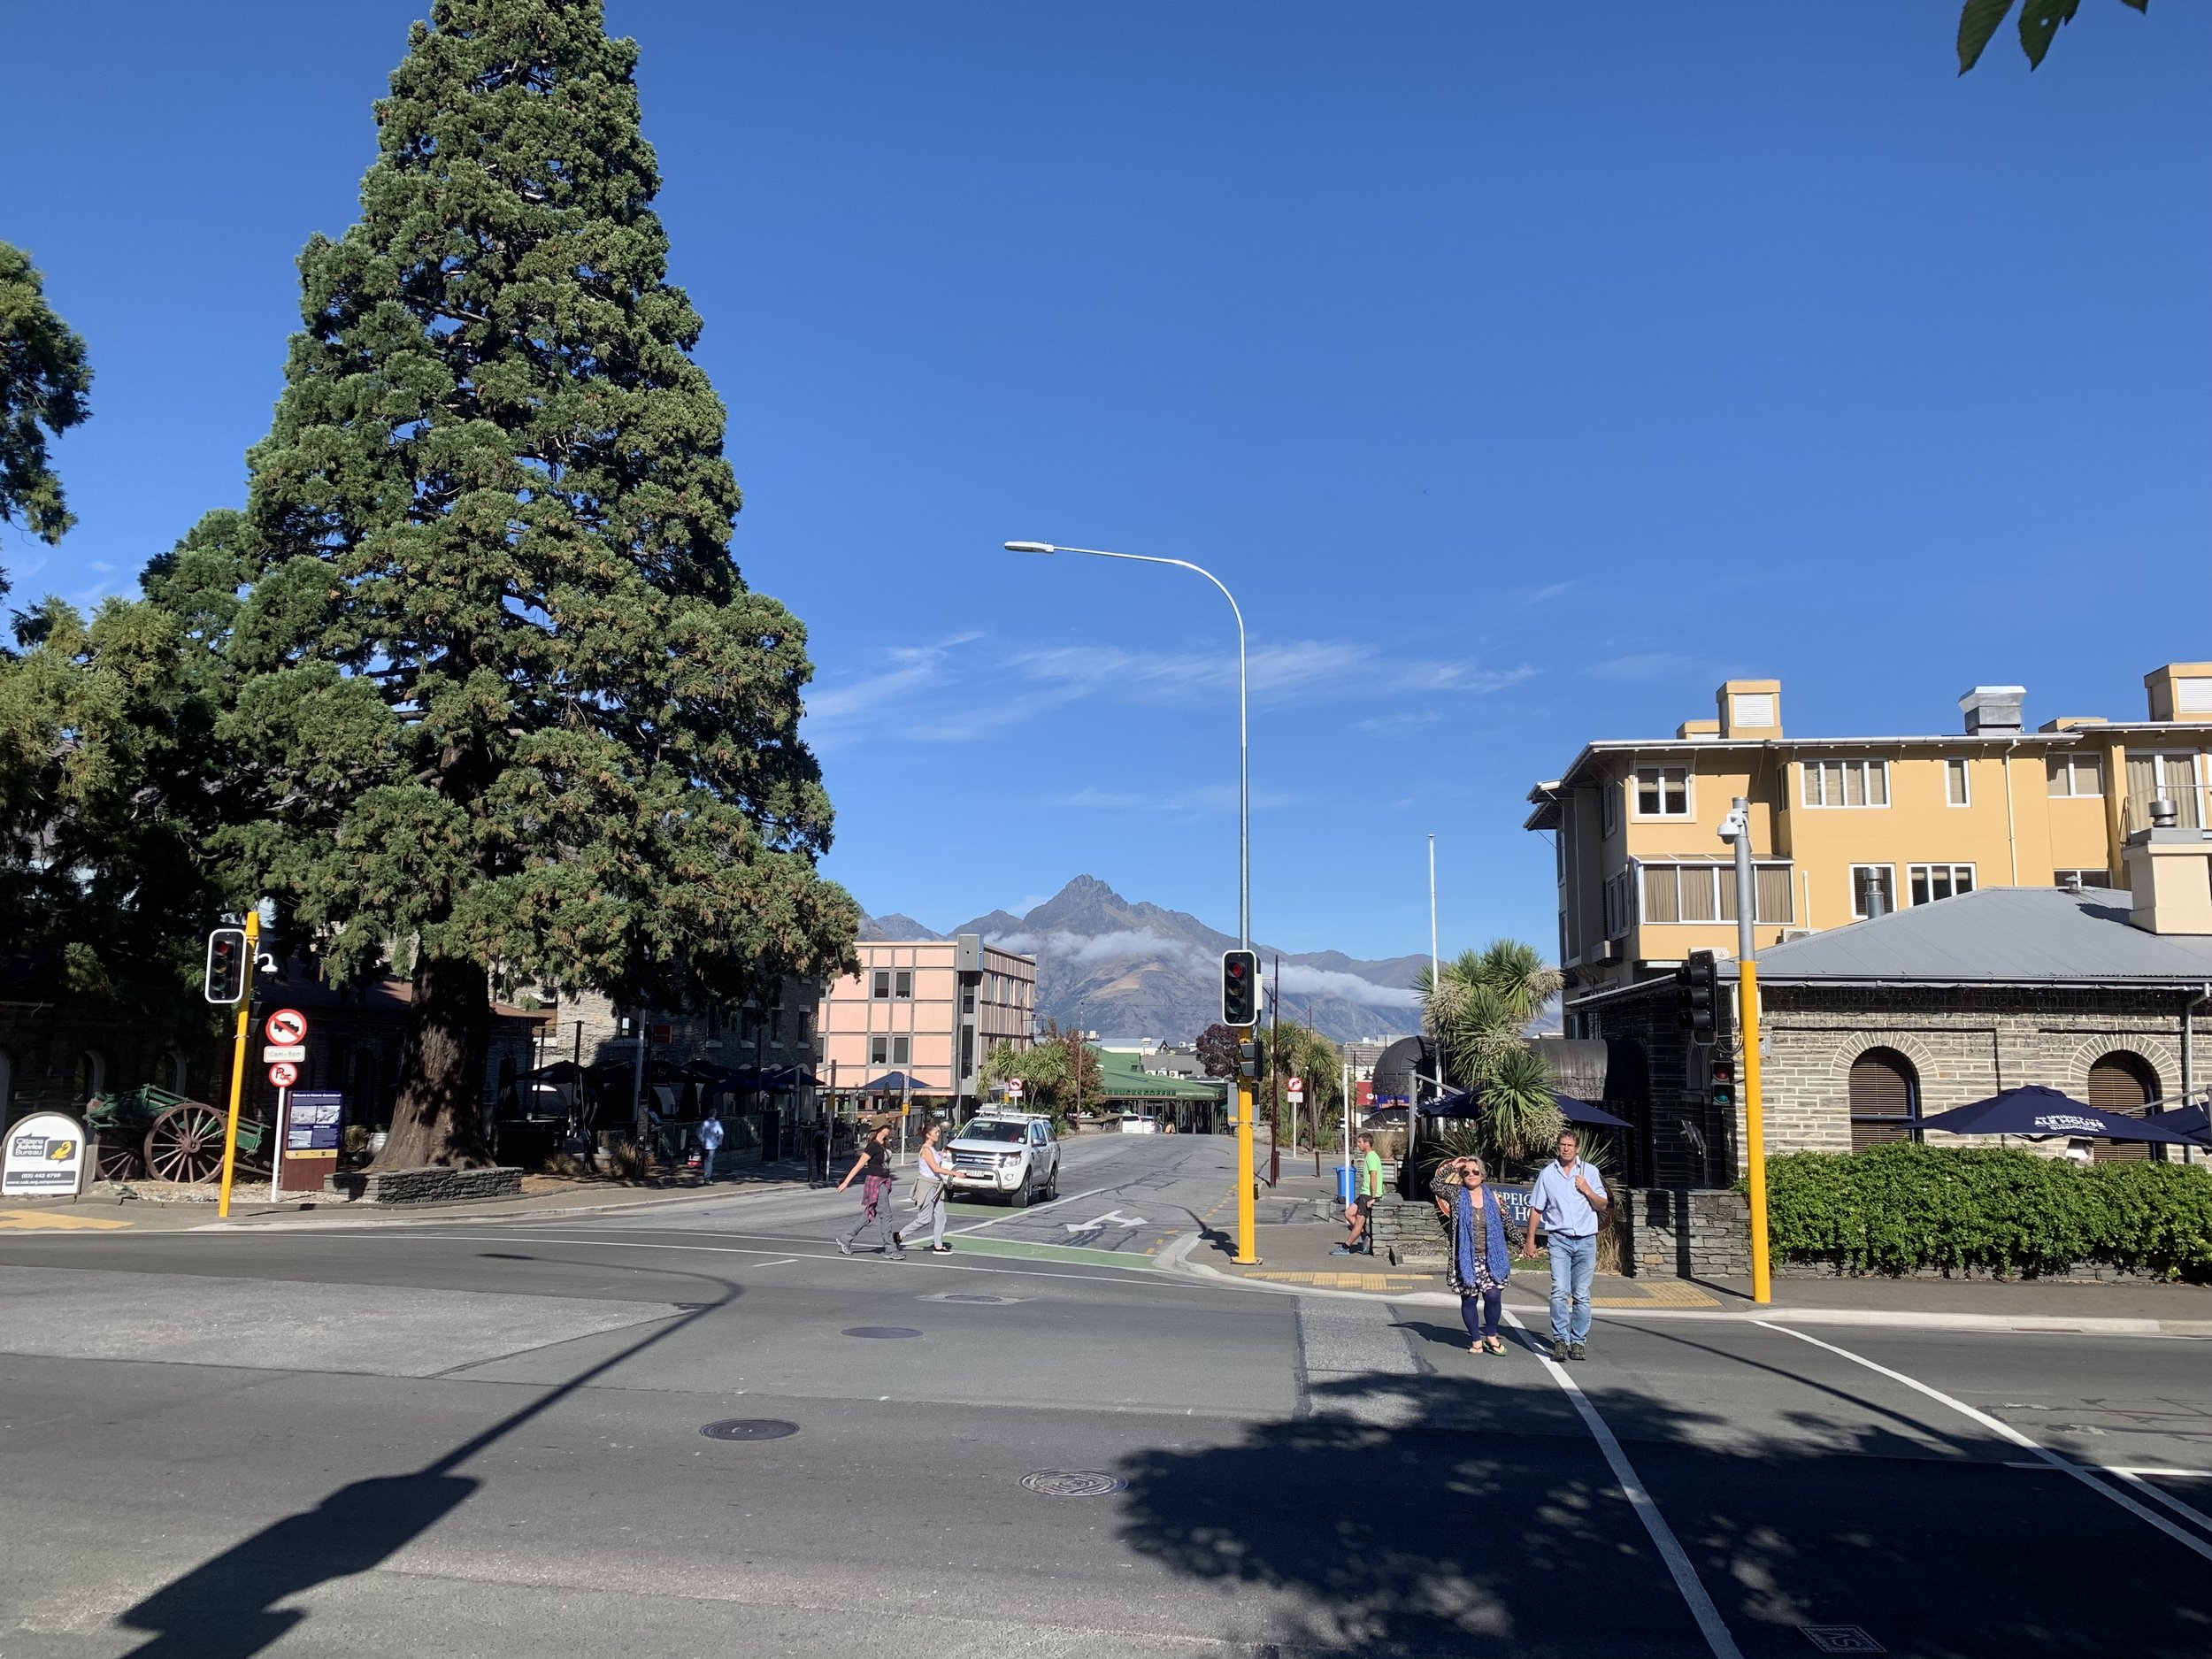
Reference Photo
Please feel free to use or copy this photo if you would like to have a go at painting this artwork. Also, check out the painting tutorial video on my Patreon channel where I demonstrate how to paint this artwork from start to finish.
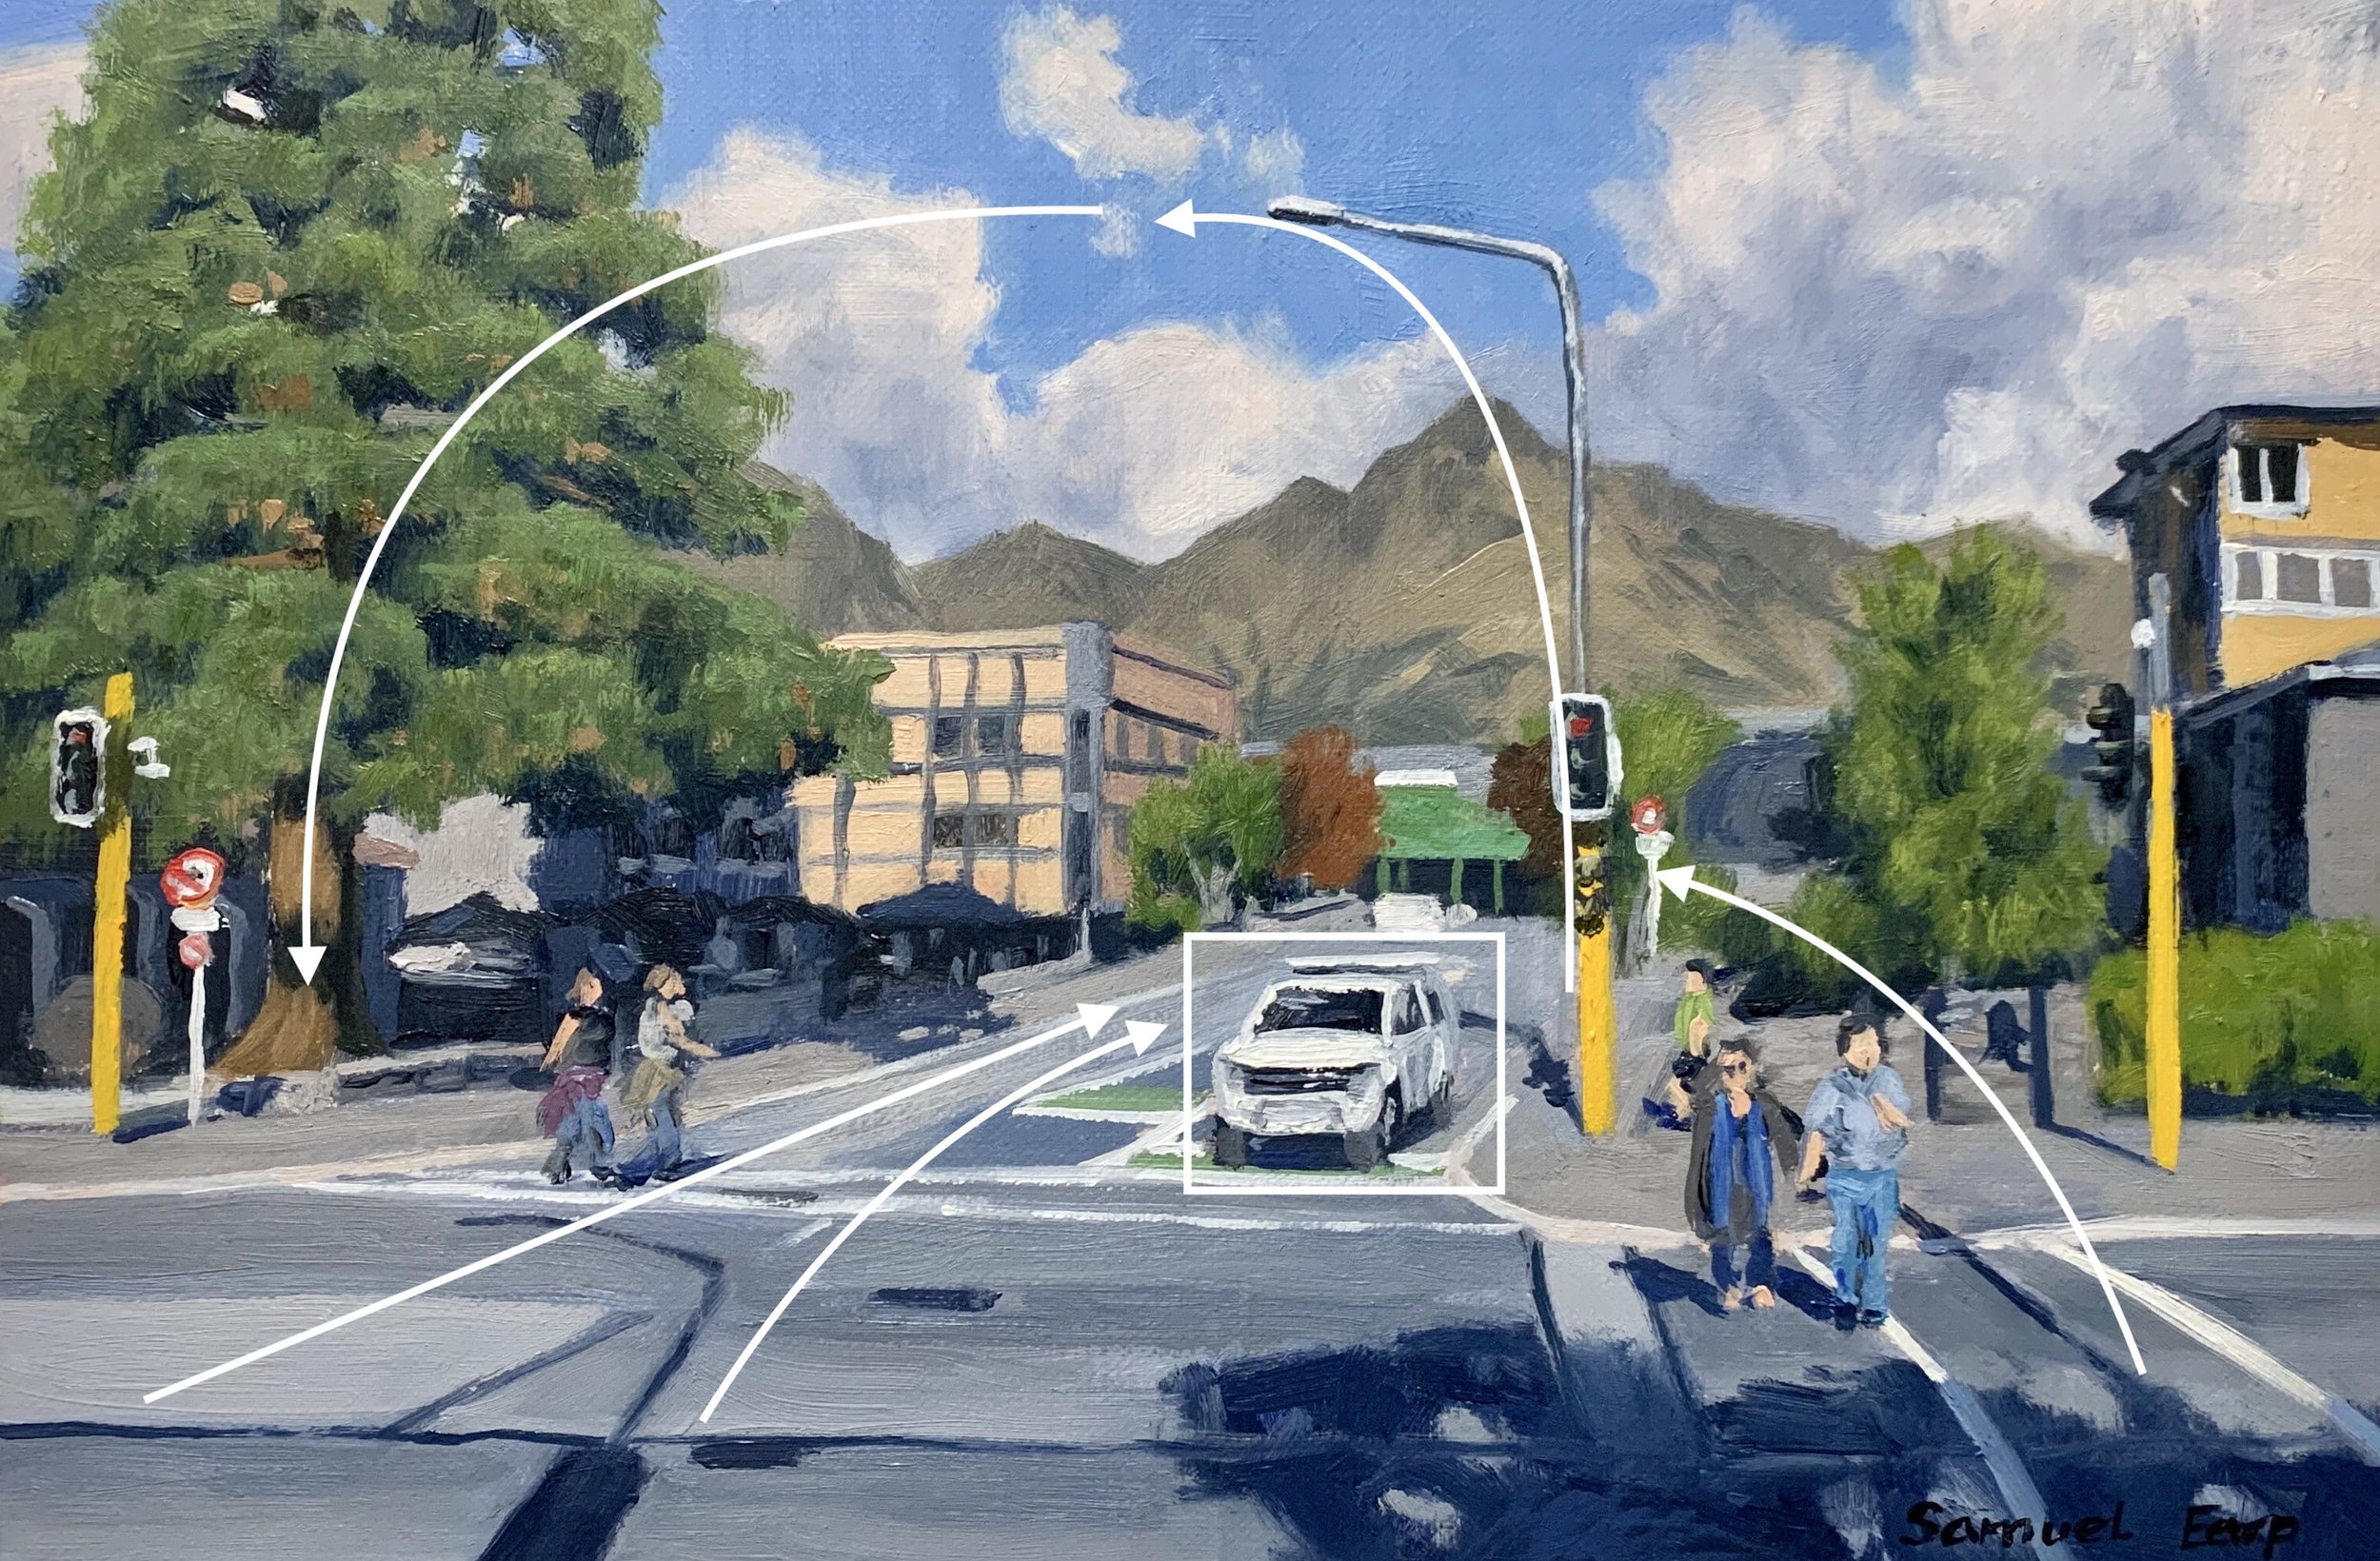
Composition
The vehicle is one of the main focus areas within this composition. The street light is a secondary focal area helping to lead the eye towards the background mountain and to the giant sequoia tree which brings the eye back into the painting.
When designing a composition for a painting avoid having centred objects, centred lines and repeating masses as this will spoil the composition.
Colours
I painted this artwork using oil paint the colours I used in this painting are as follows:
- Titanium white
- Burnt sienna
- Yellow ochre
- Cadmium yellow
- Cadmium red light
- Alizarin crimson
- Ultramarine blue
- Phthalo green
Brushes
Here is a list of the brushes I used in this painting:
- No.5 flat
No.3 flat
- No.2 flat
- No.3 filbert
- No.1 round
- No.0 round
- 1/4” synthetic dagger
Painting Demonstration
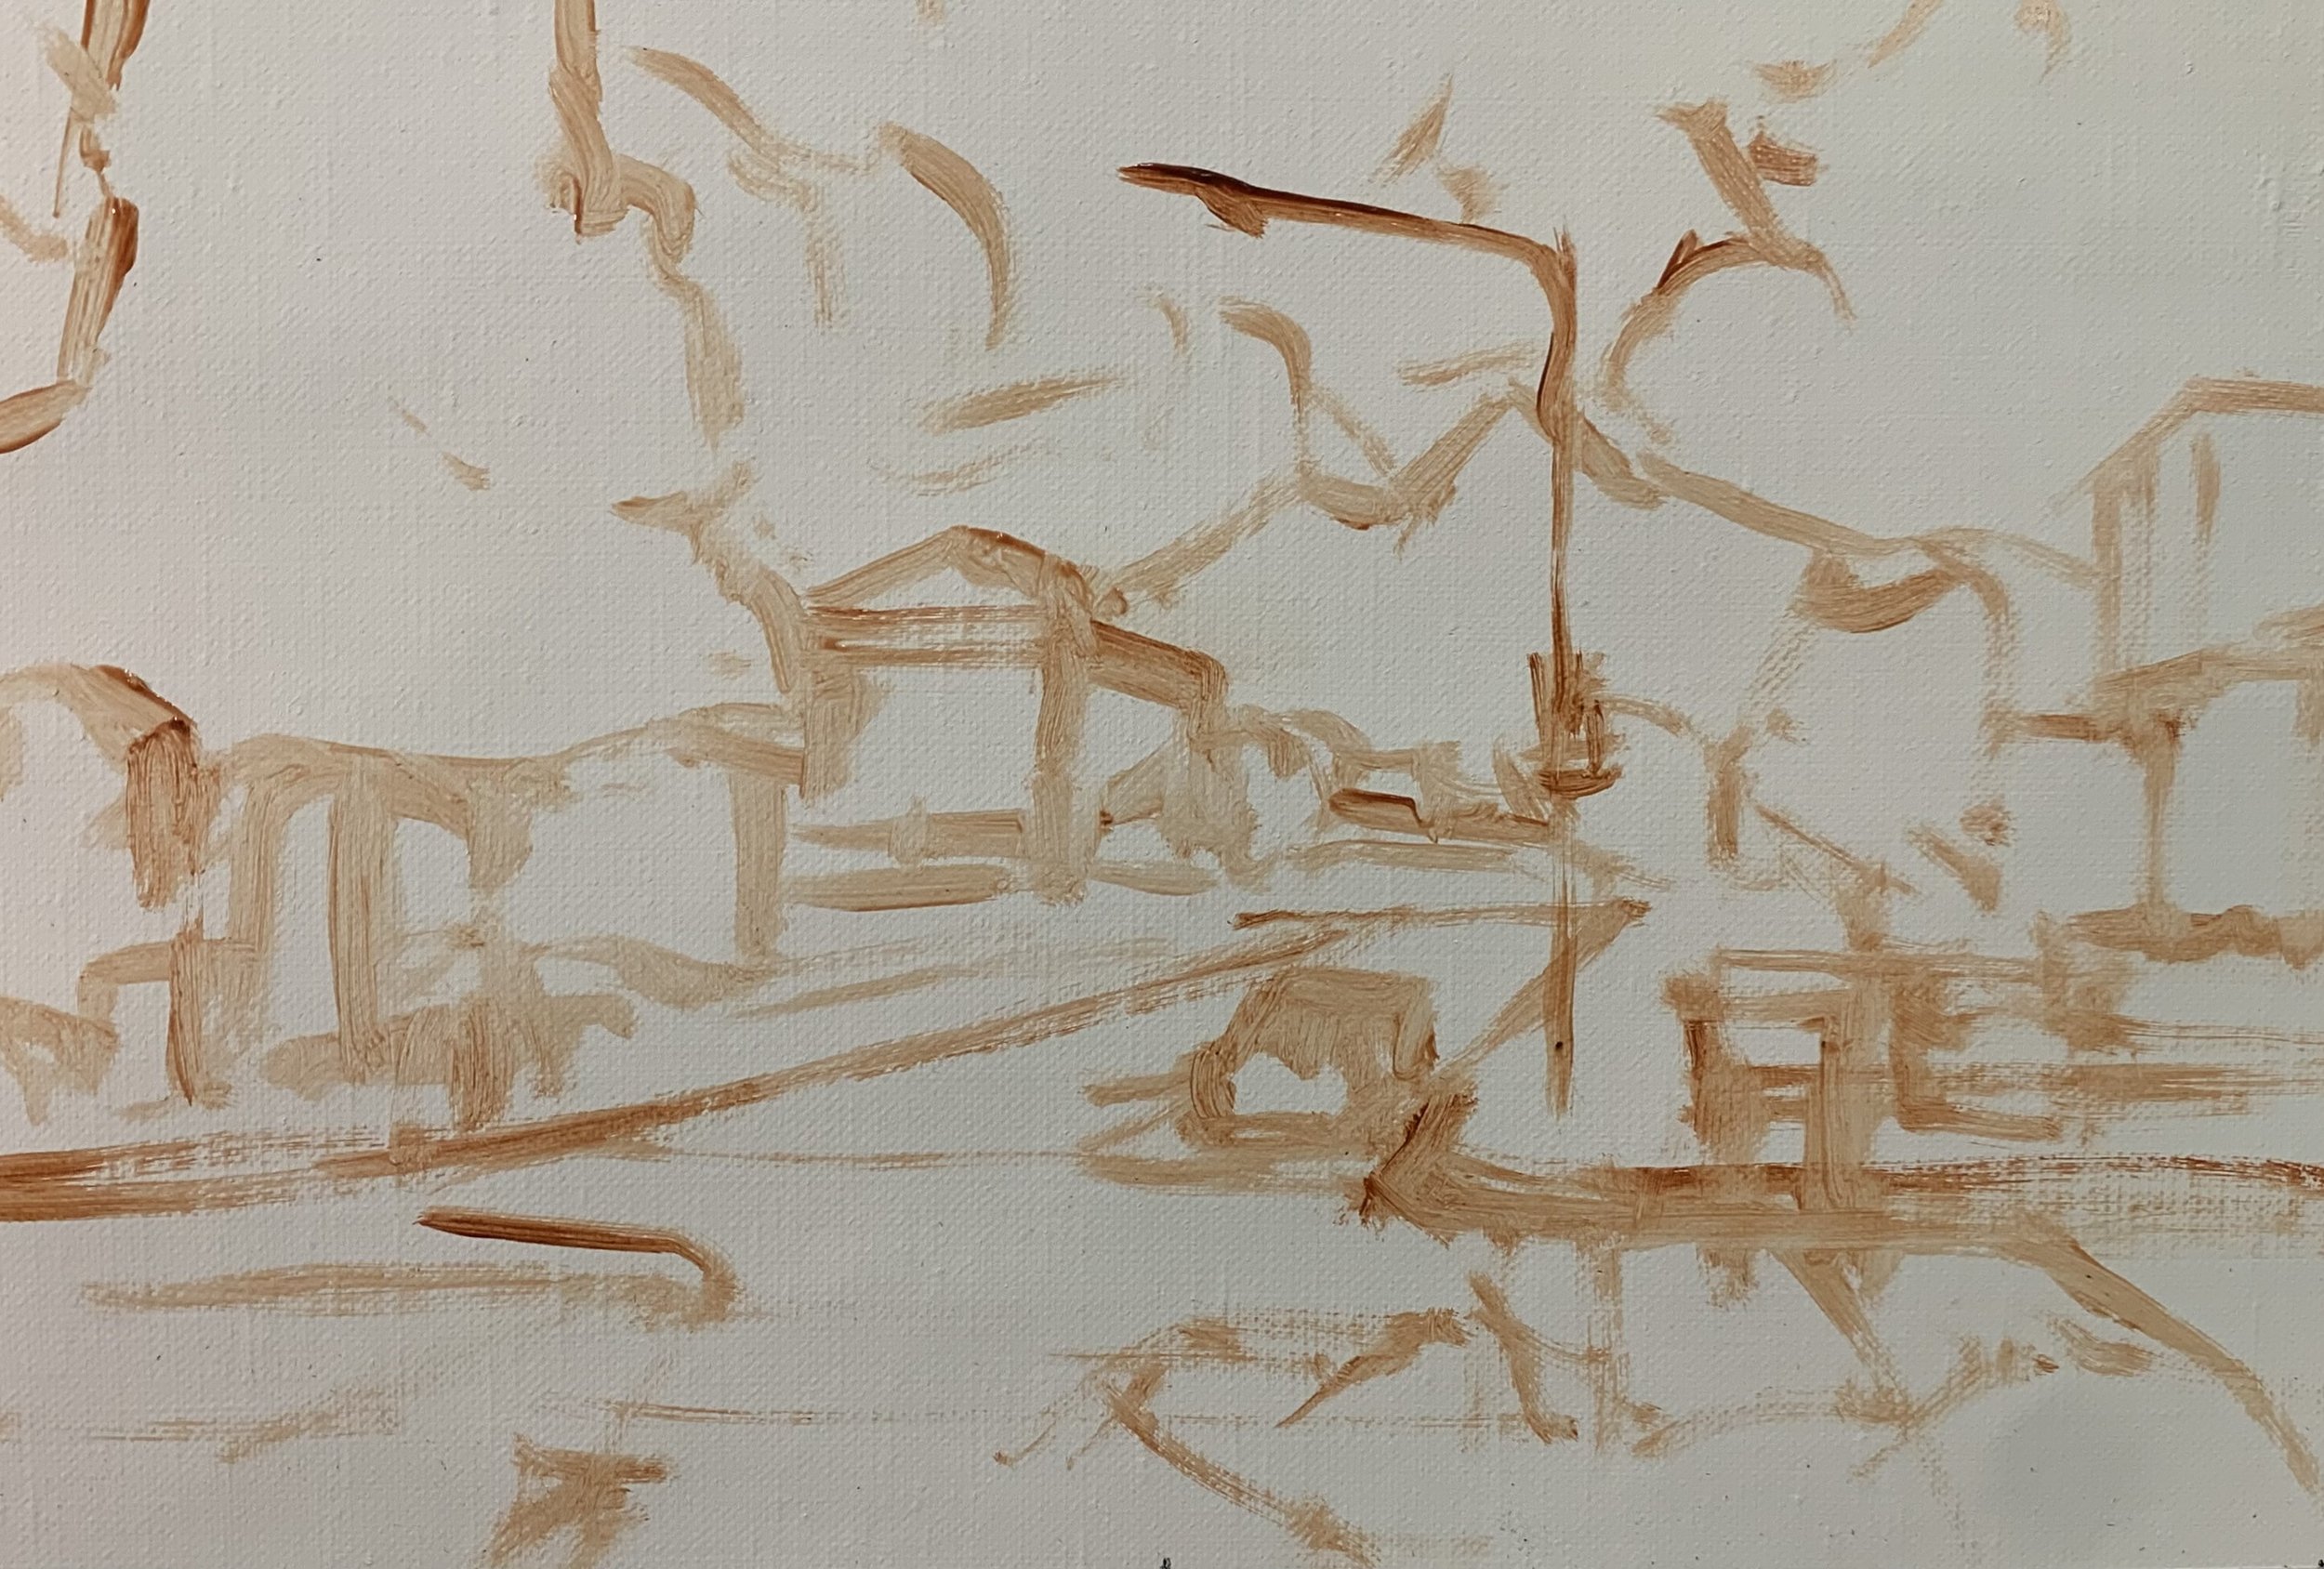
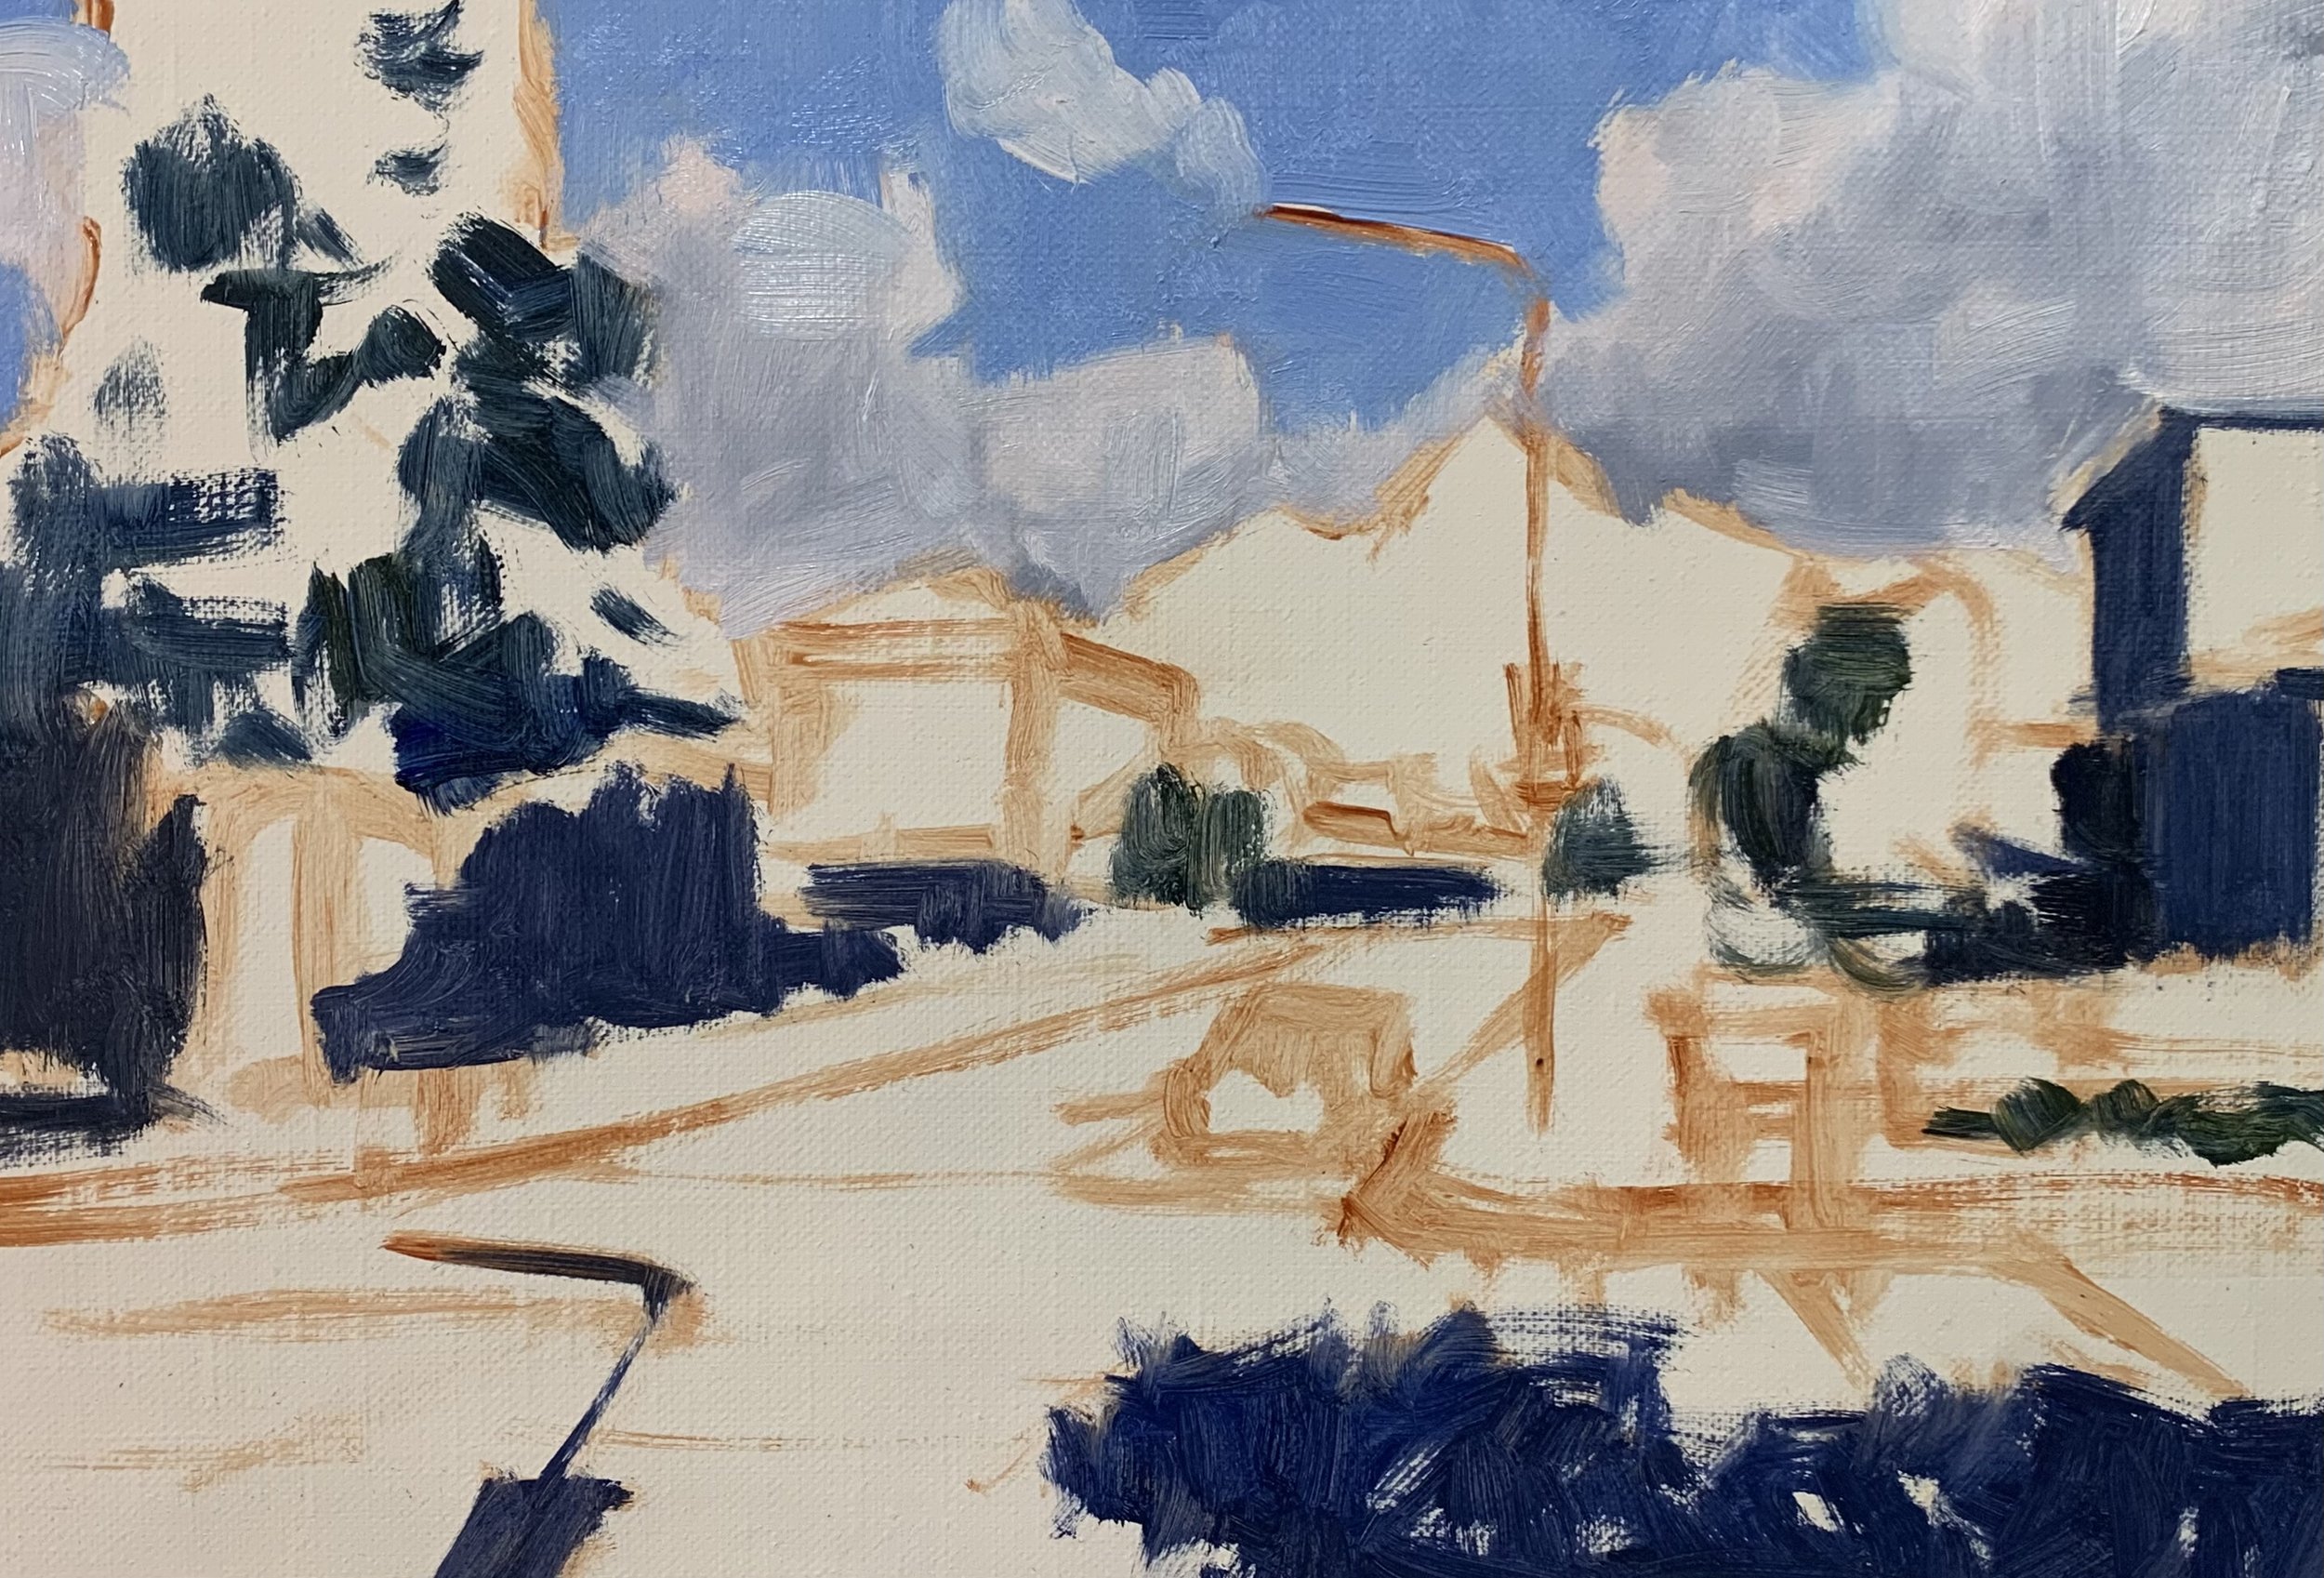
Stage 1 – Blocking-In The Painting
I painted this artwork on oil-primed, medium-weave Belgian linen. The painting itself measures 18cm x 40cm
I sketched the composition using a No.1 round brush with burnt sienna mixed with Liquin Original (Liquin). I am using Liquin as a medium to thin the paint and it also has the advantage of speeding up the drying time.
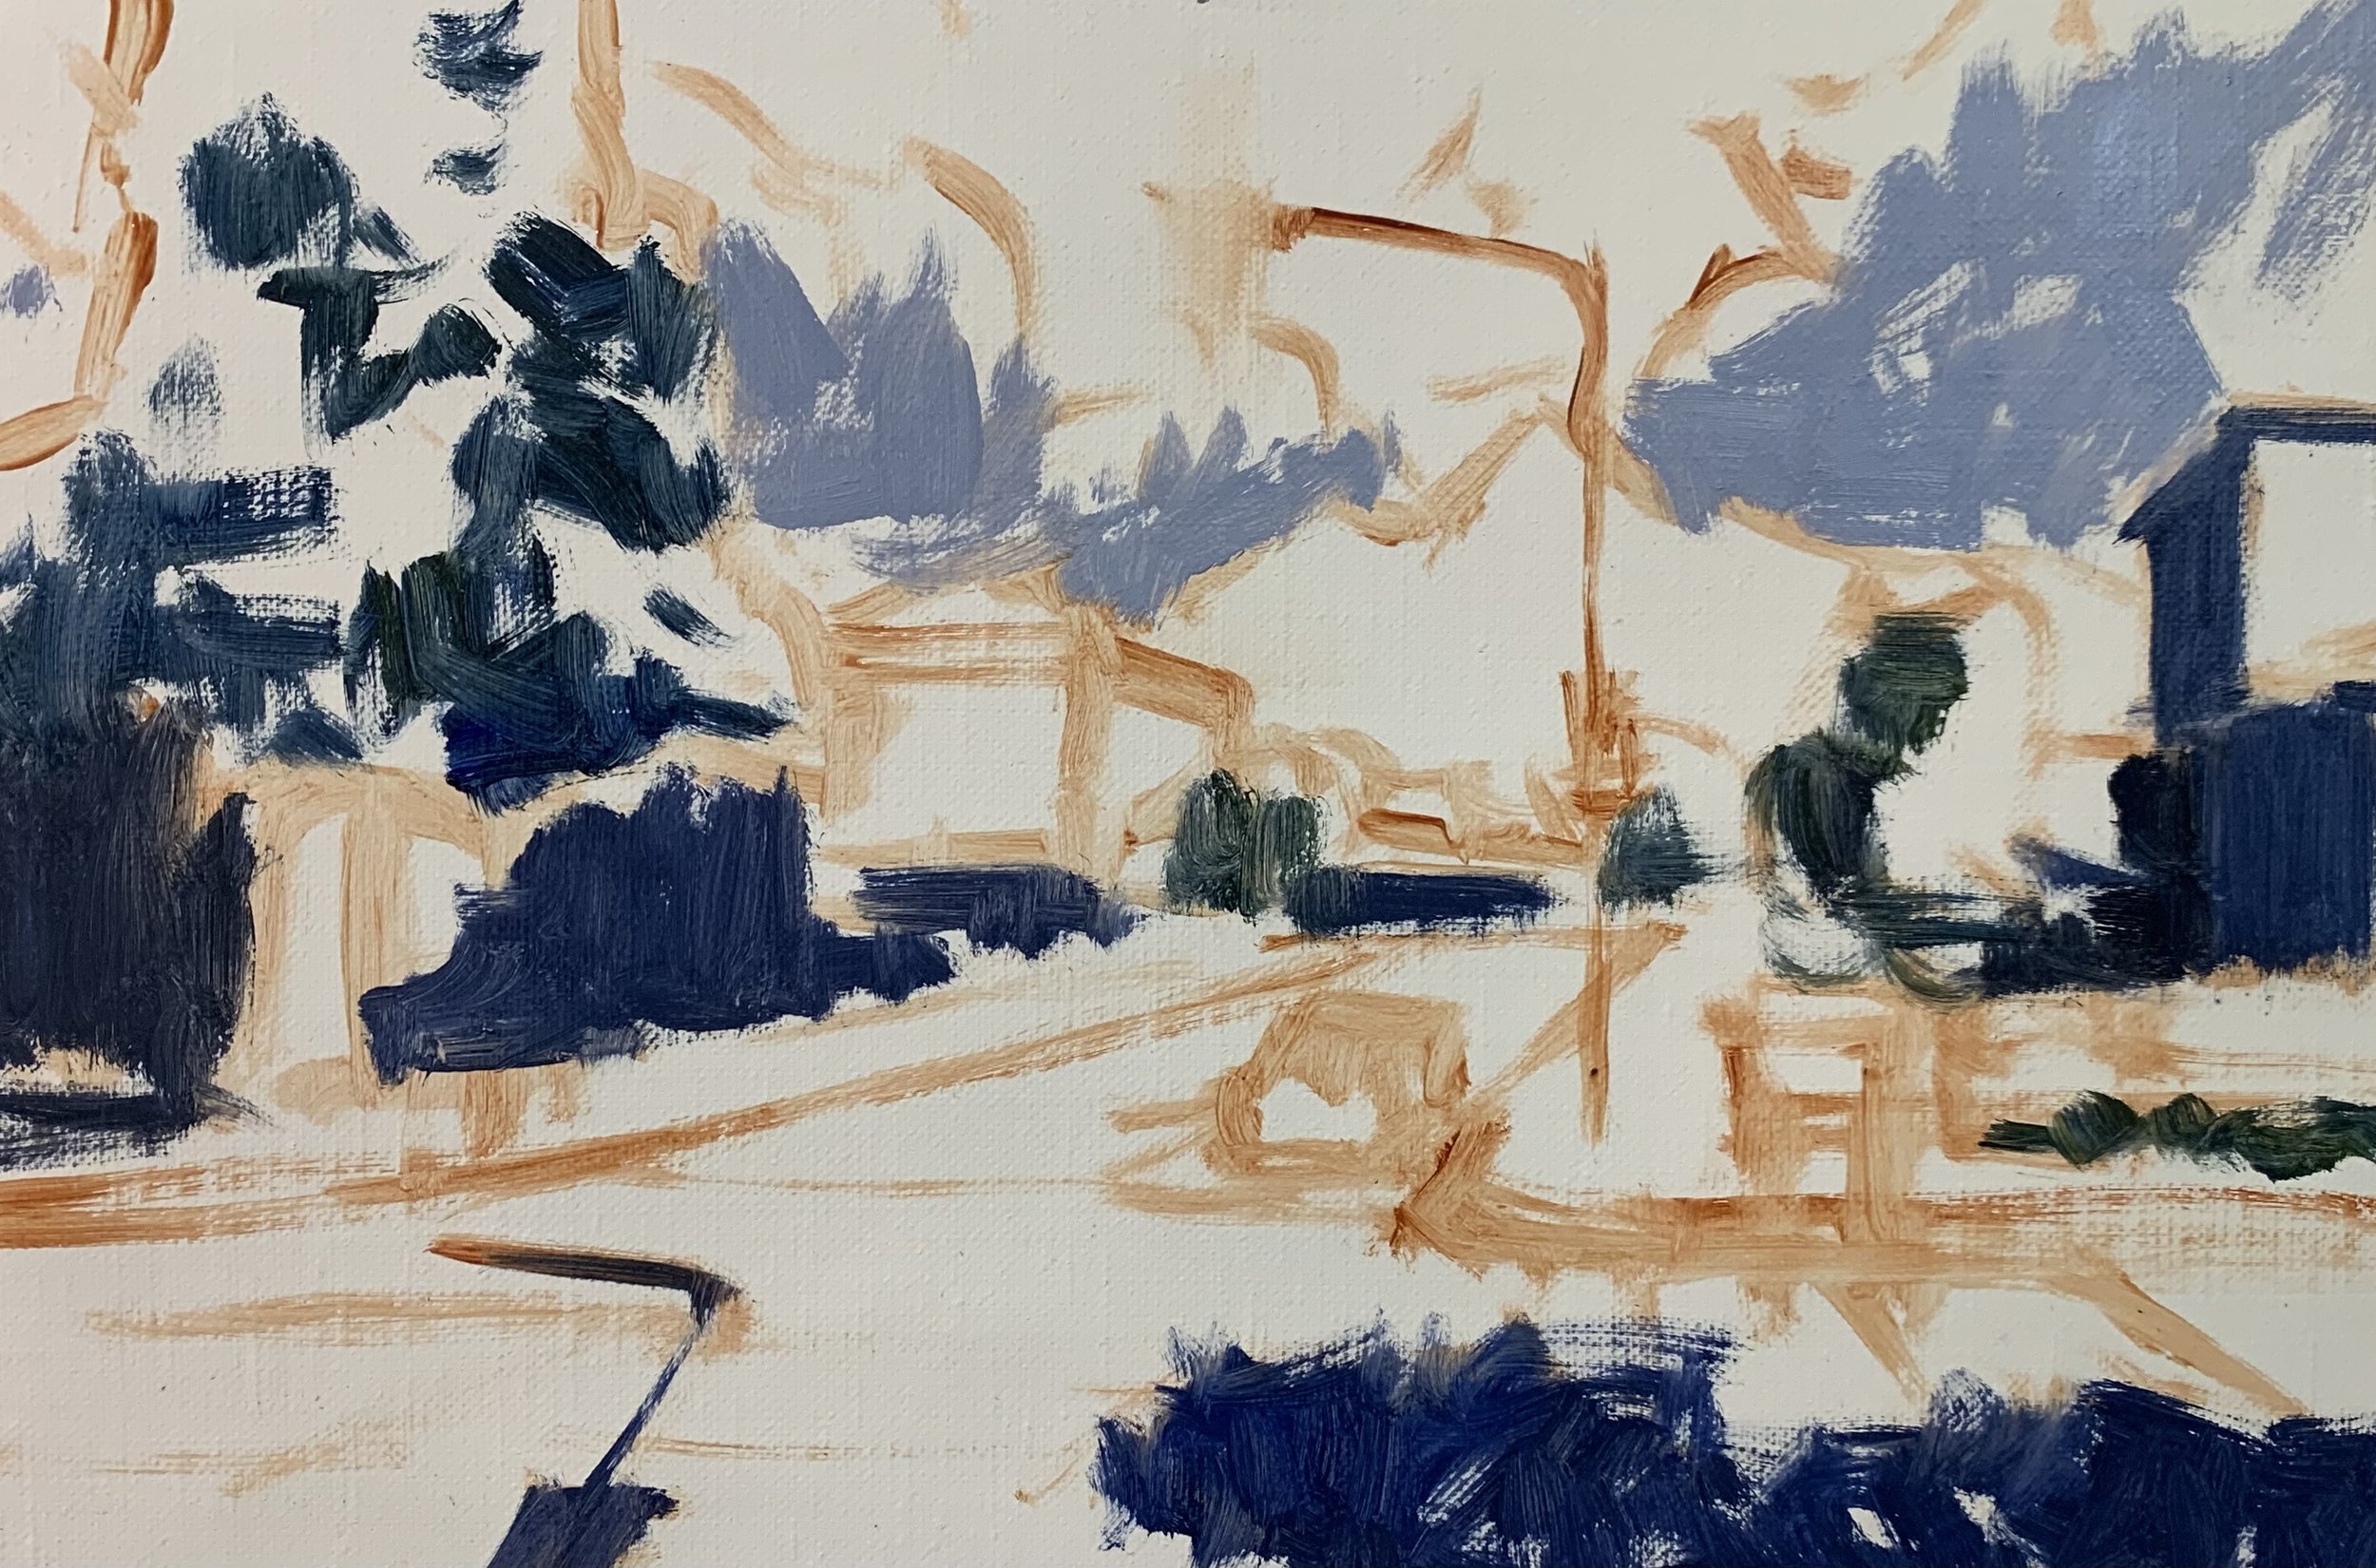
Paint Your Dark Values and Shadows First
Whenever I start a painting I always identify where the dark values and shadows are first in the scene I am painting. Value refers to how light or dark a subject is and by painting in the dark values first I personally find it is much easier to create atmospheric perspective in my paintings. It also makes it easier to add the areas in light and to get the saturation of your colours correct once you have painted your dark values.
I started this painting by blocking in the cloud shadows, building shadows and the dark values in the tree canopy.
For the cloud and building shadows, I used a combination of ultramarine blue, burnt sienna, titanium white and a dash of alizarin crimson. As the building shadows are a darker value than the cloud shadows I used less titanium white in the mix.
For the shadows in the tree canopy of the giant sequoia, I used a mix of ultramarine blue and yellow ochre.
Once I had marked in the dark values and shadows I started adding colour working from the furthest zone in the painting, the sky and clouds. For the sky, I used a mix of ultramarine blue, phthalo green and titanium white.
The cloud highlights are a mix of titanium white with a dash of burnt sienna added. I can also use the colour to blend in the shadows and create some of the halftones within the clouds.
The beauty of using a mix of ultramarine blue, burnt sienna, titanium white and alizarin crimson as a base mix for the clouds and buildings is that it creates a nice natural grey. I can use this same colour mix for the road and by doing this I am helping to create colour harmony in the painting. I keep in mind that the value of the road is lighter than the buildings so I have used more titanium white in the mix and a little more blue to give the road a blue cast to it.
The background mountain is a low chroma colour and for this, I used a mix of yellow ochre, ultramarine blue, alizarin crimson and titanium white.
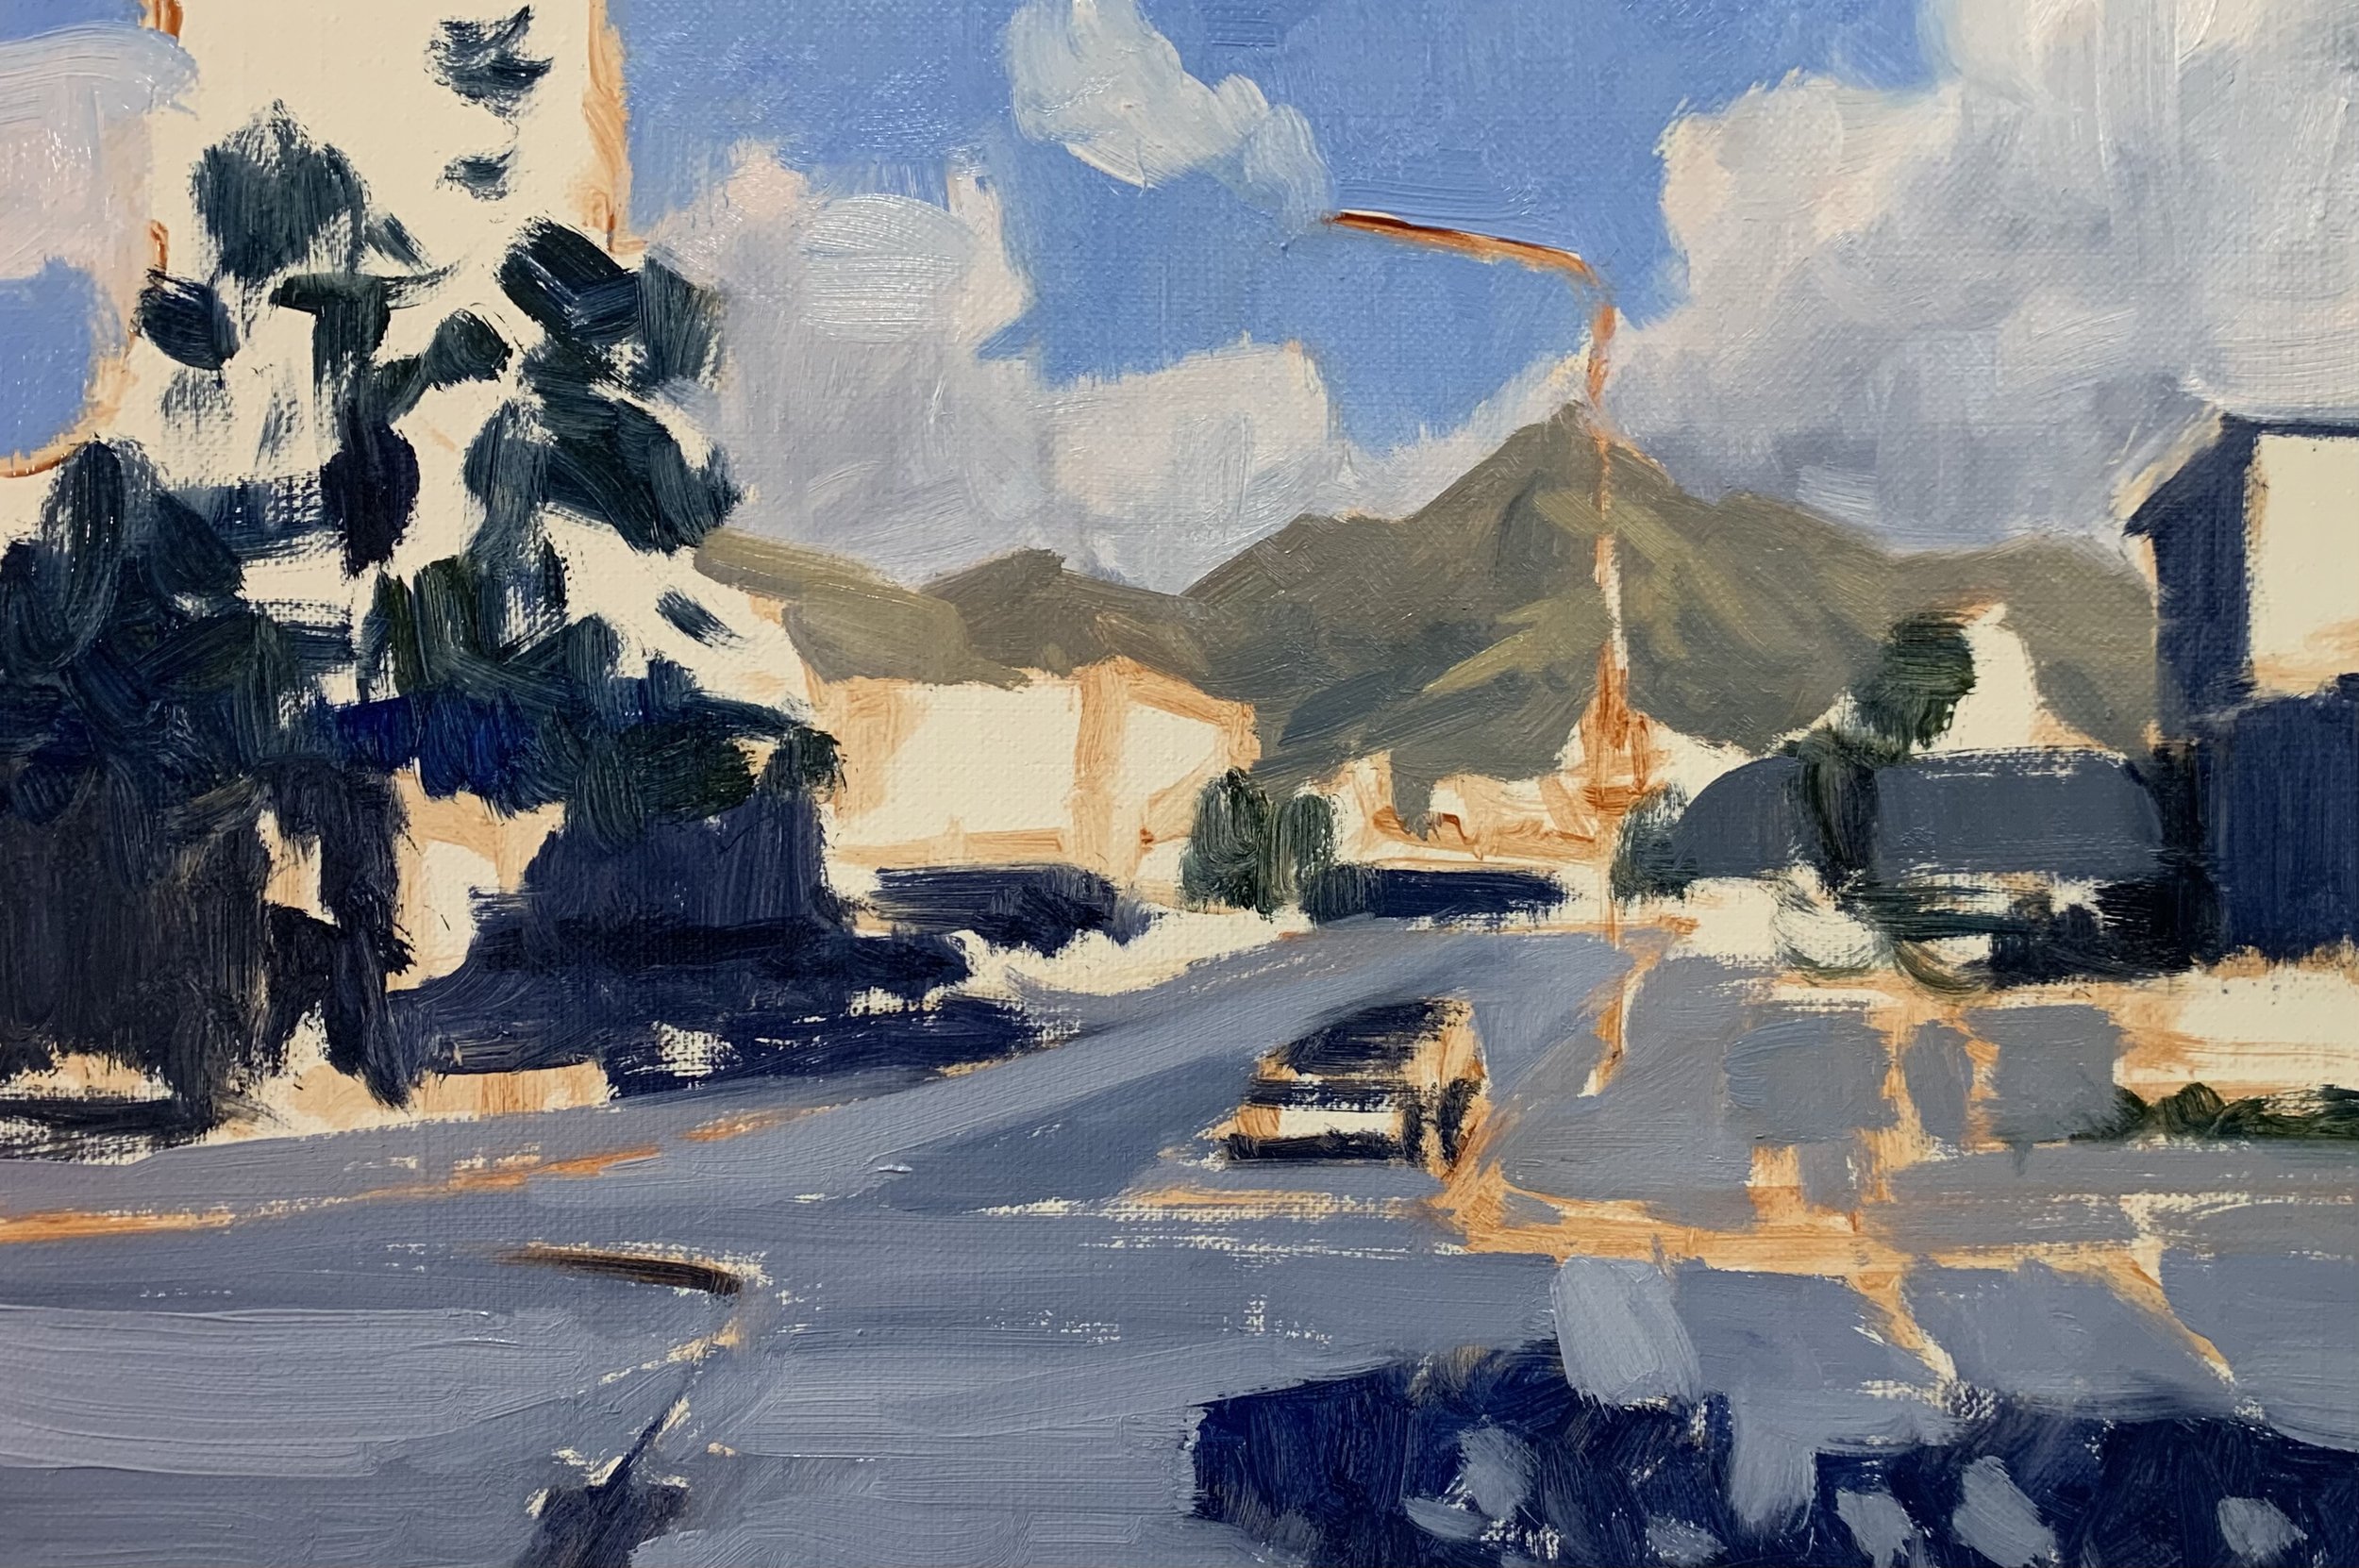
For the tree foliage, I mixed a base green using yellow ochre, cadmium yellow and ultramarine blue. I then adjusted the hue and the value by mixing in titanium white, cadmium red and phthalo green. The giant sequoia is a cooler green so there is more ultramarine blue in the mix and also a dash of phthalo green which kicks up the saturation of the colour.
The other street trees are a slightly more intense green than the giant sequoia so I have added more cadmium yellow into my green mix. I have also added a dash of cadmium red to my greens which helps to reduce the saturation of the colour and it makes the greens look more natural.
Here I was adding colour to the buildings, these are the areas that are in the full sunlight. Again I have used neutral greys for some of the stone buildings and the same colours I have used for the shadows, a mix of ultramarine blue, burnt sienna, titanium white and alizarin crimson. The values are lighter so I have used more titanium white in my mixes.
For the creamy-coloured buildings, I used yellow ochre, alizarin crimson and titanium white. If I needed to reduce the saturation I mixed in a little ultramarine blue.
The yellow building on the right is a simple mix of yellow ochre and titanium white.
I finish the blocking on stage by painting the more detailed elements of this artwork such as the street lights, traffic lights, road markings, shadows and people. For now, I have marked the outline of the people using my shadow mix and I’ll come back to adding details and skin tones at the end of the painting, for now, I just need an outline of where they are.
The vehicle was one of the things I painted last in this street scene. I made adjustments to the shape of the vehicle later on in the painting. Just like the people in the scene, I just needed a basic outline.
At this point, I stopped painting and allowed it to dry so I could begin modelling and adding details.
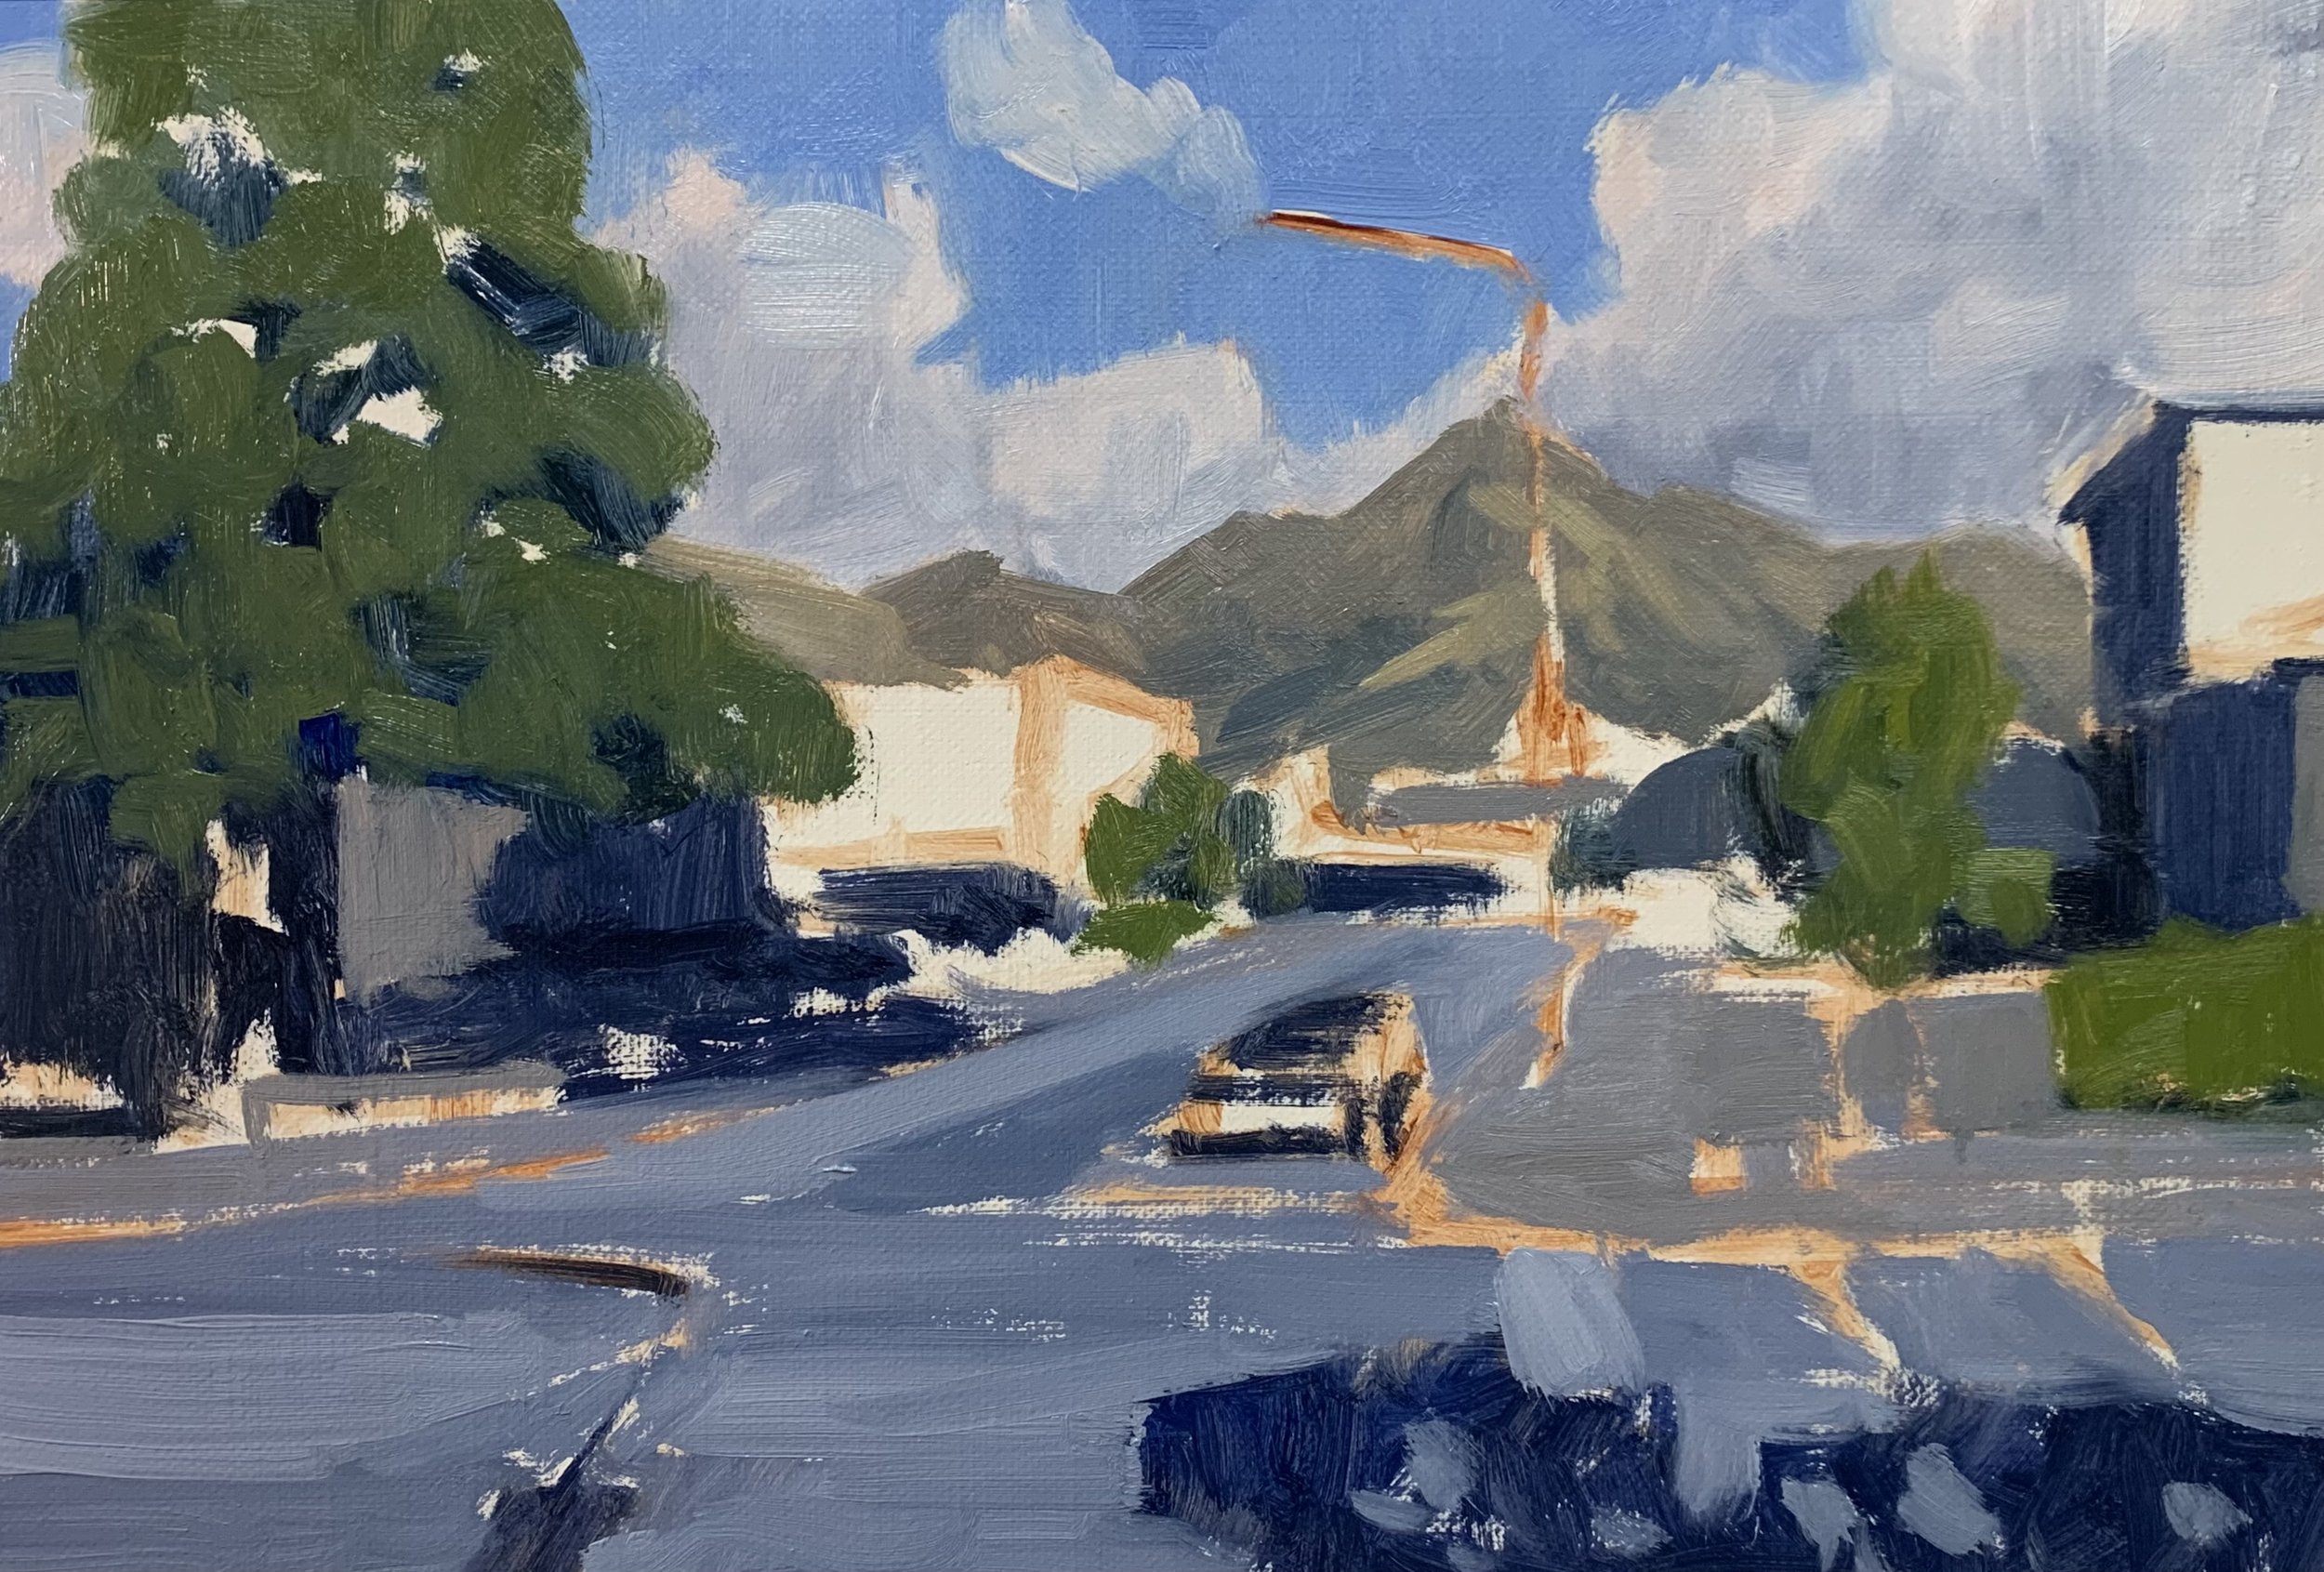
Stage 2 – Adding Details, Modelling and Refining the Painting
Once the painting was dry I began adding details starting with the furthest zone away, the clouds and sky and then moving forward. Essentially I am using the same colours I was using during the blocking-in stage.
I refined the clouds and sky and used the same colours as I did during the block-in stage. Following this the clouds and sky were complete. The same methods and colours were applied to the background mountains. I wanted to make sure I kept the details in the mountains down to a minimum so I don’t overcomplicate the composition.
Following this I began modelling the foliage on the giant sequoia tree and using a 1/4” dagger brush to layer on some lighter-value greens and to begin building up the details.

One of the main elements in this painting is the giant sequoia tree on the left side of the composition so I spent a bit of time adding layers to the foliage in the tree canopy. I used a mix of yellow ochre, cadmium yellow, ultramarine blue and titanium white. I kept the green mix more on the blue side but I also added some cadmium red and a little phthalo green. I used a 1/4” dagger brush to paint the tree canopy which I found ideal for painting conifer tree foliage. By applying lighter layers of paint it is going to build out the form of the tree and make it look realistic.
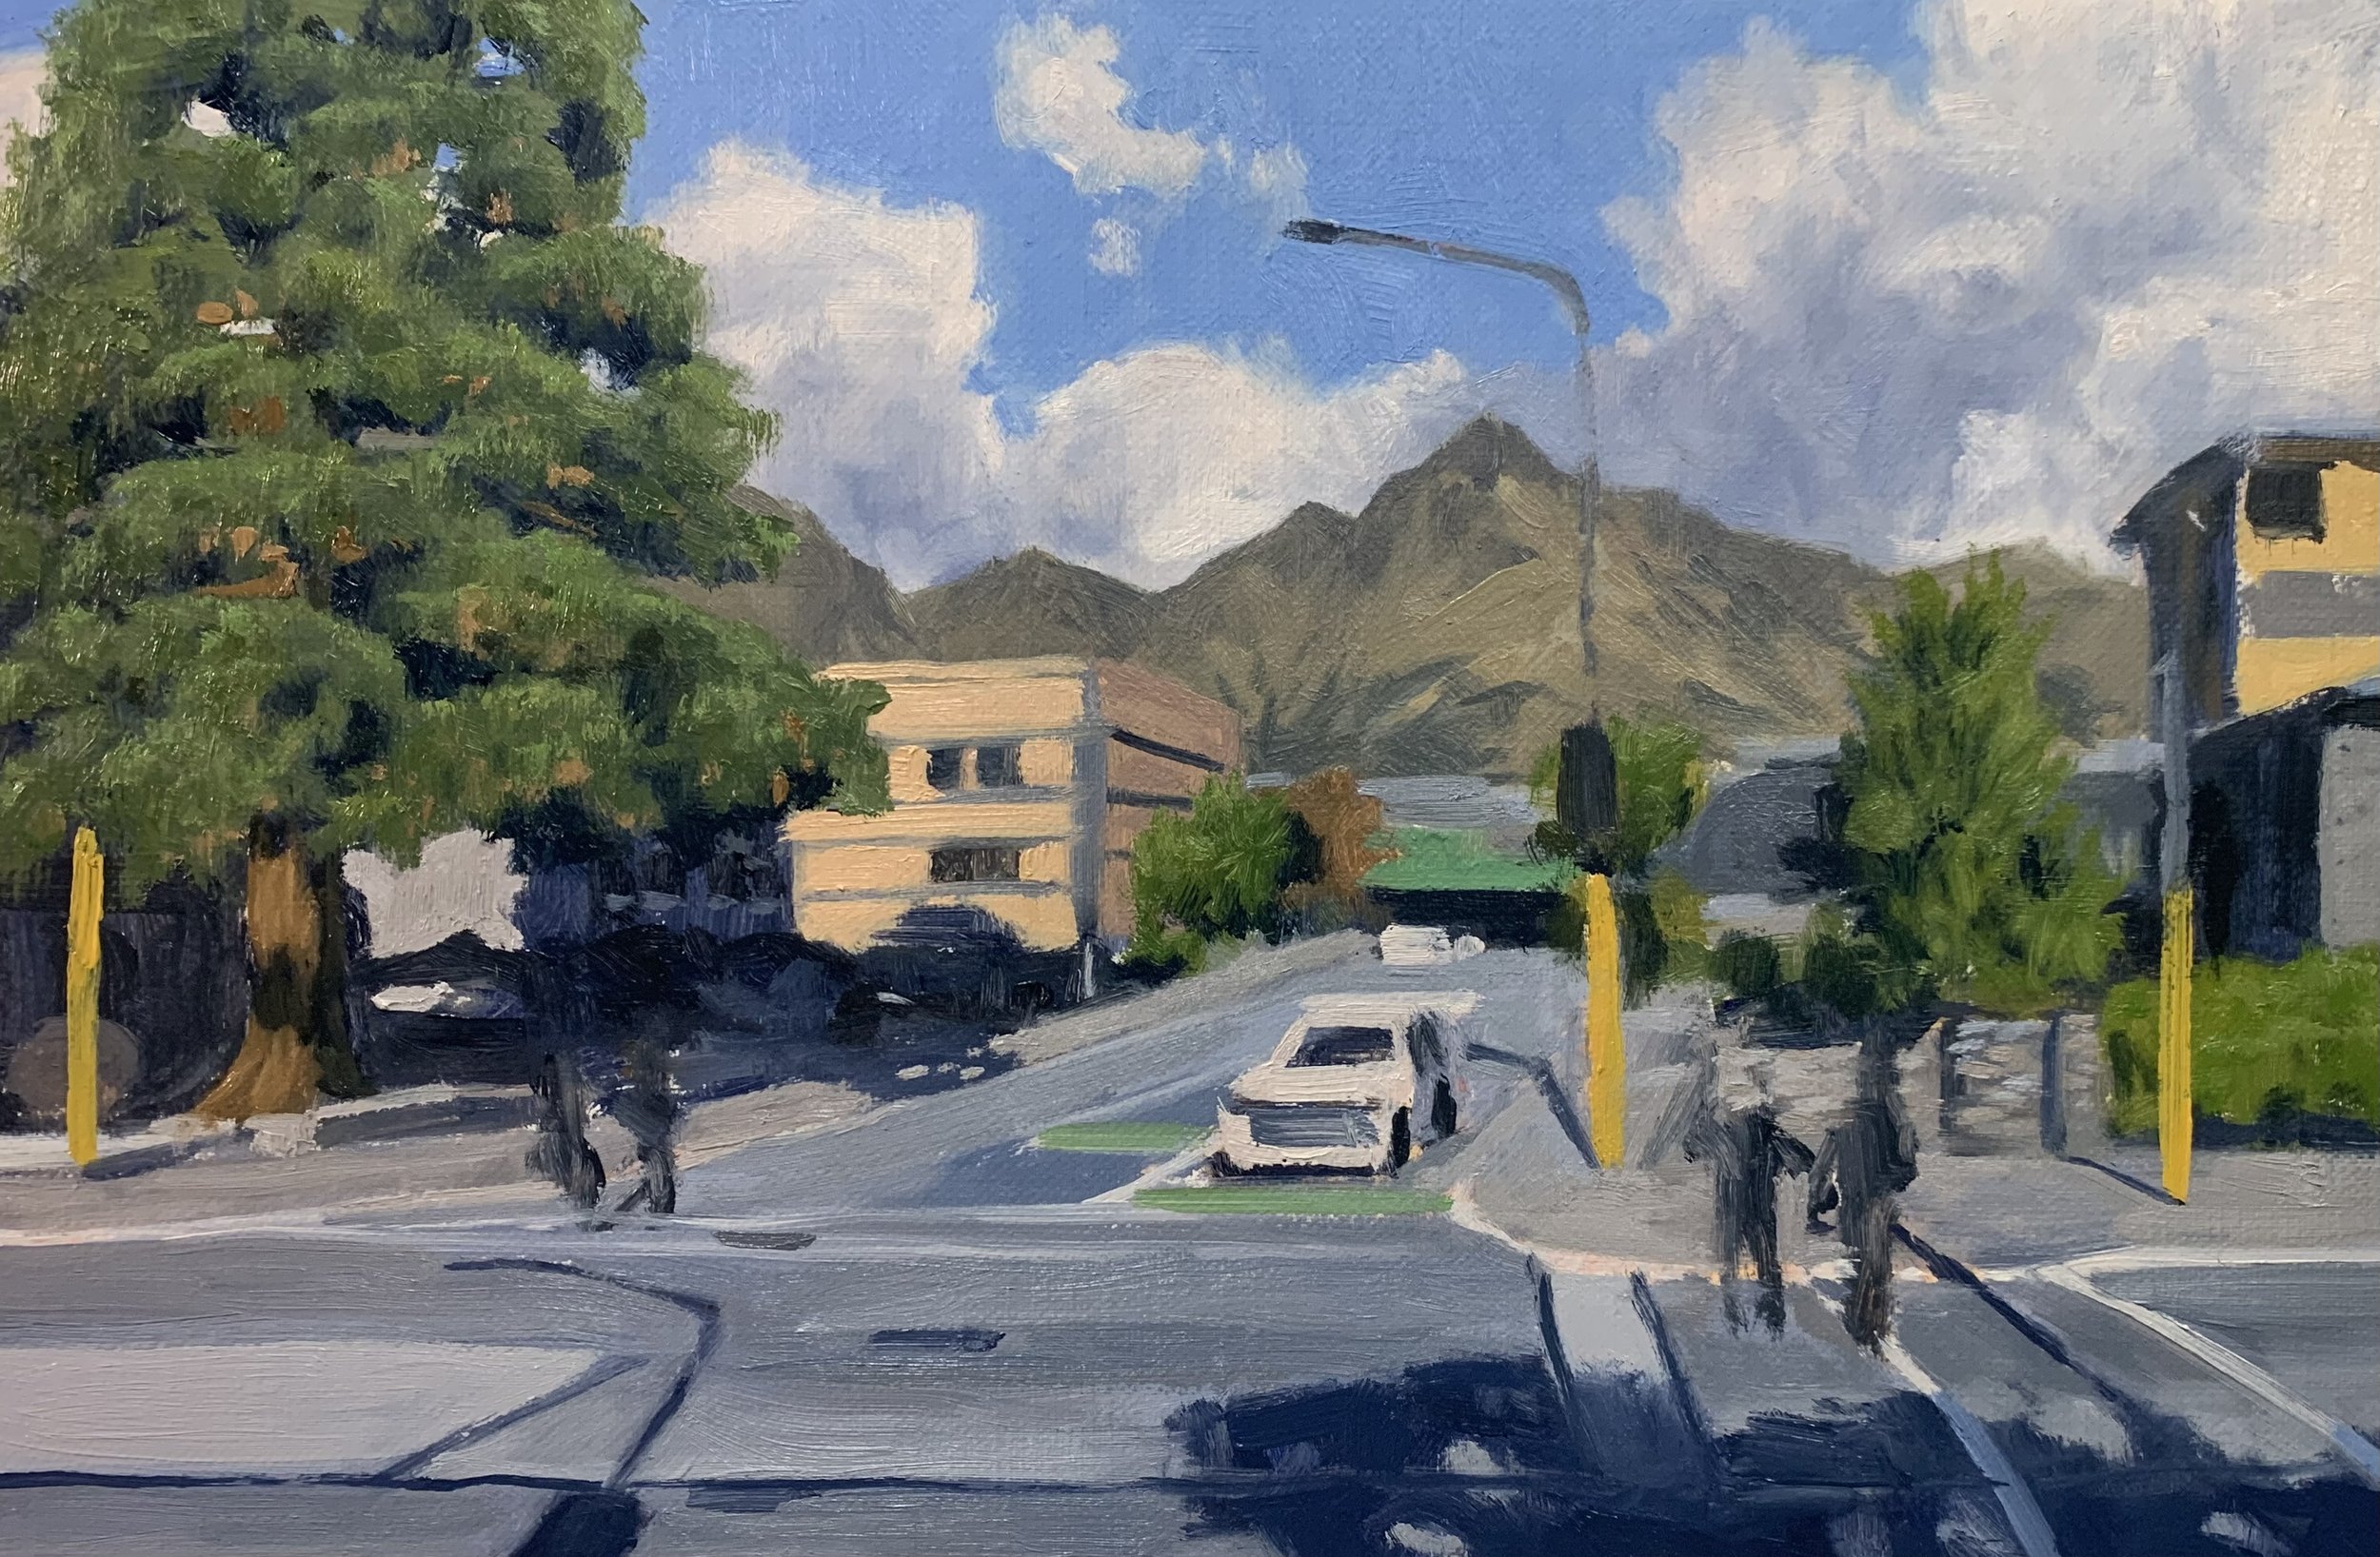
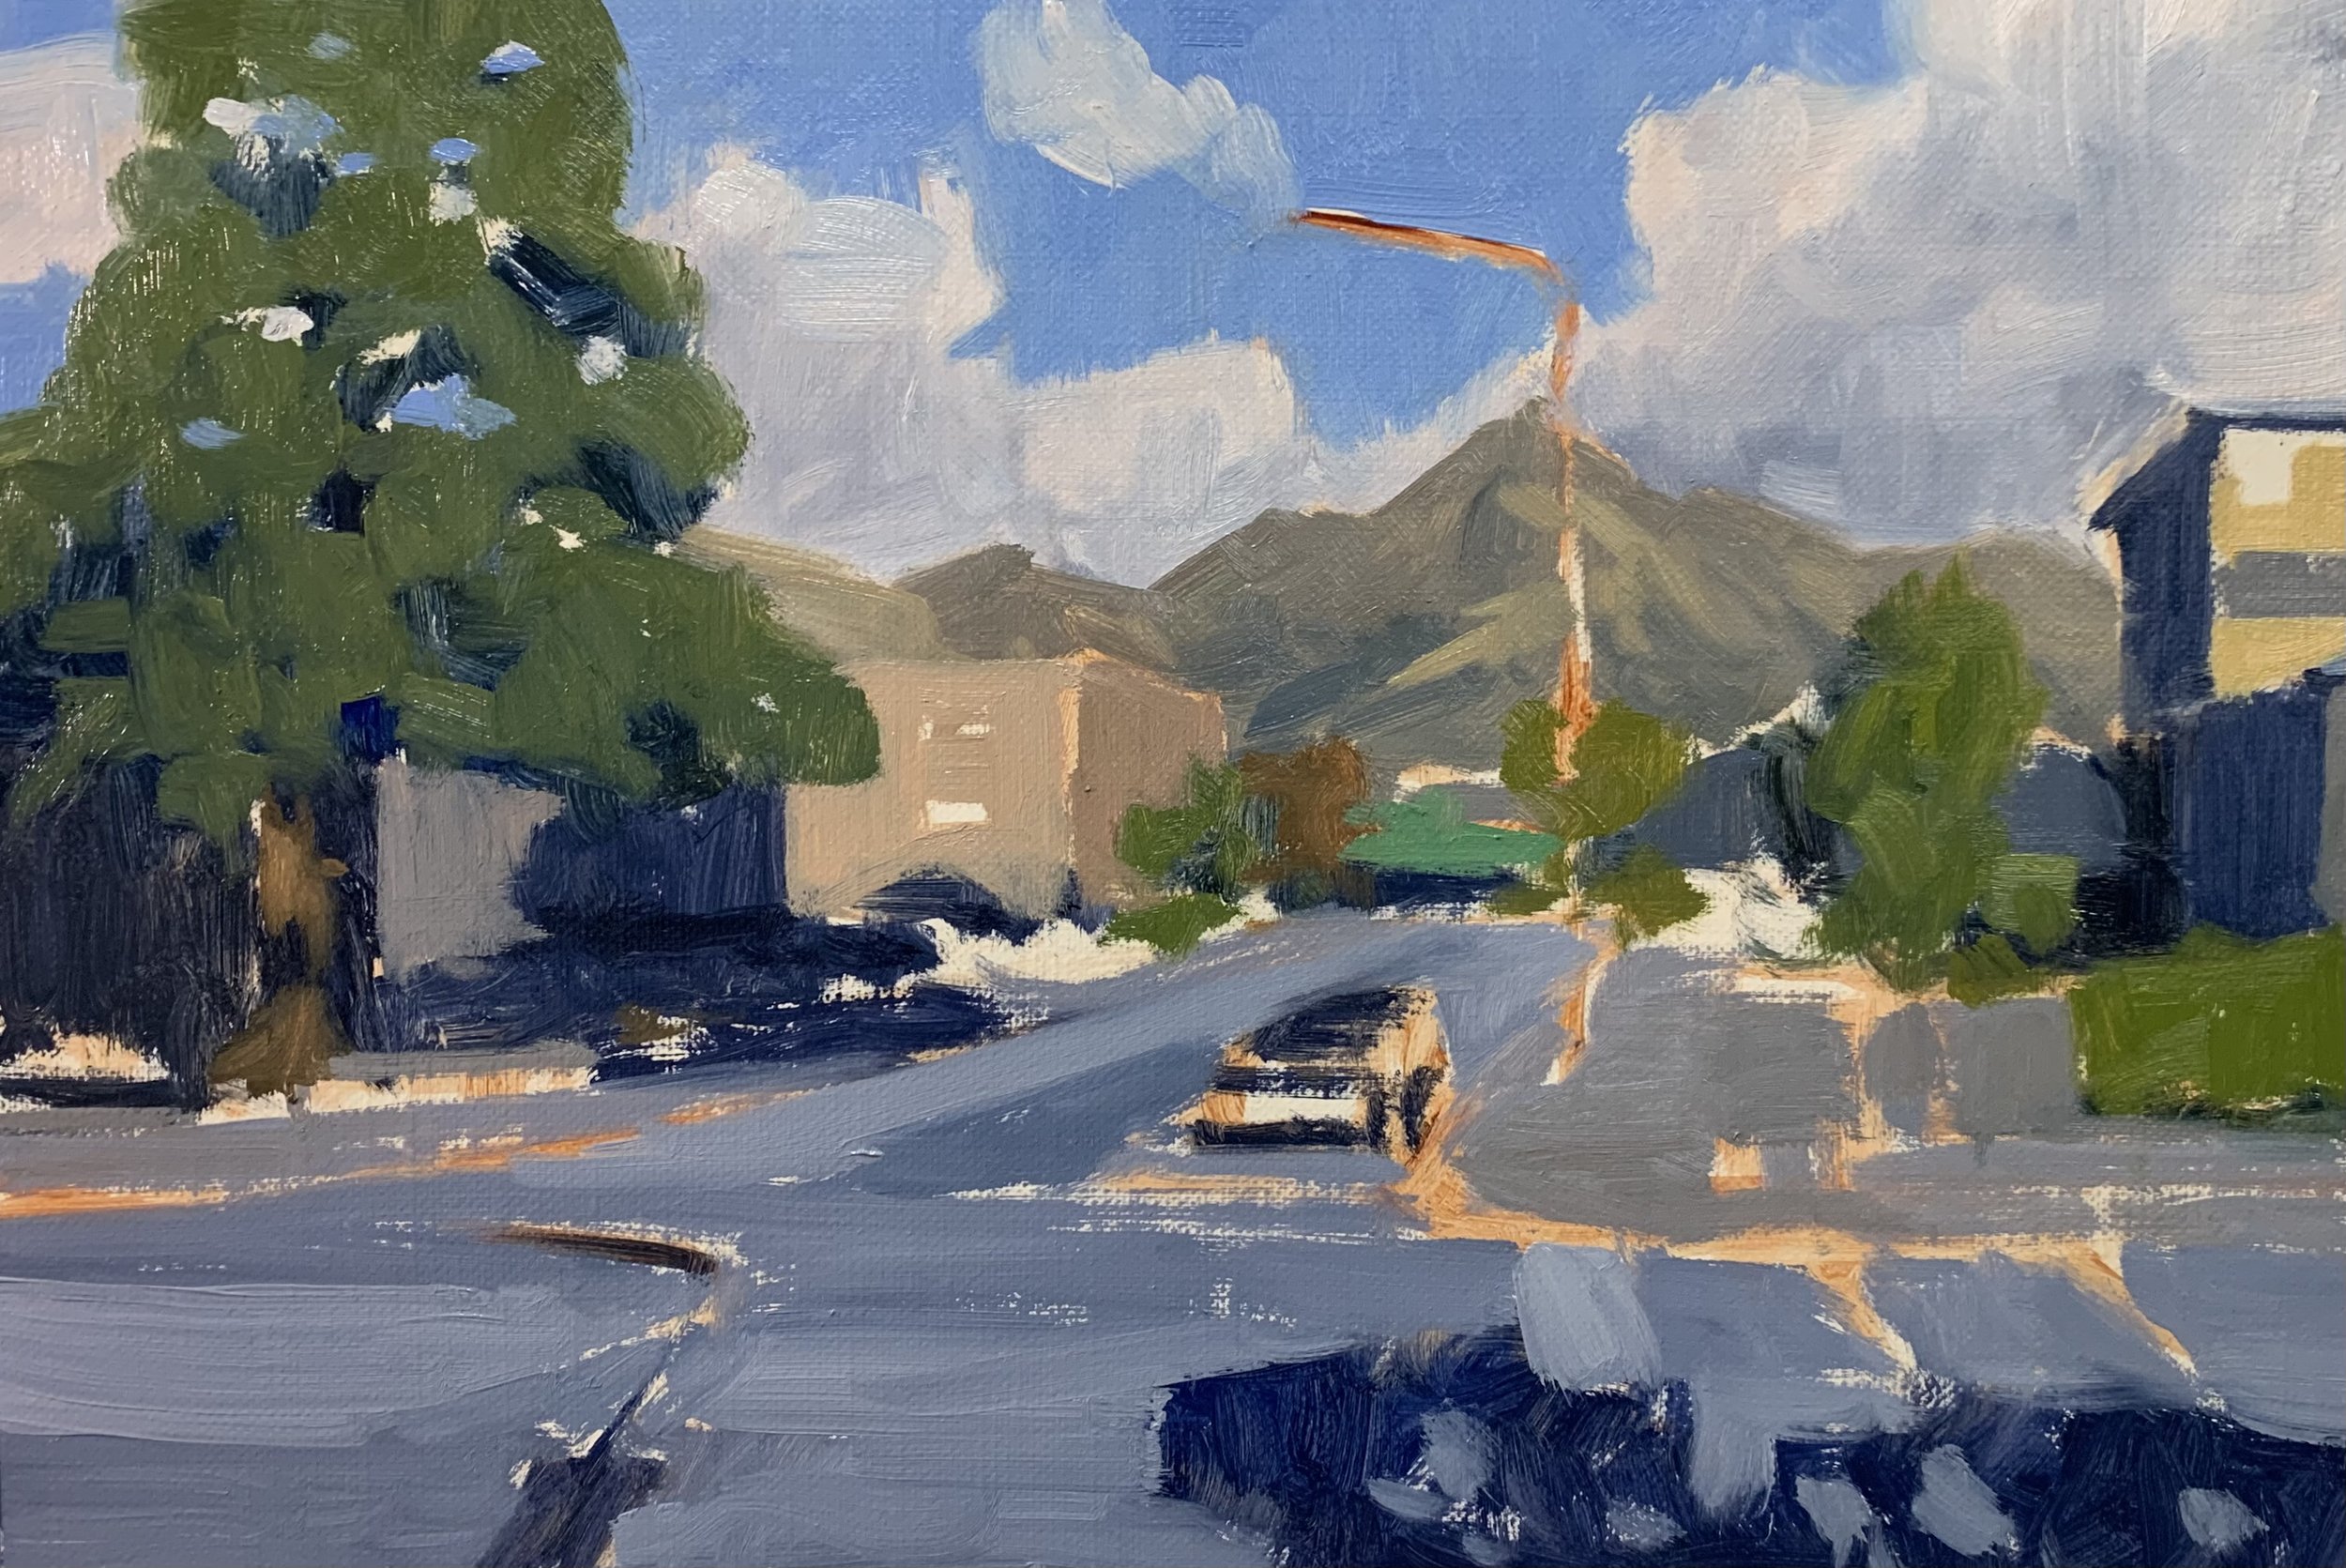
Stage 3 – Final Details
The final stage of this artwork involved adding the details and more technical elements within the scene such as the street lights, traffic lights, pedestrians, signs, road markings and the parked vehicle at the traffic lights.
Whenever I get to the end stages of a painting, then this is where I apply my lightest values. The vehicle was a key feature in this painting where I kept the value of the colour tonally darker during the painting and then save my lightest lights until the end. Painting some highlights on the vehicle has made it look more prominent in the painting. For my lightest whites, I used a mix of titanium white with a dash of yellow ochre. I also used the same colour for the road markings and some of the highlights in the street light and signs.
I added details to the pedestrians painting their skin tones with a mix of yellow ochre, alizarin crimson and titanium white.
Lastly, I made sure that all the shadows in the scene line up with the various structures within the composition.

Final Note
I hope you enjoyed this written painting demonstration, however, I have only scratched the surface as there is way more to this painting. Check out the painting tutorial video where I show you how to paint this scene, available on my Patreon channel.
