This article may contain affiliate links, please read my affiliate disclosure for more information
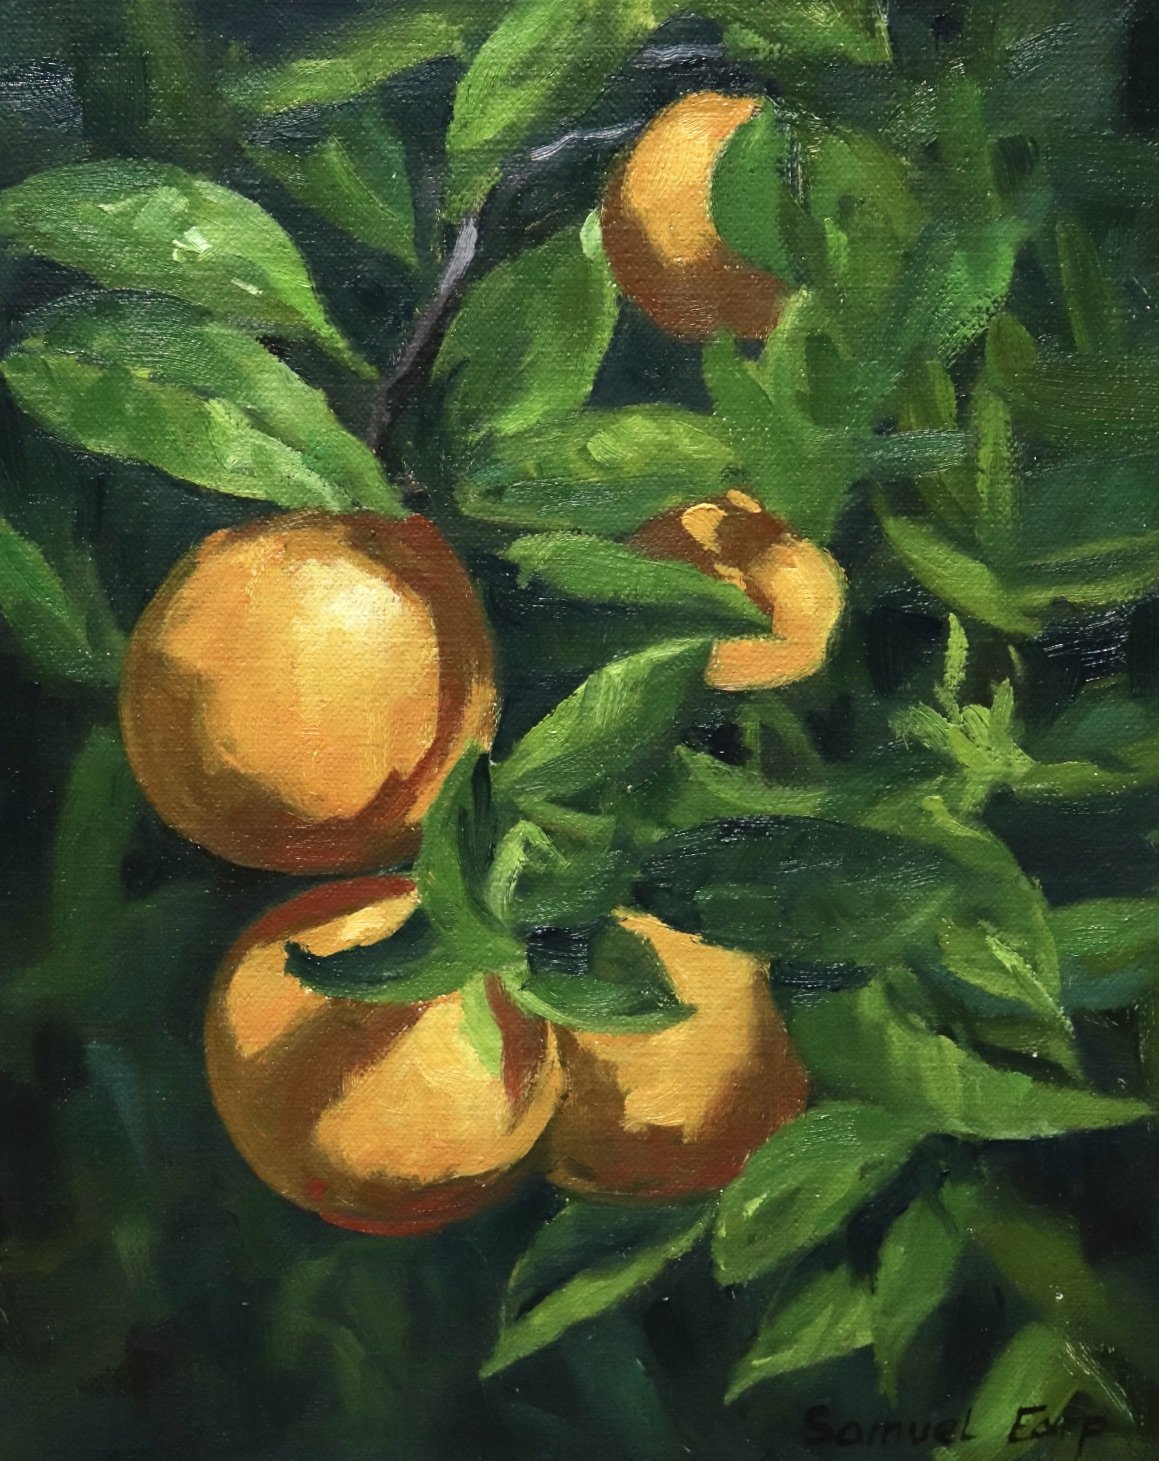
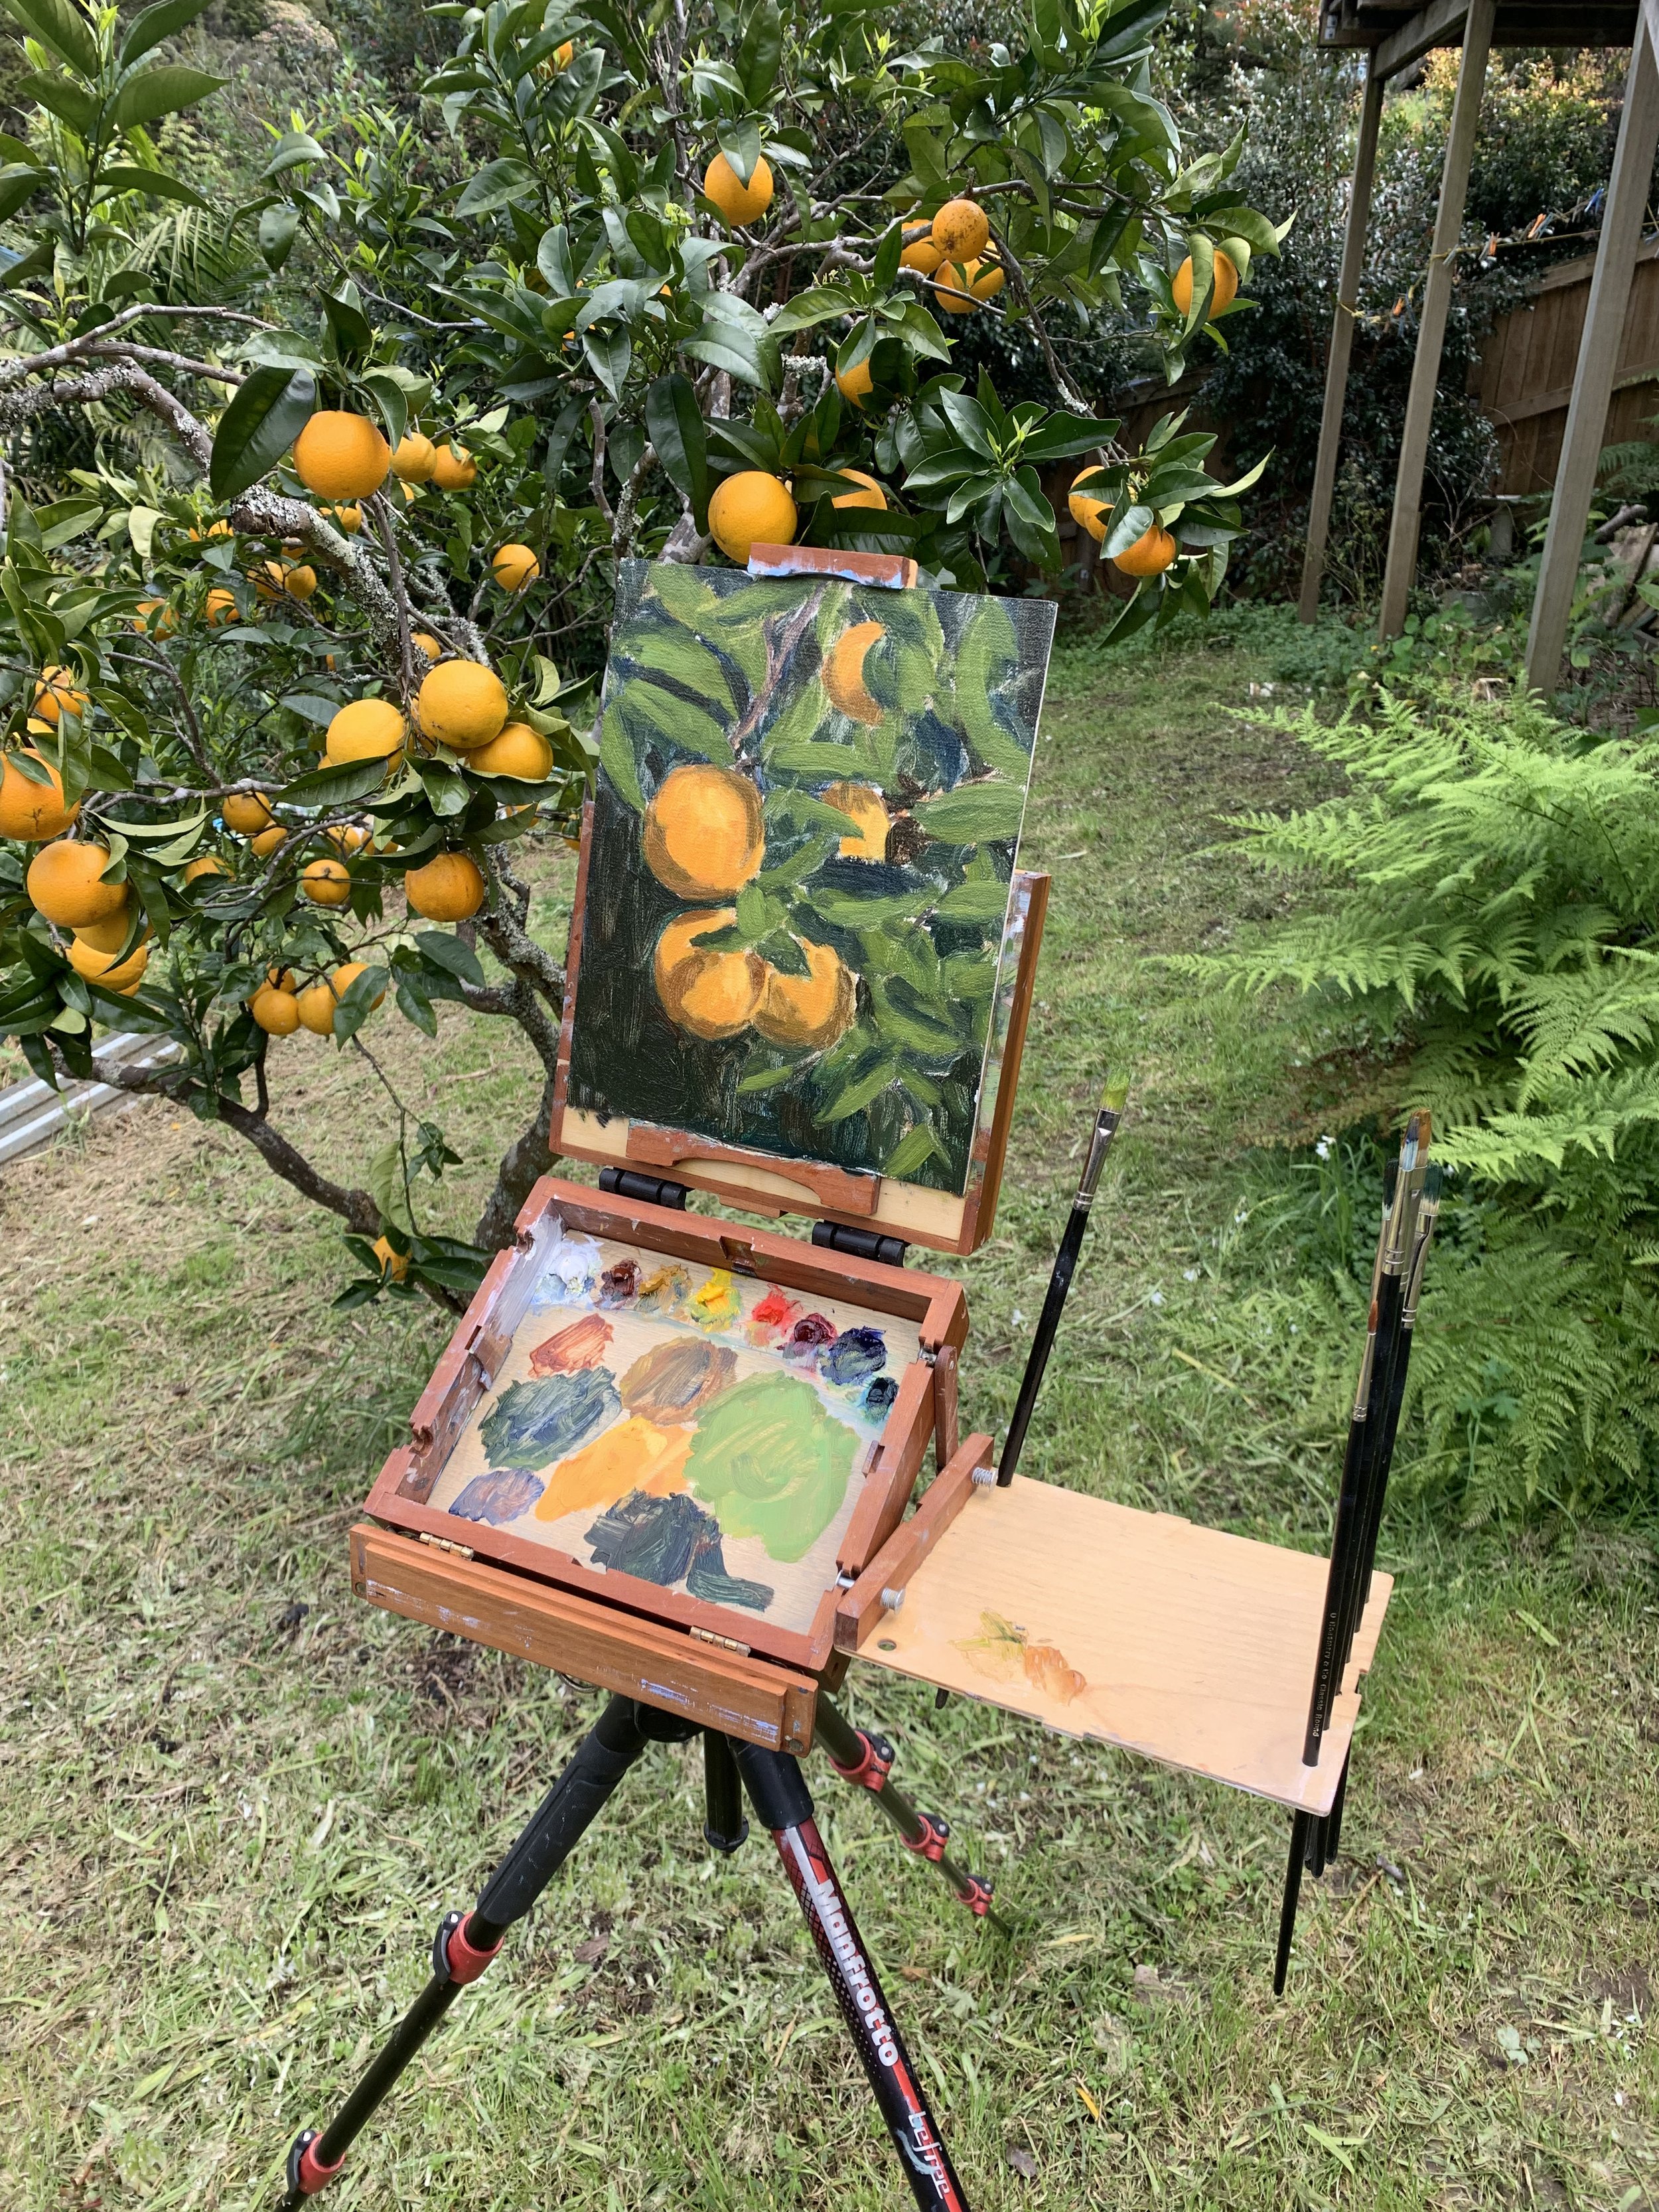
In this painting demonstration I show you how to paint oranges. I created the first part of this art work by painting the oranges from life then I took my painting back to my studio, let it dry before adding some more details to it.
Suitable for oils and acrylics.
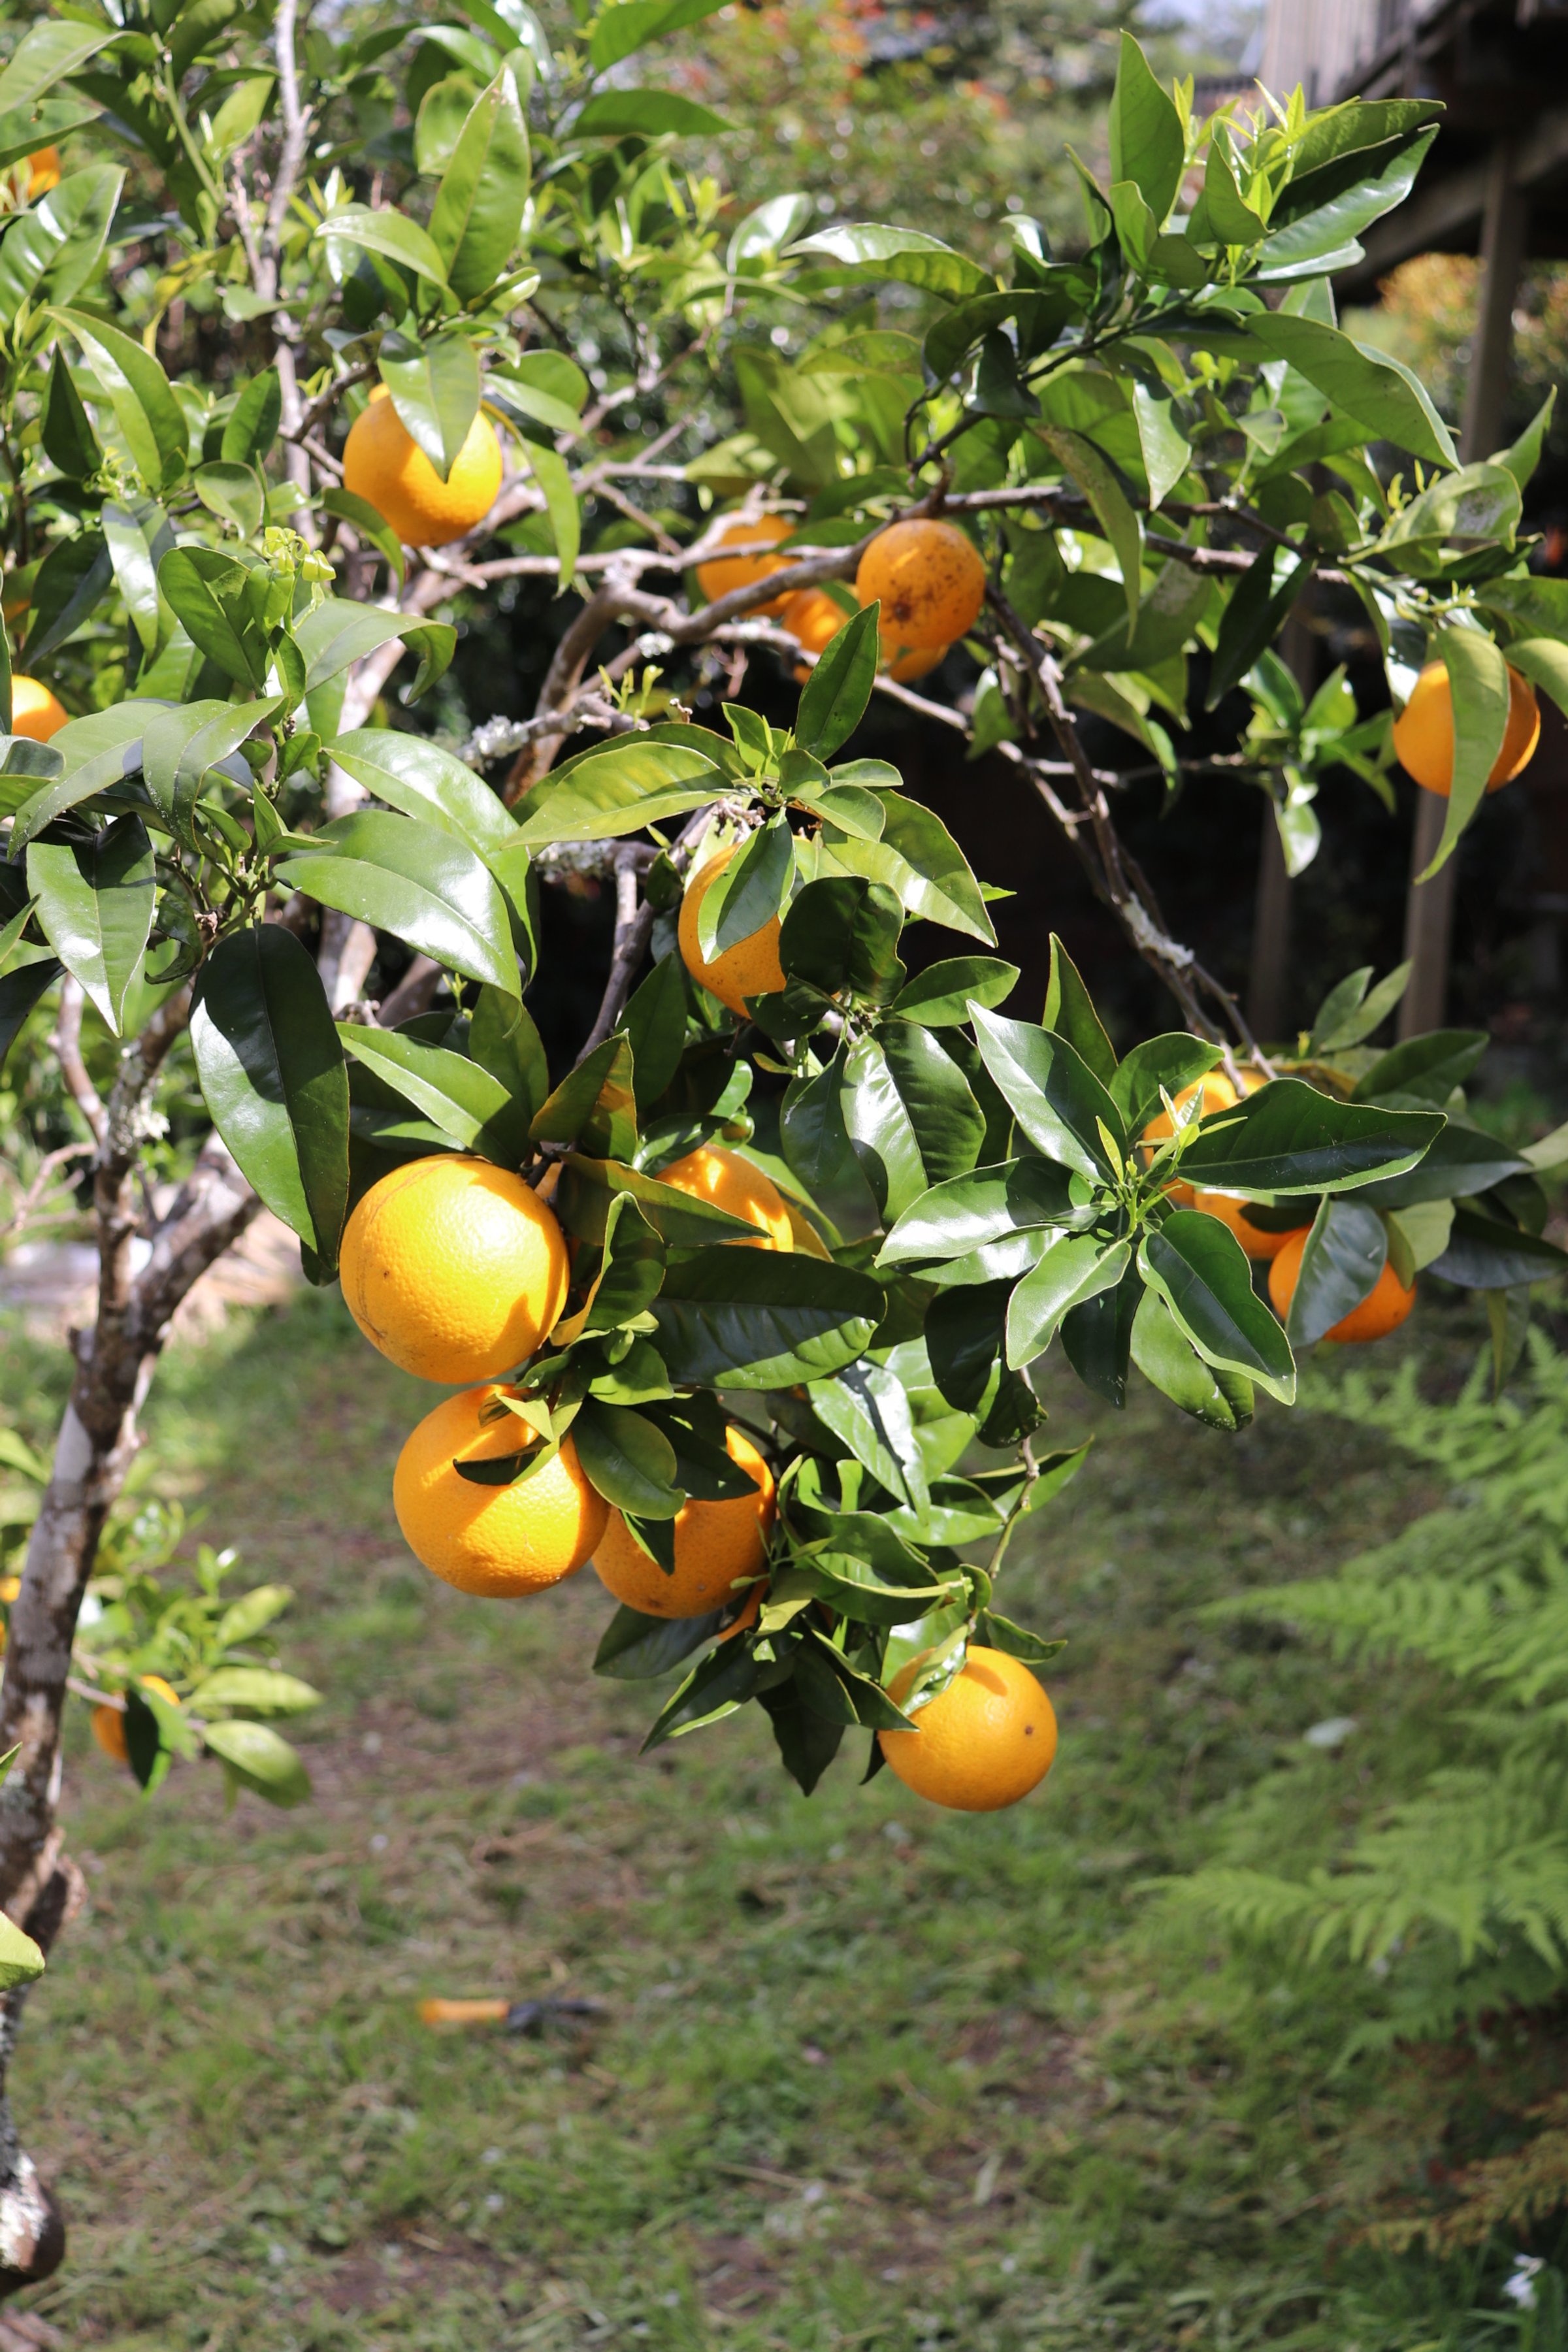
Reference Photos
Please feel free to use or copy these photos if you would like to have a go at painting this art work. Also check out the painting tutorial video on my Patreon channel where I demonstrate how to paint this art work from start to finish.
Colours
I painted this artwork using oil paint and the colours I used in this particular painting are as follows:
- Titanium white
Burnt sienna
- Yellow ochre
Cadmium yellow
- Cadmium red light
- Alizarin crimson
- Ultramarine blue
- Phthalo green
Brushes
Here is a list of the brushes I used in this painting:
- No.5 flat
- No.3 flat
- No.2 flat
- No.3 filbert
- No.1 round
- No.0 round
- 1/4” synthetic dagger
Painting Demonstration
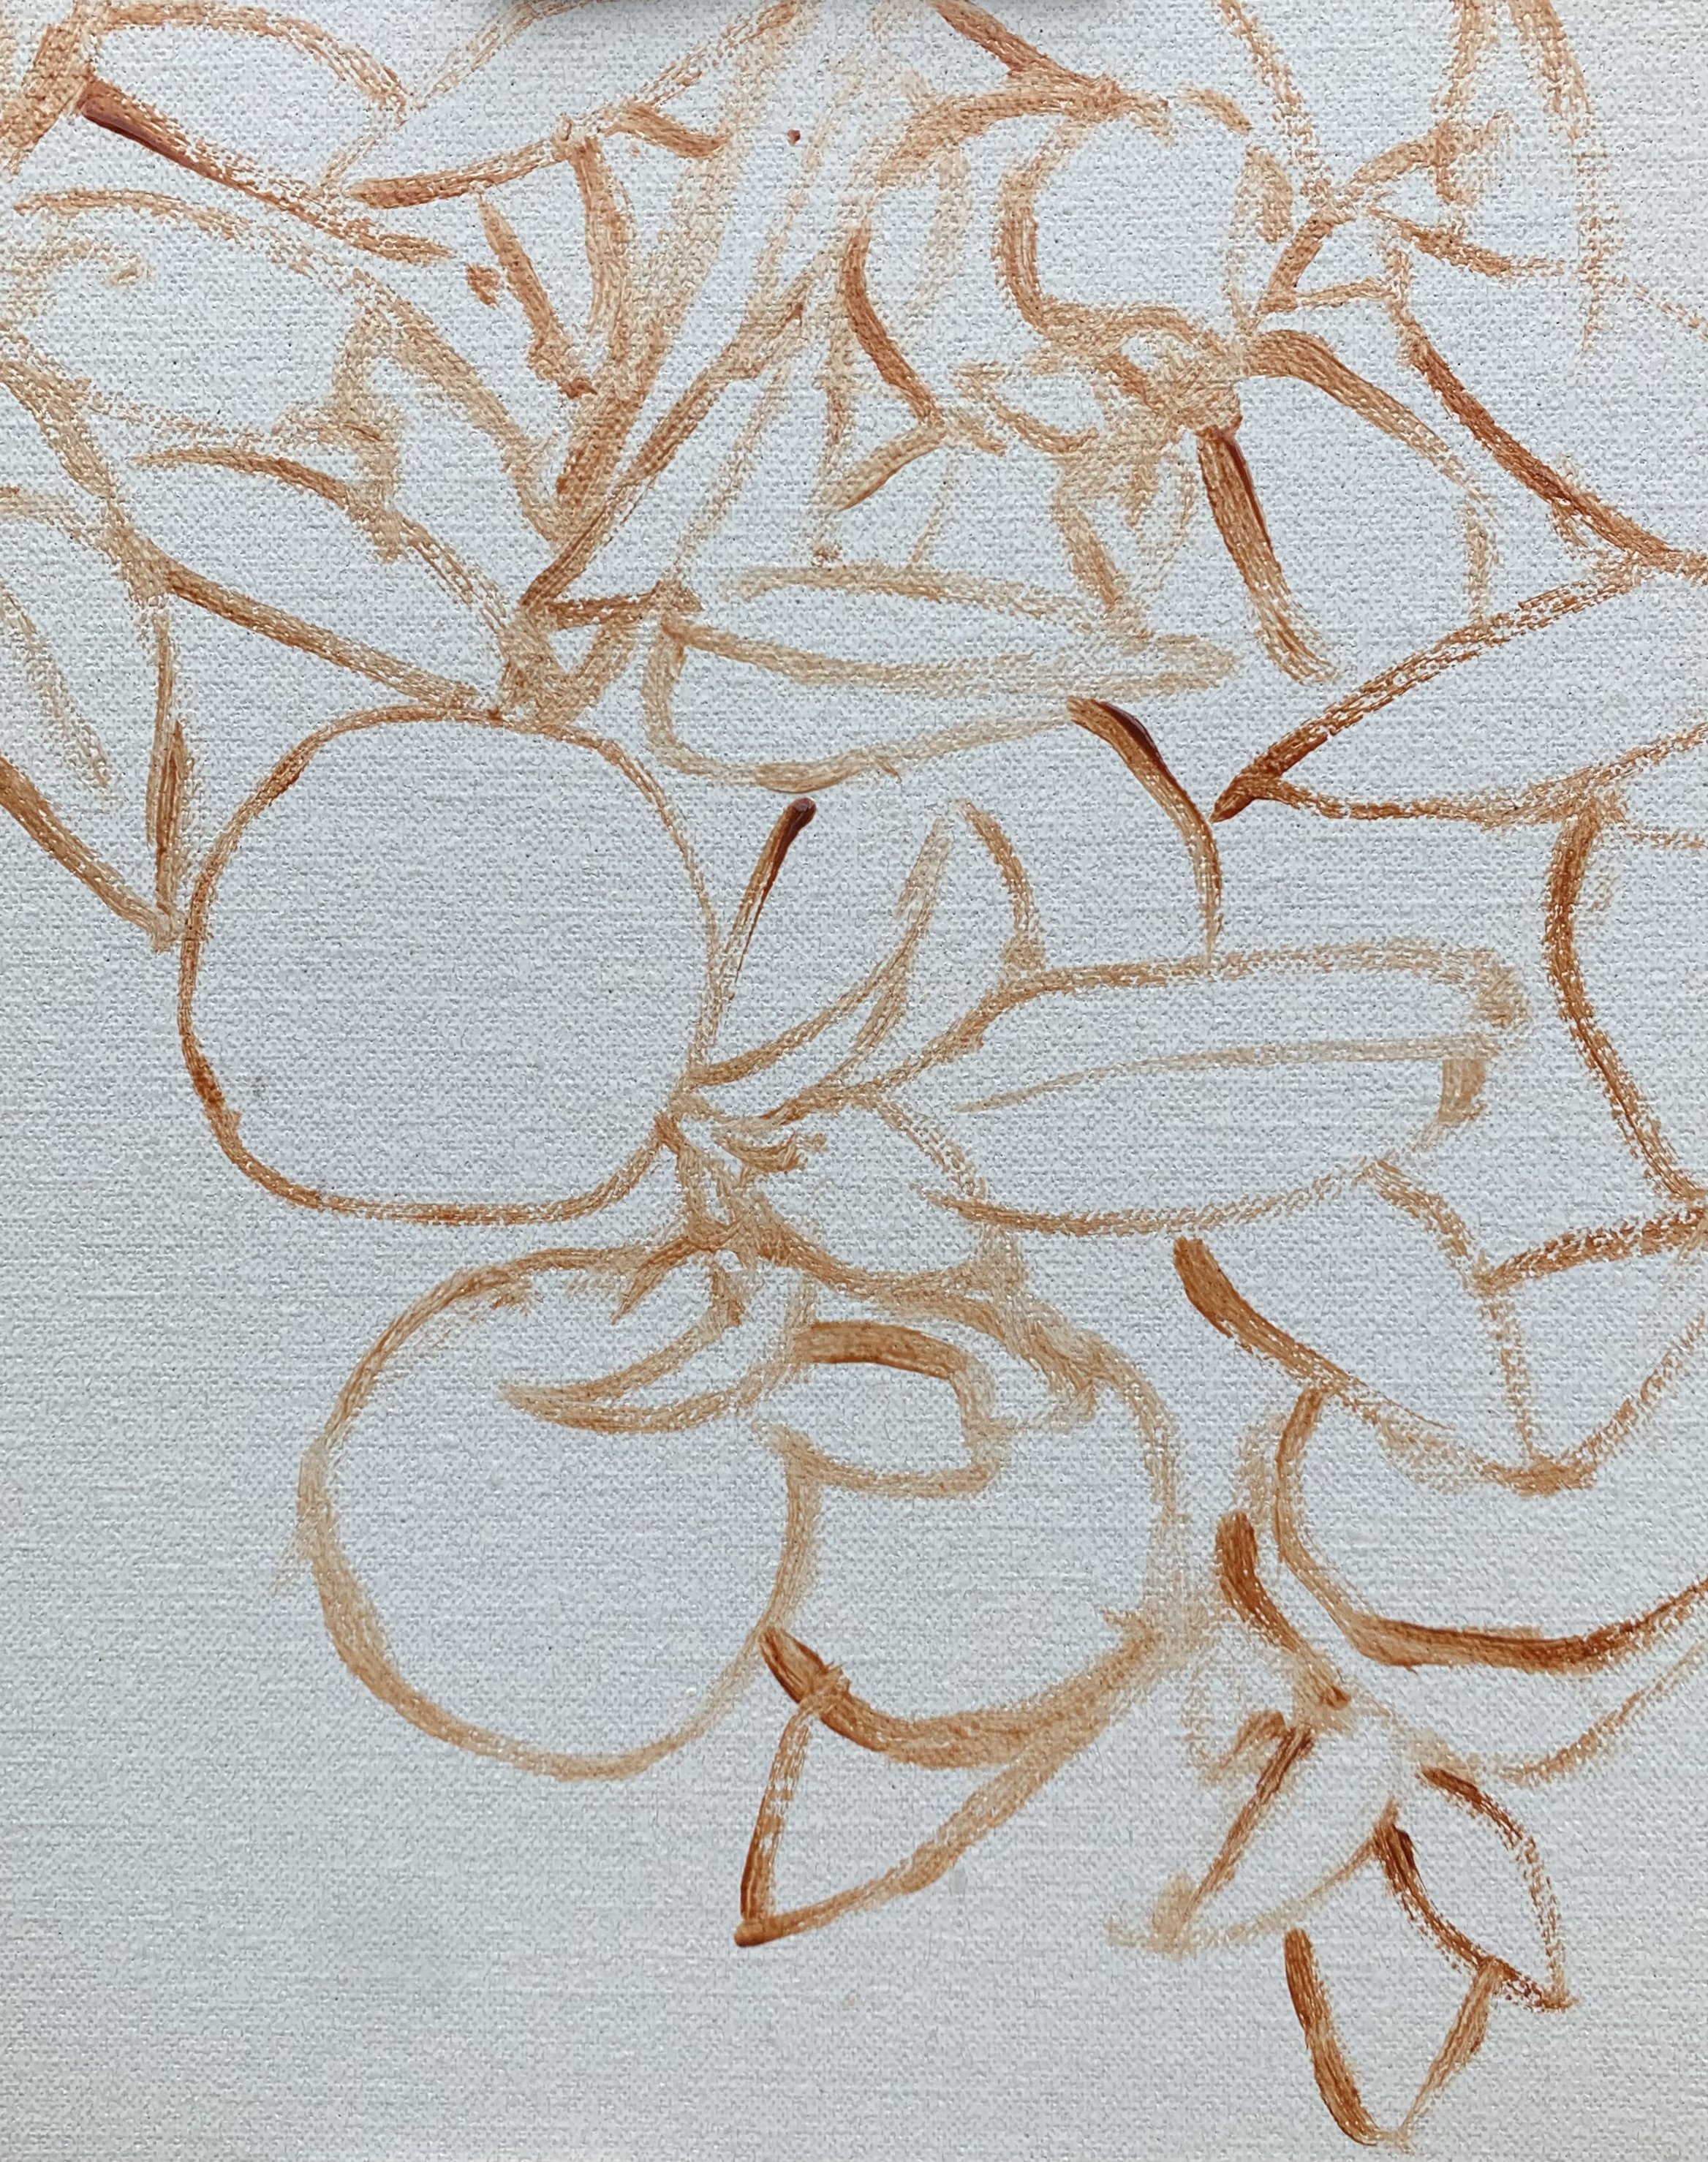
Stage 1 – Blocking-In The Painting
I painted this art work on an oil primed, medium weave Belgian linen panel. The painting itself measures 8” x 10”.
I sketched the composition using a No.1 round brush with burnt sienna mixed with Liquin Original (Liquin). I am using Liquin as a medium to thin the paint and it also has the advantage of speeding up the drying time.
Paint Your Dark Values and Shadows First
Whenever I start a painting I always identify where the dark values and shadows are first in the scene I am painting. Value refers to how light or dark a subject is and by painting in the dark values first I personally find it is much easier to create atmospheric perspective my paintings. It also makes it easier to add the areas in light and to get the saturation of your colours correct once you have painted your dark values.
I started this painting by mixing the colours for the shadows in the leaves using a mix of ultramarine blue and yellow ochre.
The shadows in the oranges are a mix of yellow ochre, cadmium yellow, cadmium red light and ultramarine blue. I keep in mind that this variety of oranges is more on the yellow side and yellow is a light value colour so the shadows are going to be lighter in value.
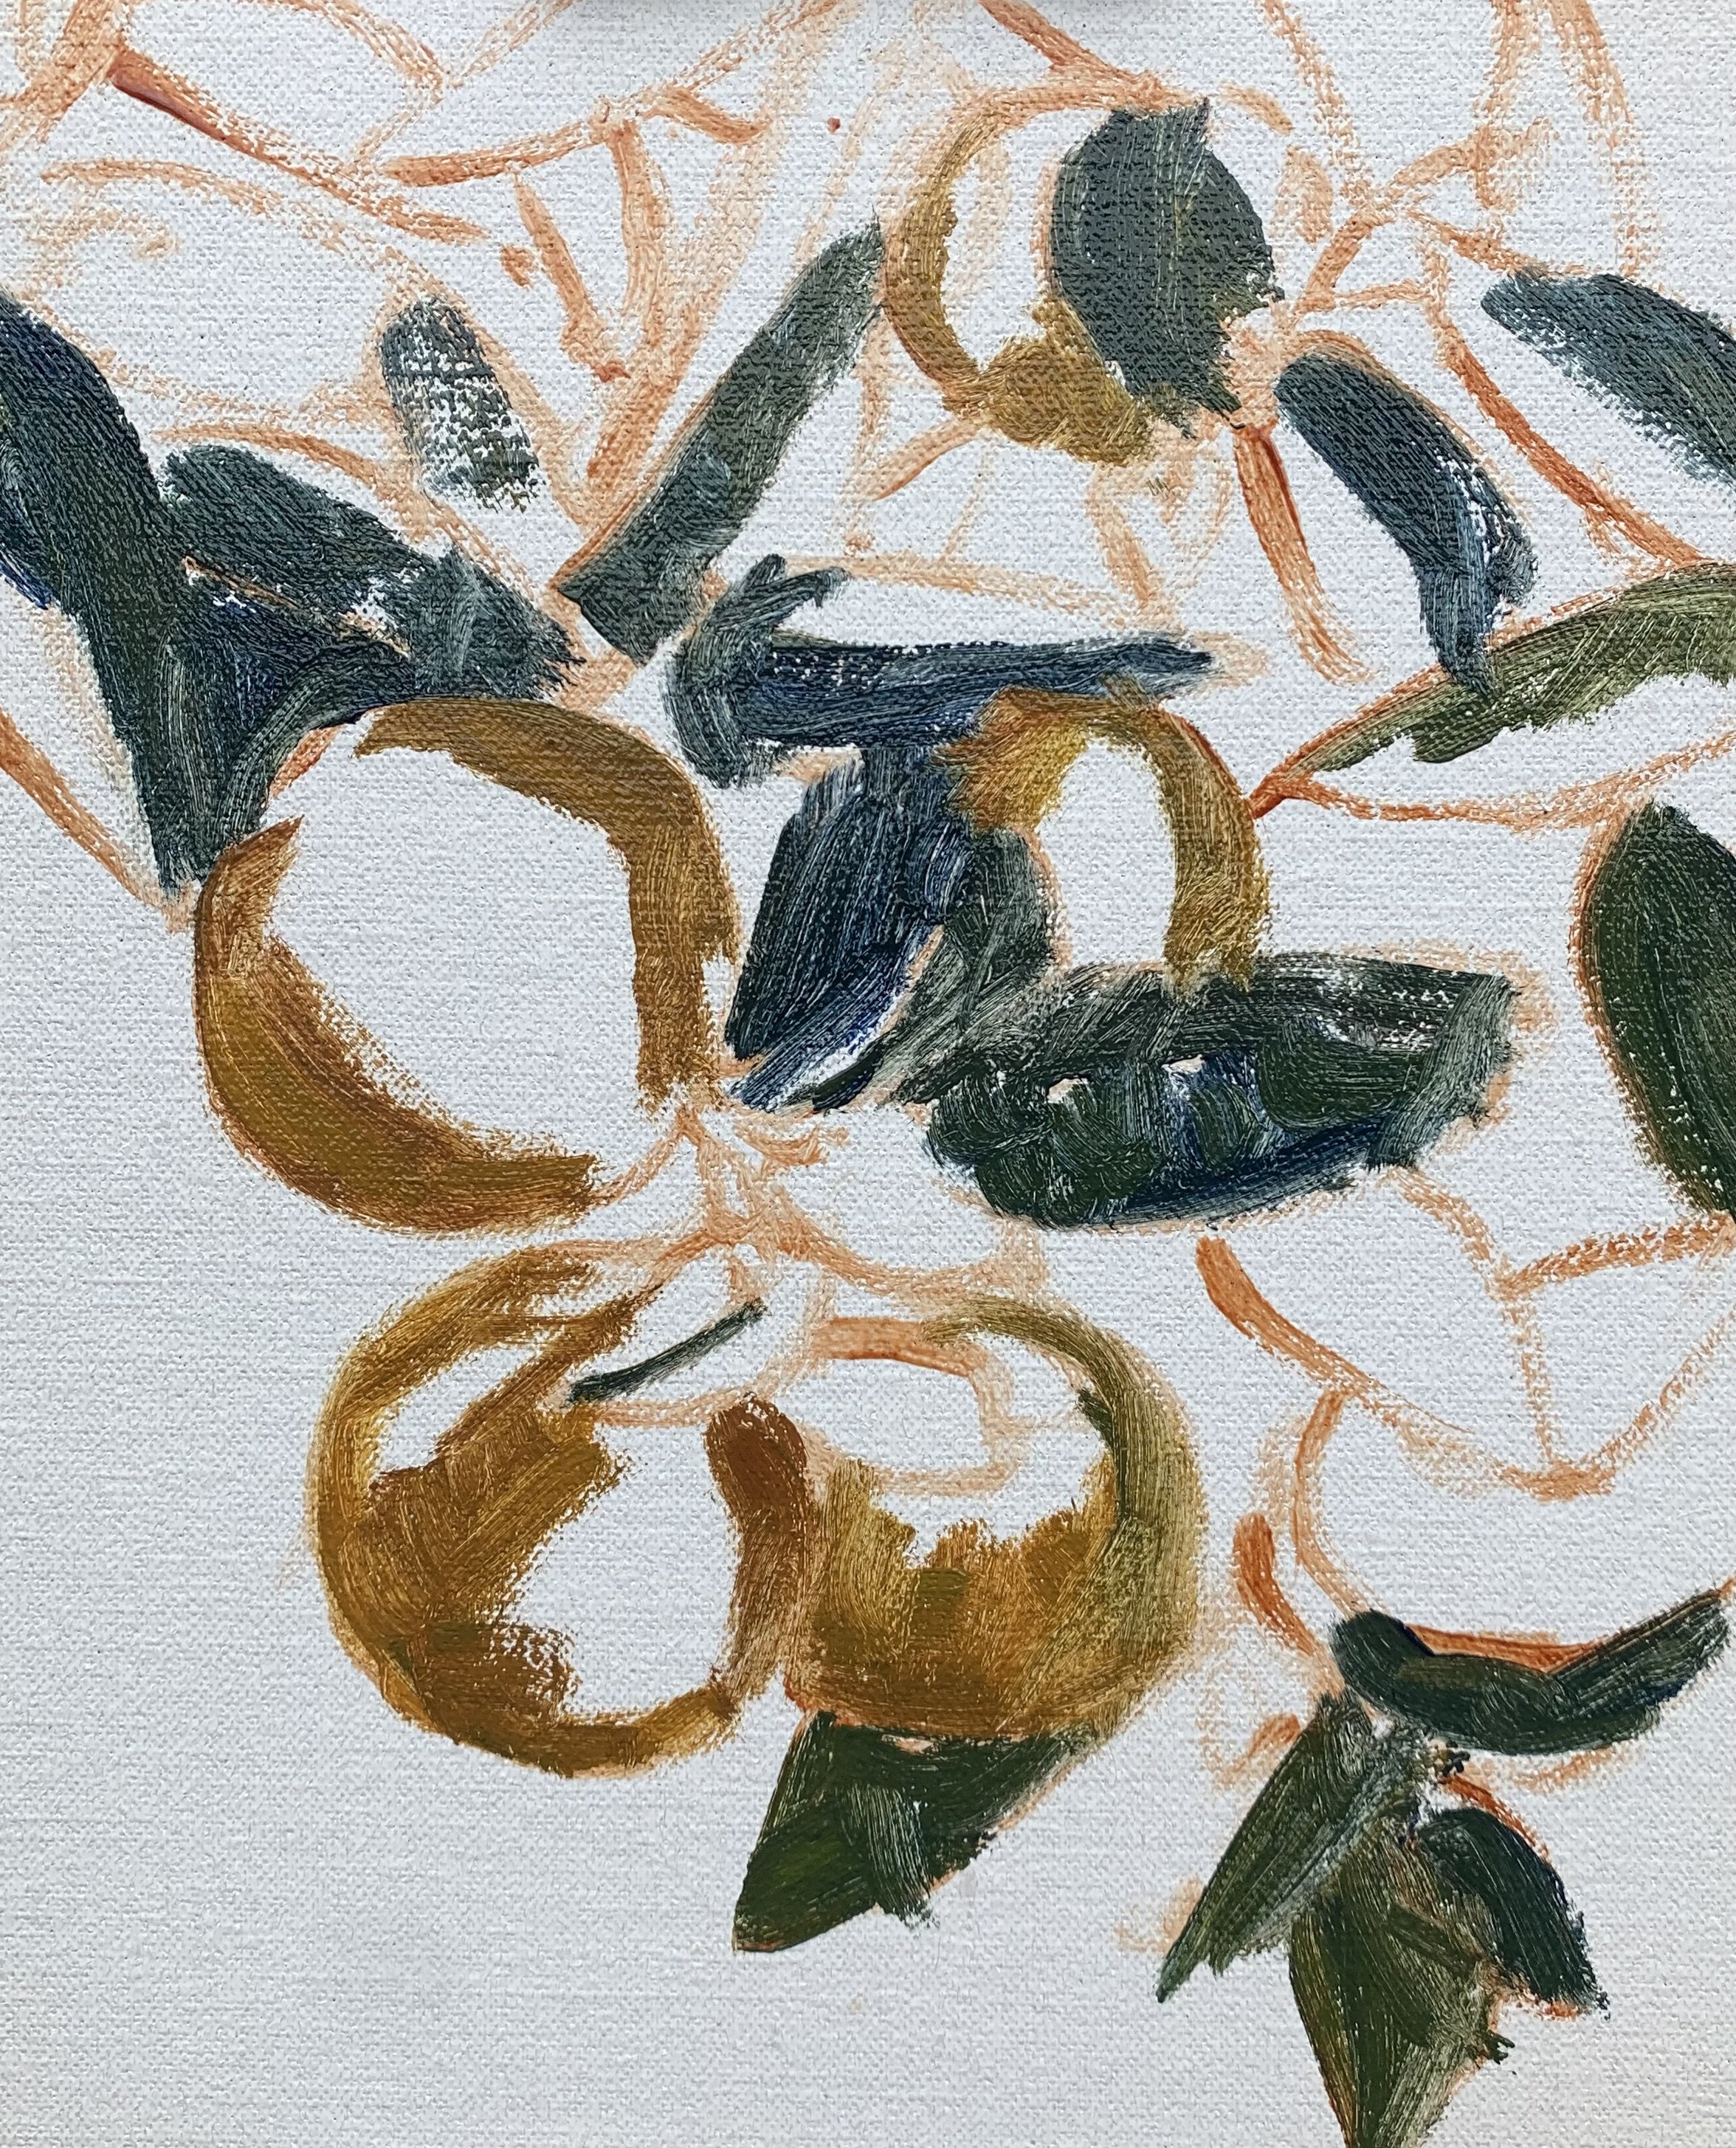
I paint the areas of the leaves that are in light and I am mainly focussing on the half tones and true colours of the leaves. I used a mix of yellow ochre, cadmium yellow, cadmium red light and ultramarine blue.
For the oranges I used a mix of cadmium yellow, cadmium red light and titanium white where required. The titanium white will make the value of the colour lighter but it also desaturates the colour as well so I used only a little titanium white in the mix.
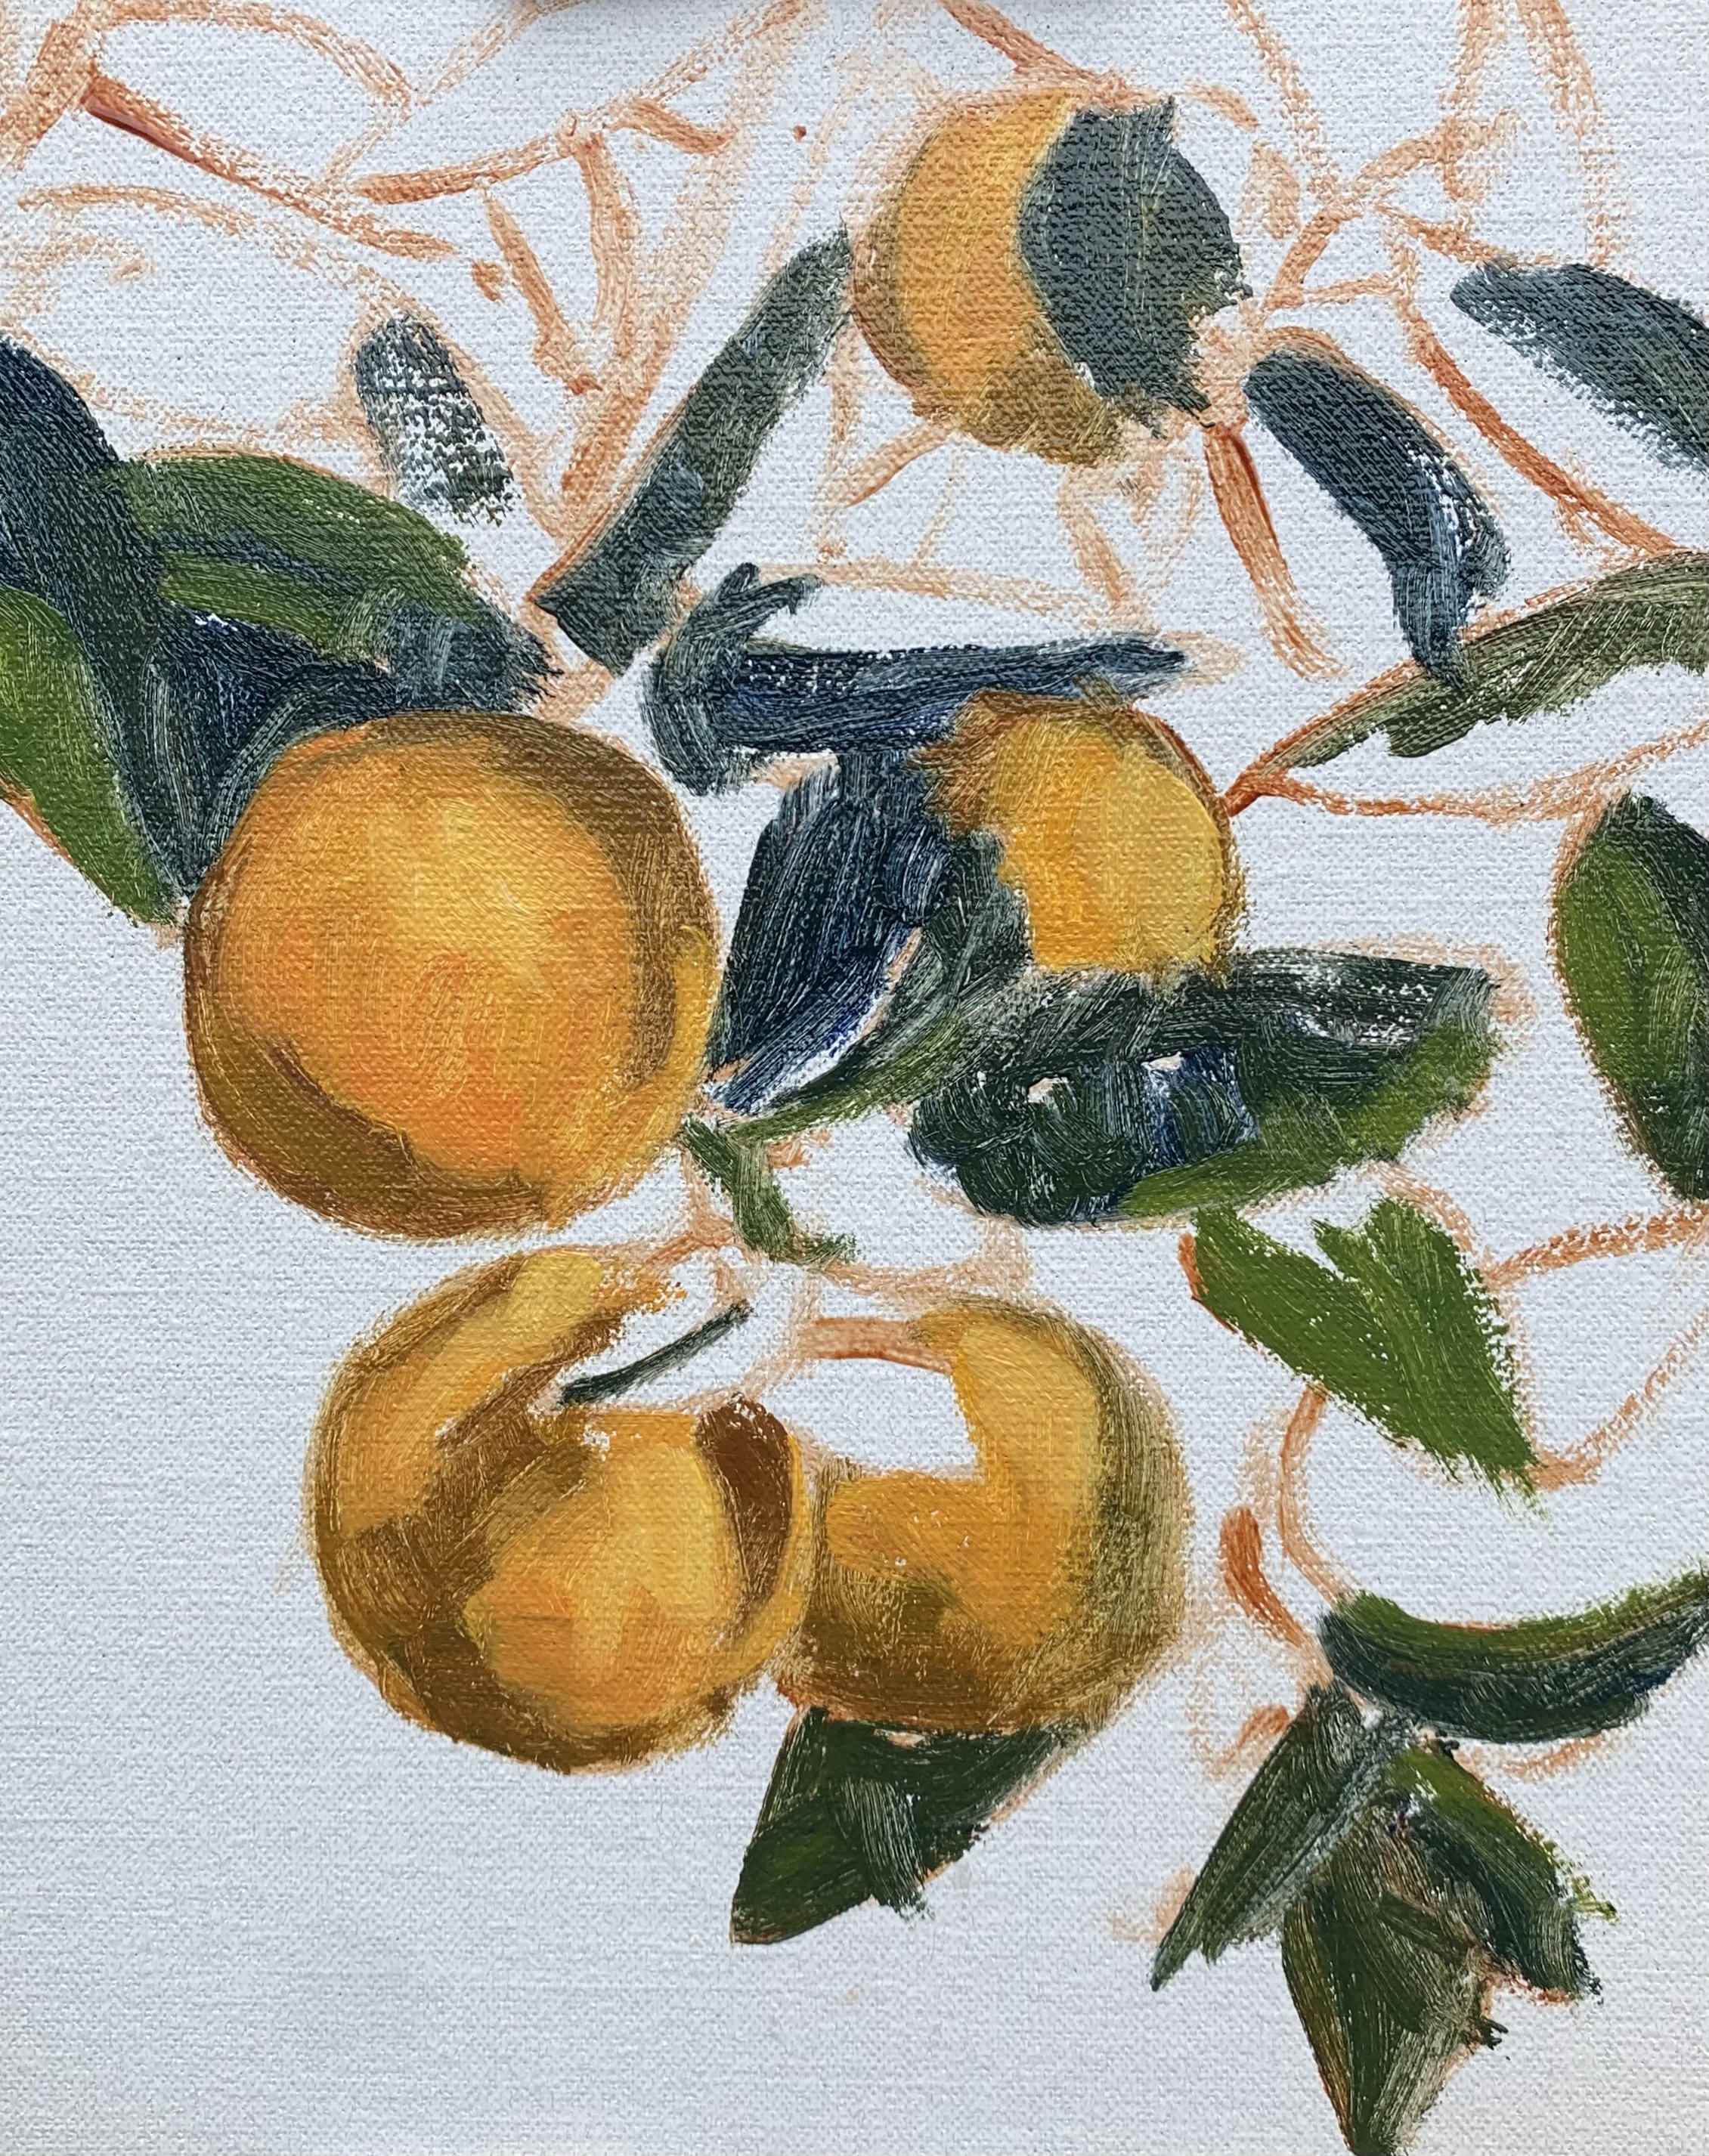
Here I was adding more paint to the leaves that are in light. Where required I mixed in a little titanium white to my existing green and even a little phthalo green to increase the saturation and create some emerald tones.
I finished up the plein air part of this painting by juxtaposing the oranges against a dark background using a mix yellow ochre, burnt sienna and ultramarine blue.
Below you can see my plein air painting set up as I was painting the oranges hanging from the tree in my garden.
Stage 2 – Adding Details, Modelling and Refining the Painting
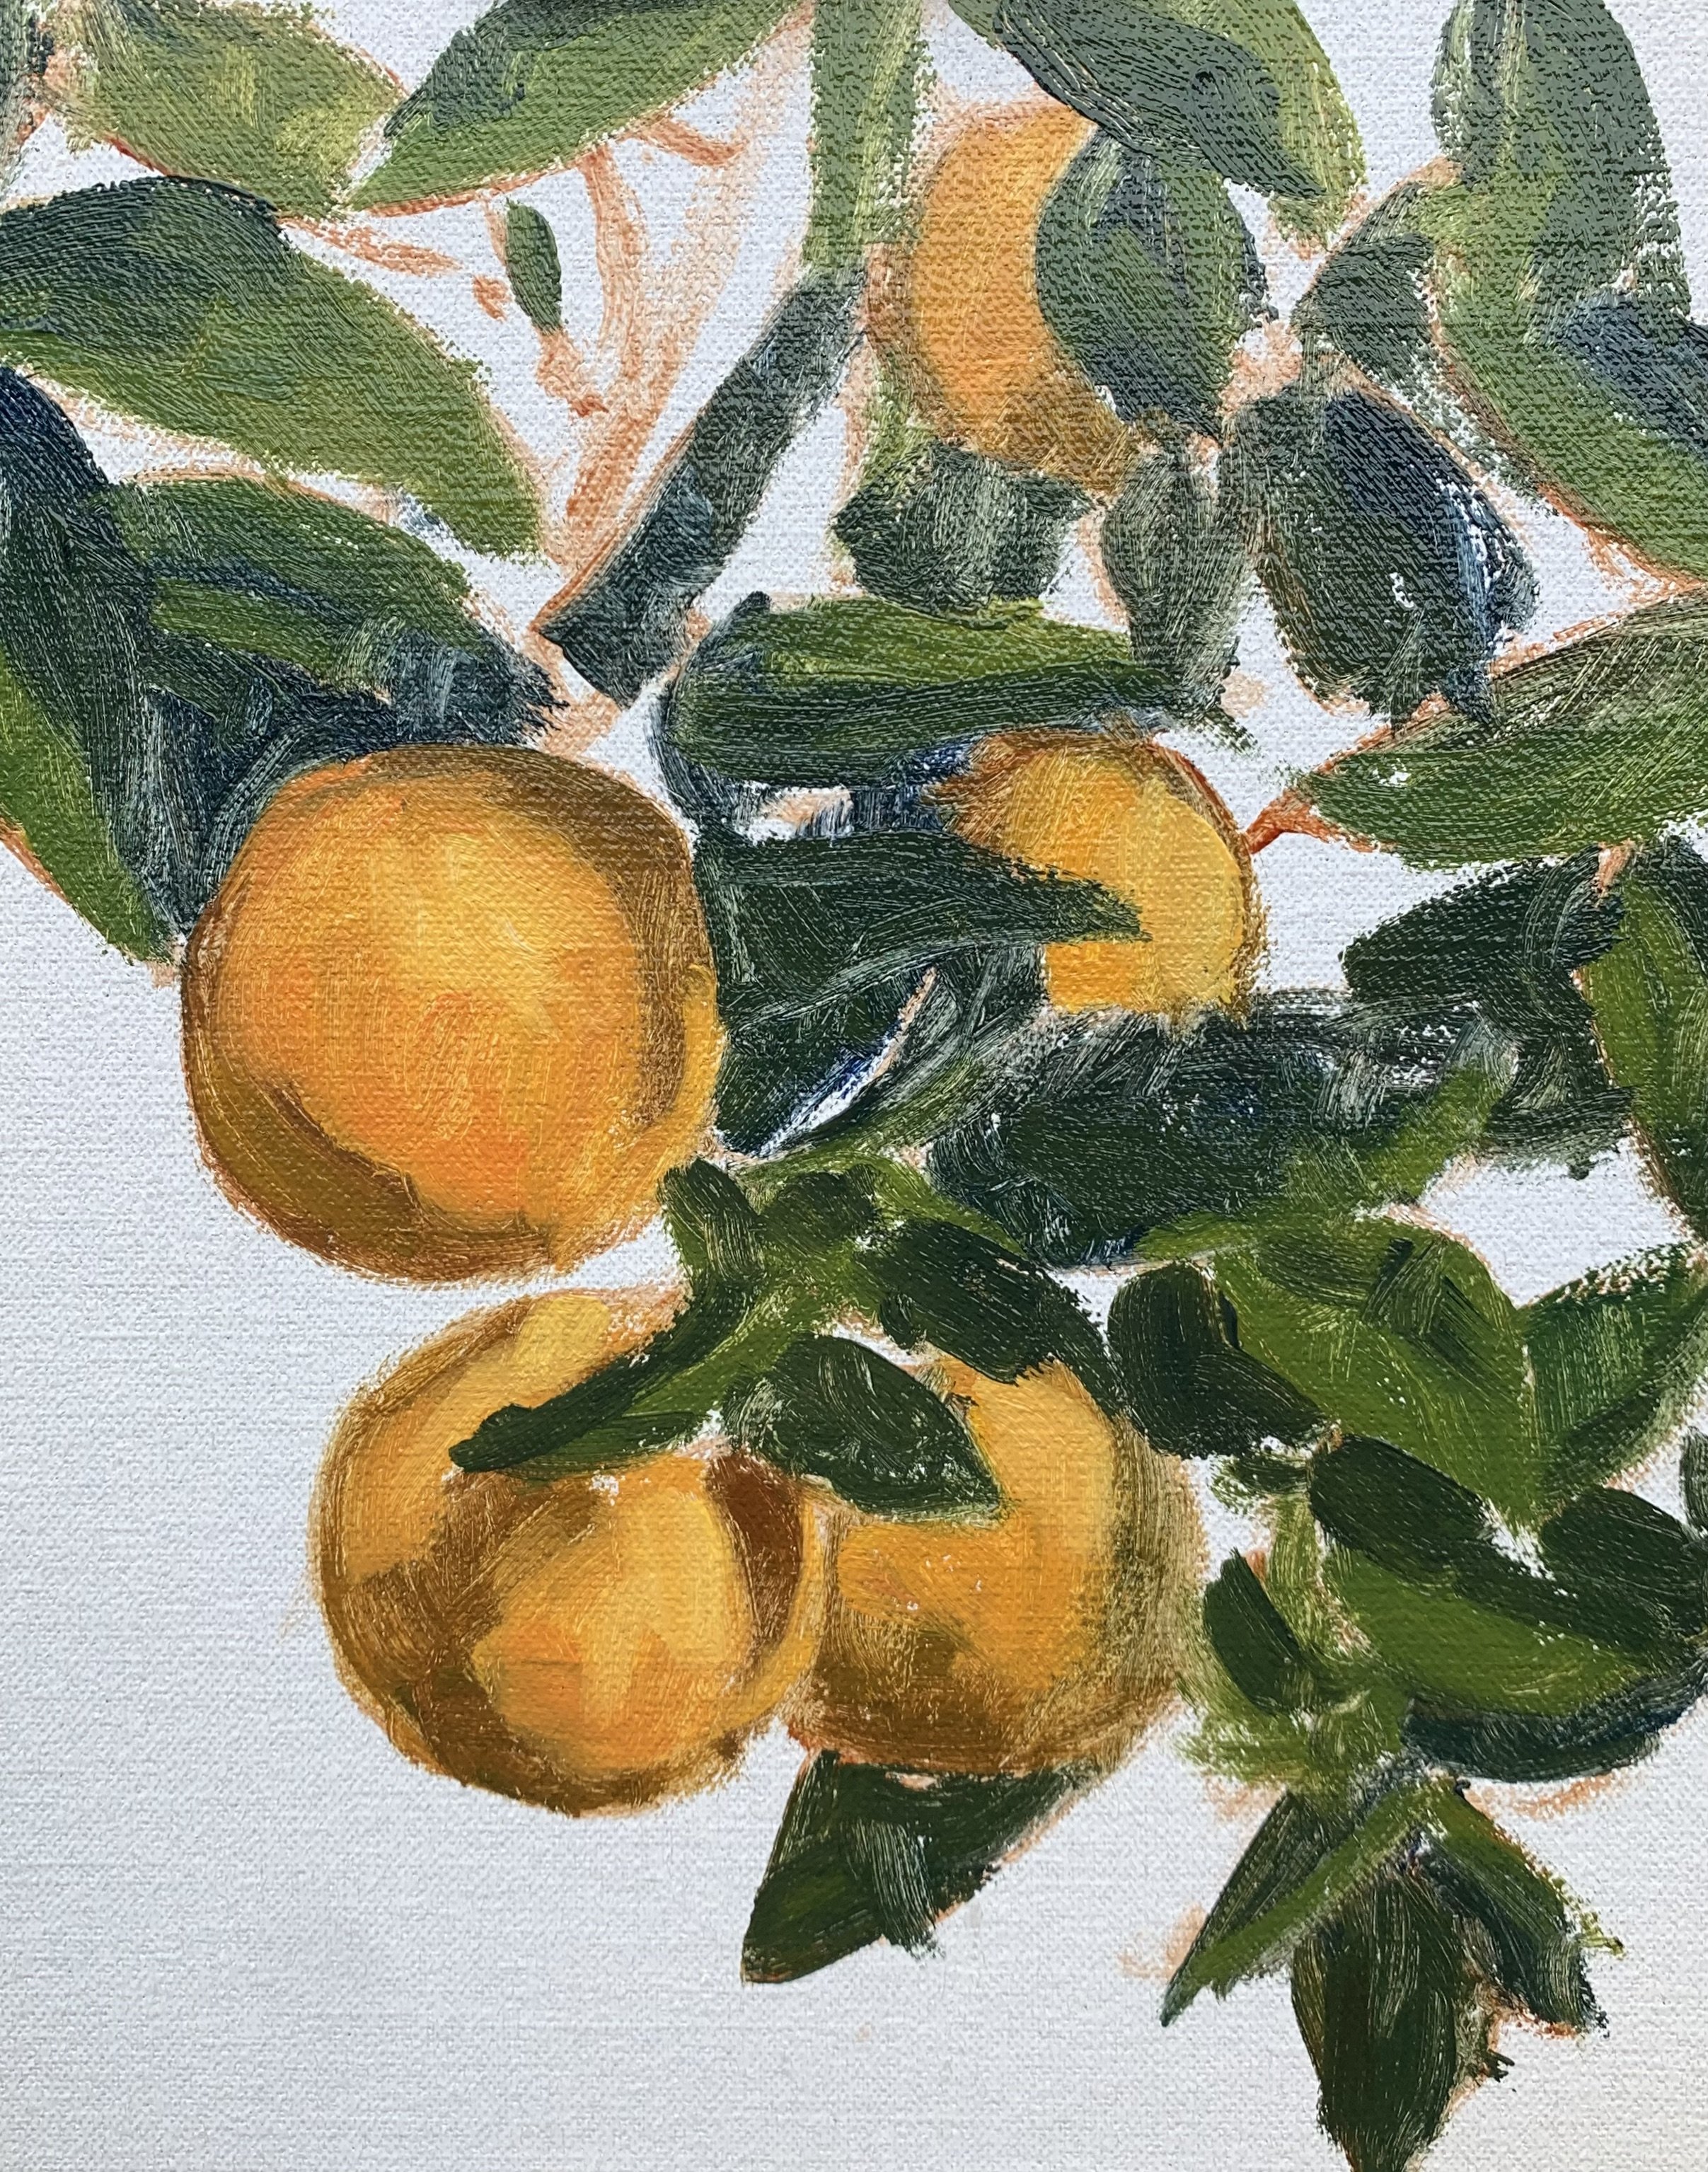
Once the painting was dry I then spent a session on this painting modelling the paint and building up the details. Essentially I am using the same colours I used during the blocking-in stage in varying amounts.
I spent the majority of the time on this painting working on the leaves. Essentially I was using similar colours as I was using during the blocking-in / plein air painting stage. My greens were a mix of yellow ochre, cadmium yellow, ultramarine blue, cadmium red light, titanium white and phthalo green. I used these colours in varying amounts to create different hues.
For the shadow areas of the leaves I created some deeper cool greens using yellow ochre, ultramarine blue, a dash of cadmium yellow and phthalo green and some alizarin crimson to desaturate.
I wanted to keep this painting relative loose and gestural so I didn’t go overboard with the details.
I painted the suggestion of the foliage in the background in the deep shadow areas to add interest to the painting.
Stage 3 – Final Details
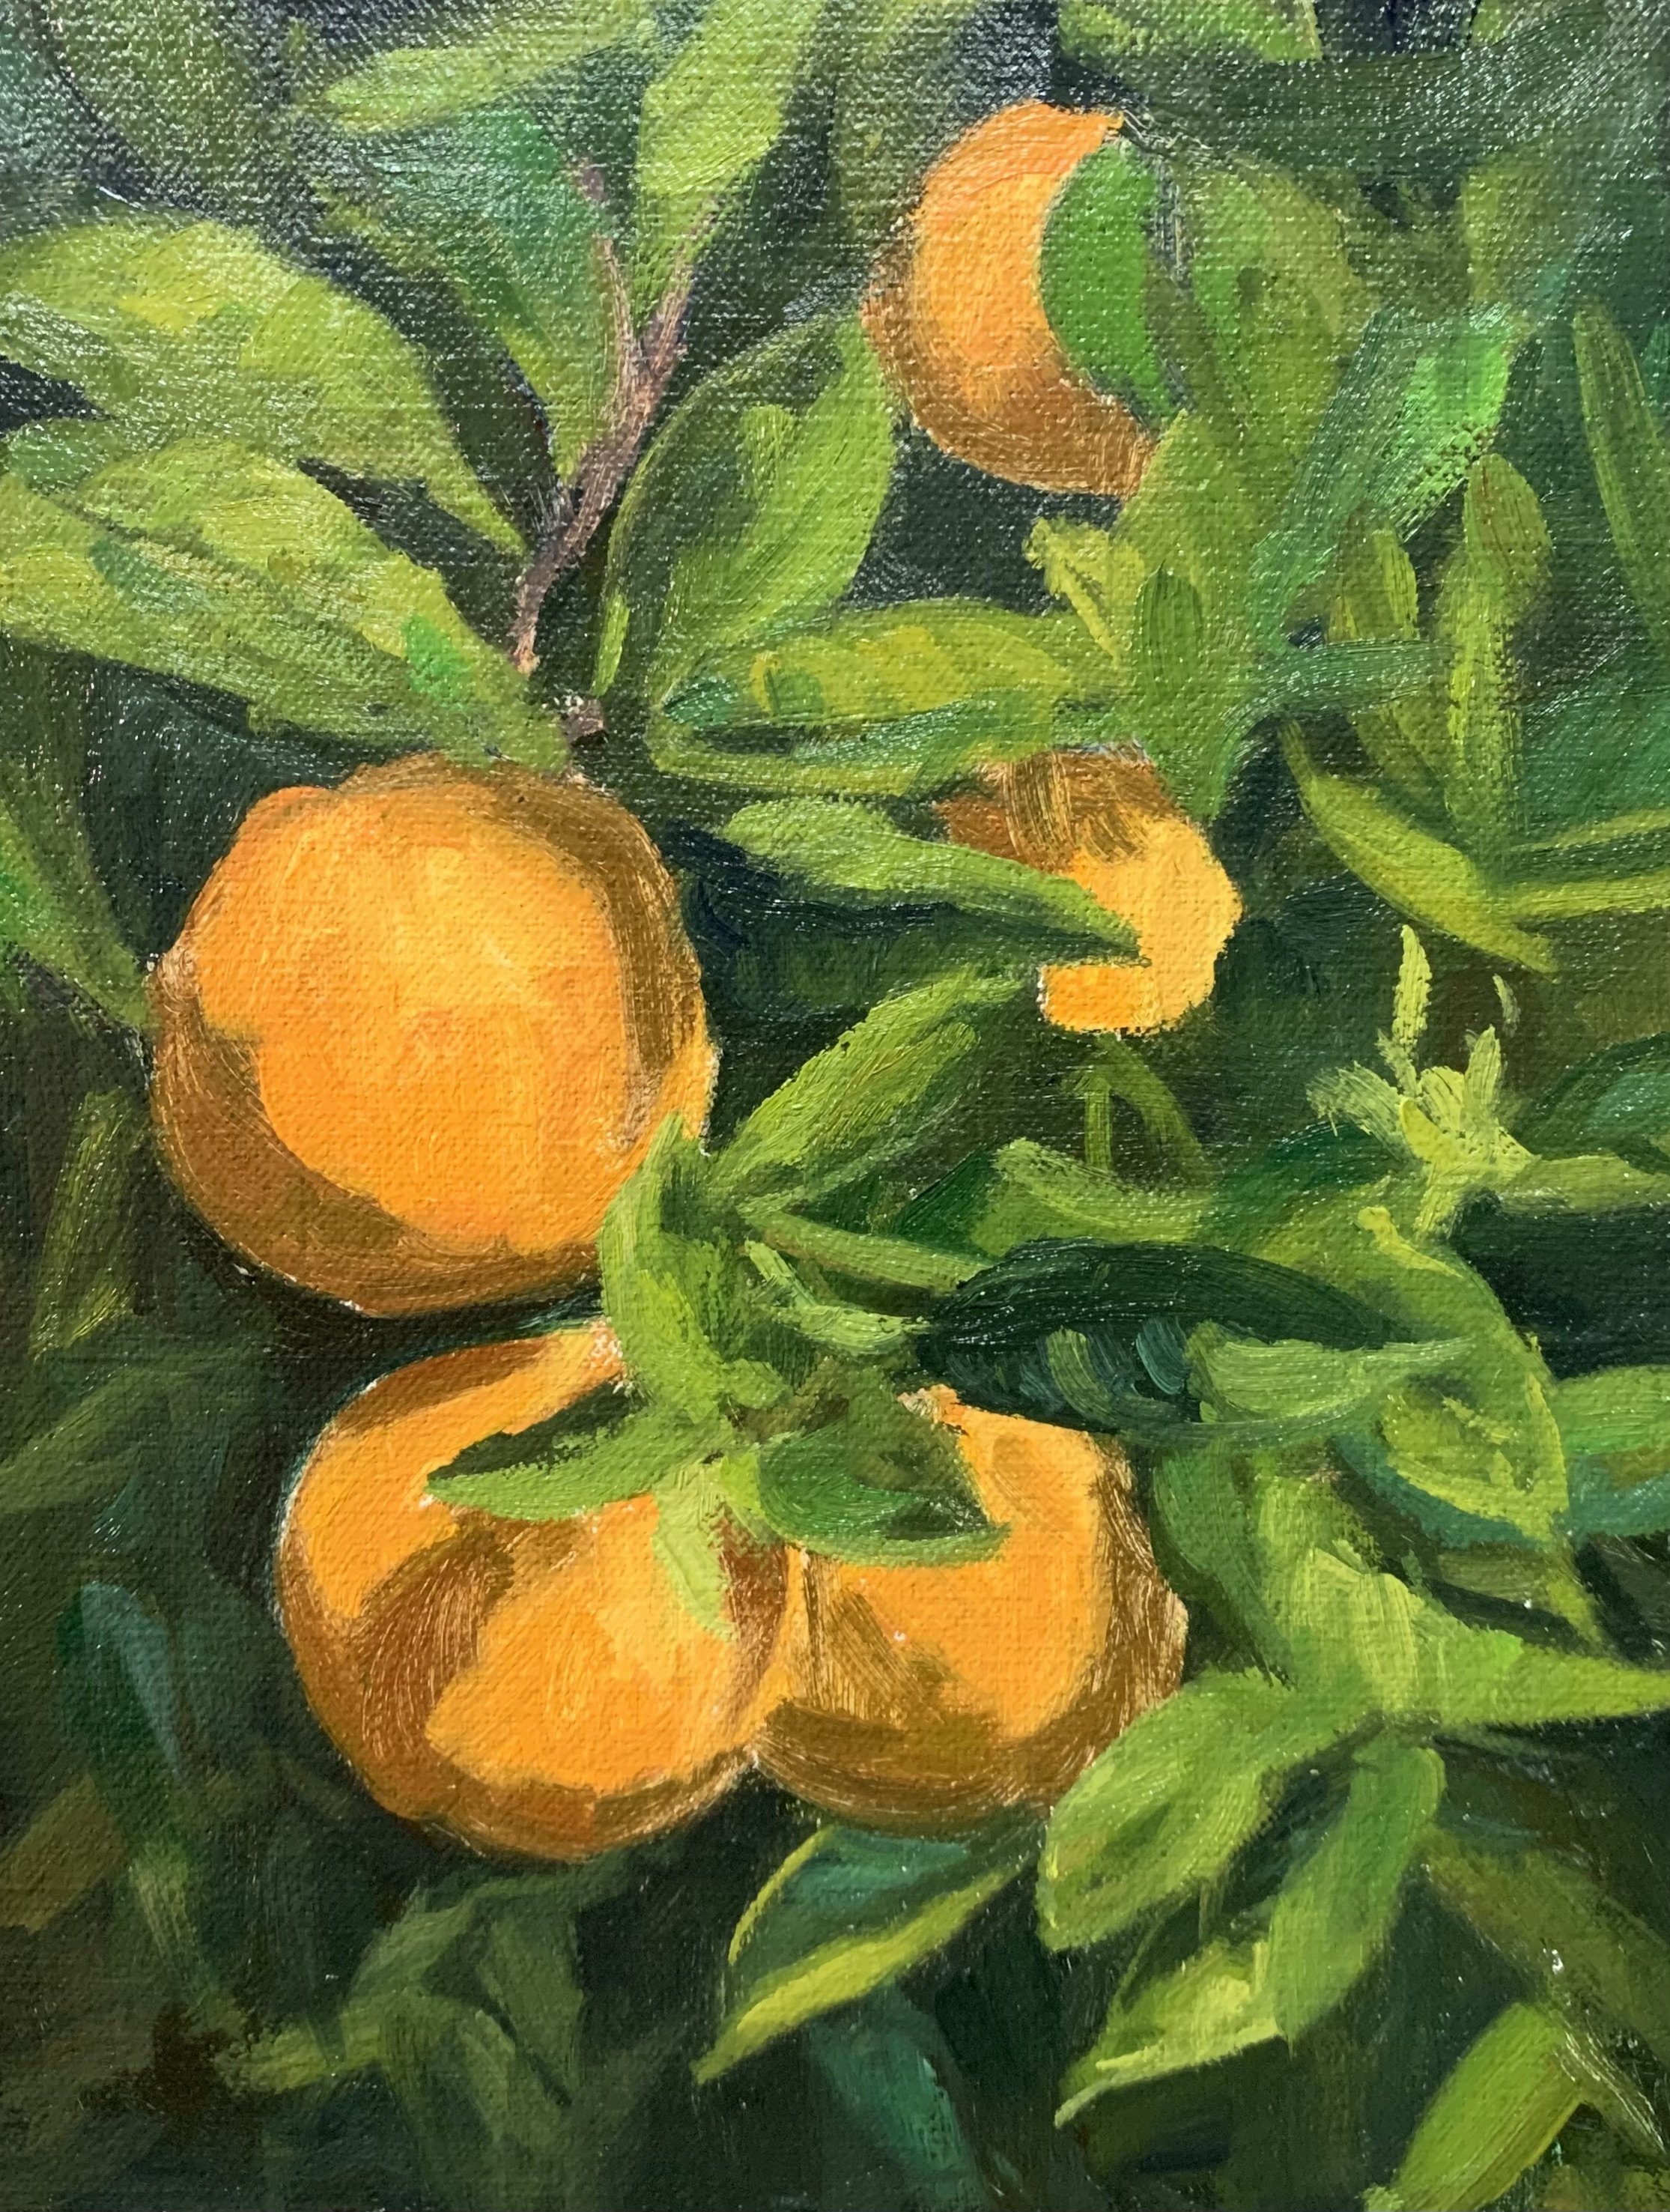
I left the oranges until last where I painted some warm reflected light in the shadows using the same colours as the blocking-in stage but with more cadmium red light in the mix at add some heat to the shadows. I then painting the areas in light using cadmium yellow, cadmium red light and titanium white being sure to paint the highlights.
I added some highlights to the leaves but I dialled back the values so they would not become a distraction in the painting. I worked off the existing green I had mixed and added more titanium white and cadmium yellow.
For the twigs in the upper section of the painting I used a mix of ultramarine blue, burnt sienna, alizarin crimson and titanium white.
Final Note
I hope you enjoyed this written painting demonstration, however I have only scratched the surface as there is way more to this painting. Check out the painting tutorial video where I show you how to paint this scene, available on my Patreon channel.
