If your painted tree trunks seem flat, dull, or lifeless, you’re not alone. Many artists, whether beginners or intermediates, end up with trees that look more like cardboard tubes than vibrant, three-dimensional forms rooted in nature. The good news? With just a few crucial techniques for painting bark texture, lighting, and color, you can transform your trees from lifeless to lively—no matter what species you’re painting!
In this guide, I’ll walk you through my entire process for painting beautiful gum trees in oils, but the techniques work equally well for oaks, pine, birch, and more. We’ll explore how to make your tree trunks truly pop, from understanding how light wraps around cylindrical forms to applying the all-important four-step bark texture method. Plus, I’ll share frequent painting tips along the way—so whether you paint in oils, acrylics, or gouache, you’ll get something practical out of this post.
Let’s get into it!
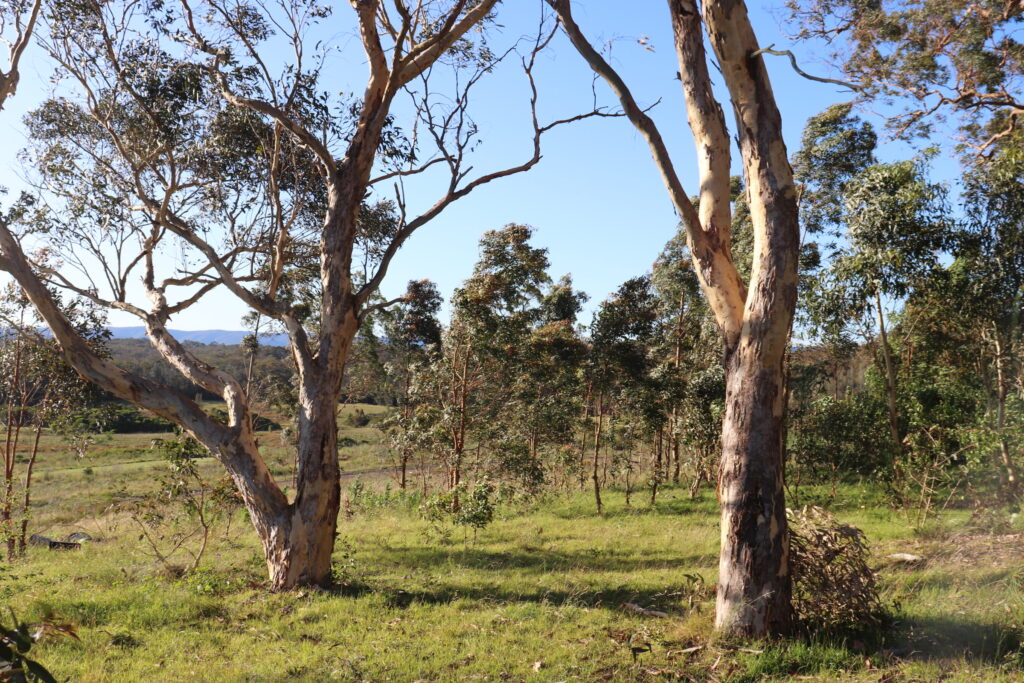
Reference Photo
Materials and Setup
You don’t need fancy equipment, but here’s exactly what I used for this demo to keep things concrete:
- Canvas: 11×14 inch linen panel
- Paints: Blue Ridge Oil Paints (but use what you have)
- Go-to colors: Ultramarine Blue, Yellow Ochre, Burnt Sienna, Titanium White, Alizarin Crimson, Cobalt Teal, Cadmium Yellow Medium, and Phthalo Green
- Brushes: Start with big brushes for blocking in, then move to smaller synthetic flats for detail
Pro tip: The canvas and paint brand are less important than your approach and process. Feel free to substitute according to your own kit!
Understanding the “Cylinder Principle” for Trees
Before putting paint to canvas, let’s talk form. Most tree trunks and branches are essentially cylinders (or close to it), and the way light interacts with a cylinder is at the heart of realistic tree painting.
The Key: Light doesn’t hit the trunk evenly! A single source of light (like sunlight) will wrap around a cylindrical tree trunk in a particular way, creating a predictable pattern of light, shadow, and reflected light.
Cylinder Lighting Basics:
- Light Side: The part facing the light source.
- Core Shadow: The part turning away—darker and more colored.
- Reflected Light: On the shadow side, where light bounces back from the ground or nearby objects.
- Highlight: Where sunlight hits most directly—this should be your brightest, most chromatic color but used sparingly!
“We’ll start with understanding how light wraps around cylindrical forms and then dive into my four-step bark texture method…”
This principle applies to ANY tree: smooth beach trunks, gnarly oaks, even gum trees with their famous peeling bark.
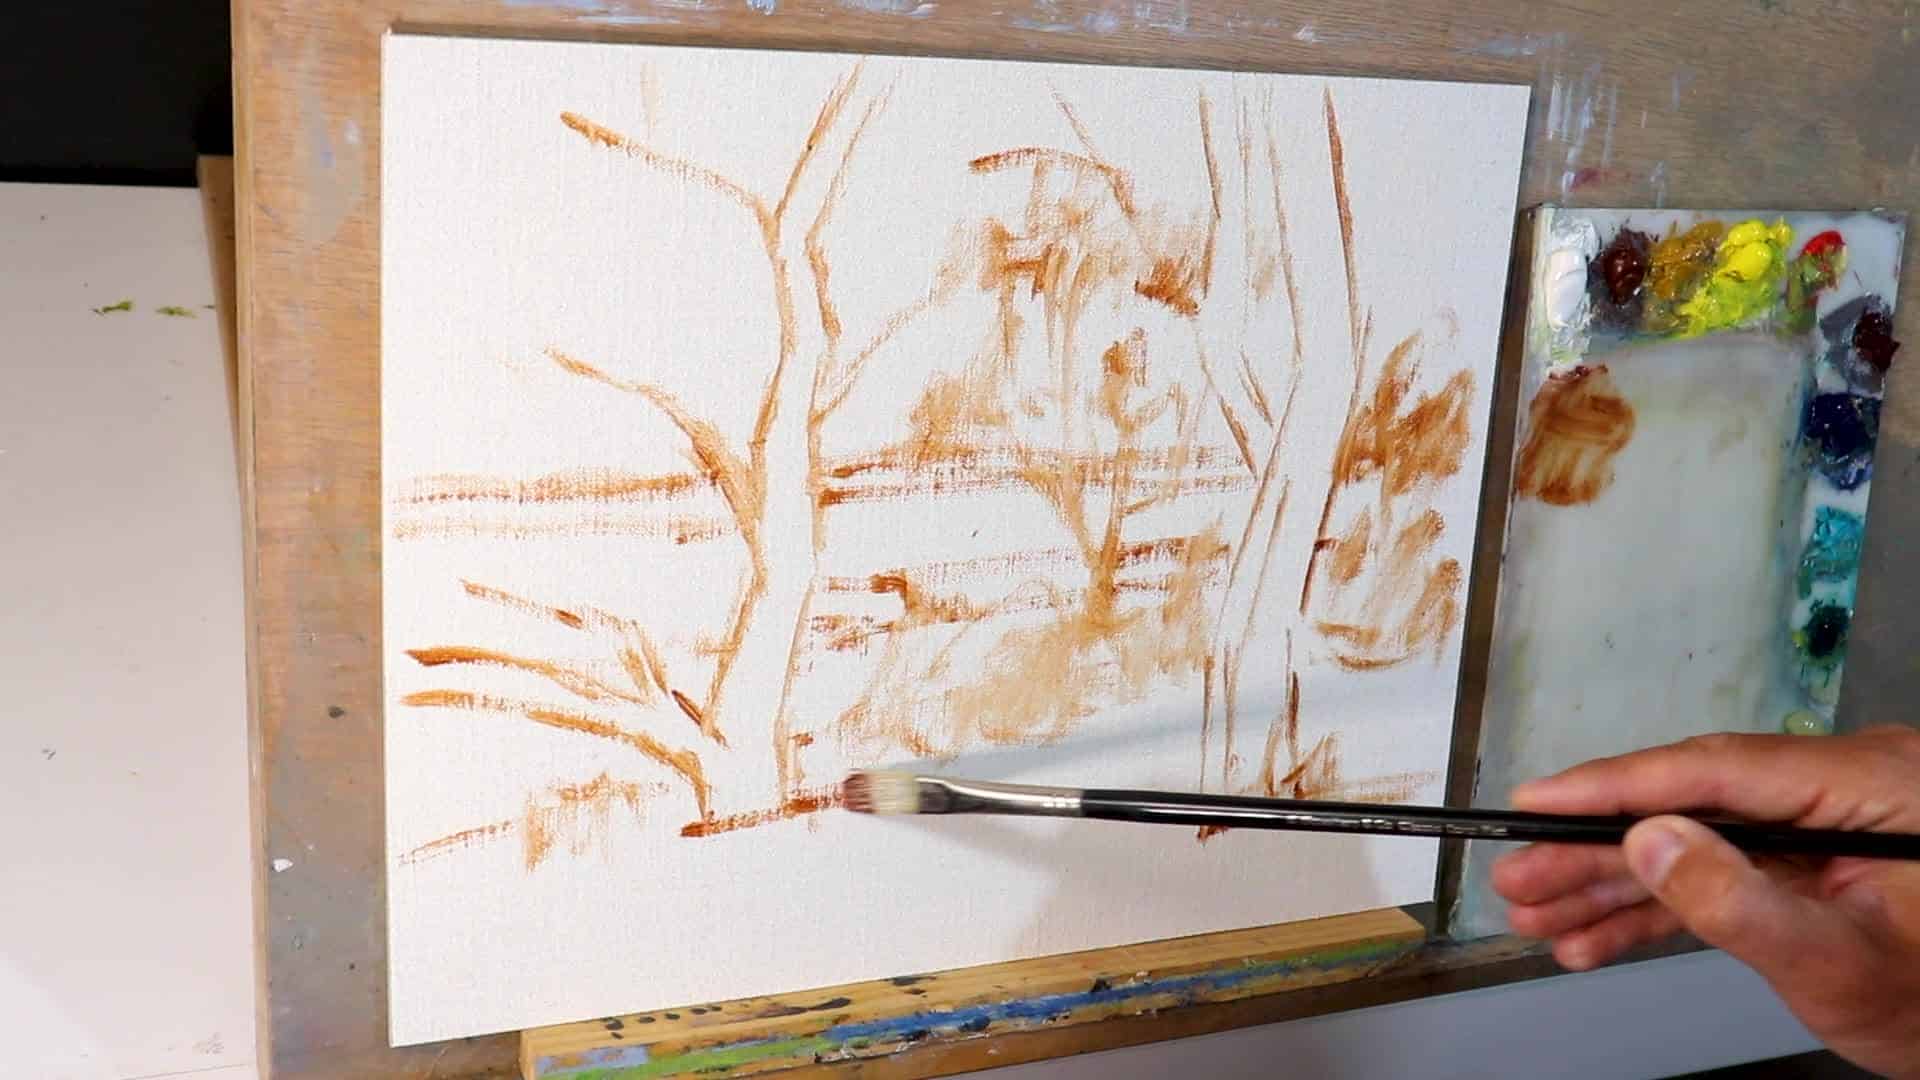
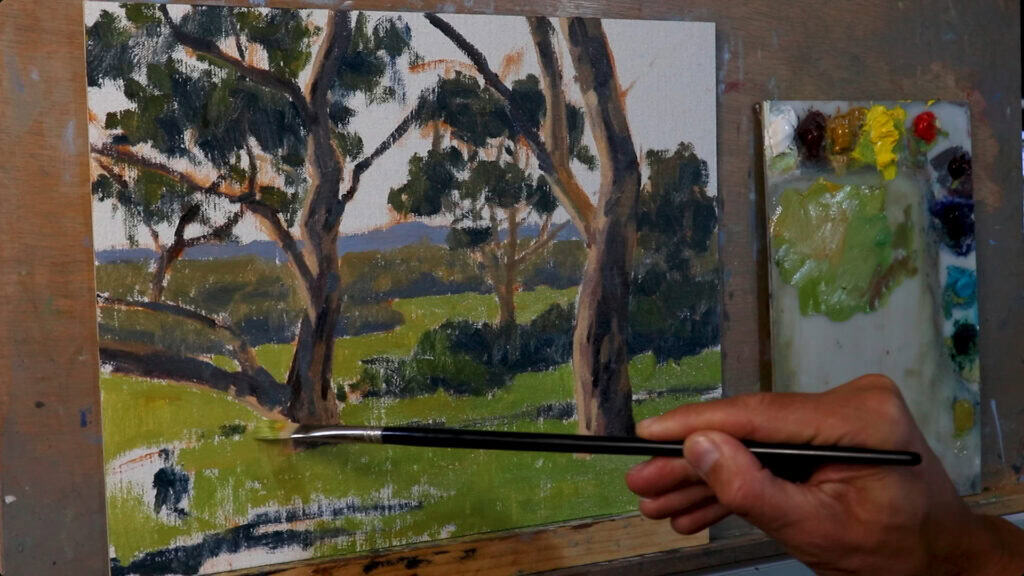
Step 1: Blocking In the Dark Values
Why Start with the Darks?
Starting with your darkest tones (often called “blocking in the darks”) immediately gives your painting a sense of depth and three-dimensionality. It sets the maximum contrast range, so you’ll know precisely where your lightest lights need to go later.
Value = How light or dark something is.
When painting trees (and most landscape elements), your foreground will contain both the darkest darks and lightest lights. As objects recede, values compress—dark isn’t as dark, and light isn’t as light.
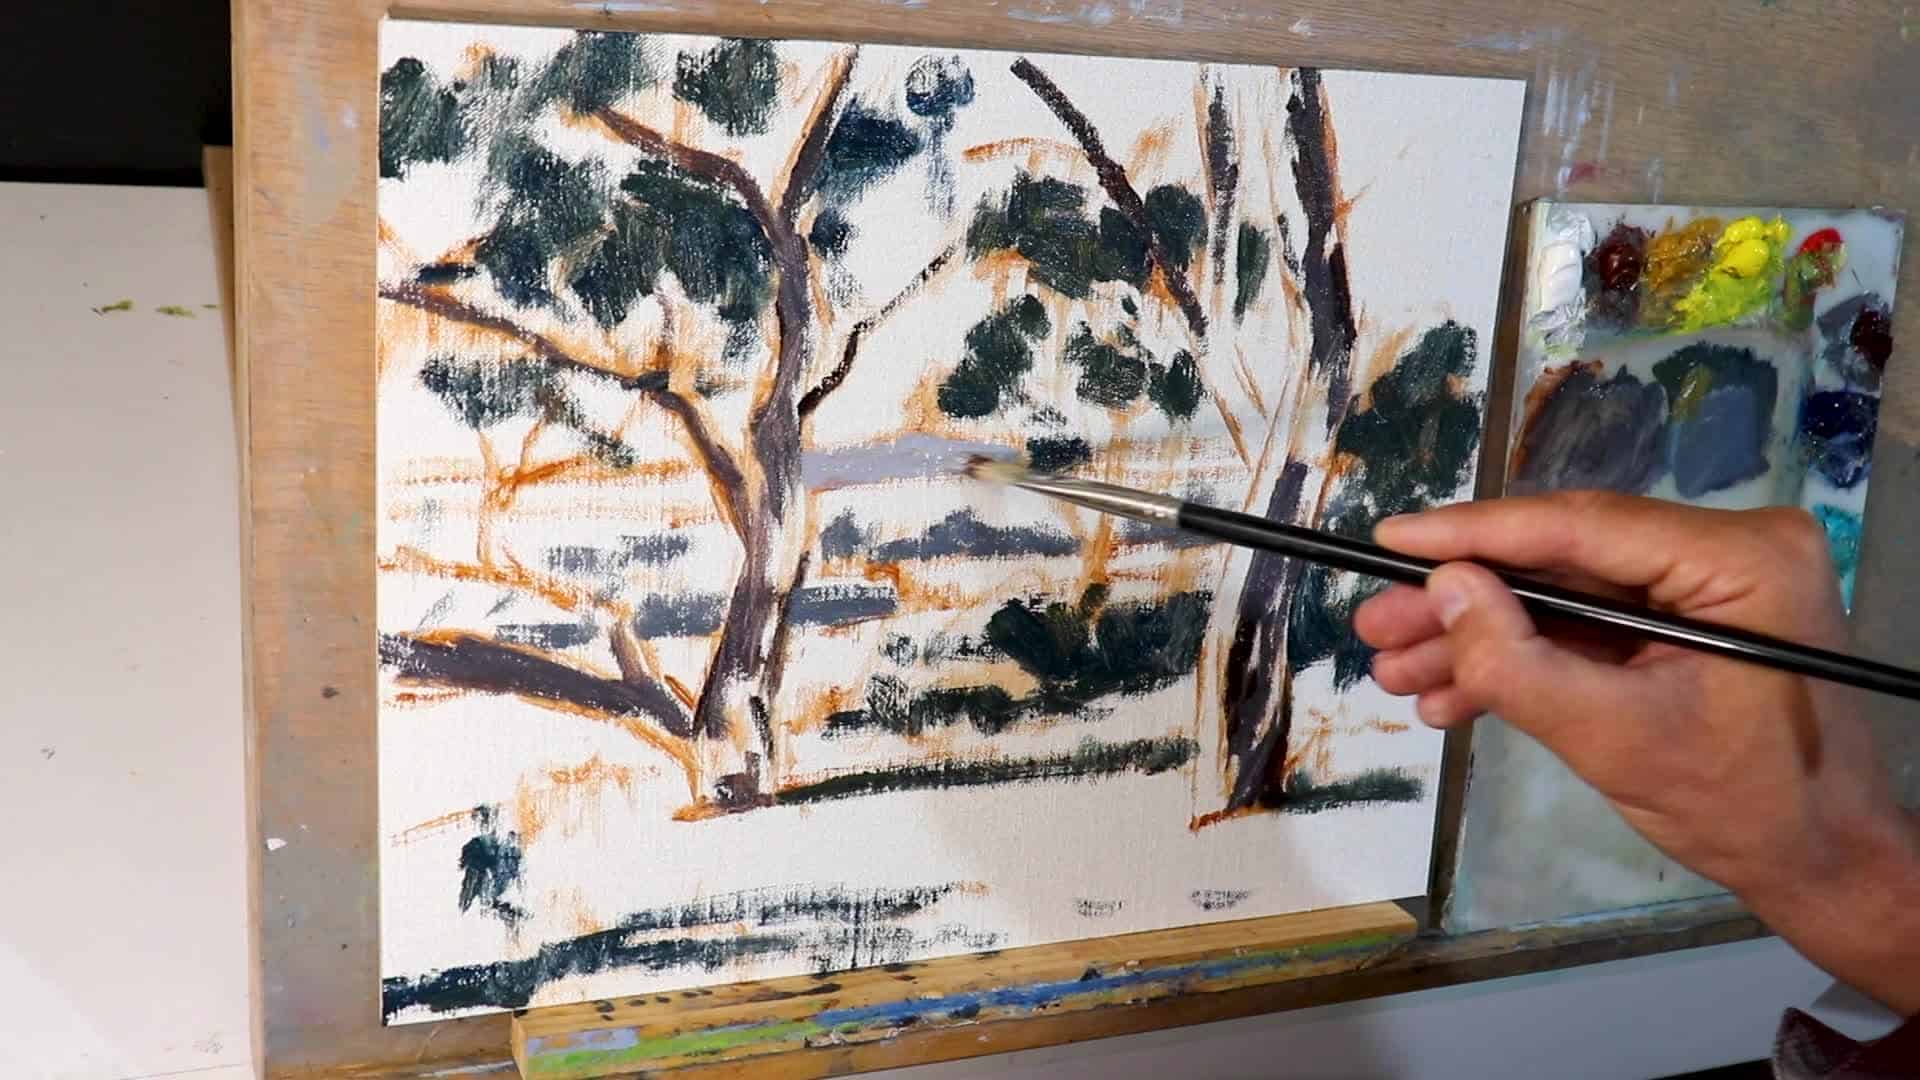
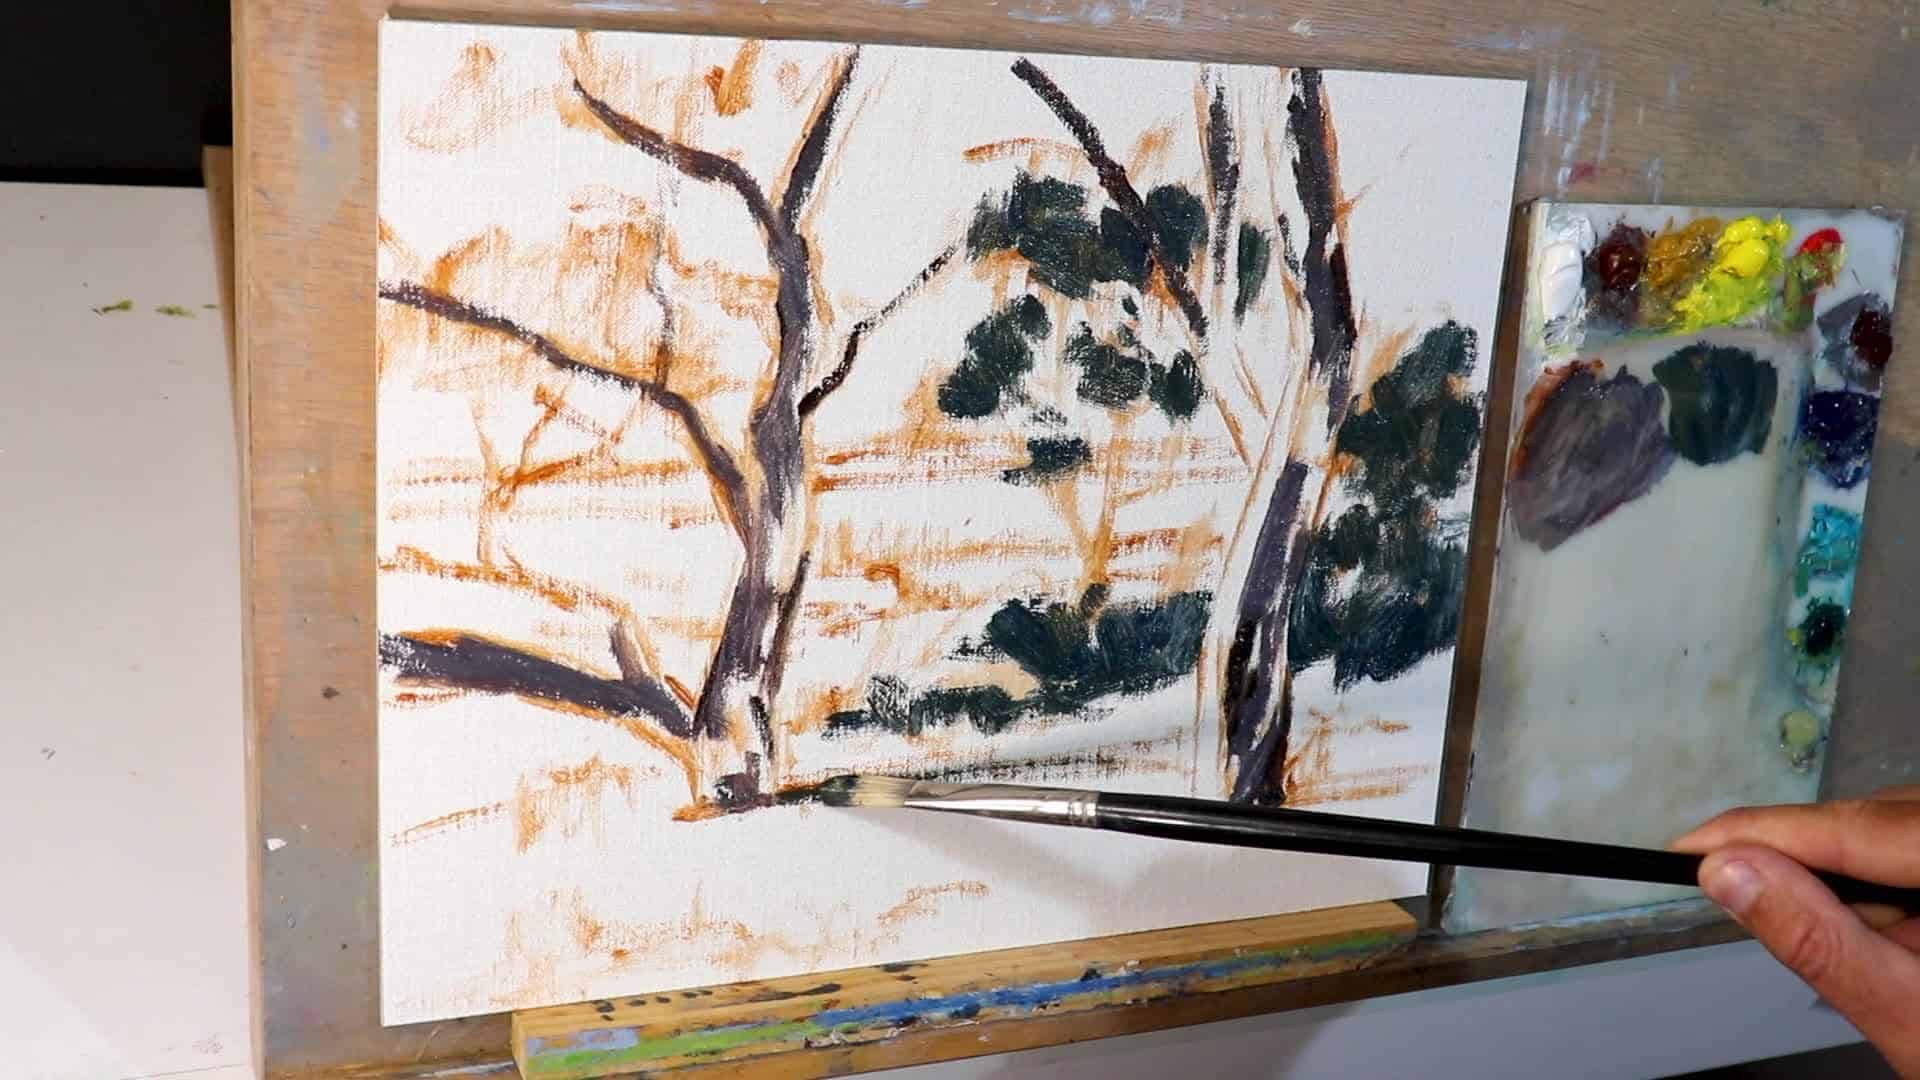
How to Do It:
- Mix a dark, low-chroma (muted) color for your bark base. For gum trees, I like ultramarine blue + yellow ochre + burnt sienna.
- Be bold! Lay in those shadow shapes on the trunk, especially on the side turned away from the sunlight.
- Don’t forget: Even in the darks, there are subtle color and temperature variations, gum trunks can have bluish, purplish, or greenish notes in shadow.
Pro Tips
- Don’t make your shadows dead black; keep some color in them.
- Use a big brush and focus on broad areas, not precise details.
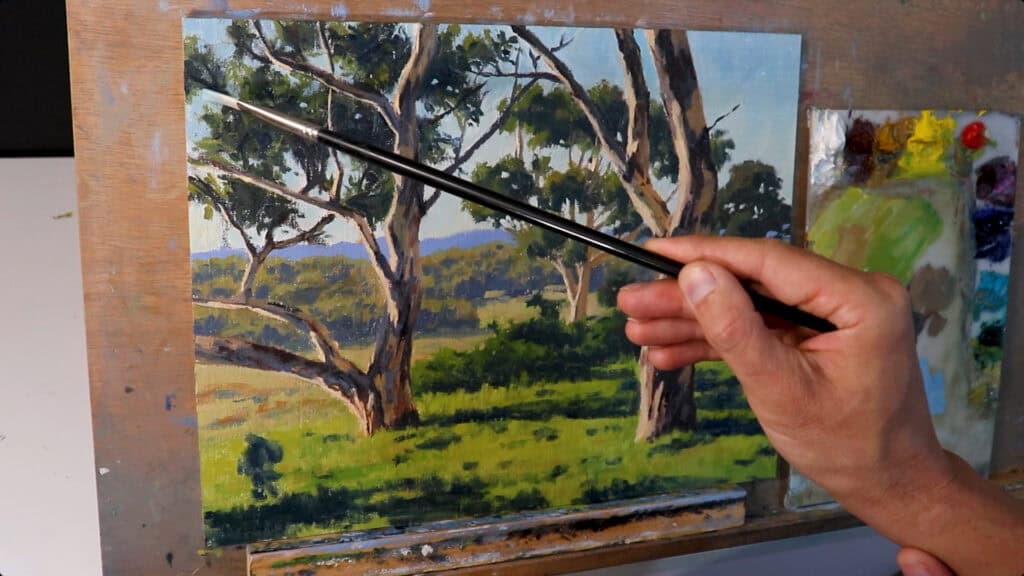
Step 2: Building Up Midtones & Lighting
Once the darks are blocked in, it’s time to establish the sense of light and structure, especially the way direct sunlight and reflected light interact on the trunk.
Mixing Tree Trunk Colors
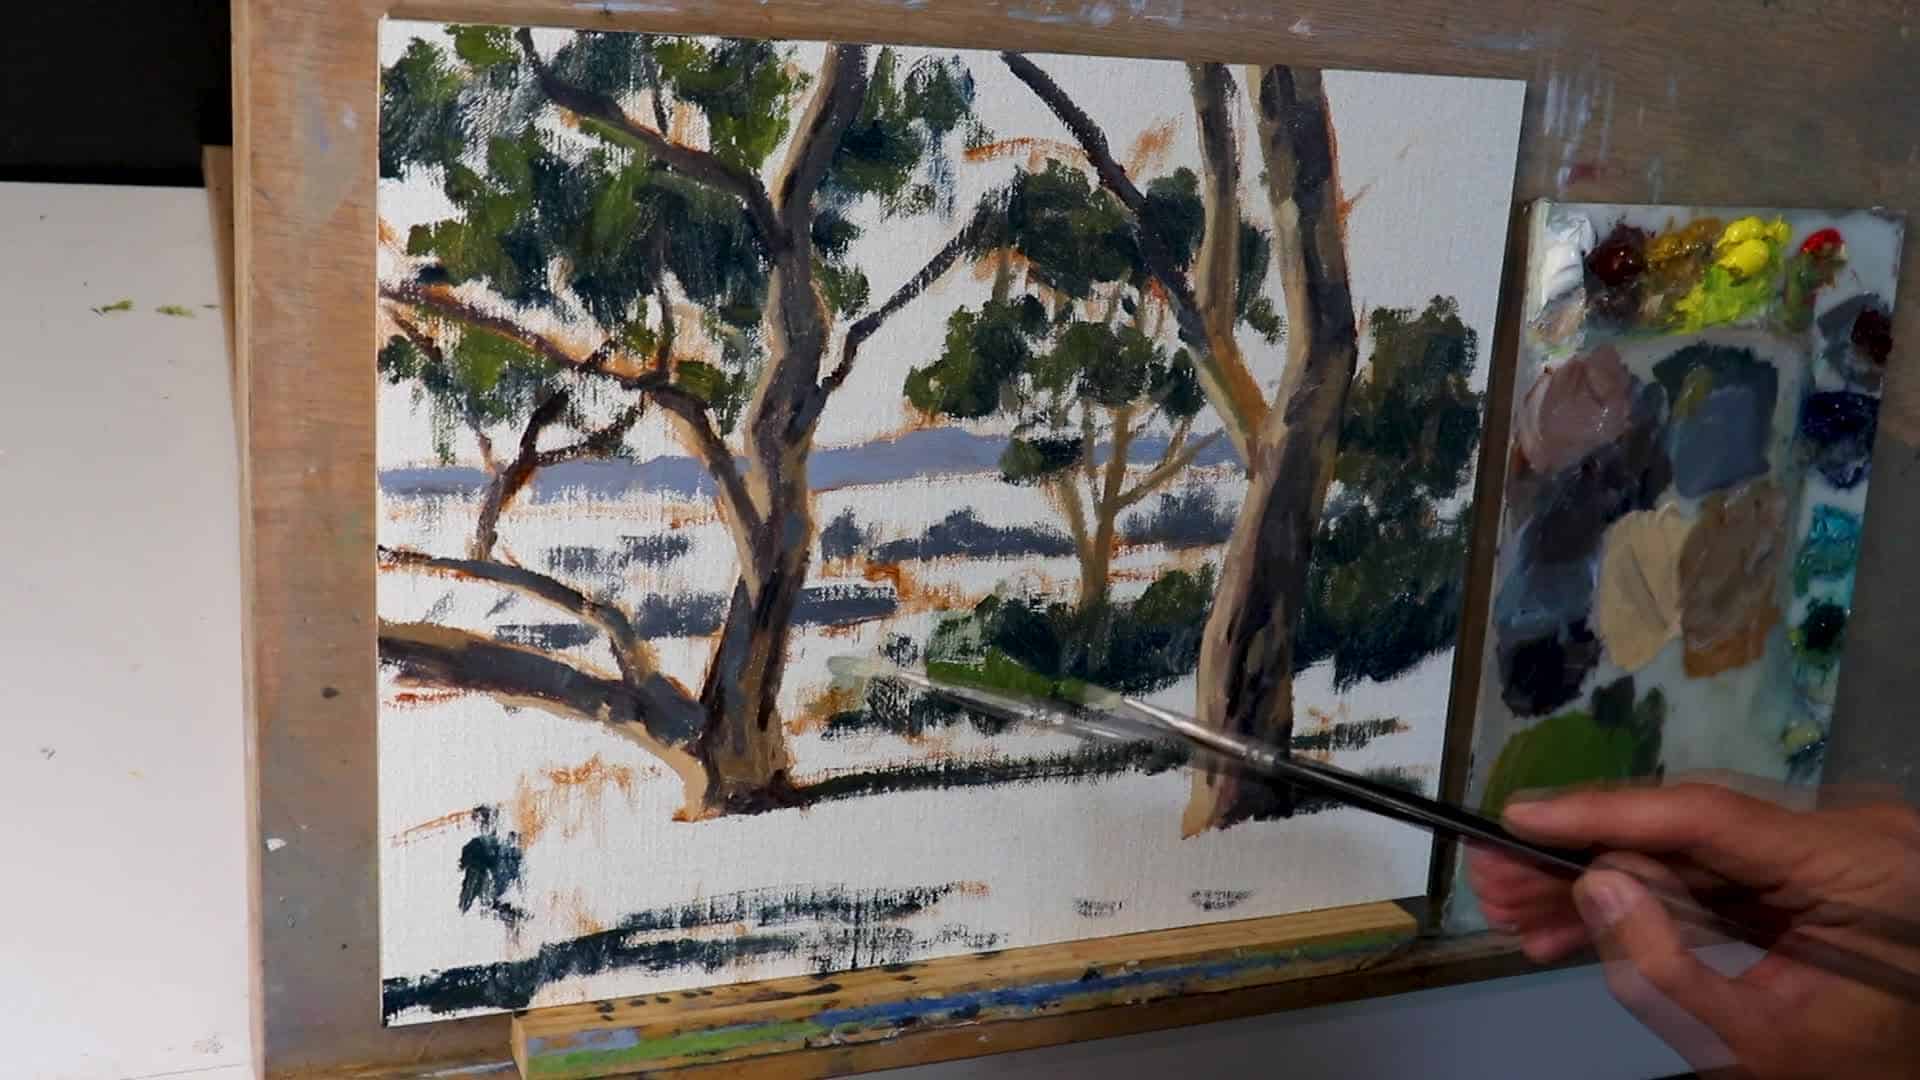
Gum trees, in particular, have a surprising range of colors in their bark—but most are fairly low-chroma (not too bright or saturated).
Typical Gum Tree Bark Mixes:
- Warm sunlit side: Yellow ochre + titanium white + touch of alizarin crimson
- Cool shadows: Ultramarine blue + yellow ochre + burnt sienna (+ cobalt teal for extra coolness)
- Neutralize if needed: Add a tiny bit of the color’s opposite (for example: a bit of red to green, or blue to orange)
Add Warmth, Avoid Mud
If your tree trunks look muddy, it’s probably from overmixing or using too many grays. Add a touch of warm color (like burnt sienna or yellow ochre) to sunlit areas for vibrancy.
Lighting the Cylinder
As you work over your darks, use these tricks:
- Gradually lighten your mixes toward the lit side of the trunk or branch.
- Keep your brushwork loose and follow the curve of the cylinder—this enhances the illusion of roundness.
- Introduce a “band” of darker value right where the shadow turns to light for that extra 3D pop.
- Save your brightest highlights for last! Don’t rush them.
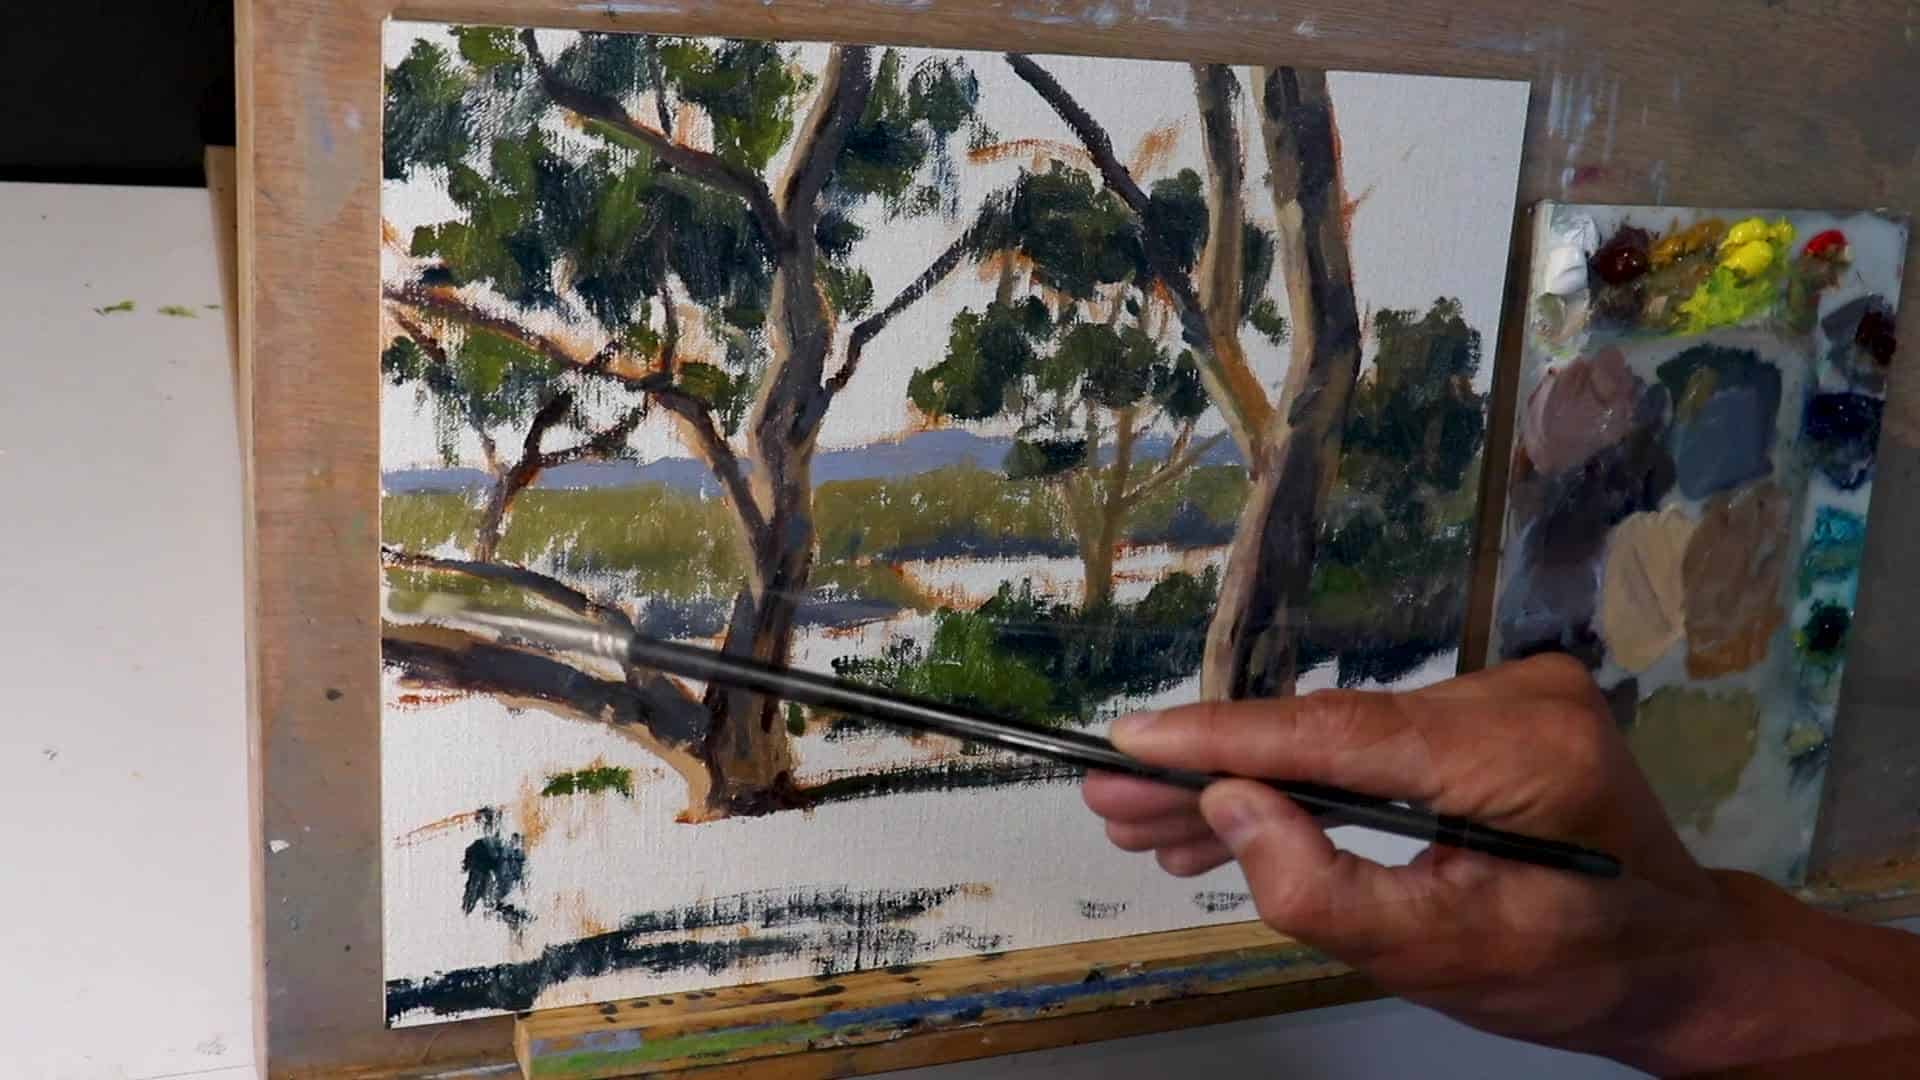
Step 3: Layering Details & Bark Texture
Now for the real fun: making bark look real, whether it’s smooth or deeply textured.
The Four-Step Bark Texture Method
- Block In Main Values
Already done in steps 1–2 with the darks and lights. - Layer Lighter Tones
Using a slightly lighter, warmer mix, loosely indicate strips or patterns in the bark. For gum trees, this means pale cream or yellowish marks in the sunlit parts. - Hint at Peeling Bark / Texture
Use a smaller flat brush or even a palette knife to drag on streaks, dabs, and broken bits. Don’t overdo it—imply, don’t describe, especially if the tree is mid- or background.- For Australian gum trees: focus on bold, peeling patches; leave small “edges” where light catches a curl of bark.
- For oaks/pines/etc, suggest cracks, ridges, or patches by gently zig-zagging your brush or dabbing in marks.
- Add Core Shadows & Reflected Light
Deepen the core shadow band, then add reflected light on the shadow side using a softer, paler tone (blue-violet, cool green, etc.).
“One of the things I really wanted to convey… was just that bark that’s peeling off that’s so characteristic of Australian gum trees.”
If you paint every detail, your painting will look stiff. Imply the roughness with smart, confident touches!
Restate Values for Drama
After building up bark texture, go back and restate (re-emphasize) your darkest darks in bark creases or under bark peels. This adds drama and brings those features forward.
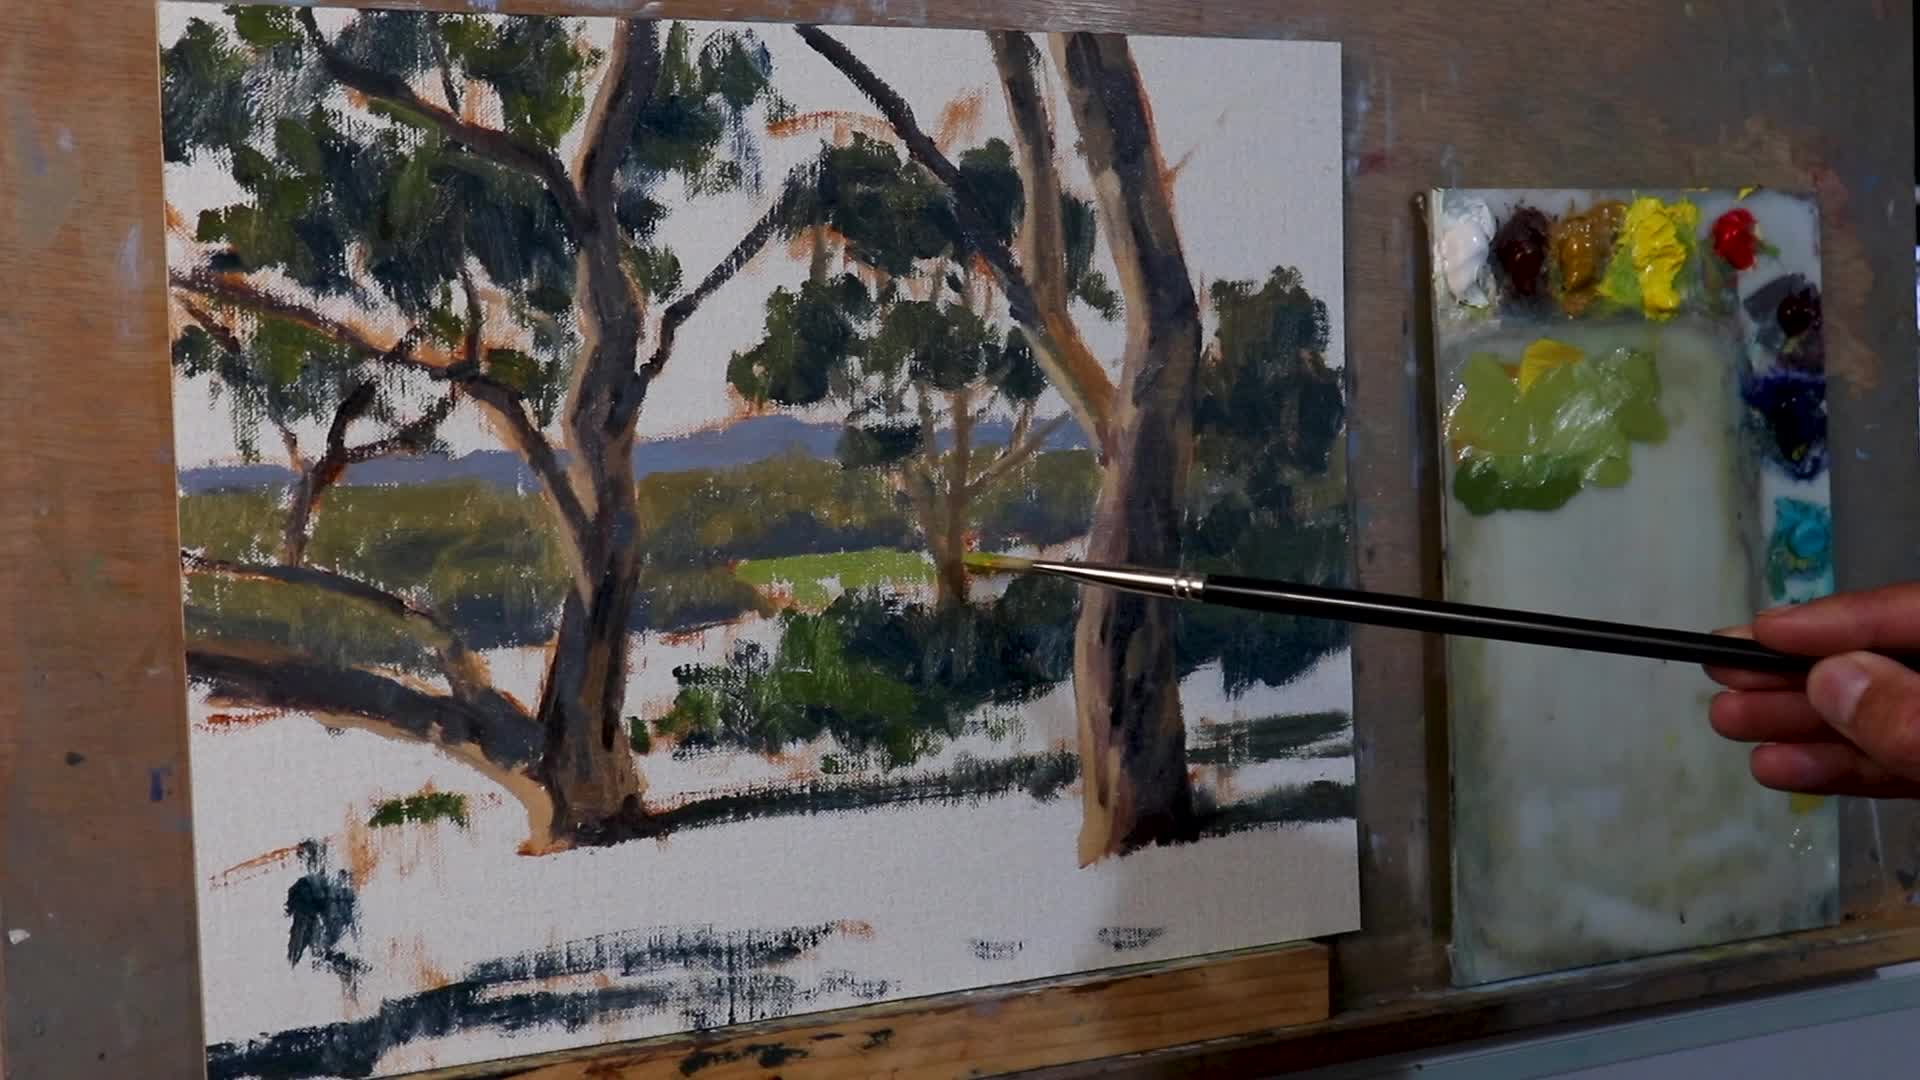
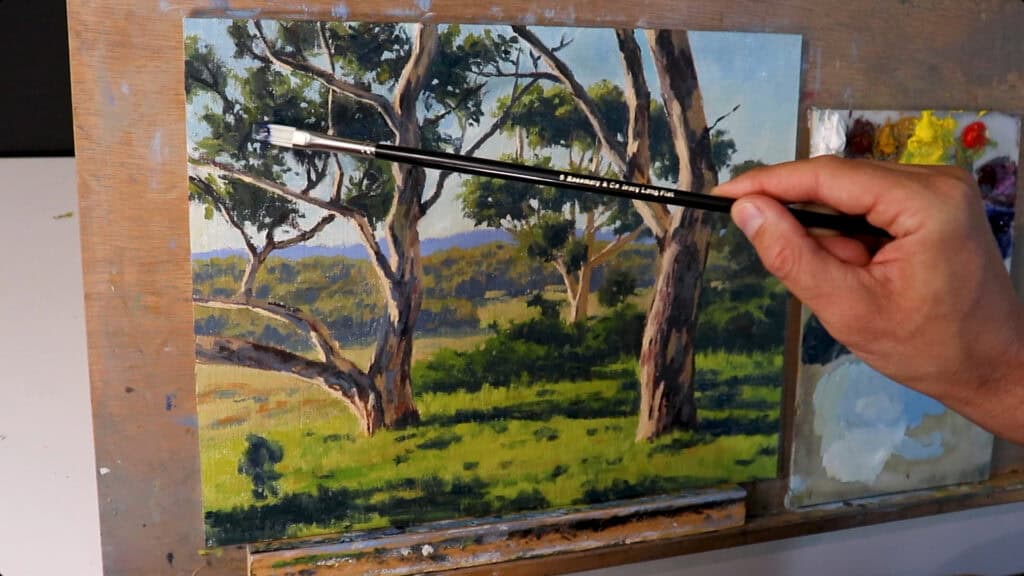
Step 4: Adding Highlights and Finishing Touches
All your work so far has set the stage for the finest and brightest highlights. This is where your trunks really pop and look lit by the sun.
How to Highlight:
- Mix your lightest trunk color (often: a lot of titanium white + yellow ochre, maybe a touch of alizarin for warmth)
- Use a smaller brush and gently place pure, clean highlights only on the sunniest, most forward-facing parts of the bark.
- Don’t outline—dab and drag. Keep them varied in shape!
- Less is more: Reserve these marks for just a few spots
Final Touches
- Add a lighter color to sunlit grass patches, especially in the midground.
- Optionally, restate deep shadows in the branches/canopy to add more punch.
- “Sky holes” (dabbing small bits of sky color in the tree canopy with intention) help make foliage more convincing and airy.
- Add tiny details last: baby saplings, bits of leaf litter, small twigs.
“I often find it a little difficult to know when to put my paint brushes down to finish a painting, so I was just fiddling around at this point, adding last little details here and there.”
Mixing Realistic Tree & Foliage Colors

Greens are notorious for getting out of control in landscape painting. Here’s how to keep yours harmonious and natural-looking:
How to Mix Natural Greens
- Start with a mix of ultramarine blue + yellow ochre/titanium white for muted blue-greens
- For punchier grass or foliage, add cadmium yellow medium and a bit of phthalo green
- To desaturate: Add a touch of burnt sienna, alizarin crimson, or even cadmium red.
This neutralizes the green and gives it an earthy, believable tone.
Foliage Tips
- Distant trees/foliage: Keep your colors lighter and less saturated.
- Foreground trees: Darker, more contrasty.
- Imply, don’t describe! Treat leaves as masses with hints of individual shapes.
Common Tree Painting Mistakes (And How to Fix Them!)
Let’s tackle some of the big mistakes artists make with trees:
1. Flat, Tube-Like Trunks
Fix: Remember the cylinder principle! Paint the bands of light, core shadow, transition shadow, and reflected light.
2. Muddy, Unconvincing Bark
Fix: Don’t mix too many colors at once. Layer colors simply, and keep your brush clean between steps.
3. Over-detailed Foliage
Fix: Block in masses. Then, suggest leaves with just a few lighter dabs and negative space (sky holes).
4. Overly Saturated Greens
Fix: Knock back your green with a bit of red (burnt sienna or alizarin). This applies to grass as well as tree leaves.
5. Ignoring Value Compression in Distance
Fix: Make your lights less light and your darks less dark in background trees.
Foreground = most contrast; background = lighter, airier, less saturated.
Bonus: Quick Tips for Looser, Livelier Landscapes
Do your tree landscapes look stiff or overworked? Try these:
Start Loose, Then Tighten Later
- Block in with the largest brushes you can handle for as long as possible
- Avoid details early on—just get shapes, values, and color temperature sorted
- Only move to detail brushes after the underpainting is dry or close to it
Define Shape with Negative Spaces
- Paint around branches/trunks with your sky color to “cut out” a clean edge
- Use this to tidy up fuzzy edges or badly-placed limbs
Sky Holes are Key!
- Use your sky mix (ultramarine blue, titanium white, cobalt teal, yellow ochre for that dusty Aussie-blue) to poke holes in the canopy.
- This brings a sense of air and depth to the foliage.
Wrapping Up: When is a Painting Finished?
This is the age-old question. Here’s what I do, and maybe it’ll help you too:
- Step back and squint—does the painting hang together? Do trunks look round? Is the light believable?
- Add only the finishing touches that will genuinely improve the painting, not just add fuss.
- If in doubt, put the painting aside for a day or two. Fresh eyes spot both mistakes and strengths fast.
- Remember: Expressiveness—not photographic detail—brings vitality!
“In general, I don’t like my paintings to be overly detailed because I still want to maintain an expressive and have vitality in my paintings from some loose brush marks. But I do like a little bit of detail, so it’s trying to find the balance between the two.”
Additional Resources
If you’re serious about painting better landscapes (and possibly even selling your work down the line), grab my free landscape painting blueprint. It details my entire painting process, from thumbnail sketch to finishing touches, and is designed to improve your painting skills fast.
Get it here:
Key Takeaways
- Painting great trees = understanding light + value + subtle color + confident texture
- Start with the darks—finish with the lightest lights
- Focus on cylindrical form, not just bark pattern
- Imply details, don’t spell them out
- Expressiveness and brush energy should trump photographic realism
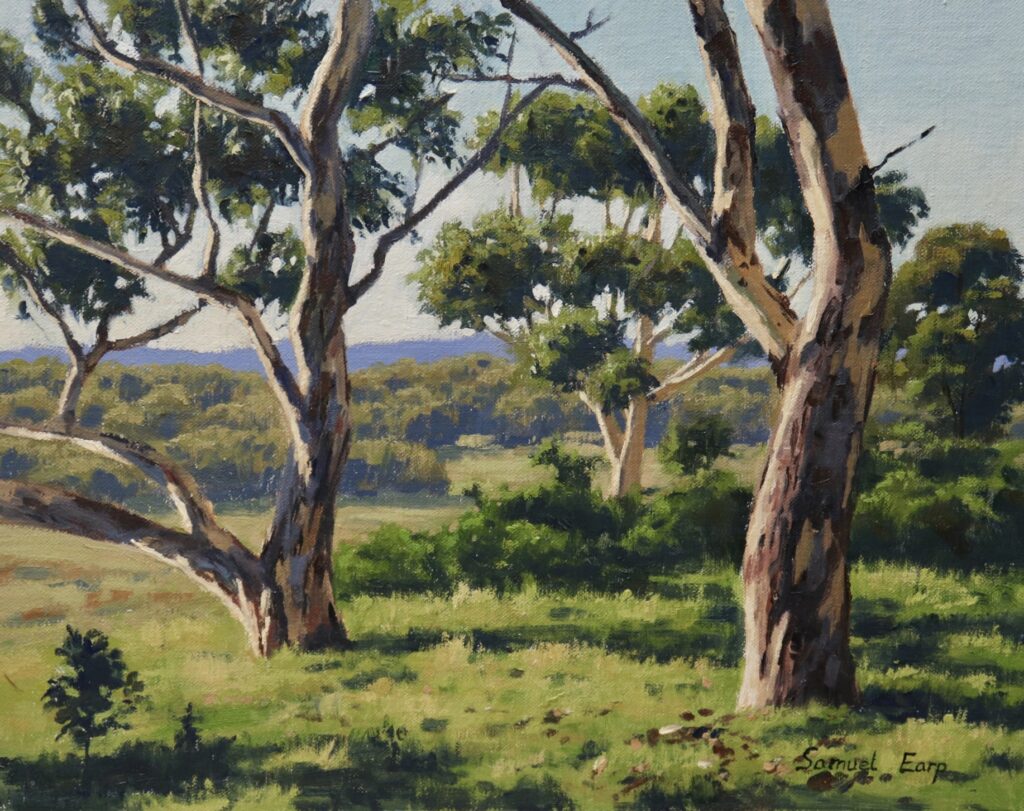
Final Thoughts
Painting convincing, lively gum trees (or any tree) is a journey—a bit of craft, a bit of art, and a lot of observation. Remember, don’t stress about perfection. Enjoy the process, experiment, and watch your tree trunks go from flat to fantastic with every painting!
Thanks for reading and happy painting! If you enjoyed this blog, drop a comment below, share your tree studies, or let me know which tree you struggle with most. Until next time—keep your brushes loose and your lights bright!
Related Posts
- How to Paint Lively Foliage in Oil or Acrylics
- Mixing Greens: The Secret to Natural Landscapes
- 5 Landscape Painting Mistakes Beginners Make (And Simple Ways to Fix Them)
“If you’d like to learn more about painting trees, then check out this video here. Thanks for watching and I shall see you in the next video.”
Frequently Asked Questions
Q: Can I use these techniques for acrylic or watercolor?
A: Absolutely! While some mixing and blending is unique to oils, the basic method (underpainting, building up lights, layering texture) works with any opaque medium. Just adjust for drying times!
Q: What if my tree trunks still look flat?
A: Focus on increasing the difference between shadow and light sides, and make sure your highlights are reserved for the sunniest bits only. Don’t forget that thin, dark “core shadow” line can work magic!
Q: How do I practice painting better trees?
A: Paint lots of small studies—just a trunk or branch at a time. Speed is less important than observation!
Happy painting!
