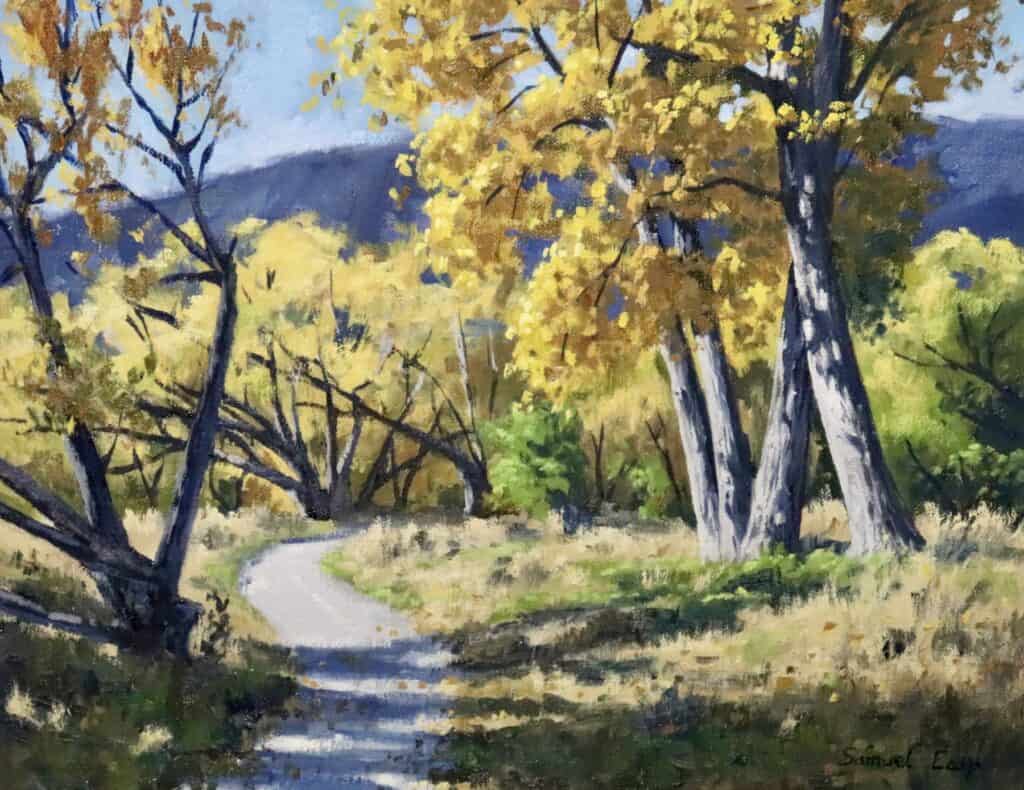
The majestic transformation of nature during autumn presents both an irresistible subject and a unique challenge for artists. As trees burst into their magnificent display of yellows, oranges, and reds, many painters find themselves struggling to capture this vibrancy on canvas, often ending up with muddy, lifeless colors instead of the radiant scenes they envision.
In this written painting tutorial, I will show you how to paint fall foliage in this painting that is inspired by autumn trees in Arrowtown, New Zealand.
Why Fall Colors Challenge Artists
Creating luminous fall foliage requires more than just mixing warm colors, it demands a careful understanding of color relationships and a methodical approach to layering paint. Throughout my years of painting autumn scenes, I’ve developed a reliable technique that consistently produces glowing, lifelike results.
In this step-by-step demonstration, I’ll share my complete process for painting autumn trees that maintain their brilliance. Whether you’re new to painting or have years of experience, these techniques will help you capture the magic of fall foliage in your work.
Getting Started
Essential Materials
Before we dive into the painting process, let’s look at the specific materials that will help us achieve those vibrant autumn colors. While you can adapt these recommendations to suit your preferences and what you have available, here’s what I use to achieve consistent results:
Canvas Selection
I work on an 11″ x 14″ linen canvas panels. The linen surface provides an ideal texture for building up layers of color, though a quality cotton canvas can also work well.
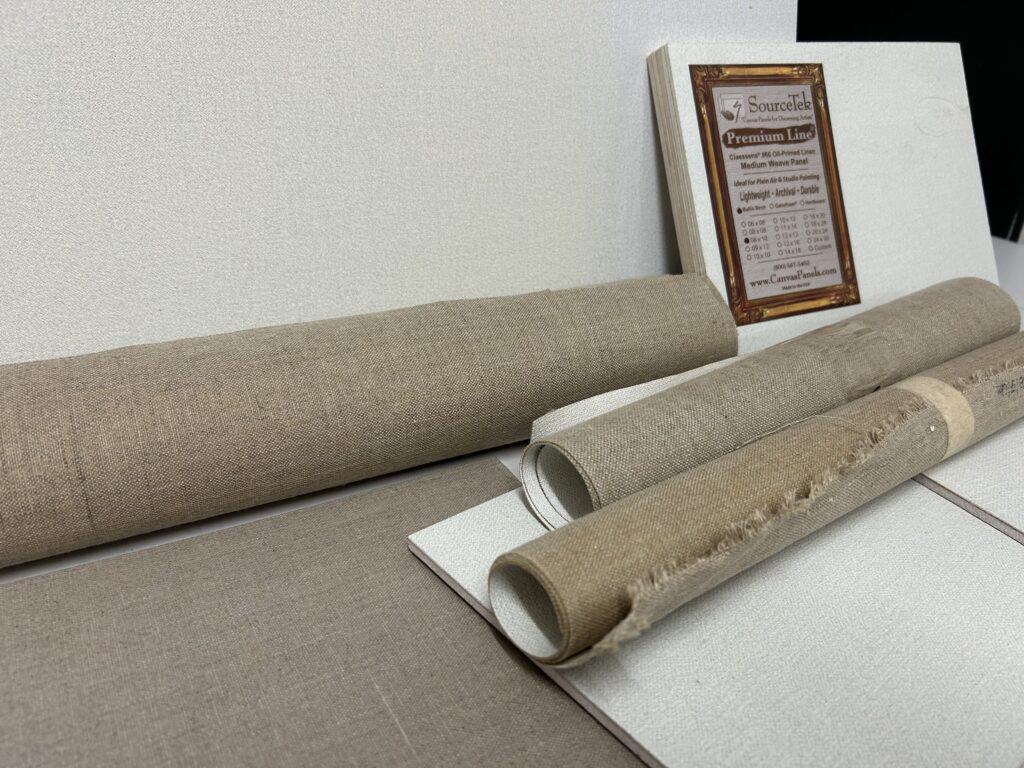
Paint Choice
I rely on Blue Ridge oil paints for their intense pigmentation and consistent performance. Their color range is particularly well-suited for capturing the vivid hues of fall foliage.
Colours Used
- Titanium white
- Burnt sienna
- Yellow ochre
- Cadmium yellow medium
- Cadmium red light
- Alizarin crimson
- Ultramarine blue
- Cobalt teal
- Phthalo green
Brush Selection
A thoughtful combination of brushes allows for both broad strokes and precise detail work:
- A number 6 bristle flat brush for larger areas and initial blocking
- Several synthetic flat brushes for controlled color application
- A 3/8-inch bristle dagger brush for creating fine details and texture
Buy Prints of This Painting
The Painting Process – Step 1: Creating Your Foundation
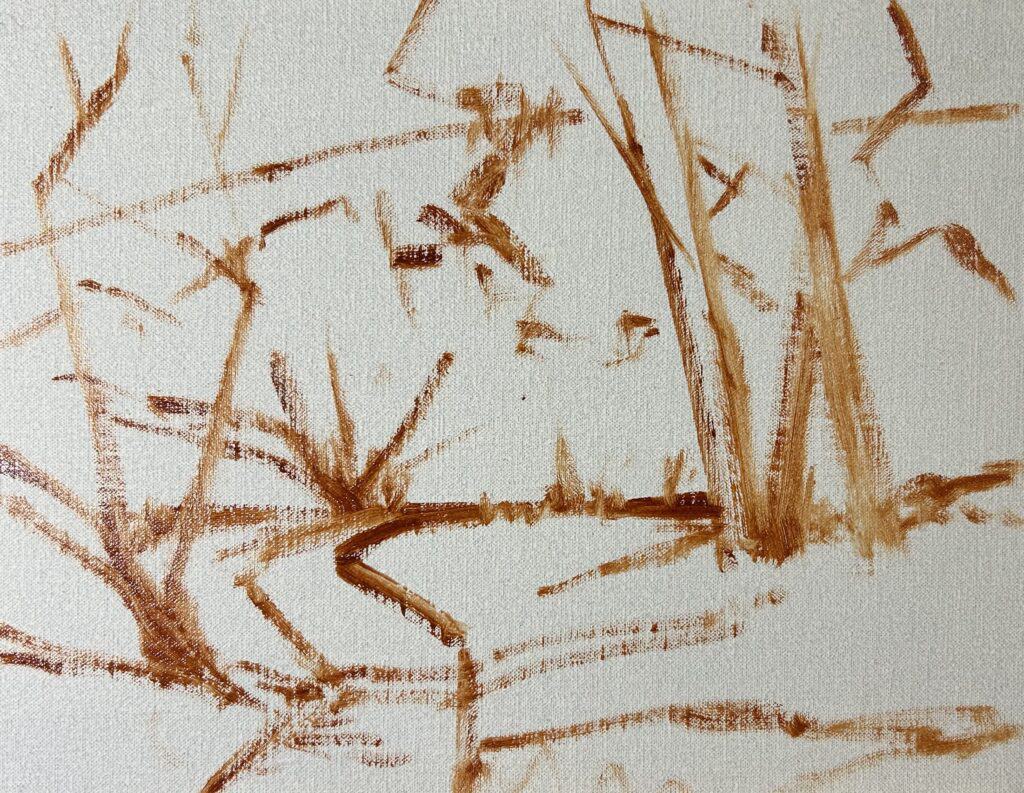
Sketching your composition on the canvas
I begin by establishing the basic composition using a mixture of burnt sienna and pale drying gel medium. This combination will complement our autumn colors while providing enough transparency to guide our subsequent layers.
Understanding Value Structure
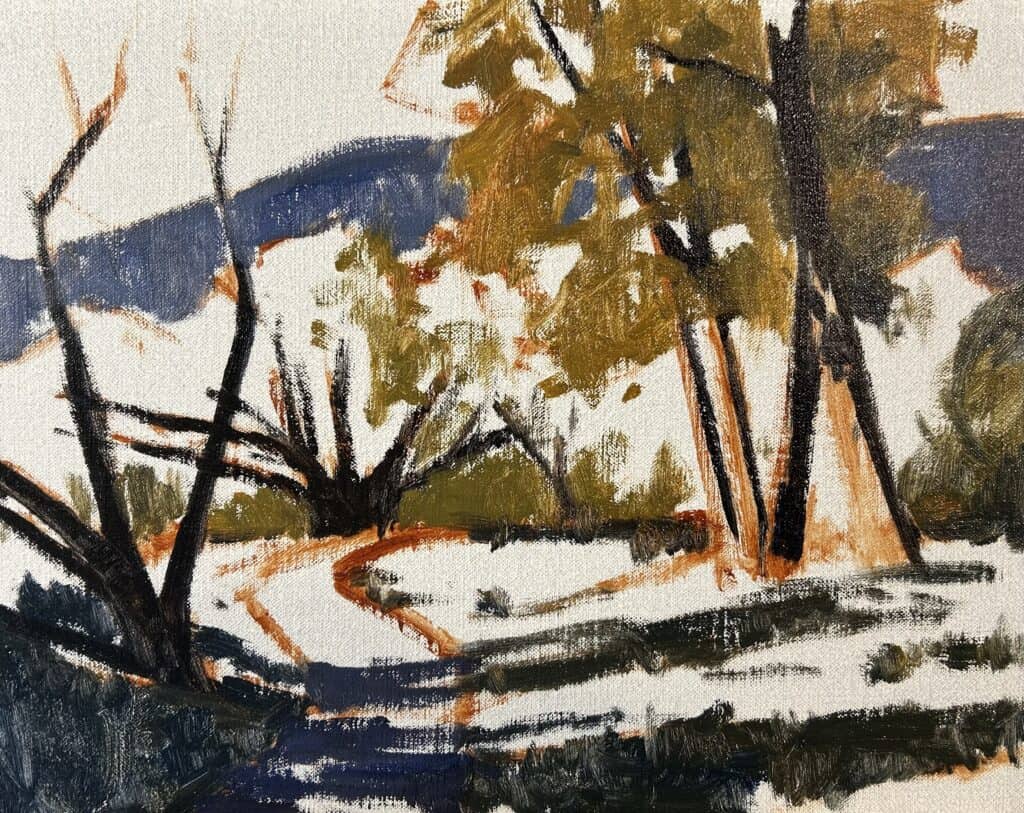
Before we explore the vibrant fall colors, it’s crucial to establish a solid value structure, the backbone of any successful painting. Value, which refers to how light or dark a color appears, creates the foundational drama and depth in your autumn scene.
Establishing Dark Values
I start with the darkest elements:
- Tree trunks
- Main branches
- Shadow areas within the foliage
For these dark values, I use a rich mixture of:
- Ultramarine blue
- Burnt sienna
- A touch of alizarin crimson
This combination creates deep, neutral darks that avoid appearing flat or artificial. By placing these darker values first, particularly in the foreground elements, we begin to create the depth that will make our autumn colors pop.
Step 2: Mastering Shadow Work
The key to vibrant autumn colors lies, surprisingly, in how we handle our shadows. Well-crafted shadows create the contrast that allows those bright fall colors to sing rather than becoming muddy.
Tree Structure Shadows
For the structural elements of our scene, I create rich, deep shadows using:
- Ultramarine blue
- Burnt sienna
- Alizarin crimson
This combination produces natural-looking shadows that maintain warmth while providing depth.
Foliage Shadow Technique
Autumn leaves present a unique challenge; their shadows must remain relatively light while providing definition. To achieve this balance, I use a careful mixture of:
- Yellow ochre (base)
- Alizarin crimson (warmth)
- Ultramarine blue (for desaturation)
The yellow ochre keeps the shadows appropriately light for fall foliage, while the alizarin adds warmth. The ultramarine blue is crucial, it helps desaturate the mixture just enough to create convincing shadows without dampening the overall vibrancy of your scene.
Pro Tip
When mixing these shadow colors, err on the side of lighter values. It’s easier to deepen shadows later than to lighten them once they’re too dark.
Step 3: Adding Light and Color
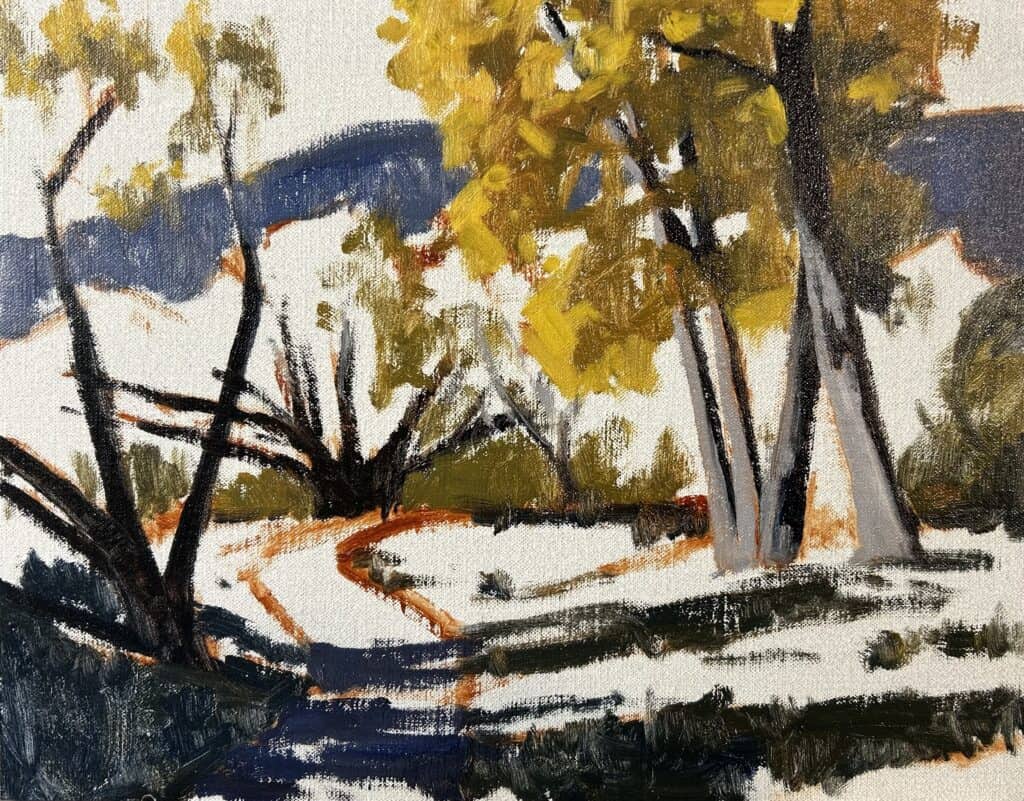
Creating Luminous Foliage
To capture that magical autumn glow, I create a warm, luminous mixture for the sunlit leaves:
- Yellow ochre (base)
- Cadmium yellow medium (brilliance)
- Cadmium red light (warmth)
- Titanium white (luminosity)
This combination creates that characteristic golden glow that makes autumn foliage appear to be lit from within.
Scene Inspiration
My reference for this demonstration comes from Arrowtown, New Zealand – a location renowned for its spectacular autumn display of willows and poplars. These trees provide an excellent study in how fall colors interact with light.
Step 4: Building the Basic Structure
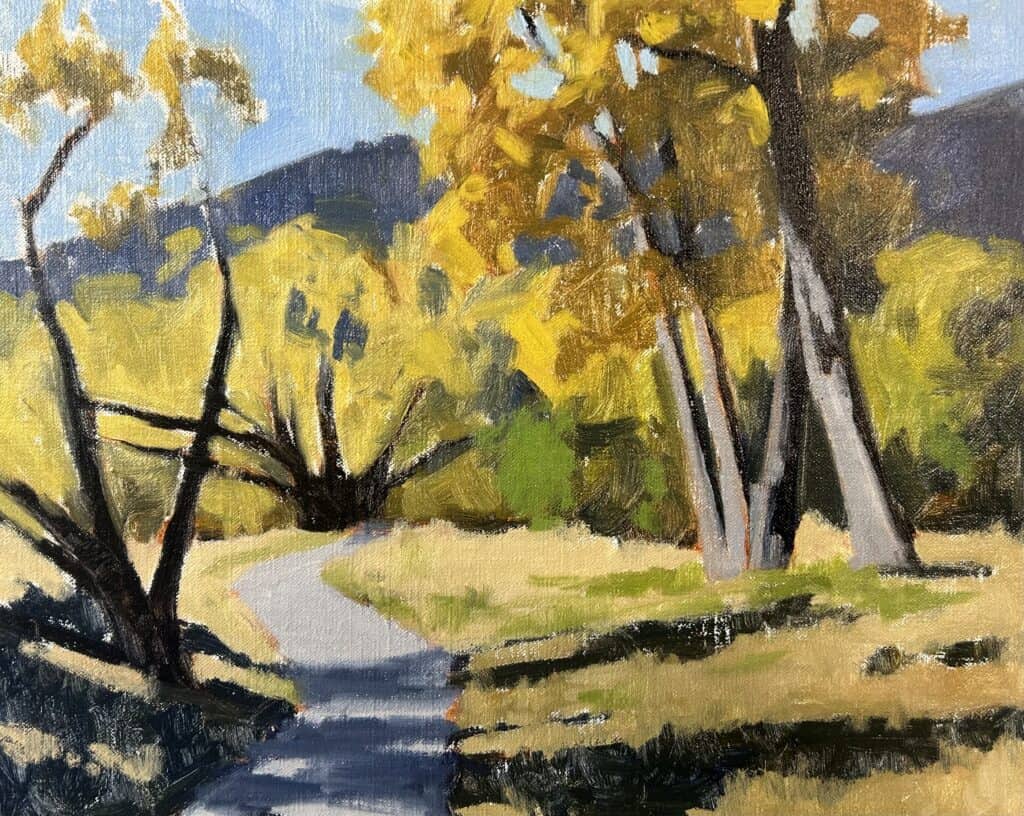
Sky Treatment
For the backdrop, I create a tranquil autumn sky using:
- Ultramarine blue
- Cobalt teal
- Titanium white
This cool, serene mixture provides the perfect counterpoint to our warm autumn colors.
Initial Blocking
At this stage, focus on establishing the major shapes and color relationships. Work broadly, avoiding the temptation to add detail:
- Block in large masses of foliage
- Establish basic tree forms
- Define major light and shadow patterns
Remember, these initial blocks of color will serve as the foundation for our more detailed work to come.
Step 5: Ground and Pathways
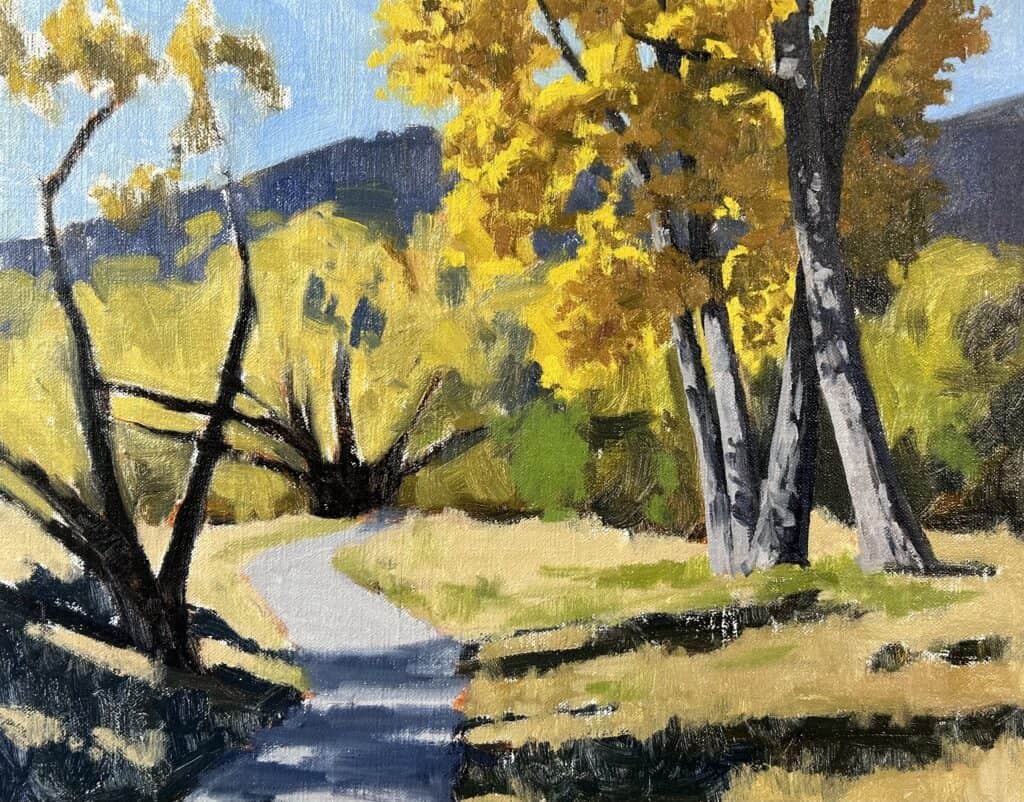
Creating Natural Pathways
The foreground pathway requires careful attention to value relationships. My mixture includes:
- Ultramarine blue
- Burnt sienna
- Titanium white
- Alizarin crimson
Work from darker values in shadowed areas to lighter values in sunlit sections, maintaining the natural flow of light through your scene.
Grass and Ground Cover
For realistic autumn grassland, I use a carefully balanced mixture:
- Yellow ochre (base)
- Alizarin crimson (warmth)
- Titanium white (lightness)
- Ultramarine blue (tone)
- Cadmium red light (to naturalize greens)
The addition of cadmium red light is crucial here; it prevents the greens from becoming artificially vibrant and helps them settle naturally into our autumn scene.
Step 6: Refinement and Details
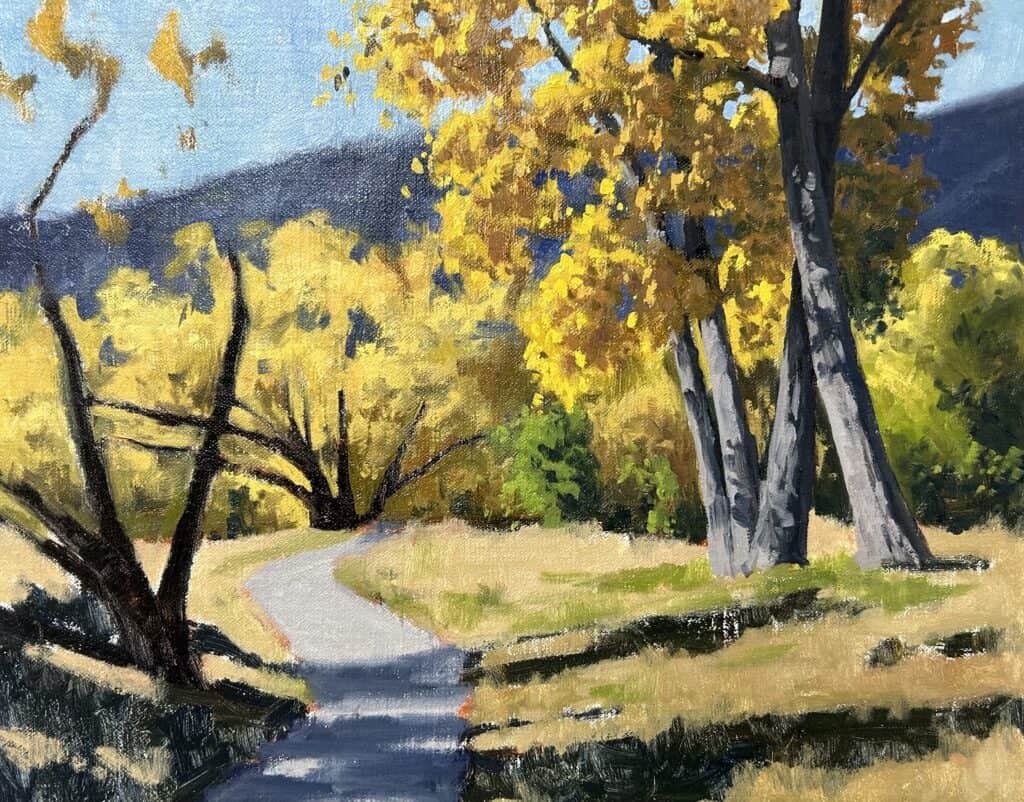
Adding Depth
With our basic structure established, I focus on refining the image using synthetic brushes for precision. This stage involves:
- Introducing subtle shadow variations within tree canopies
- Building up layers of foliage without painting individual leaves
- Strengthening the contrast between light and shadow areas
Final Details: Trees
For the distinctive characteristics of poplars and willows:
- Define edges and major branches
- Create realistic bark and branch structure using:
- Ultramarine blue
- Burnt sienna
- Alizarin crimson
- Titanium white for highlights and value adjustments
Step 7: Creating Unity and Harmony
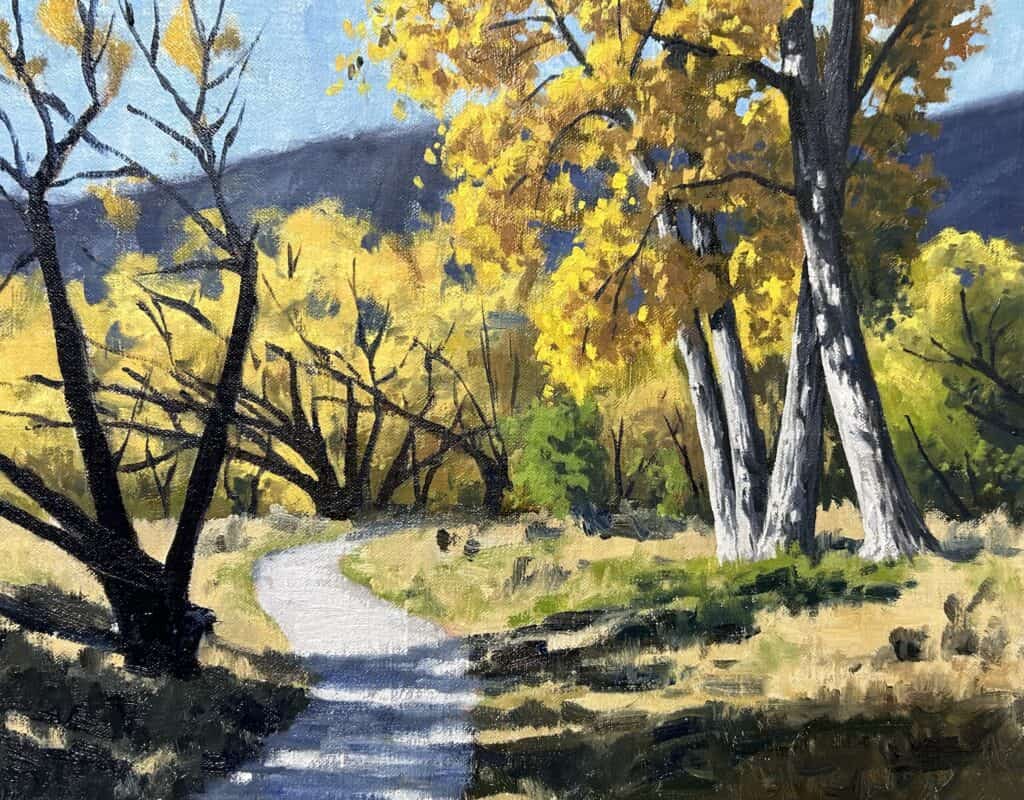
Color Harmony
The secret to a cohesive autumn scene lies in maintaining consistency throughout your palette. Even as you move between trees, grass, and pathways, use the same core color mixtures with subtle variations. This creates a unified feeling across your composition while still allowing for natural variety.
Strategic Highlights
Reserve your brightest highlights for the final stages. These luminous touches, particularly on sunlit leaves, will have maximum impact when added to an already balanced composition.
Final Stage: Refinement

Adding the Last Details
In the final painting session, focus on those elements that bring the scene to life:
- Scattered fallen leaves using yellow ochre and burnt sienna mixtures
- Delicate grass textures
- Mountain silhouette adjustments
- Subtle transitions between areas
Conclusion
Creating vibrant autumn scenes doesn’t require secret formulas – it’s about understanding color relationships, value structure, and working methodically. Success comes from:
- Building a solid foundation with proper values
- Understanding shadow and light relationships
- Maintaining color harmony throughout
- Adding details progressively
- Being patient with the process
The true joy of painting autumn scenes lies in capturing nature’s most spectacular display while developing your own artistic voice.
