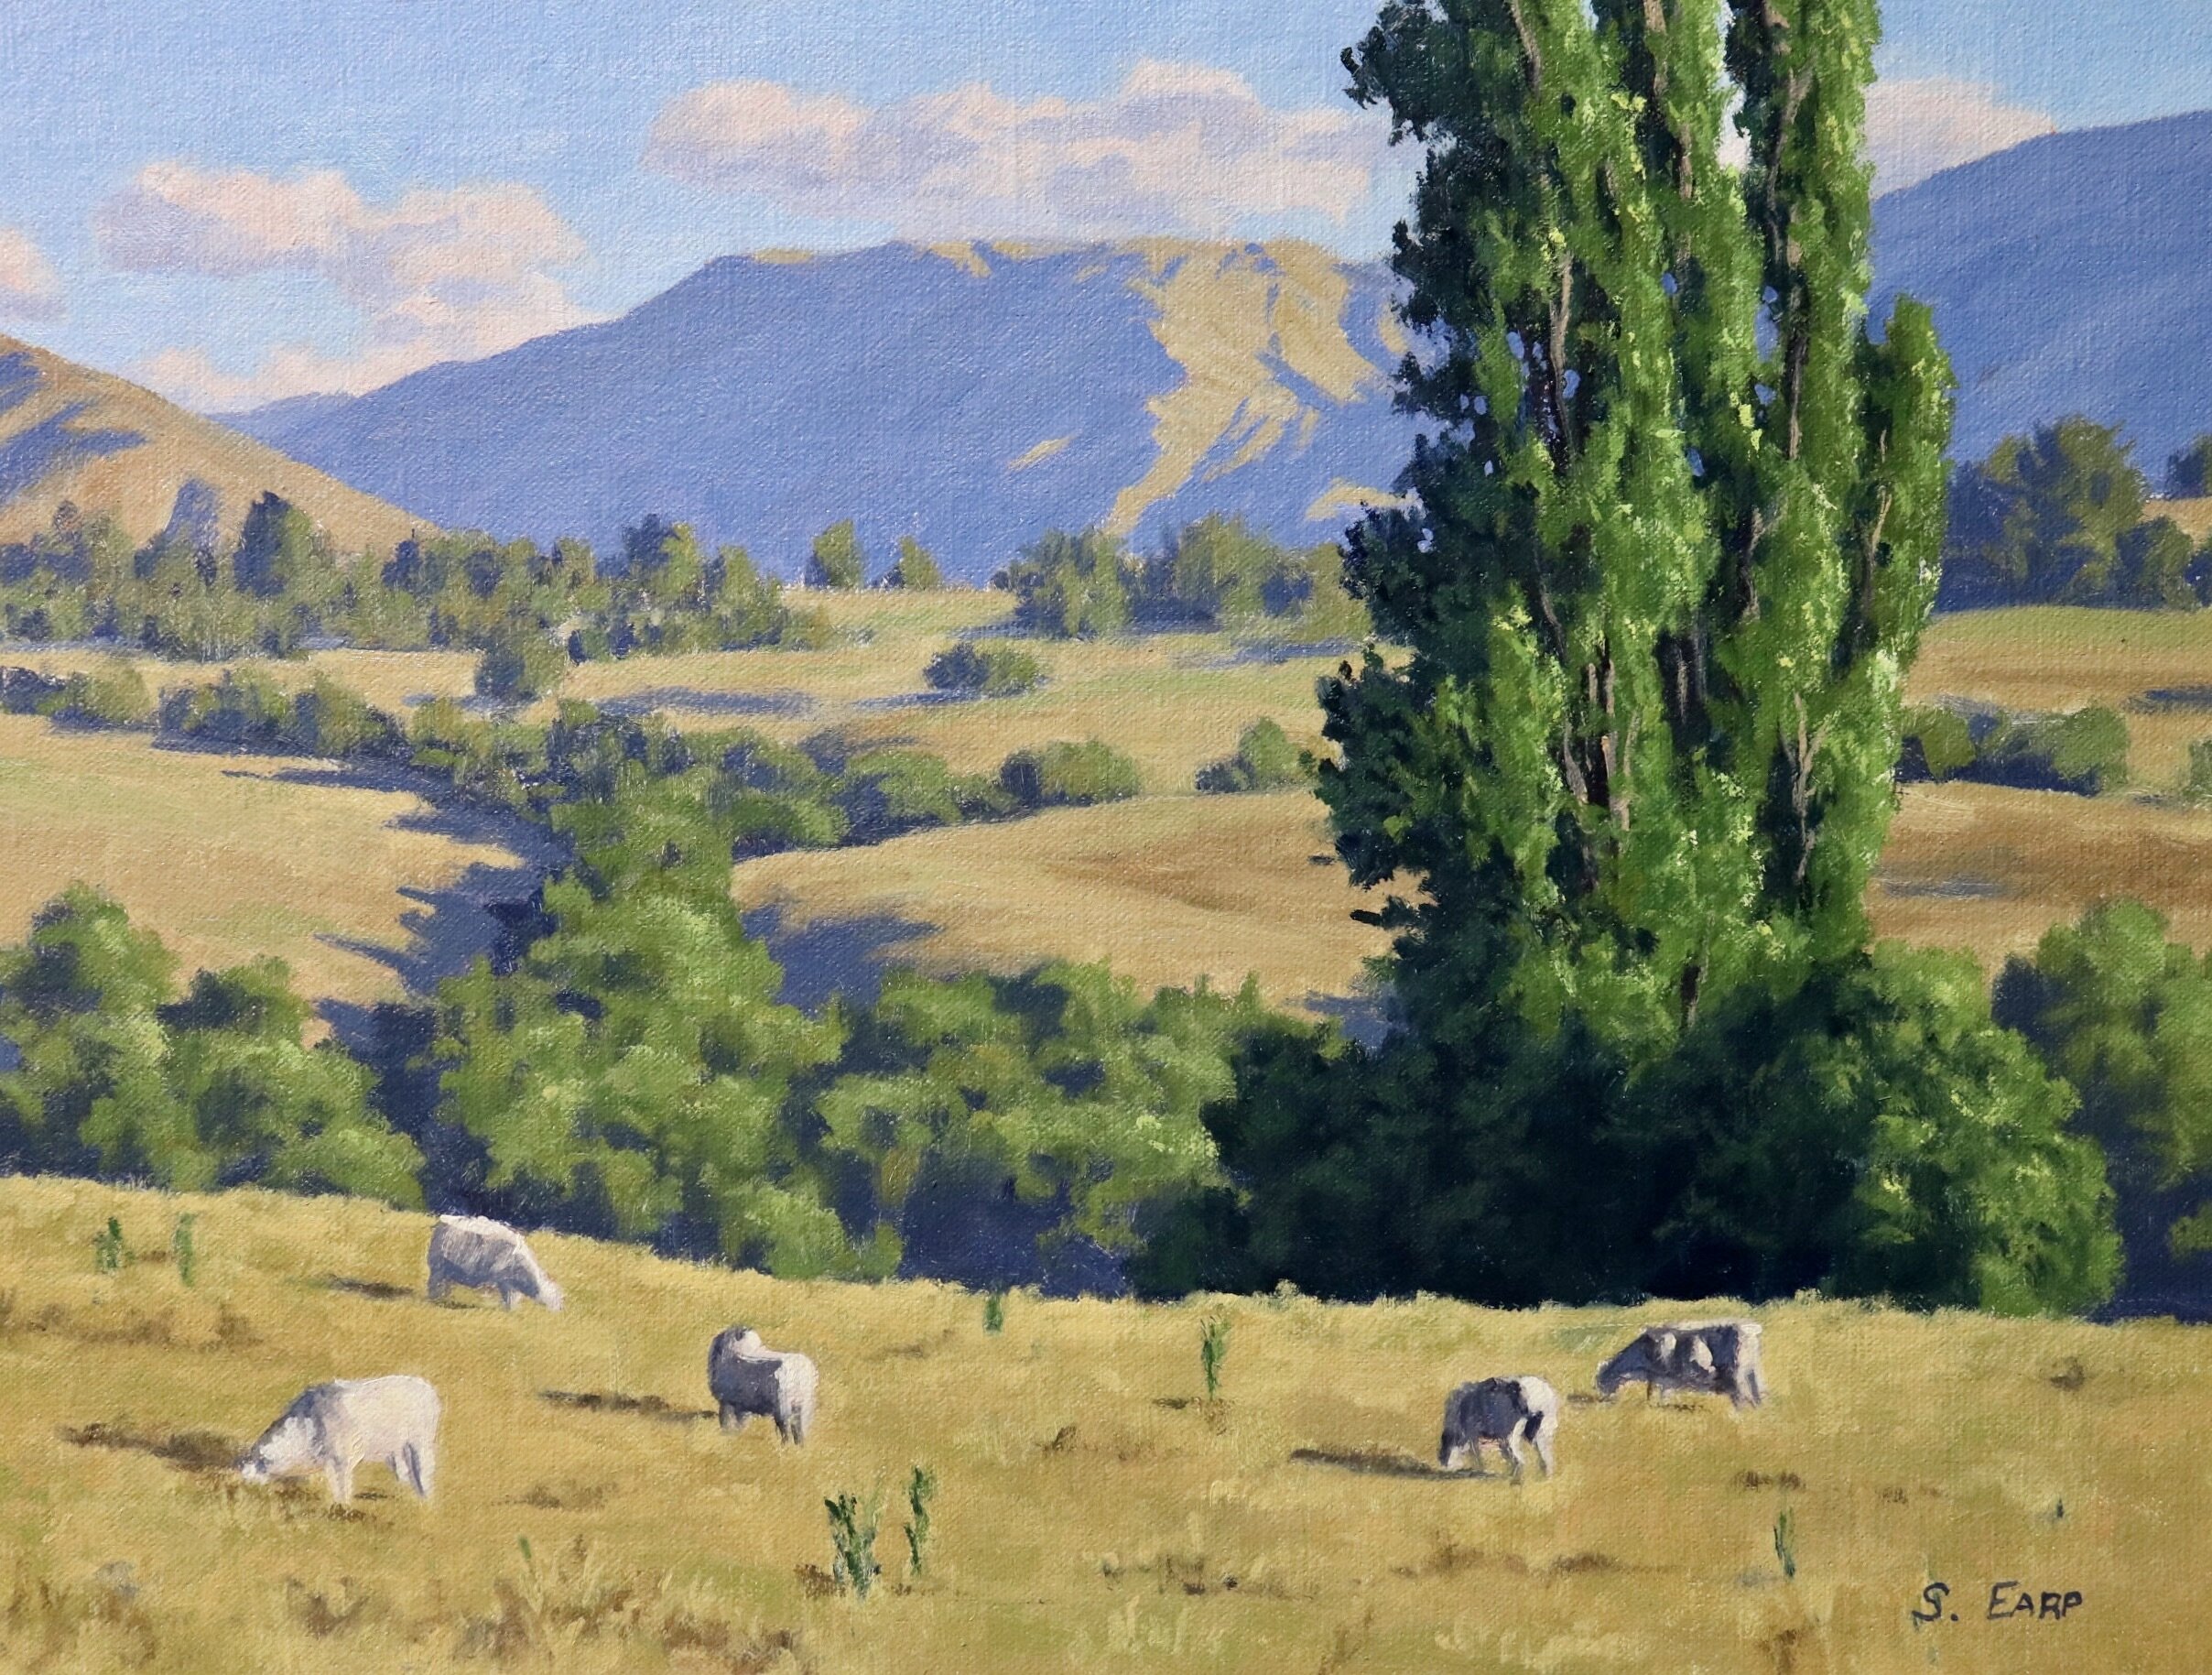
In this painting tutorial, I show you how to paint a landscape as featured in the image above. This painting is inspired by a rural area in southern New Zealand. This painting features a rural landscape at the end of summer where the fields and hills are dry, the grass is yellow and the trees are casting shadows in the soft evening light. All good ingredients for a landscape painting.
I painted this artwork in oils but you could also use acrylics instead.
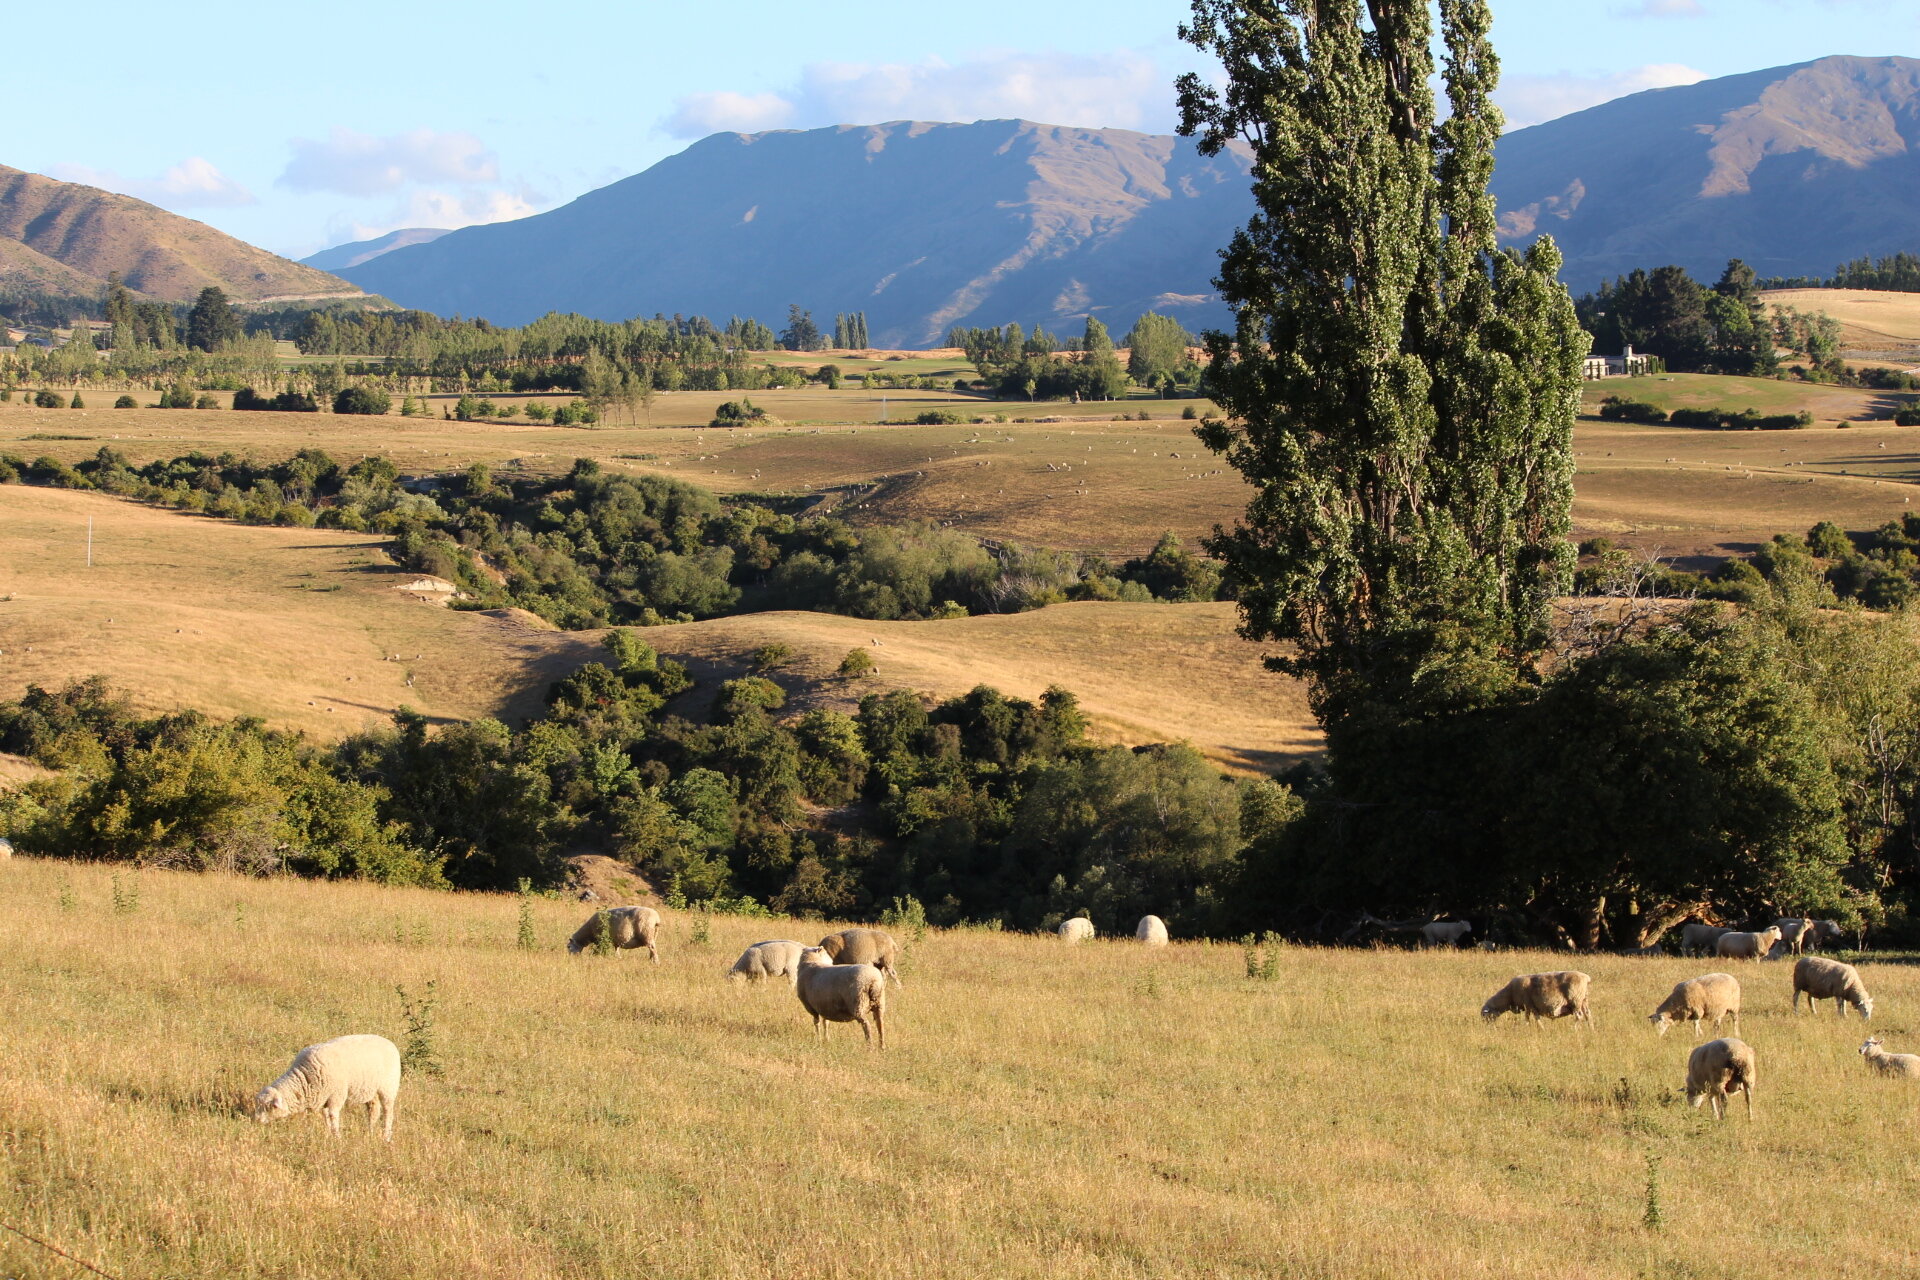
Reference Photo
Here is a reference photo I took and used in this painting. Please feel free to use or copy this photo if you would like to have a go at painting this artwork.

Colours
I painted this artwork using oil paint and the colours I used in this painting are as follows:
- Titanium white
- Burnt sienna
- Yellow oxide (you can also use yellow ochre instead)
- Cadmium yellow
- Cadmium orange
- Quinacridone crimson (you can also use alizarin crimson instead)
- Ultramarine blue
- Phthalo green
Brushes
Here is a list of the brushes I used in this painting:
- No.5 flat
- No.3 flat
- No.2 flat
- No.3 filbert
- No.1 round
- No.0 round
Composition

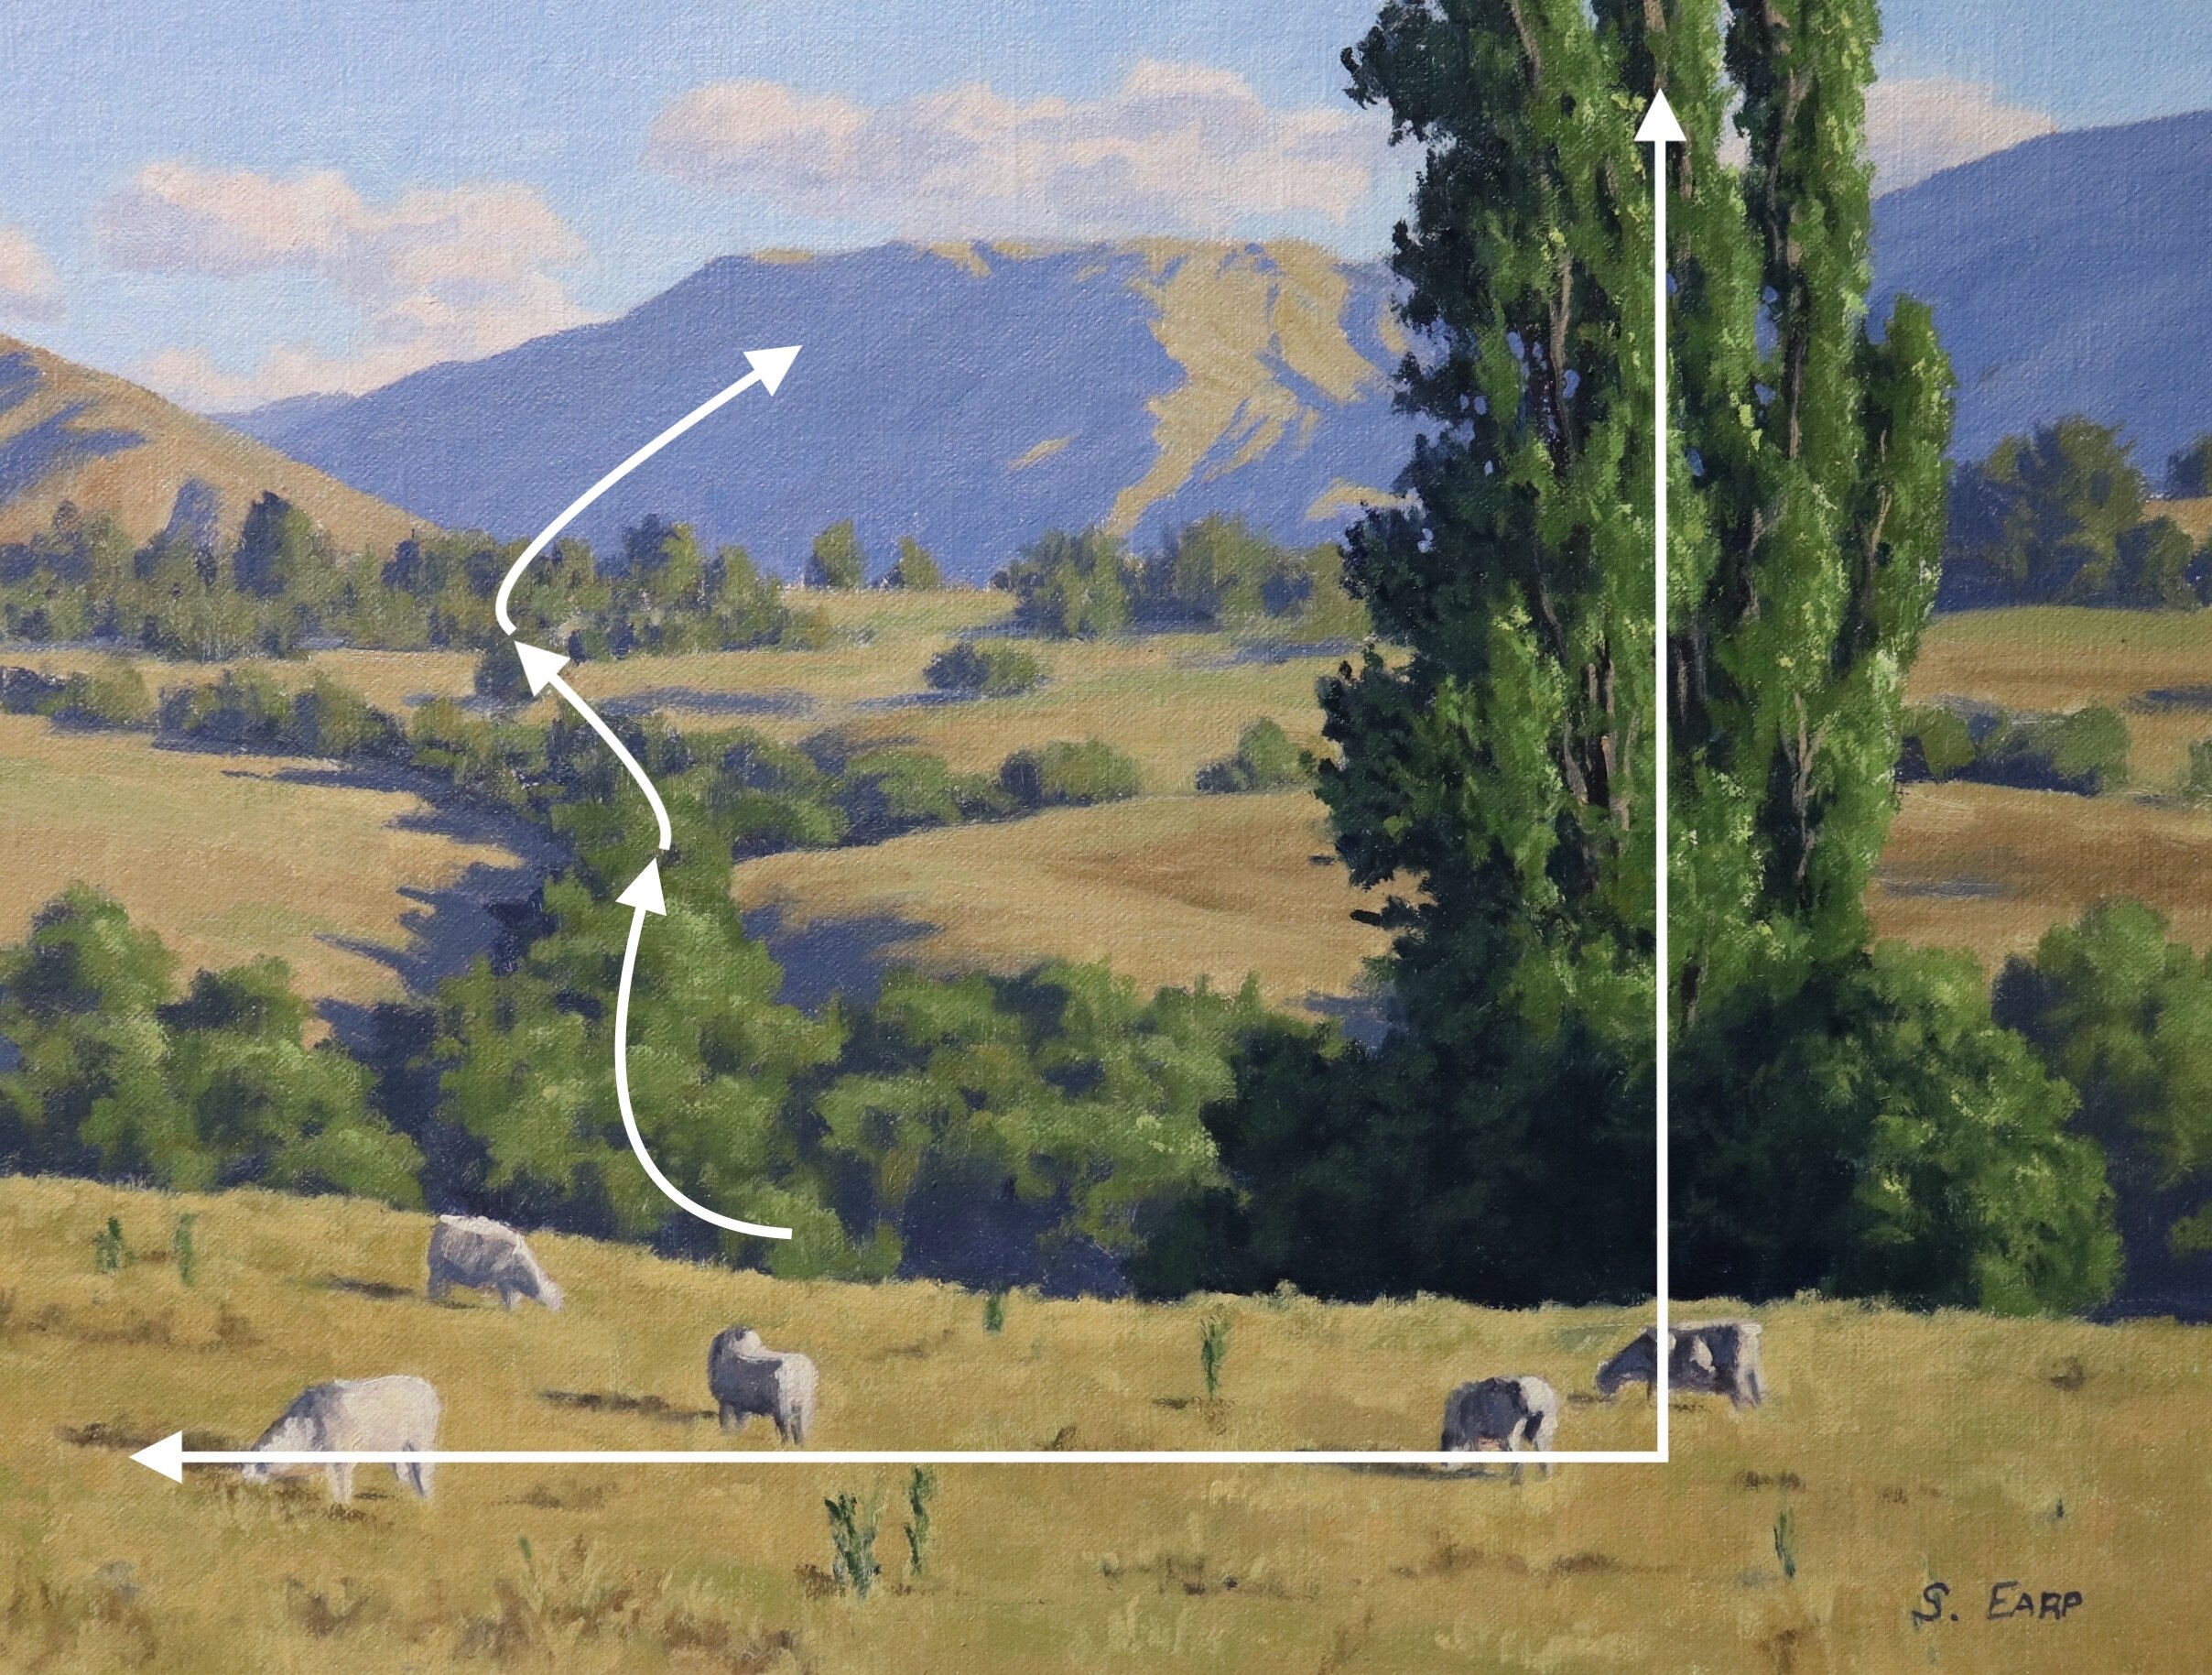
The design for this landscape painting follows an ‘ell’ or ‘rectangular’ composition. This is where the poplar tree in the foreground is providing an anchor in the composition to form an ‘L’ shape. The stand of trees in the mid ground that bound the fields are providing rhythm in the landscape, subtly leading the eye to the mountains in the distance.
Pencil Sketch

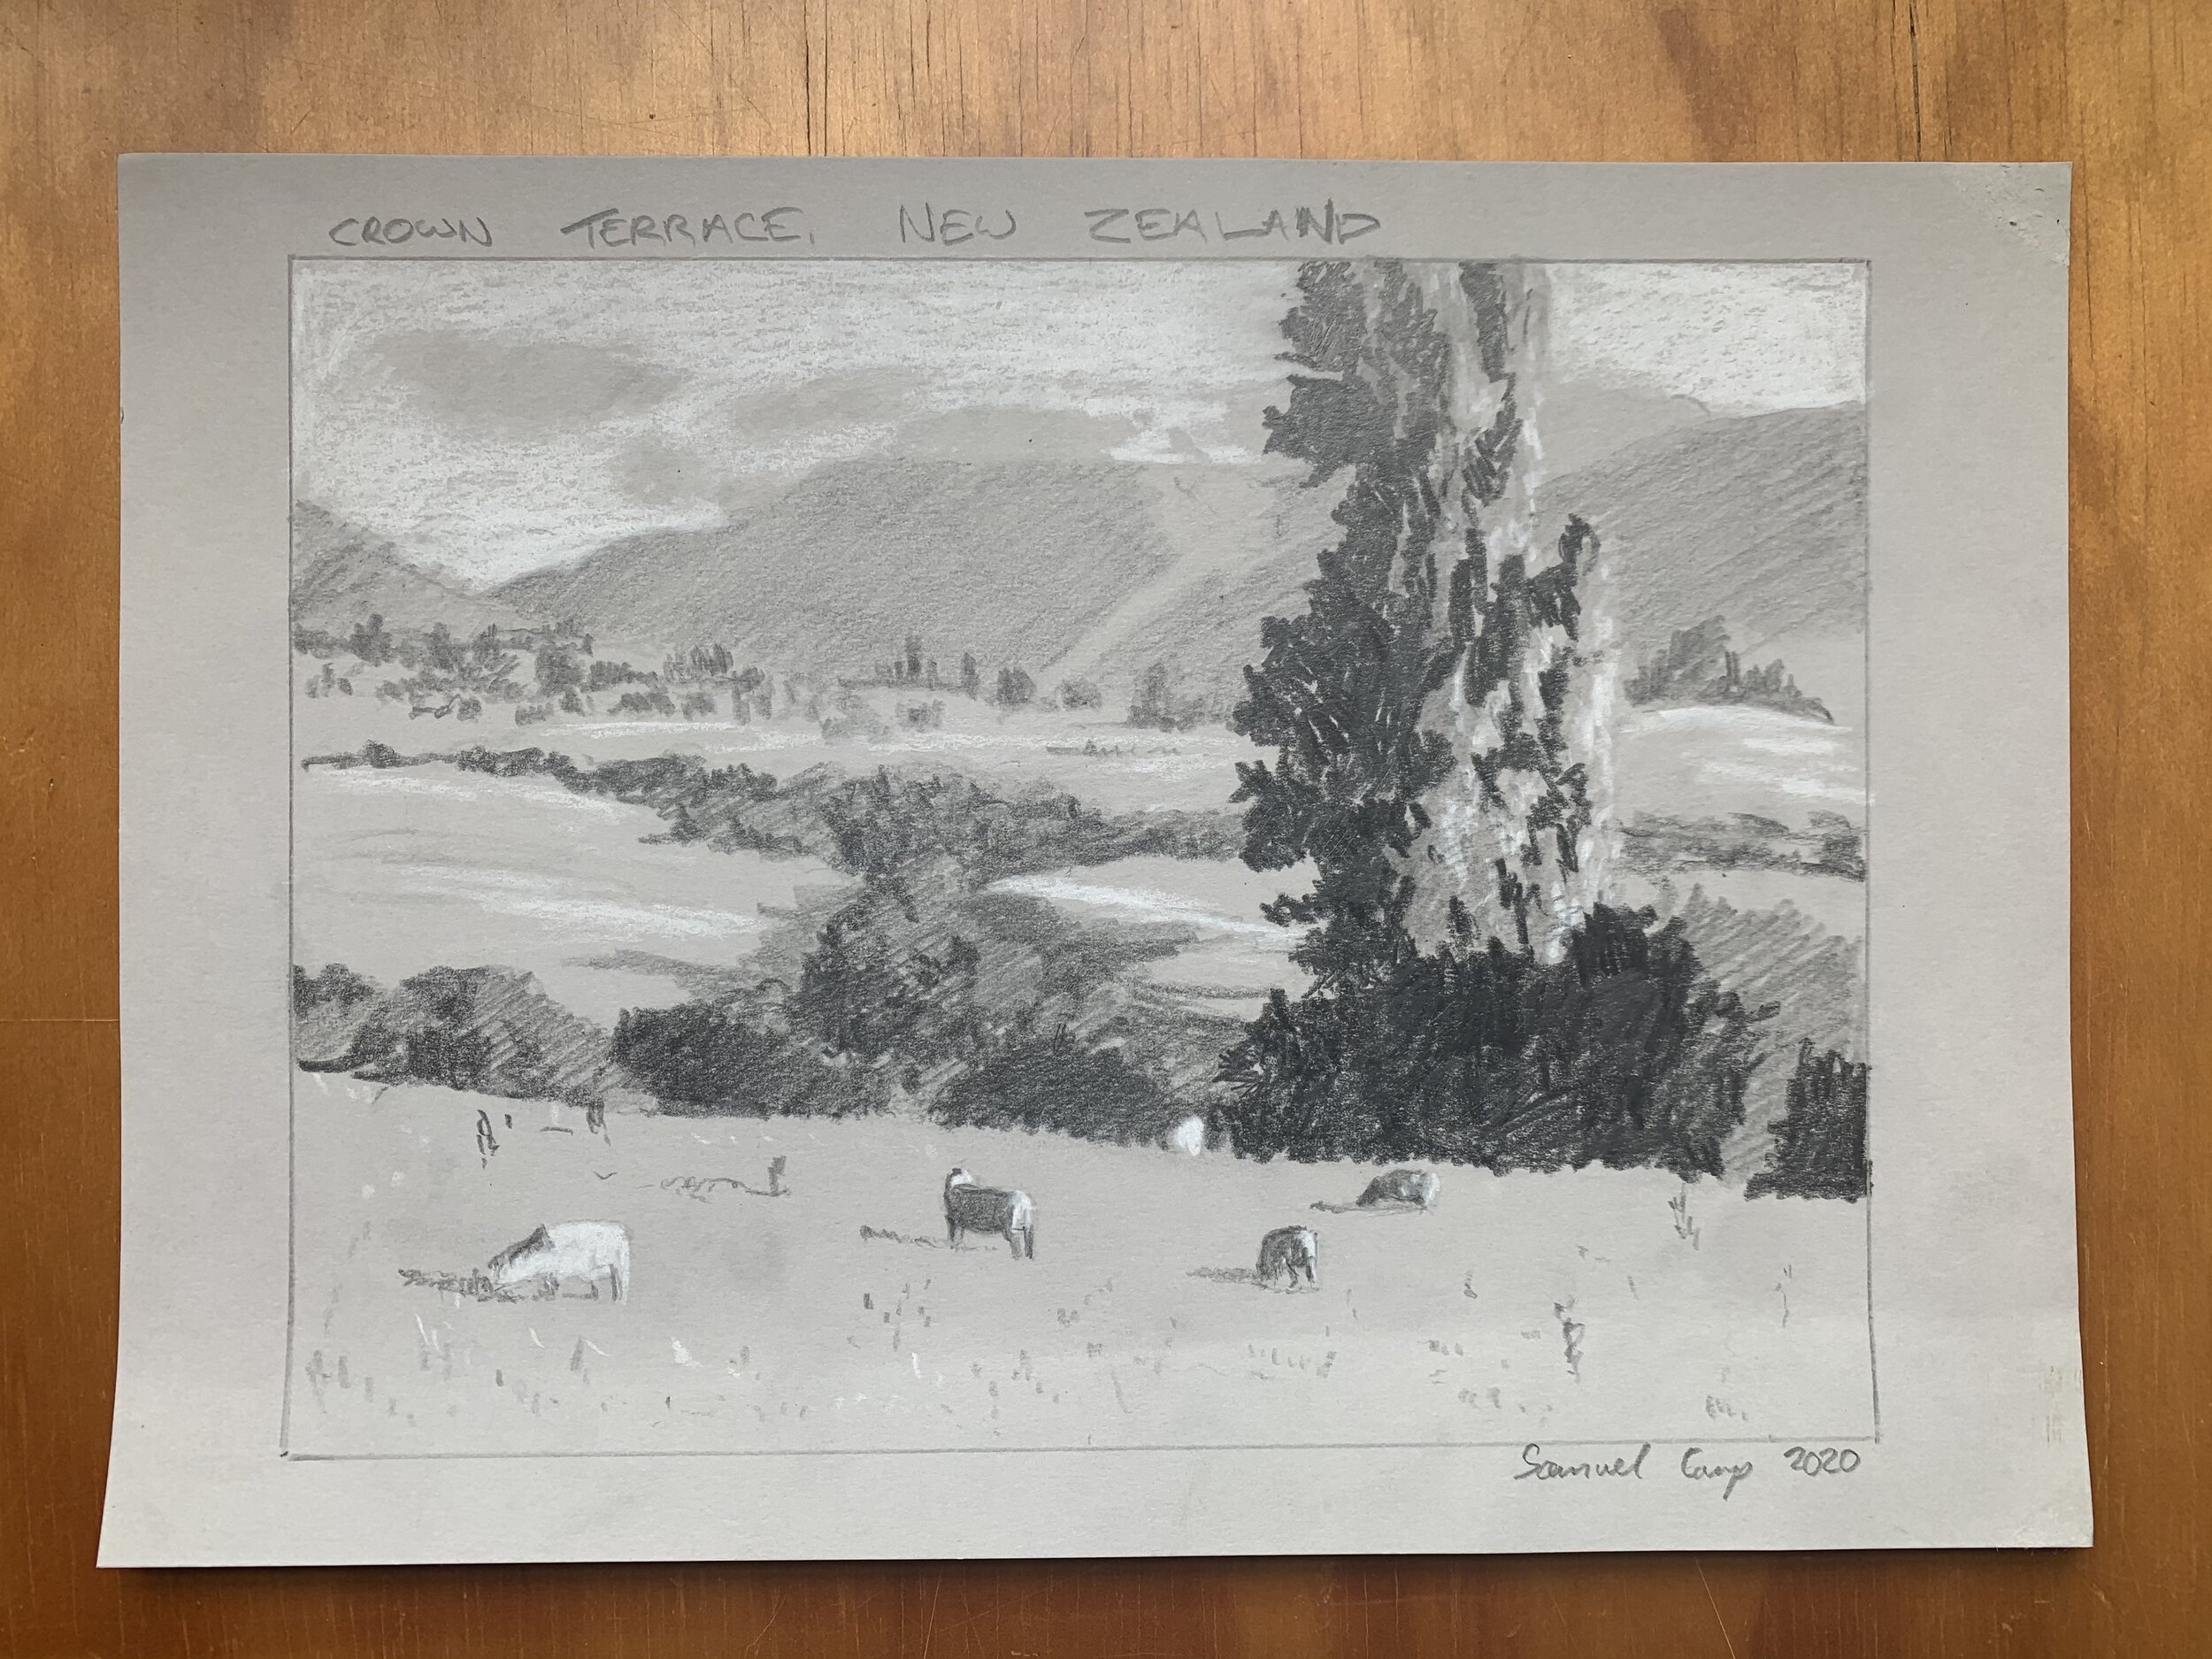
Prior to starting the painting I carried out some pencil sketches first before arriving at a final sketch. Sketching is a great way to plan your composition so that when you come to paint your artwork you know the road ahead. In this case, the photo already formed a naturally good composition so I didn’t need to change much.
I sketched out this drawing on grey paper and a range of graphite pencils from 4H to 6B. I also used a white pastel pencil for the highlights.
Stage One – Blocking in the Painting
I am painting on a 12” x 16” linen panel. The panel is pre-made with a medium weave linen that is oil primed.
I sketch out the composition using a No.1 round brush with burnt sienna mixed with Liquin Original (Liquin). I am using Liquin as a medium to thin the paint, it also has the advantage of speeding up the drying time.

Painting the Dark Values and Shadows First
Whenever I block in a painting I begin by establishing my dark values and shadows first. Value is how light or dark a subject is and by painting the dark values first it makes it easier to create a tonal dynamic in the painting. When observing the landscape in real life we will find our darkest shadows and our lightest lights in the foreground, but as landforms recede darks are not as dark and lights are not as light as the value scale narrows.
In this painting, the lightest shadows are in the clouds and the mountains in the background. I mixed the colours for the shadows with ultramarine blue and a little burnt sienna to desaturate the blue. I then mix in some titanium white to adjust the value and I add a small amount of quinacridone crimson to give the mix a violet tint.
As I work forward in the landscape those shadows are going to be getting darker. I used the same colour combination for the shadows in the mid-ground trees but with less titanium white in the mix to make the value darker.
The shadows in the Lombardy poplar tree in the foreground are the darkest values in this landscape. This is because tree foliage is naturally dark in value especially where there are occlusion shadows within the tree canopies. For these shadows, I mix ultramarine blue and a little yellow oxide.

Once I have established my main areas of shadows in my painting I work back starting with the furthest zone away and that is the sky. The clouds are a mix of titanium white with a little burnt sienna. The sky is a mix of ultramarine blue, titanium white and a little phthalo green. Skies and clouds are s usually some of the lightest values to be found in the landscape.
I paint the areas of the mountains that are in full sunlight. These mountain slopes have tussock grass growing on them which is naturally a pale straw colour and I mix this with yellow oxide, titanium white, a little burnt sienna and a little ultramarine blue.

Next, I paint the trees in the mid-ground. As green wavelengths of light don’t travel well over long distances they tend to drop out the further away they are so I need to keep this in mind when I paint the trees that are in the distant mid-ground.
For these trees, I mix yellow oxide, ultramarine blue, a little quinacridone crimson and titanium white but as I work forward towards the foreground I increase the saturation of the greens by introducing a little cadmium yellow, cadmium orange and even phthalo green.

I paint the straw-coloured grass with a mix of yellow oxide, titanium white, quinacridone crimson and ultramarine blue. I make sure to keep the value of the colour light and I even introduce a little phthalo green to some of those distant fields. I only use a tiny amount of phthalo green here as it’s a very strong colour.
I mix the colours for the Lombardy poplar tree foliage with a mix of yellow oxide, ultramarine blue, cadmium yellow and a little cadmium orange. I can adjust the value with some titanium white.

I complete the blocking on stage by painting the grass in the foreground and the sheep. I used the same colours in the foreground grass as I did with the grass in the midground but I have increased the saturation slightly by mixing in a little cadmium yellow and cadmium orange.
Lastly, I paint the sheep starting with the shadow areas which is a mix of ultramarine blue, burnt sienna and titanium white. For the highlights in the bodies of the sheep, I mix titanium white with a little burnt sienna.
At this point in the painting, I allow it to dry so I can begin adding details to it.

Stage Two – Modelling and Adding Details
Now that the painting is dry I begin adding finer details to it and tidying up the various zones within the painting. I start with the most distant zone in the painting, the sky and clouds and I work my way forward.
Essentially I am using the same colour mixes as I did during the block-in stage but applying more detail and lighter value colours, especially in the trees. This helps to build up a three-dimensional form within the tree’s canopies. I will be saving my lightest values until the end of the painting.

It is during this part of the painting that I am building up more details within the scene and I am mainly focusing on the foreground area, especially the Lombardy poplar tree. I switch to using smaller No.3 Filbert brushes to build up the foliage in the mid-ground trees and I am mainly using the rounded edge of the brush to apply the paint.
I use a No.0 round brush for building up the highlights in the Lombardy poplar tree. For this, I mix yellow oxide, ultramarine blue, cadmium yellow and titanium white. If the green is too saturated I can knock it back with some cadmium orange or quinacridone crimson.

Stage Three – Final Details
I have let my painting dry again and it is here where I add the final details to my painting. I have been saving my lightest values until the very end which are mostly in the tree canopies.
I paint a few highlights in the canopies of the trees in the mid-ground and the Lombardy poplar tree in the foreground. This is where there are some glossy leaves shimmering in the direct sunlight. For this, I mix titanium white with a little cadmium yellow and phthalo green.
I paint the suggestion of a few stems and branches in the Lombardy poplar tree and I finish up the painting by adding some highlights to the sheep and a few more details in the grass.

Thanks for reading.
