Have you ever begun painting trees only to find yourself overwhelmed by their complexity? I know I have – countless times. The endless leaves, intricate branches, and the way light dances across them can make painting trees one of the toughest challenges for artists, especially in landscape paintings. I used to stare at a tree for what felt like hours, brush in hand, completely paralyzed by where to even begin. Should I start with individual leaves? The trunk? The overall shape? The questions would multiply faster than I could answer them.
But what if there was a methodical way to break down these challenges into simple, manageable steps? After years of trial and error, I’ve discovered that the secret isn’t trying to capture every detail at once – it’s about building your tree systematically, layer by layer. In this detailed guide, I’ll share the exact seven-step process that transformed my approach to painting trees and helped me move from frustration to confidence. We’ll explore how to transform that intimidating mass of green into a convincing and expressive tree that captures both the essence and beauty of nature.
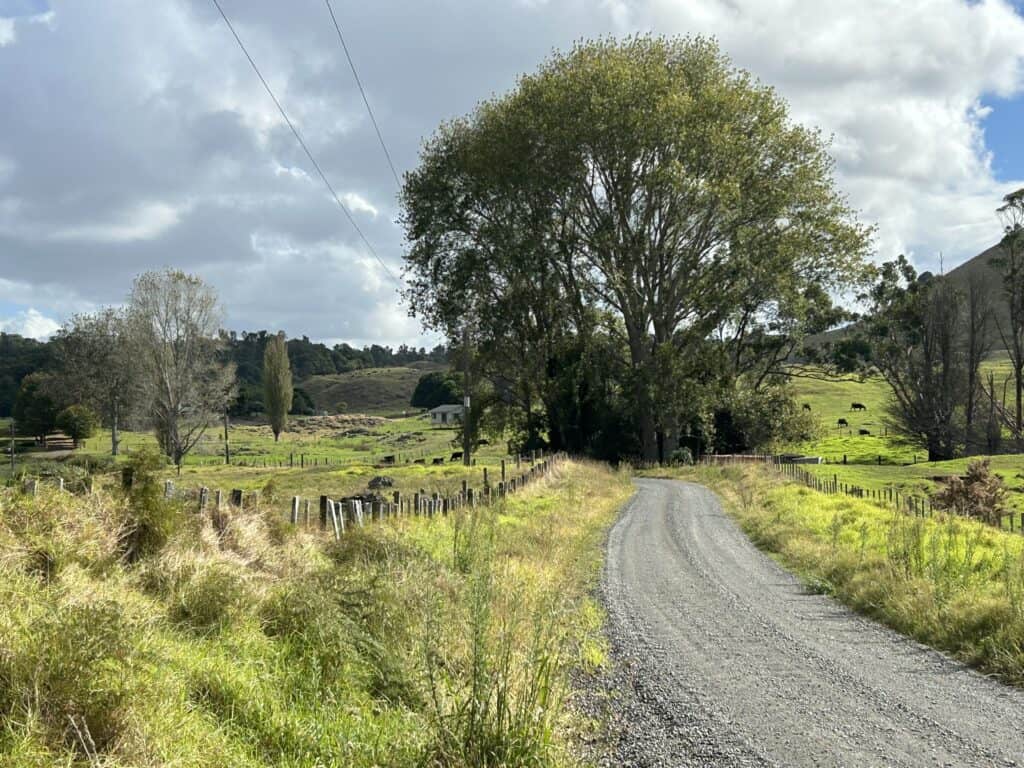
Reference photo
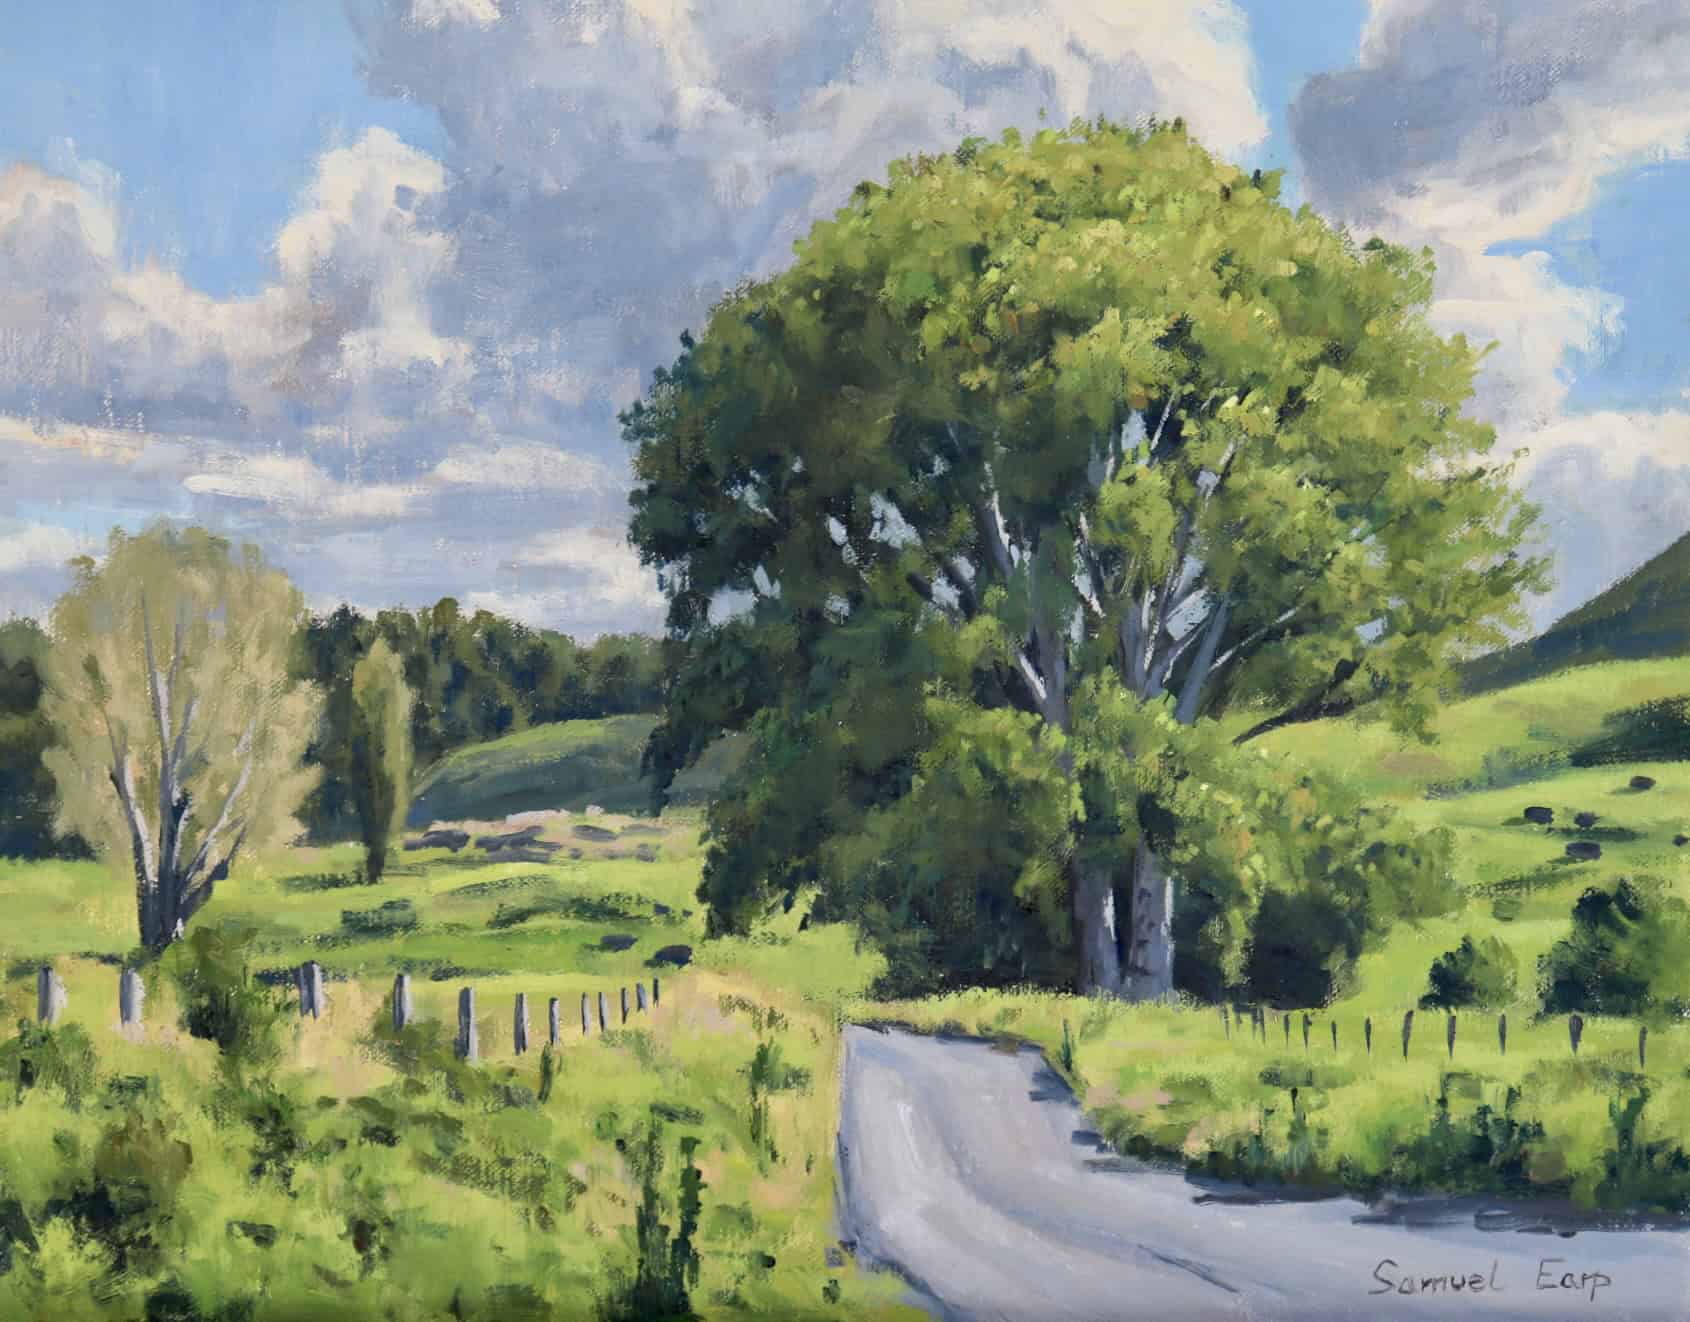
Step-by-Step Guide to Painting Trees
Learning to paint trees doesn’t have to be a guessing game. Through years of painting landscapes, I’ve refined this process into seven clear steps that work consistently, whether you’re painting a single oak tree or an entire forest. This methodical approach will help you build confidence and create more convincing trees every time you pick up your brush.
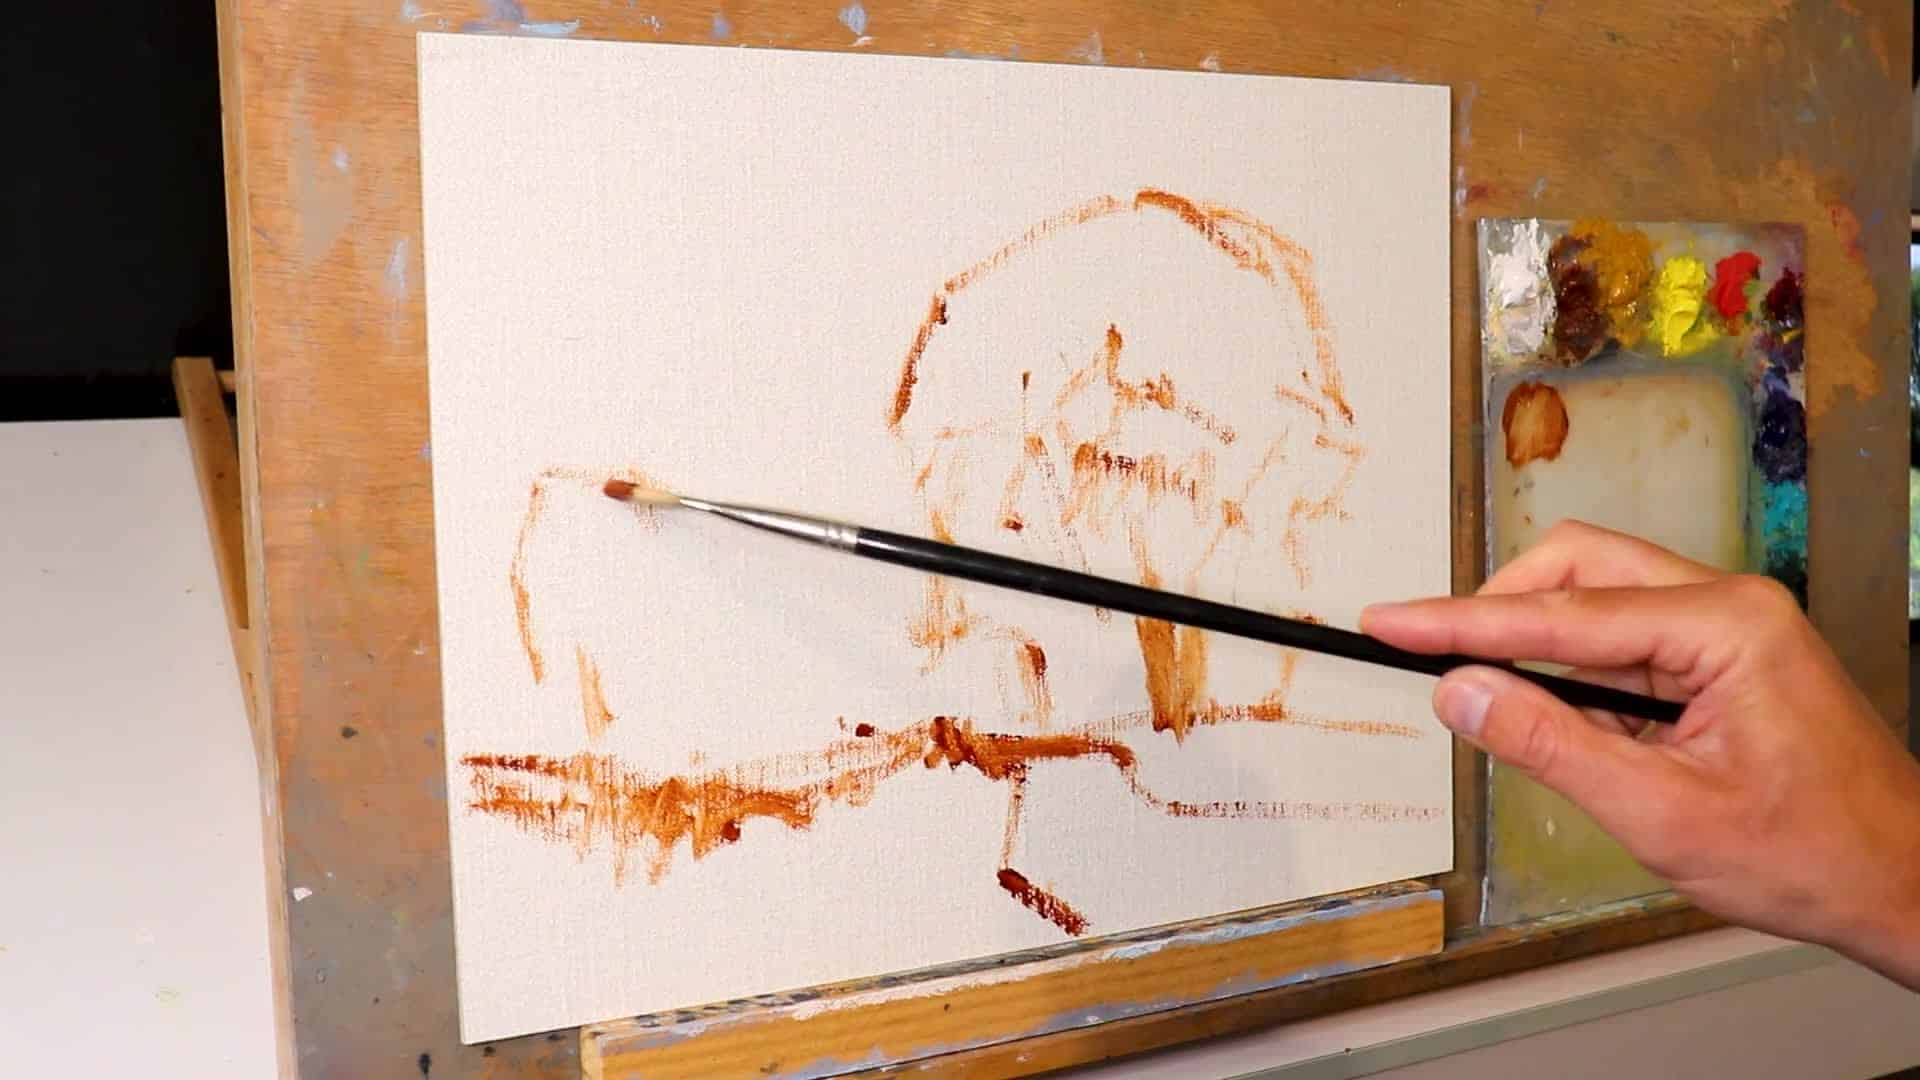
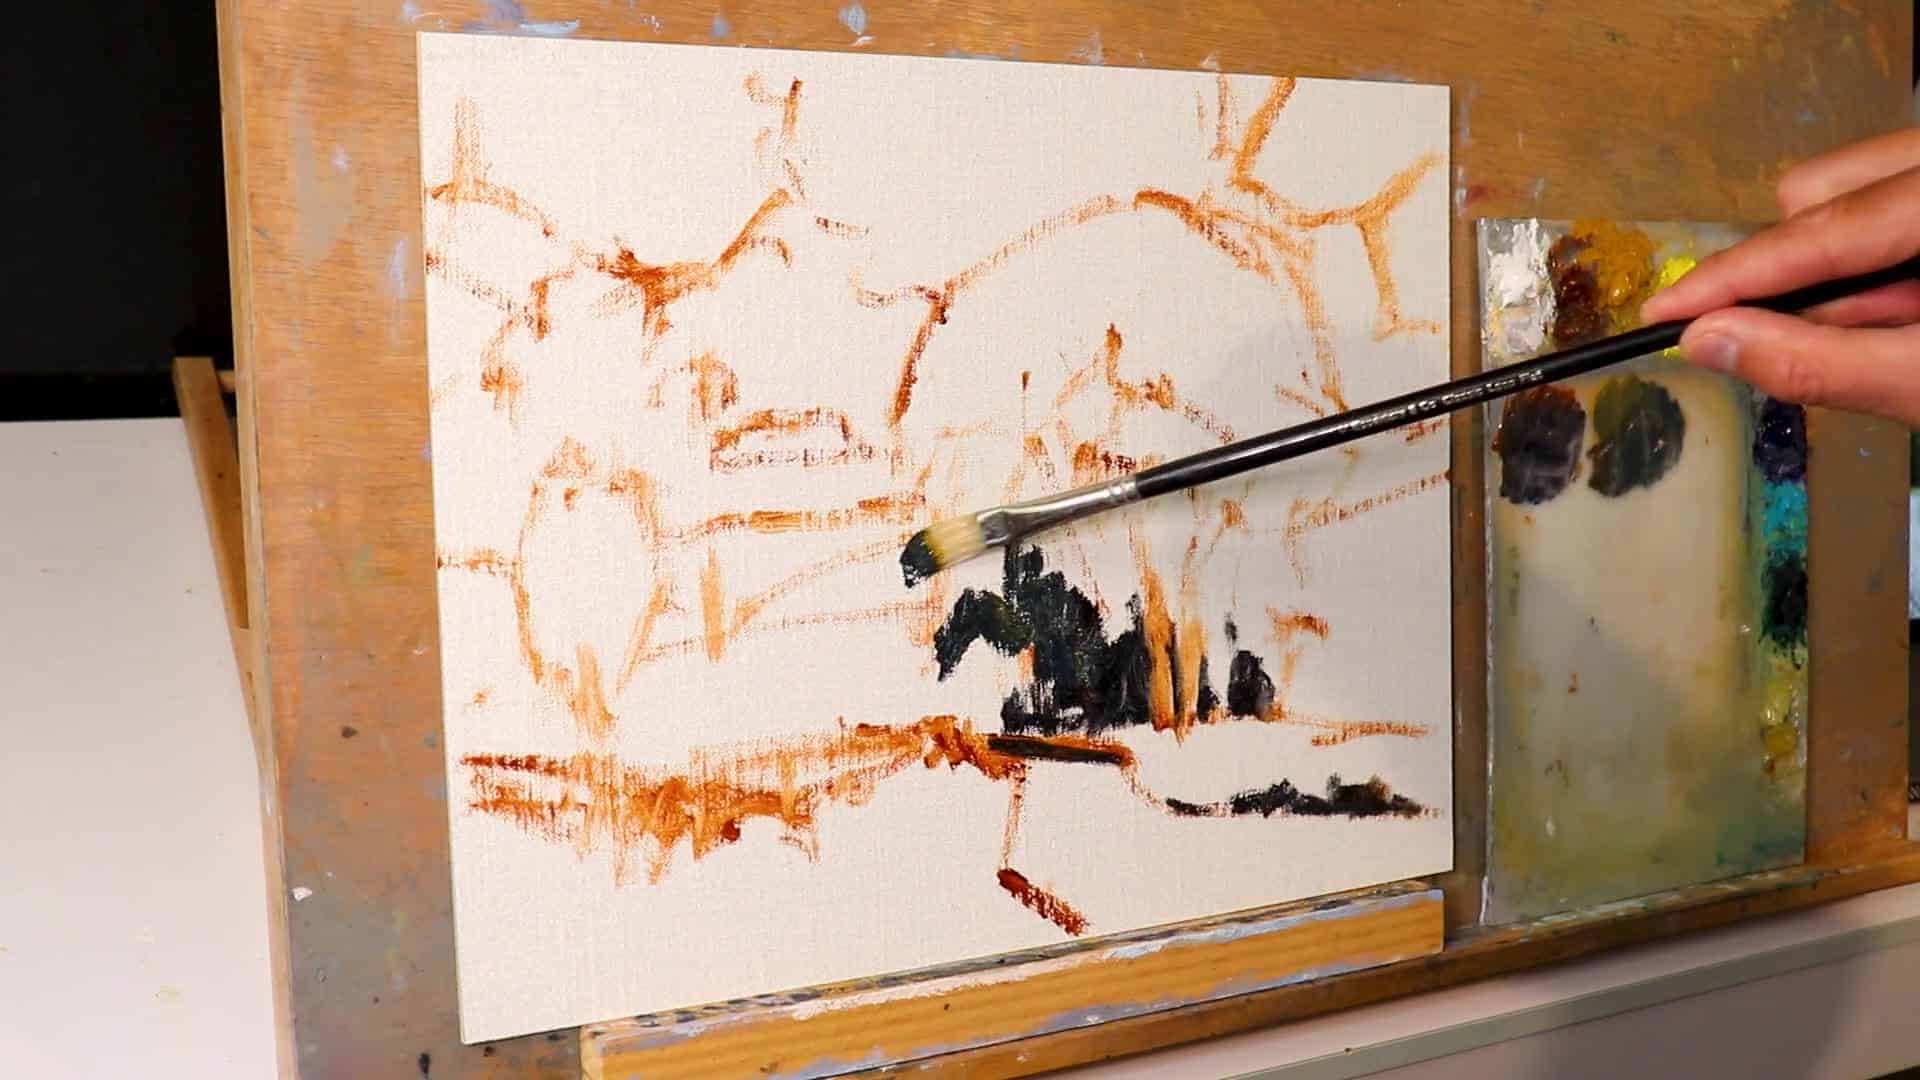
Step 1: Painting Dark Values and Shadows
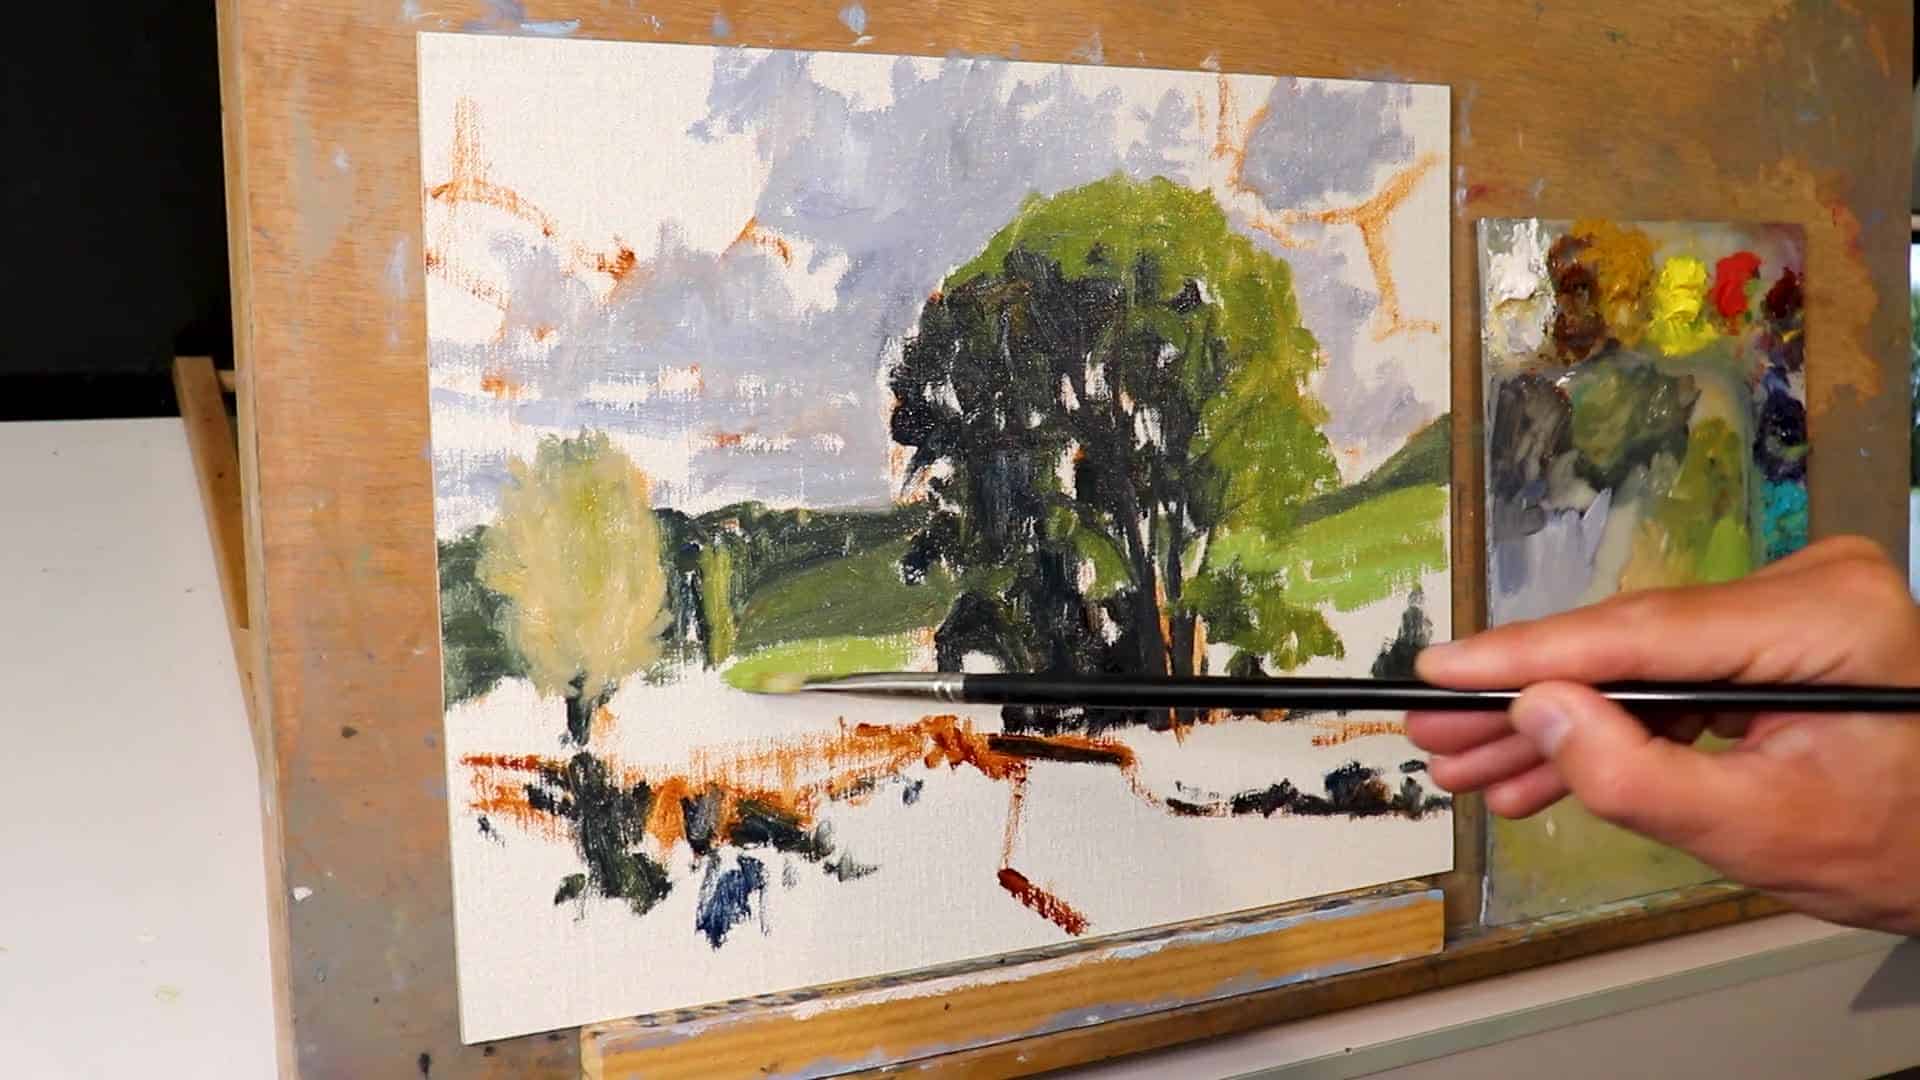
The foundation of painting a successful landscape is laying down the dark values and shadows first across the scene. This is especially true for trees. I learned this lesson the hard way after countless paintings where my trees looked flat and unconvincing because I jumped straight into the lighter colors without establishing the underlying structure first.
Avoid getting caught up in the intricate details of the canopy like individual leaves and branches at the onset, as this can lead to overwhelm. Instead, I focus on identifying the darkest areas within the tree’s mass – typically the deep shadows cast by upper branches onto lower foliage, and the spaces where branches create natural cavities. By painting these shadow shapes first with a dark mixture of burnt umber and ultramarine blue, I create the armature that will support everything else I add later.
Steps to Follow:
- Treat trees as large masses rather than intricate structures.
- Break down the tree into its essential tonal components: darks, mid-tones, and lights.
- Begin painting the shadows using a dark mix of ultramarine blue and yellow ochre, yielding a deep low chroma green.
I’ve found that this approach immediately simplifies what seems like an impossible task. By thinking in terms of big shapes first, I can establish the tree’s overall structure without getting lost in details. The key is to squint at your subject – this helps you see past the individual leaves to the broader patterns of light and shadow.
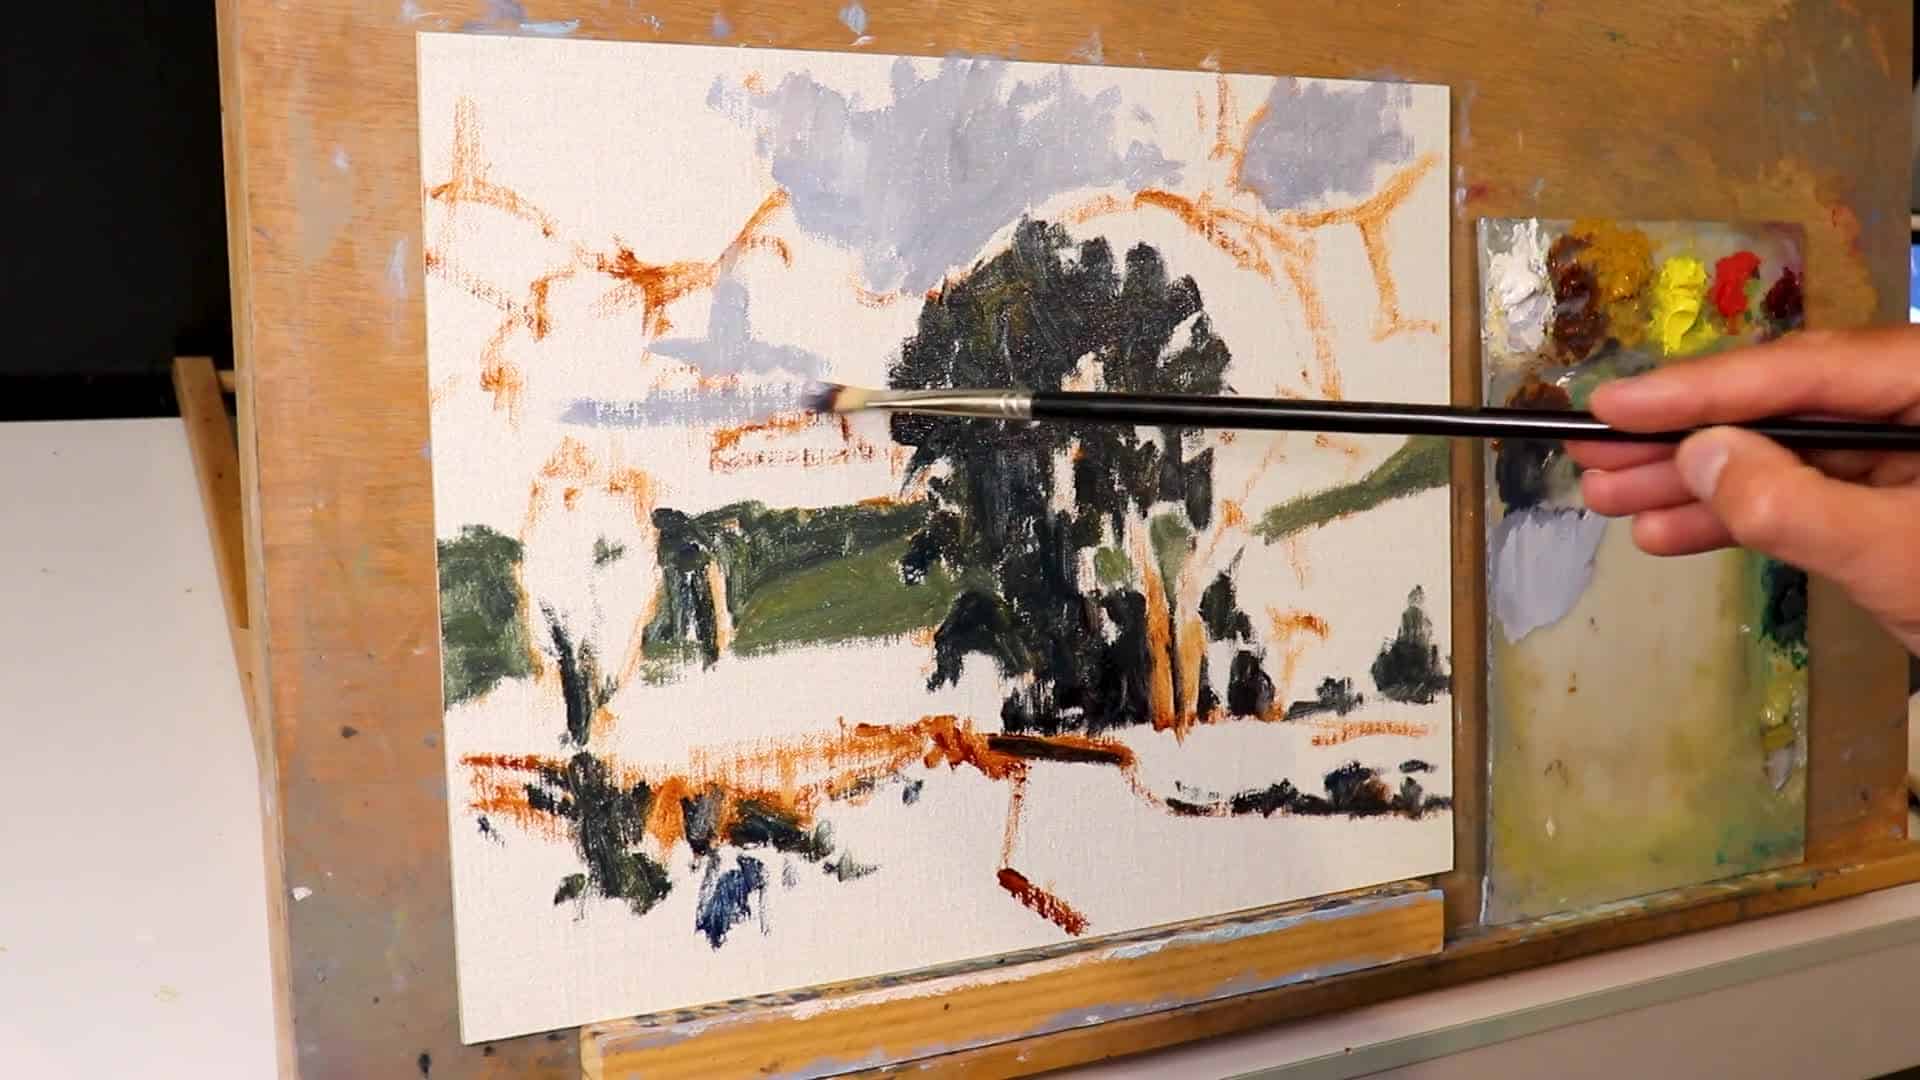
Trees often contain some of the darkest values within a landscape. In the foreground, these values are even more pronounced. As you move towards the background, both darks and lights soften, providing depth. I always remind myself that these dark areas aren’t just “dark green” – they’re opportunities to create real dimension and make the lighter areas pop when I add them later.
Step 2: Employ Loose Brushwork for Initial Block-In
This stage, known as the blocking-in stage, requires using loose brush strokes with larger brushes. For this exercise, I’m working with number five and number six bristle flat brushes.
Details on Materials:
- Canvas: Linen panel sized at 11 by 14 inches, crafted by Source Tech.
- Paints: Blue Ridge oil paints.
Details on Materials:
- Canvas: Linen panel sized at 11 by 14 inches, crafted by Source Tech.
- Paints: Blue Ridge oil paints.
I prefer working on this size canvas because it’s large enough to develop good detail but small enough to complete in a single painting session. The linen surface gives me just the right amount of tooth to hold the paint without being too aggressive.
To create your greens for the canopy, mix ultramarine blue, yellow ochre, cadmium yellow, along with touches of burnt sienna, phthalo green, and titanium white. The goal at this point isn’t precision but capturing the tree’s general shape and form. I keep my mixtures loose and varied – nature’s greens are never uniform, so neither should mine be.
Quick tip: Painting the background in cloud shadow can enhance contrast and make the foreground pop. This simple trick has saved many of my paintings from looking flat and lifeless.
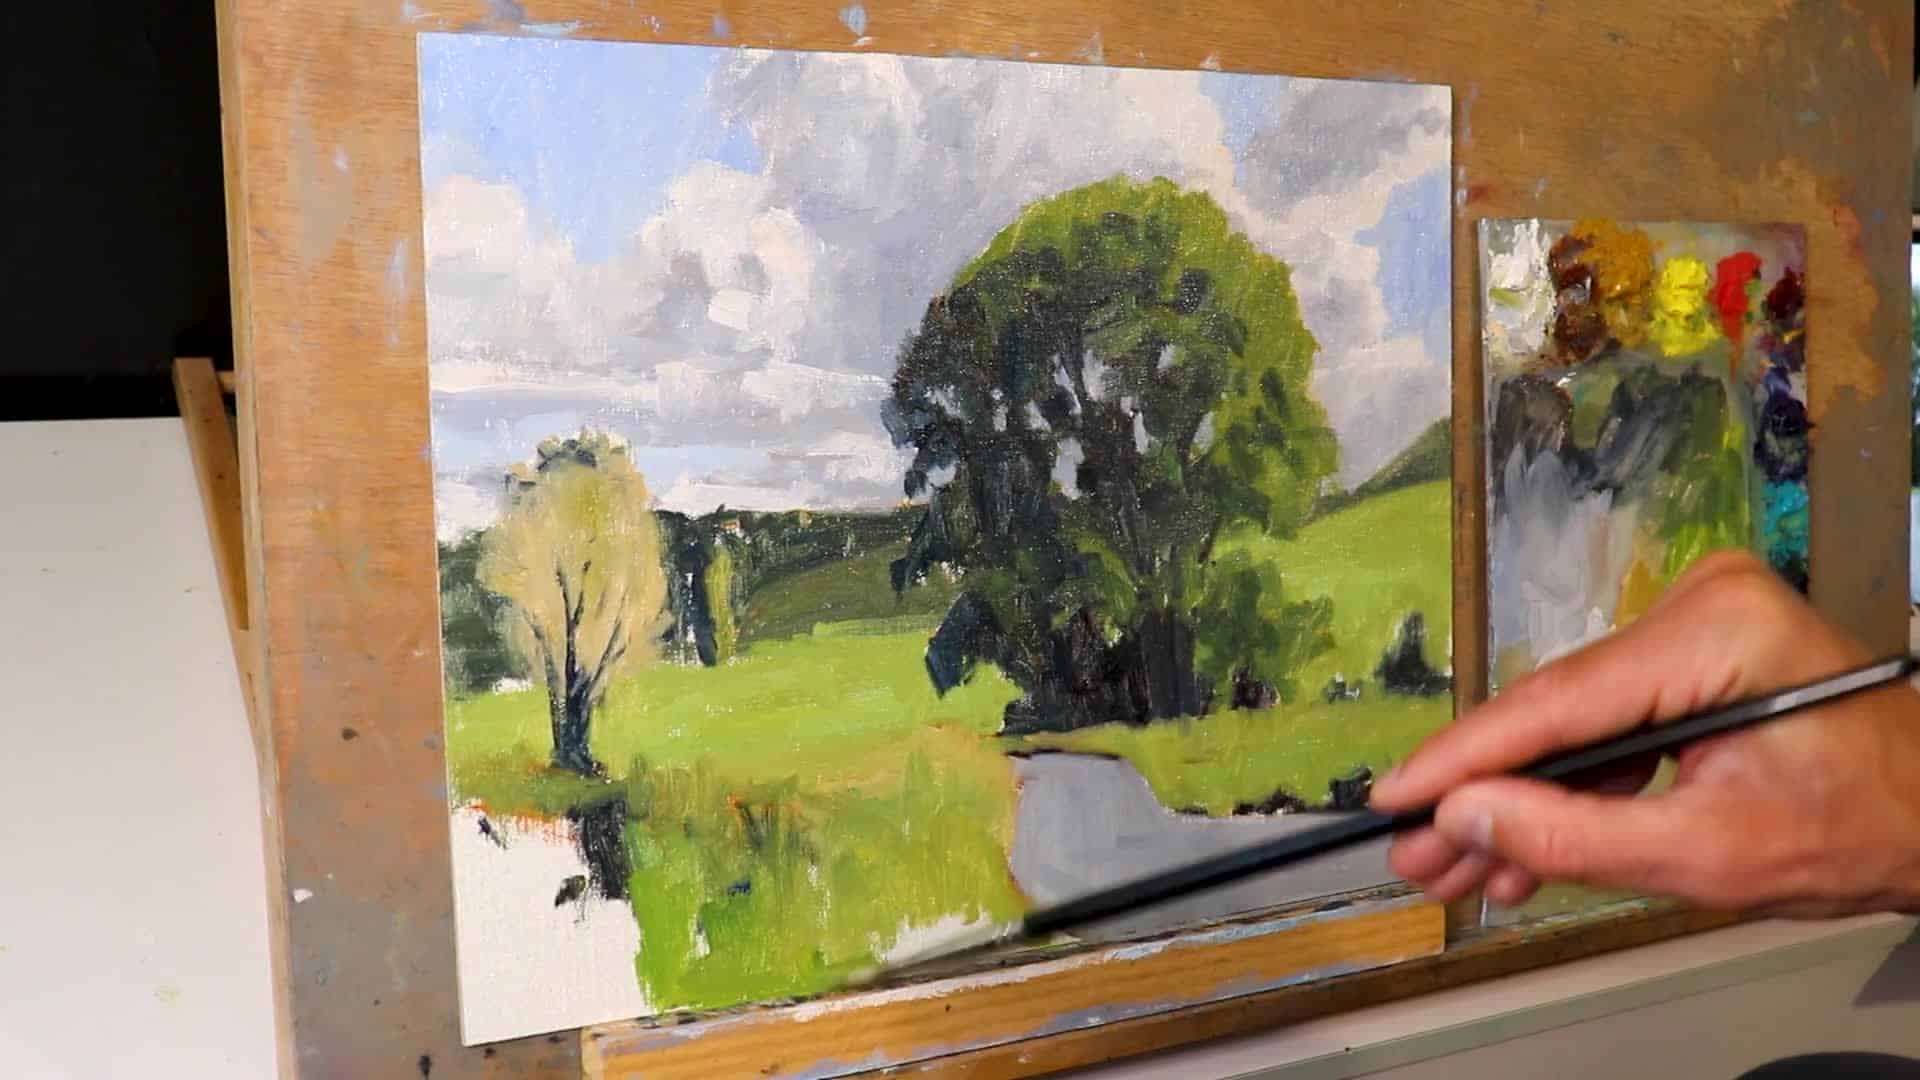
Step 3: Navigate Around Negative Spaces
This step was a game-changer for me when I finally understood its importance. Most beginners focus entirely on painting the tree itself, but the secret lies in paying equal attention to what’s NOT the tree. By carefully observing and painting these negative spaces, you’ll find your trees suddenly look more natural and convincing.
Understanding Negative Spaces:
Negative spaces are the sky holes between branches and leaves. I used to ignore these completely, but they’re actually one of the most powerful tools for creating believable trees. These gaps aren’t just empty spaces – they’re what give your tree its character and make it feel three-dimensional rather than like a flat cutout.
Focusing on these spaces will help define the structure of the tree’s crown effectively. When I paint the sky showing through the branches, I’m essentially carving out the tree’s shape from the outside in. This approach feels counterintuitive at first, but it’s incredibly effective for creating natural-looking edges and realistic tree forms.
- Use mixtures for cloud and grass to outline and refine the tree’s form.
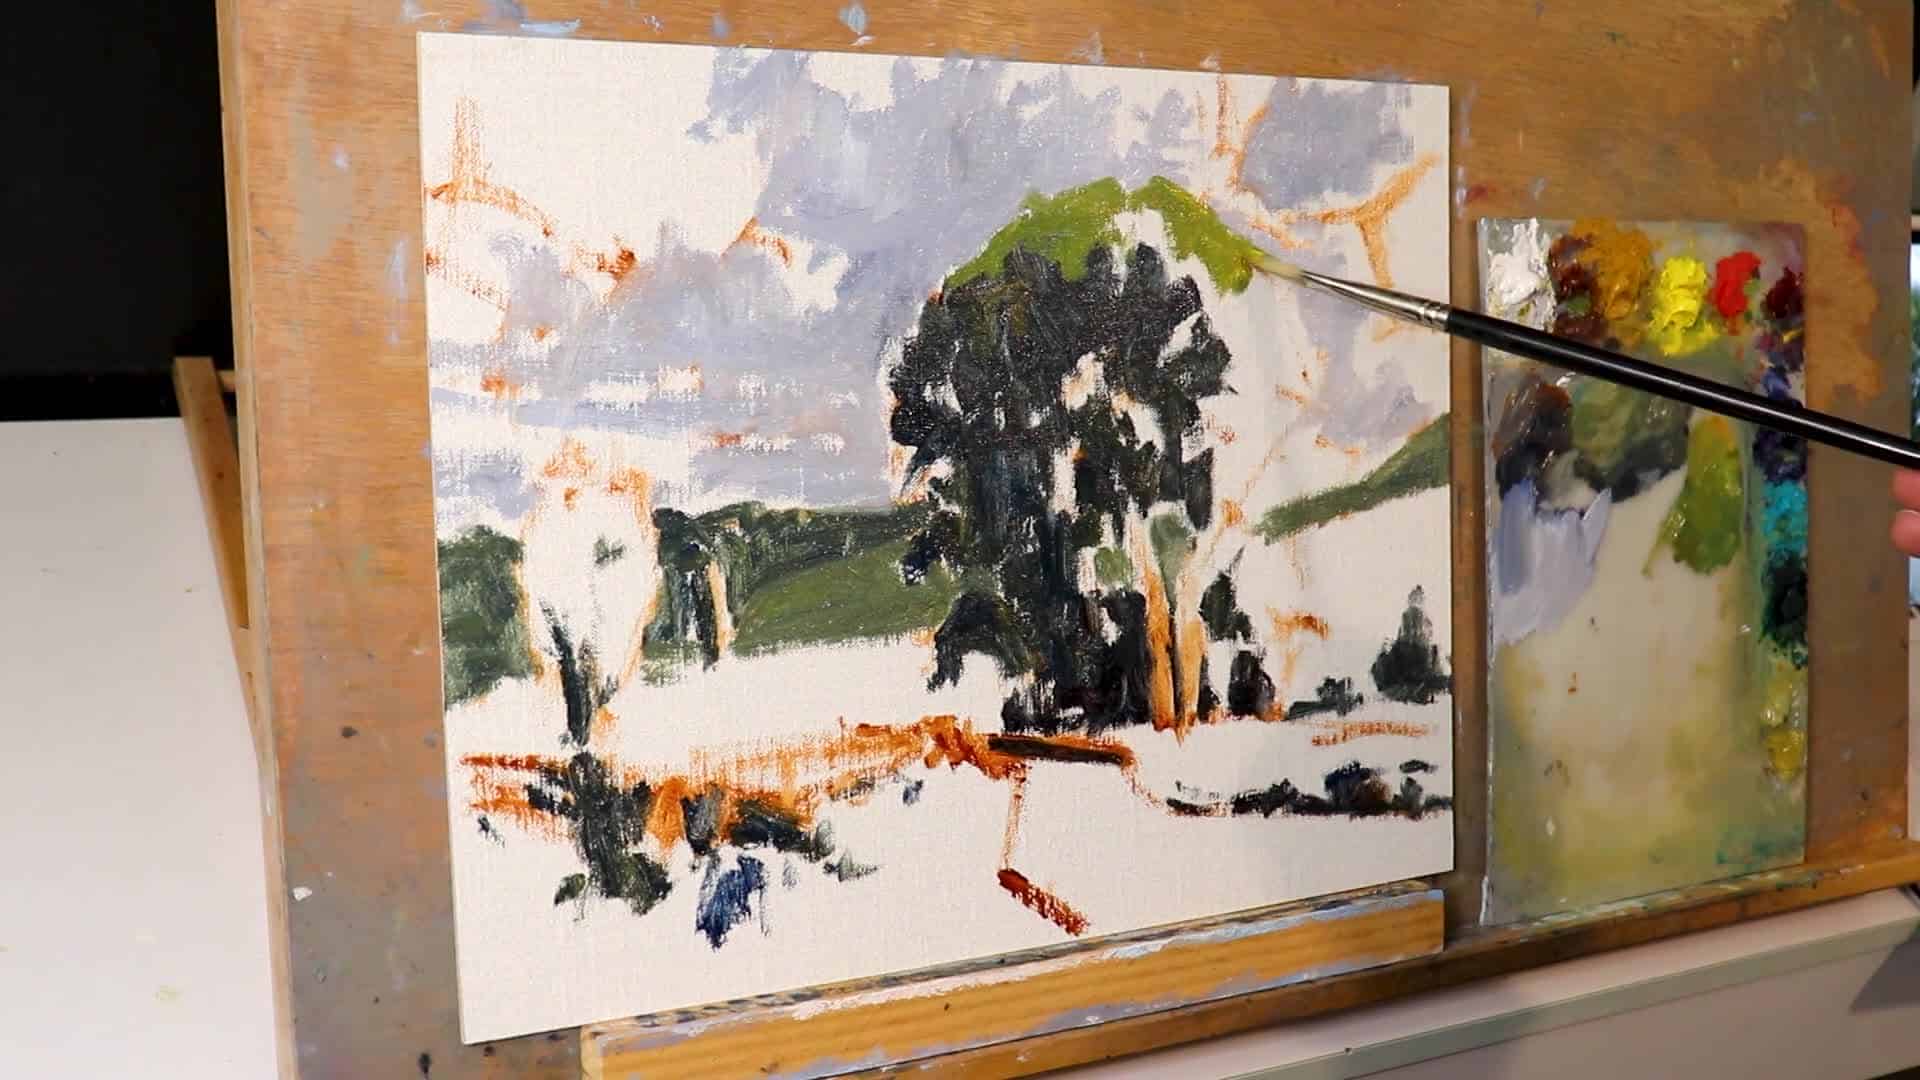
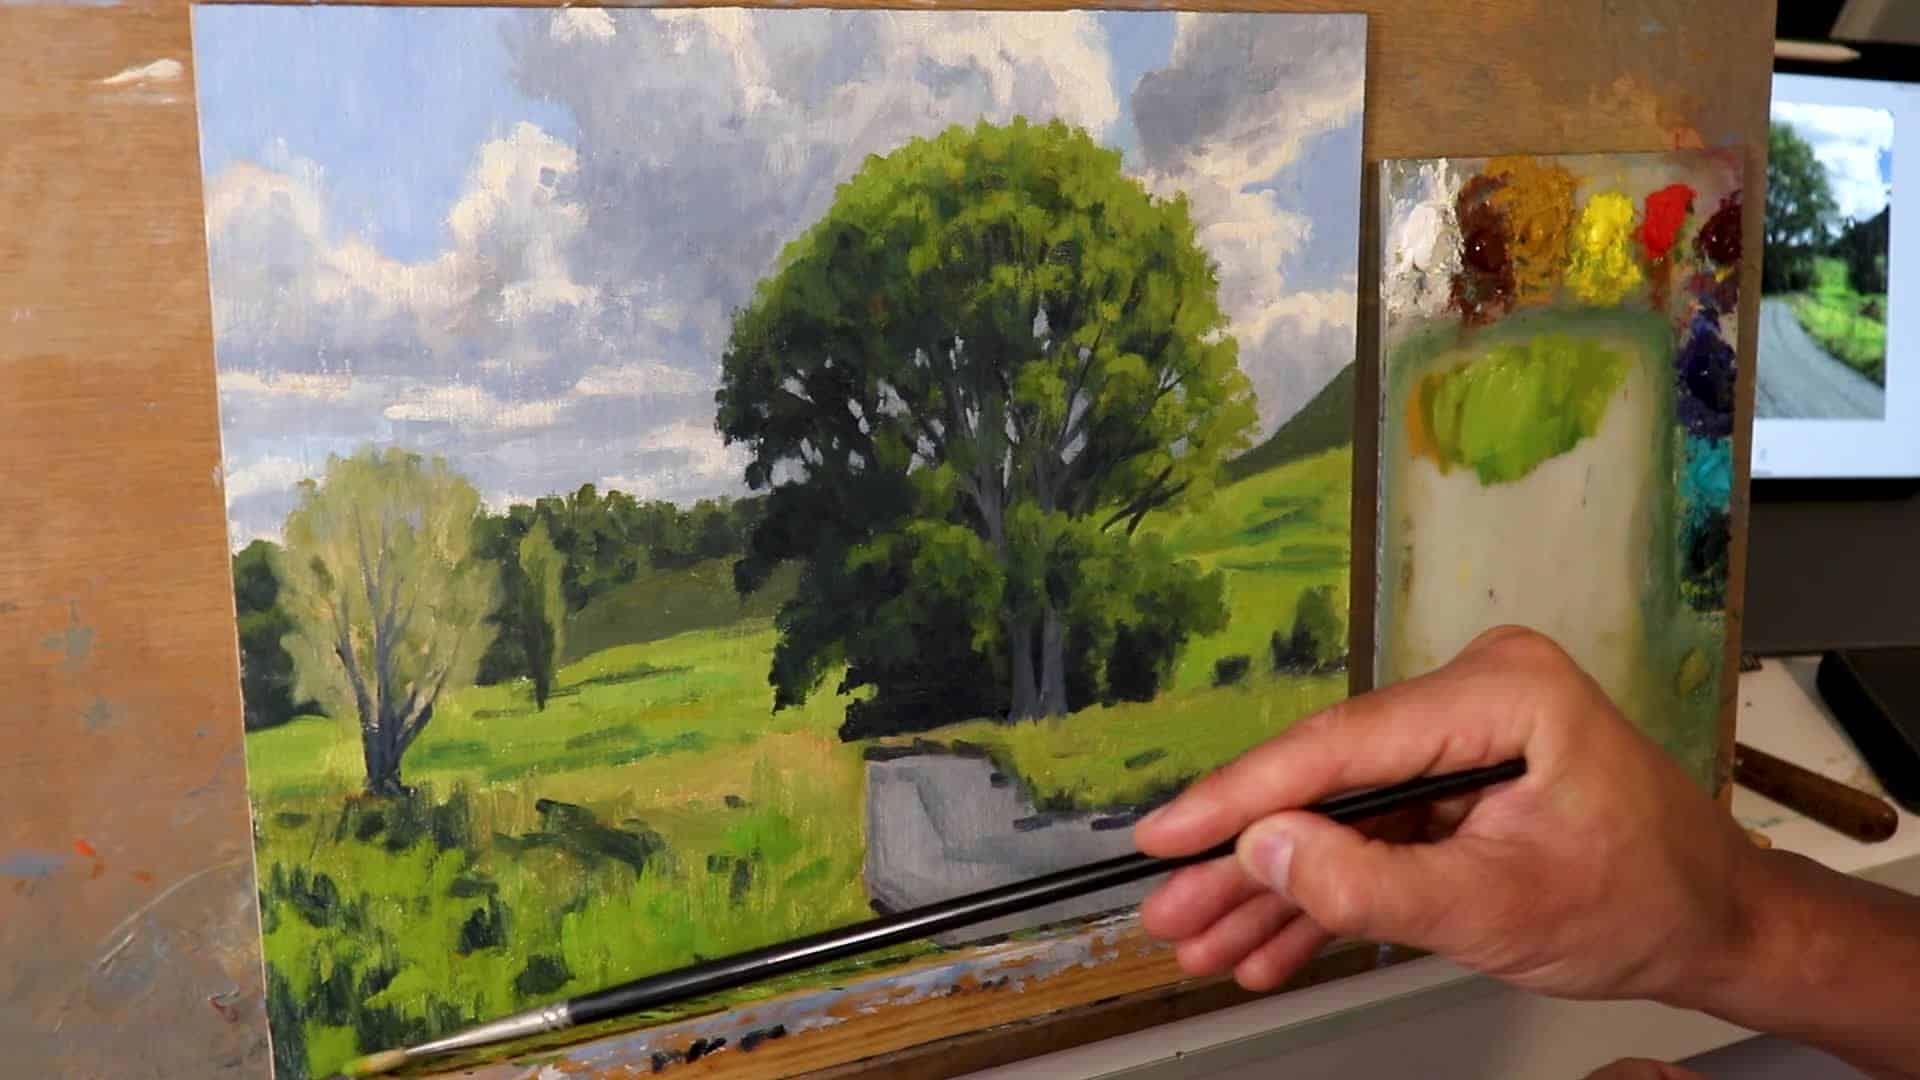
Step 4: Build Structure in the Tree Canopy
Now we’re adding detail and structure to the tree. With the painting dry, reassess the darkest values already laid down and reinforce them. This is where I take a step back and really study what I’ve established so far. Sometimes those initial dark shapes need to be pushed even darker, or their edges need to be refined to better capture the tree’s character.

Focus on areas of shadow and light to gradually define the tree’s shape. I find this stage exciting because the tree really starts to emerge from what was just a collection of abstract shapes. By strengthening the contrast between the shadowed areas and where light will eventually hit, I’m building the foundation for a convincing three-dimensional form.
As you work, the painting should remain generally darker initially—this leaves room to incorporate lighter layers over time, establishing depth. I’ve learned to resist the temptation to add lights too early. Keeping everything in the darker value range at this stage gives me much more control and allows those lighter colors to really sing when I finally apply them.
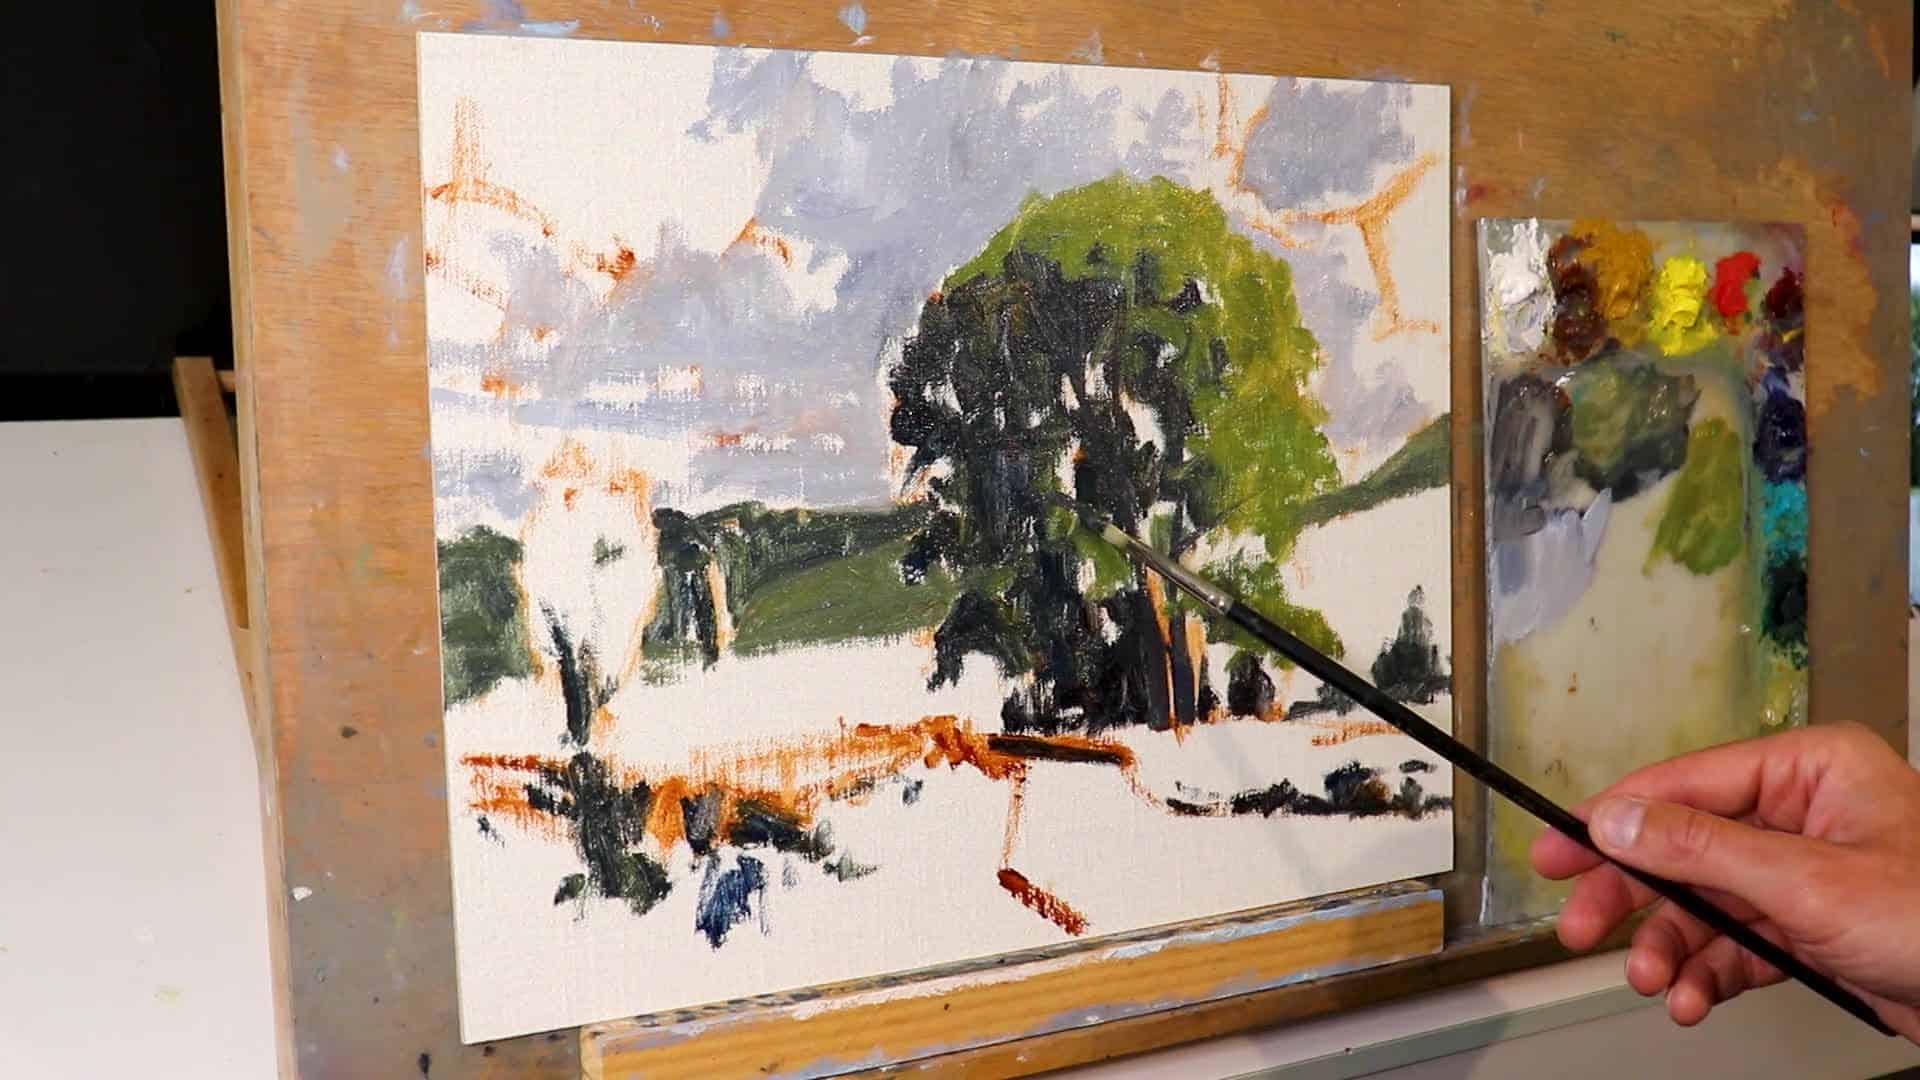
Step 5: Modeling and Refined Details
Modeling focuses on refining individual elements within the painting, enhancing zones with added detail. This is where I shift from thinking about big shapes to really developing the character of each part of my composition. I’m no longer just laying down foundation colors – I’m sculpting form and bringing life to what I’ve established.
- Address shadows and highlights in clouds, refine skies.
Tonal values—the measure of lights and darks—are critical. They create depth and distance more effectively than color mixing alone. I’ve seen so many paintings where the colors are beautiful but the values are off, and they fall completely flat. Getting your values right first means your painting will work even if your colors aren’t perfect, but perfect colors with wrong values will never convince the viewer.
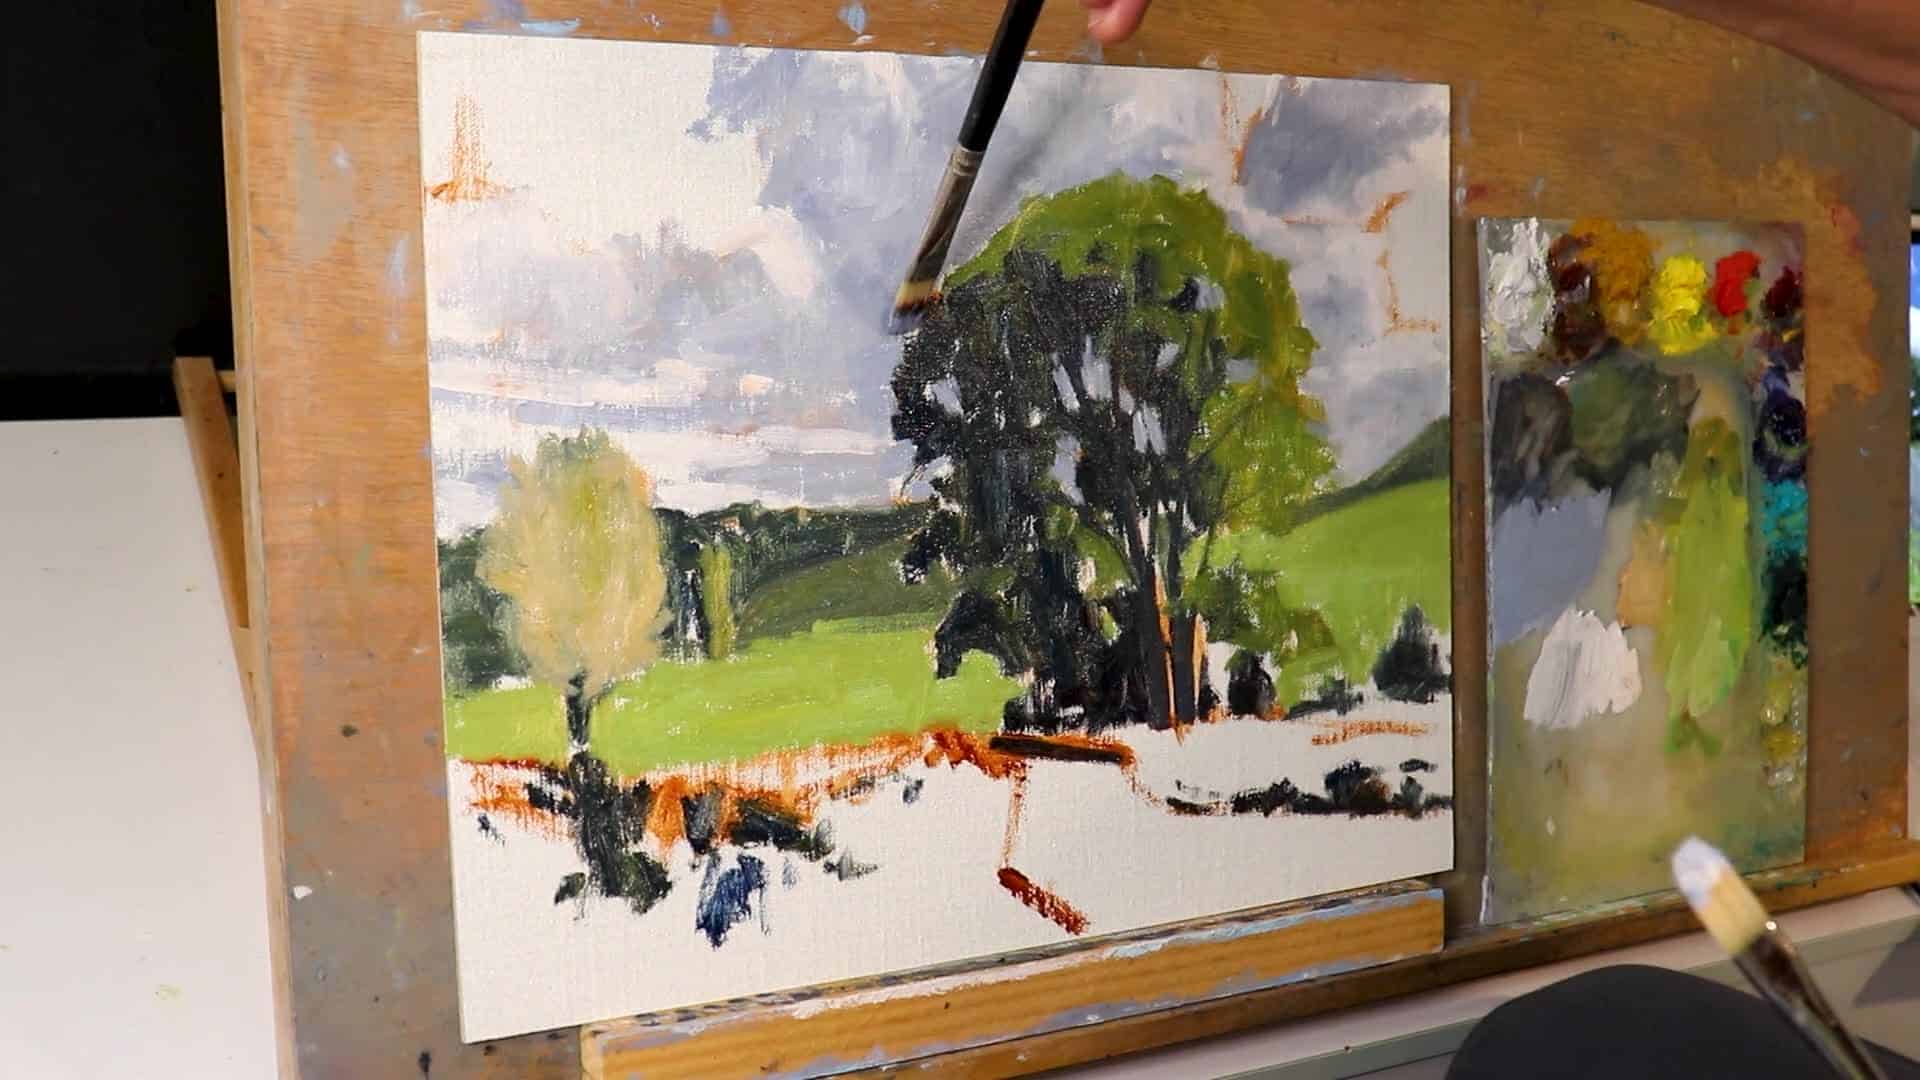
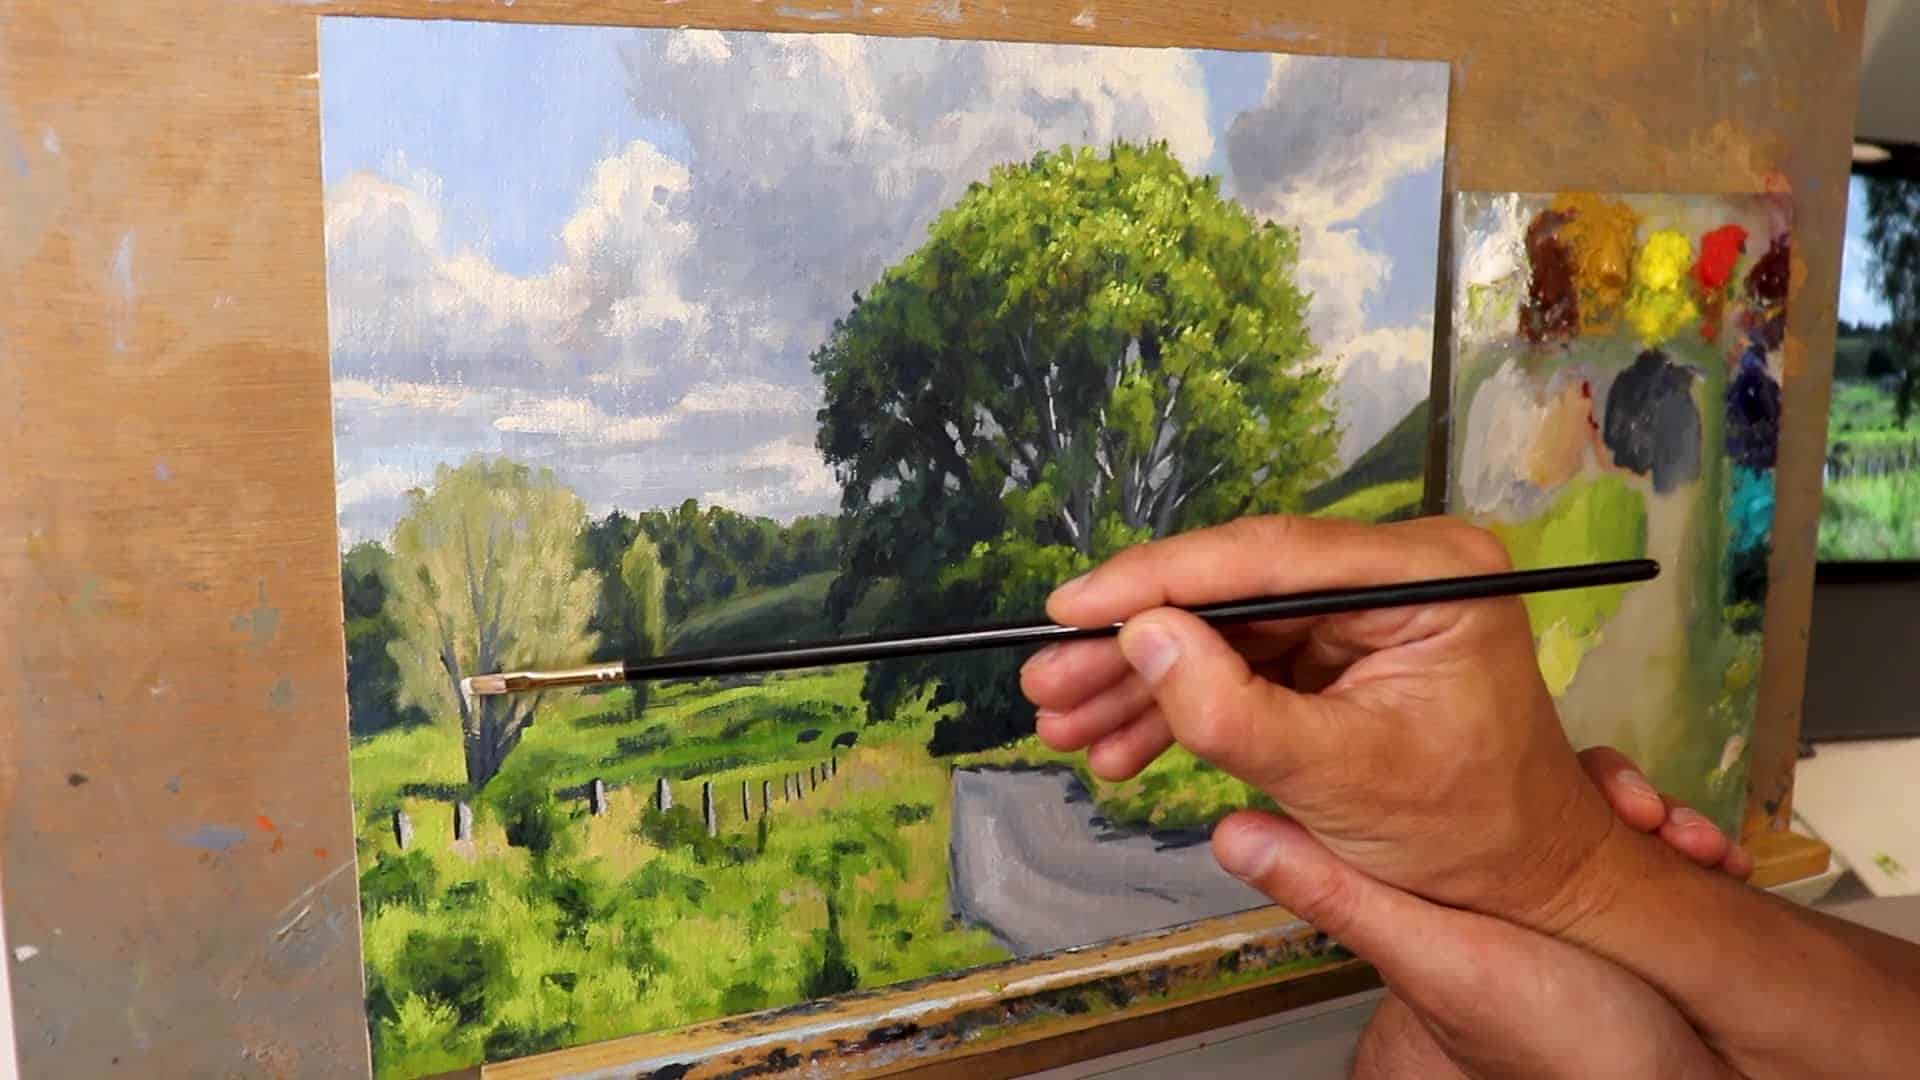
Step 6: Restate Dark Values and Refine Details
This step involves reinforcing shadows to make the scene convincing. I find this is where my painting really starts to come alive – those strengthened shadows create the drama and contrast that makes viewers stop and look. It’s amazing how much difference a few well-placed dark accents can make to the overall impact of the piece.
- Redefine the tree’s shadow, and introduce details such as sky holes.
- Employ loose brushwork to imply instead of explicitly painting all details, such as blades of grass.

The key here is suggestion rather than literal representation. I’ve learned that my brush can communicate far more with a confident, loose stroke than with tight, overworked details. When I paint grass, I’m not painting every blade – I’m capturing the essence of how grass moves and catches light.
Step 7: Highlight Lightest Values
Conclude by adding the lightest tones, imparting the tree with its final dimension and realistic appearance. This is my favorite part of the entire process – it’s like watching the painting suddenly snap into focus. After all that careful work building up the darks and mid-tones, these final light touches bring everything together and make the tree feel like it’s truly basking in sunlight.
Techniques for Final Touches:
- Introduce lighter tones to grass and foliage using brushes like a quarter-inch bristle dagger brush.
- Add subtle highlights to details like fence posts, enhancing realism without overcrowding with detail.
I’ve learned that restraint is crucial at this stage. It’s tempting to keep adding more and more highlights, but the magic happens when I stop just before I think I’m done. Those carefully placed light notes need space to breathe and contrast against all the darker work I’ve established.
BLOCKQUOTE
“Adding lighter tones to various elements provides depth, making the scene vivid and lifelike.”
Conclusion
Trees don’t always have to be intimidating in paintings. I remember the exact moment when this clicked for me – I was standing in front of a massive oak tree, feeling completely overwhelmed, when I realized I was trying to paint everything at once instead of following a logical sequence. Once I started breaking it down systematically, painting trees became one of my favorite subjects.
With these steps, explore how a methodical approach can transform a challenging element into an enjoyable painting endeavor. The beauty of having a clear process is that it frees you up to be creative within that structure. You’re not paralyzed by where to start because you know exactly what comes next.
Happy painting, and if you want more insights on painting trees, check out the video linked below. I’d love to see how these techniques work for you – every artist brings their own style to the process, and that’s what makes it so rewarding.
Learn more about painting trees here
Thank you for journeying through this step-by-step guide. Embrace the process, keep practicing, and watch your skills flourish!
