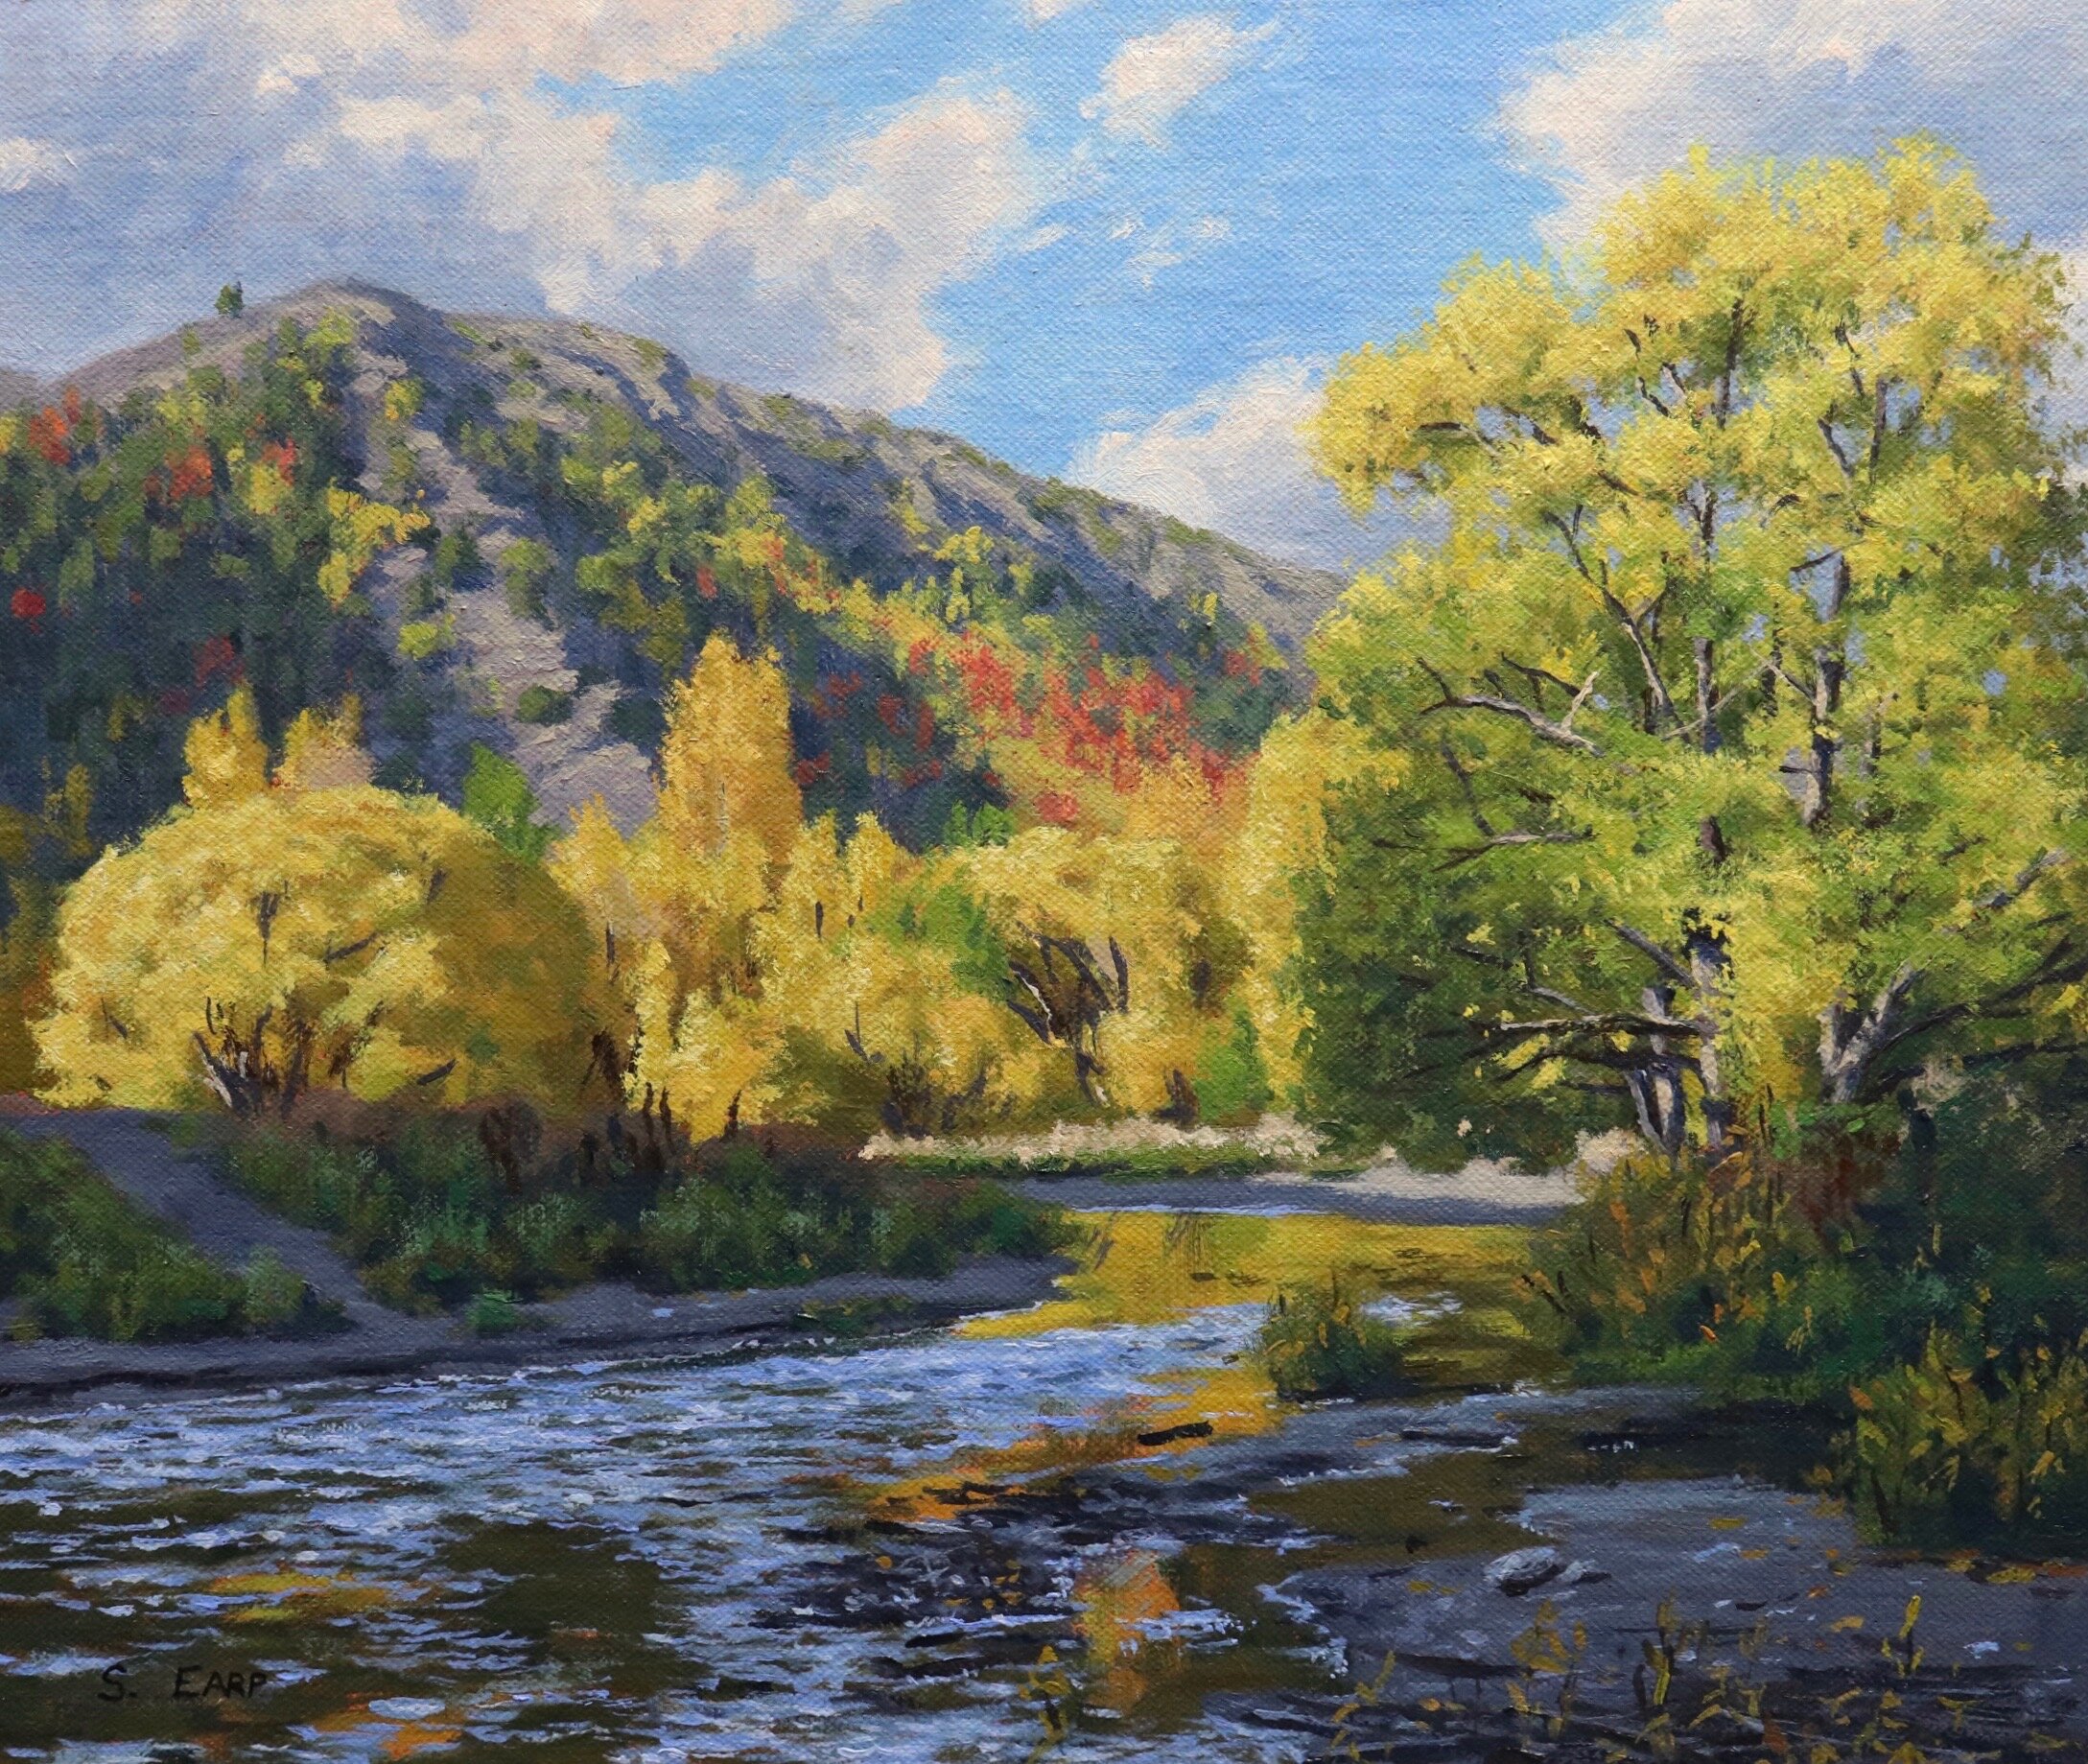
In this blog post I will show you how to paint autumn trees in this painting inspired by a place called Arrowtown in southern New Zealand. This area was planted with European deciduous trees including willows, poplars and sycamores and every autumn their leaves display vibrant beautiful colours.
I will show you the step by step process of how I created this art work.
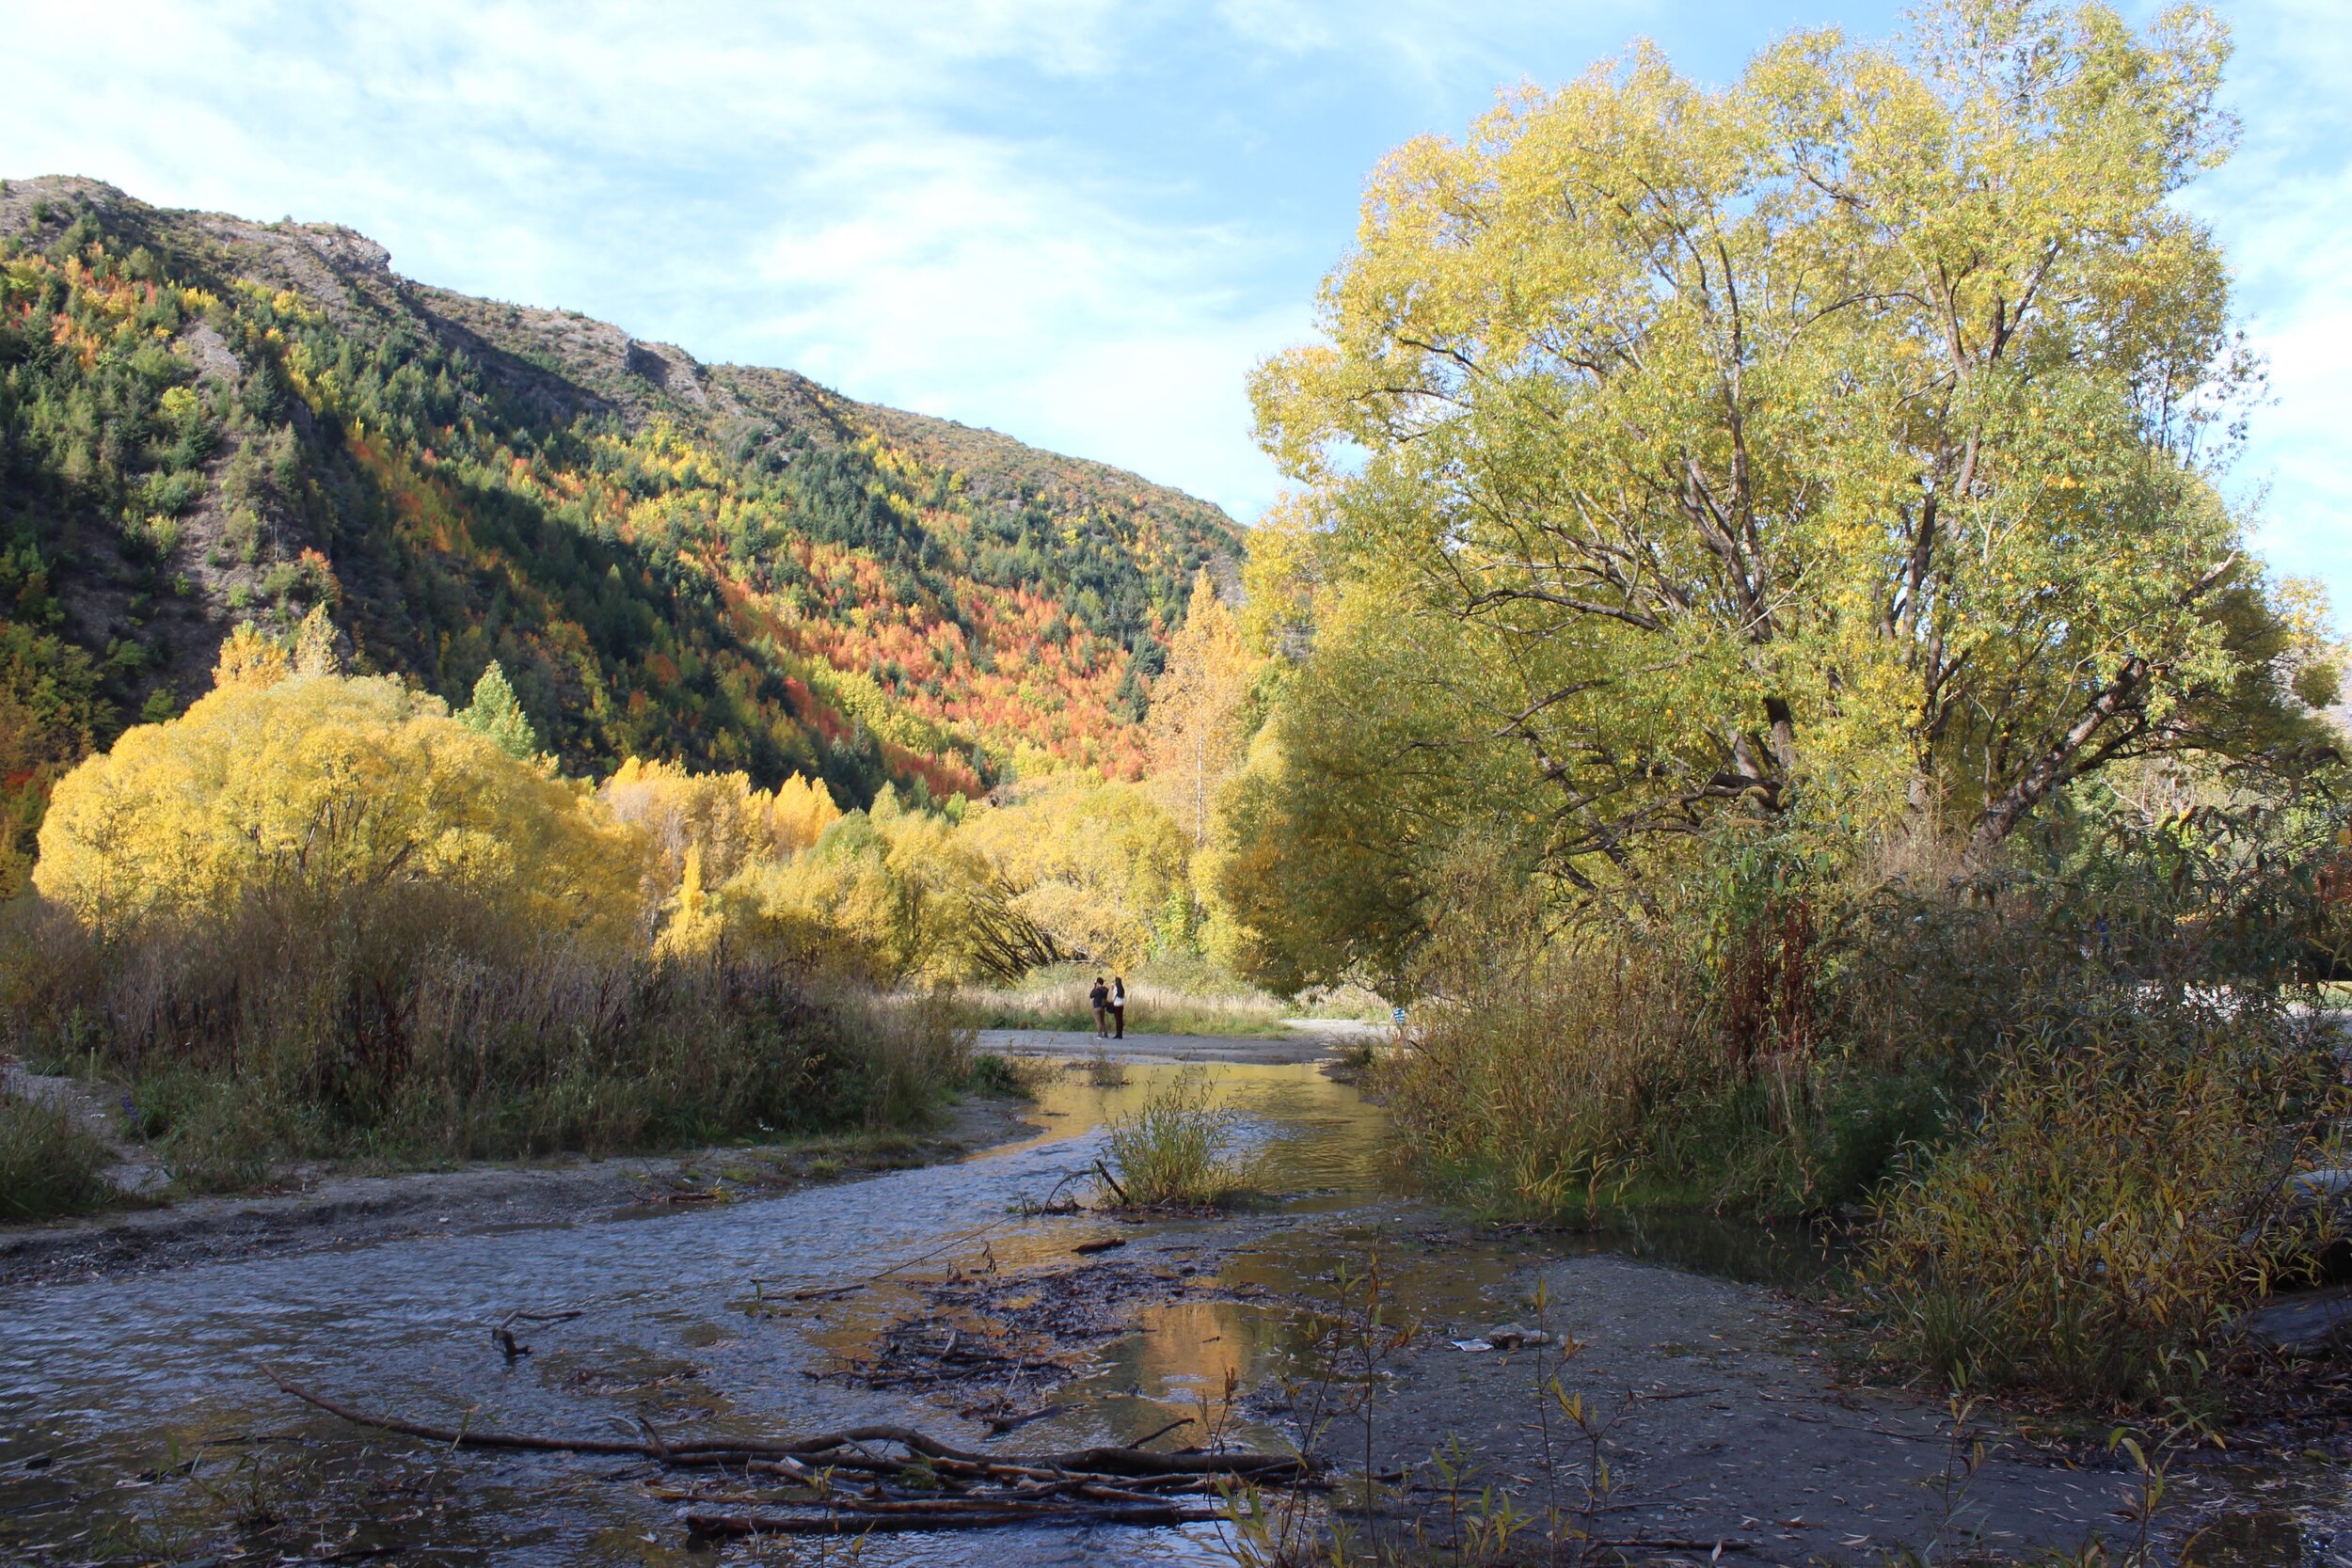
Reference Photo
Here is the reference photo I used to create this painting. Please feel free to copy it if you would like to have a go at painting this art work.
Colours
I painted this artwork using oil paint and the colours I used in this painting are as follows:
- Titanium white
- Burnt sienna
- Yellow oxide
- Cadmium yellow
- Cadmium orange
- Quinacridone magenta
- Ultramarine blue
- Cobalt teal
- Phthalo green
Brushes
Here is a list of the brushes I used in this painting:
- No.5 flat
- No.2 flat
- No.3 filbert
- No.1 round
- No.0 round (bristle and synthetic brushes)
- No.00 round
- 1/4” dagger (bristle and synthetic brushes)
Blocking-In The Painting
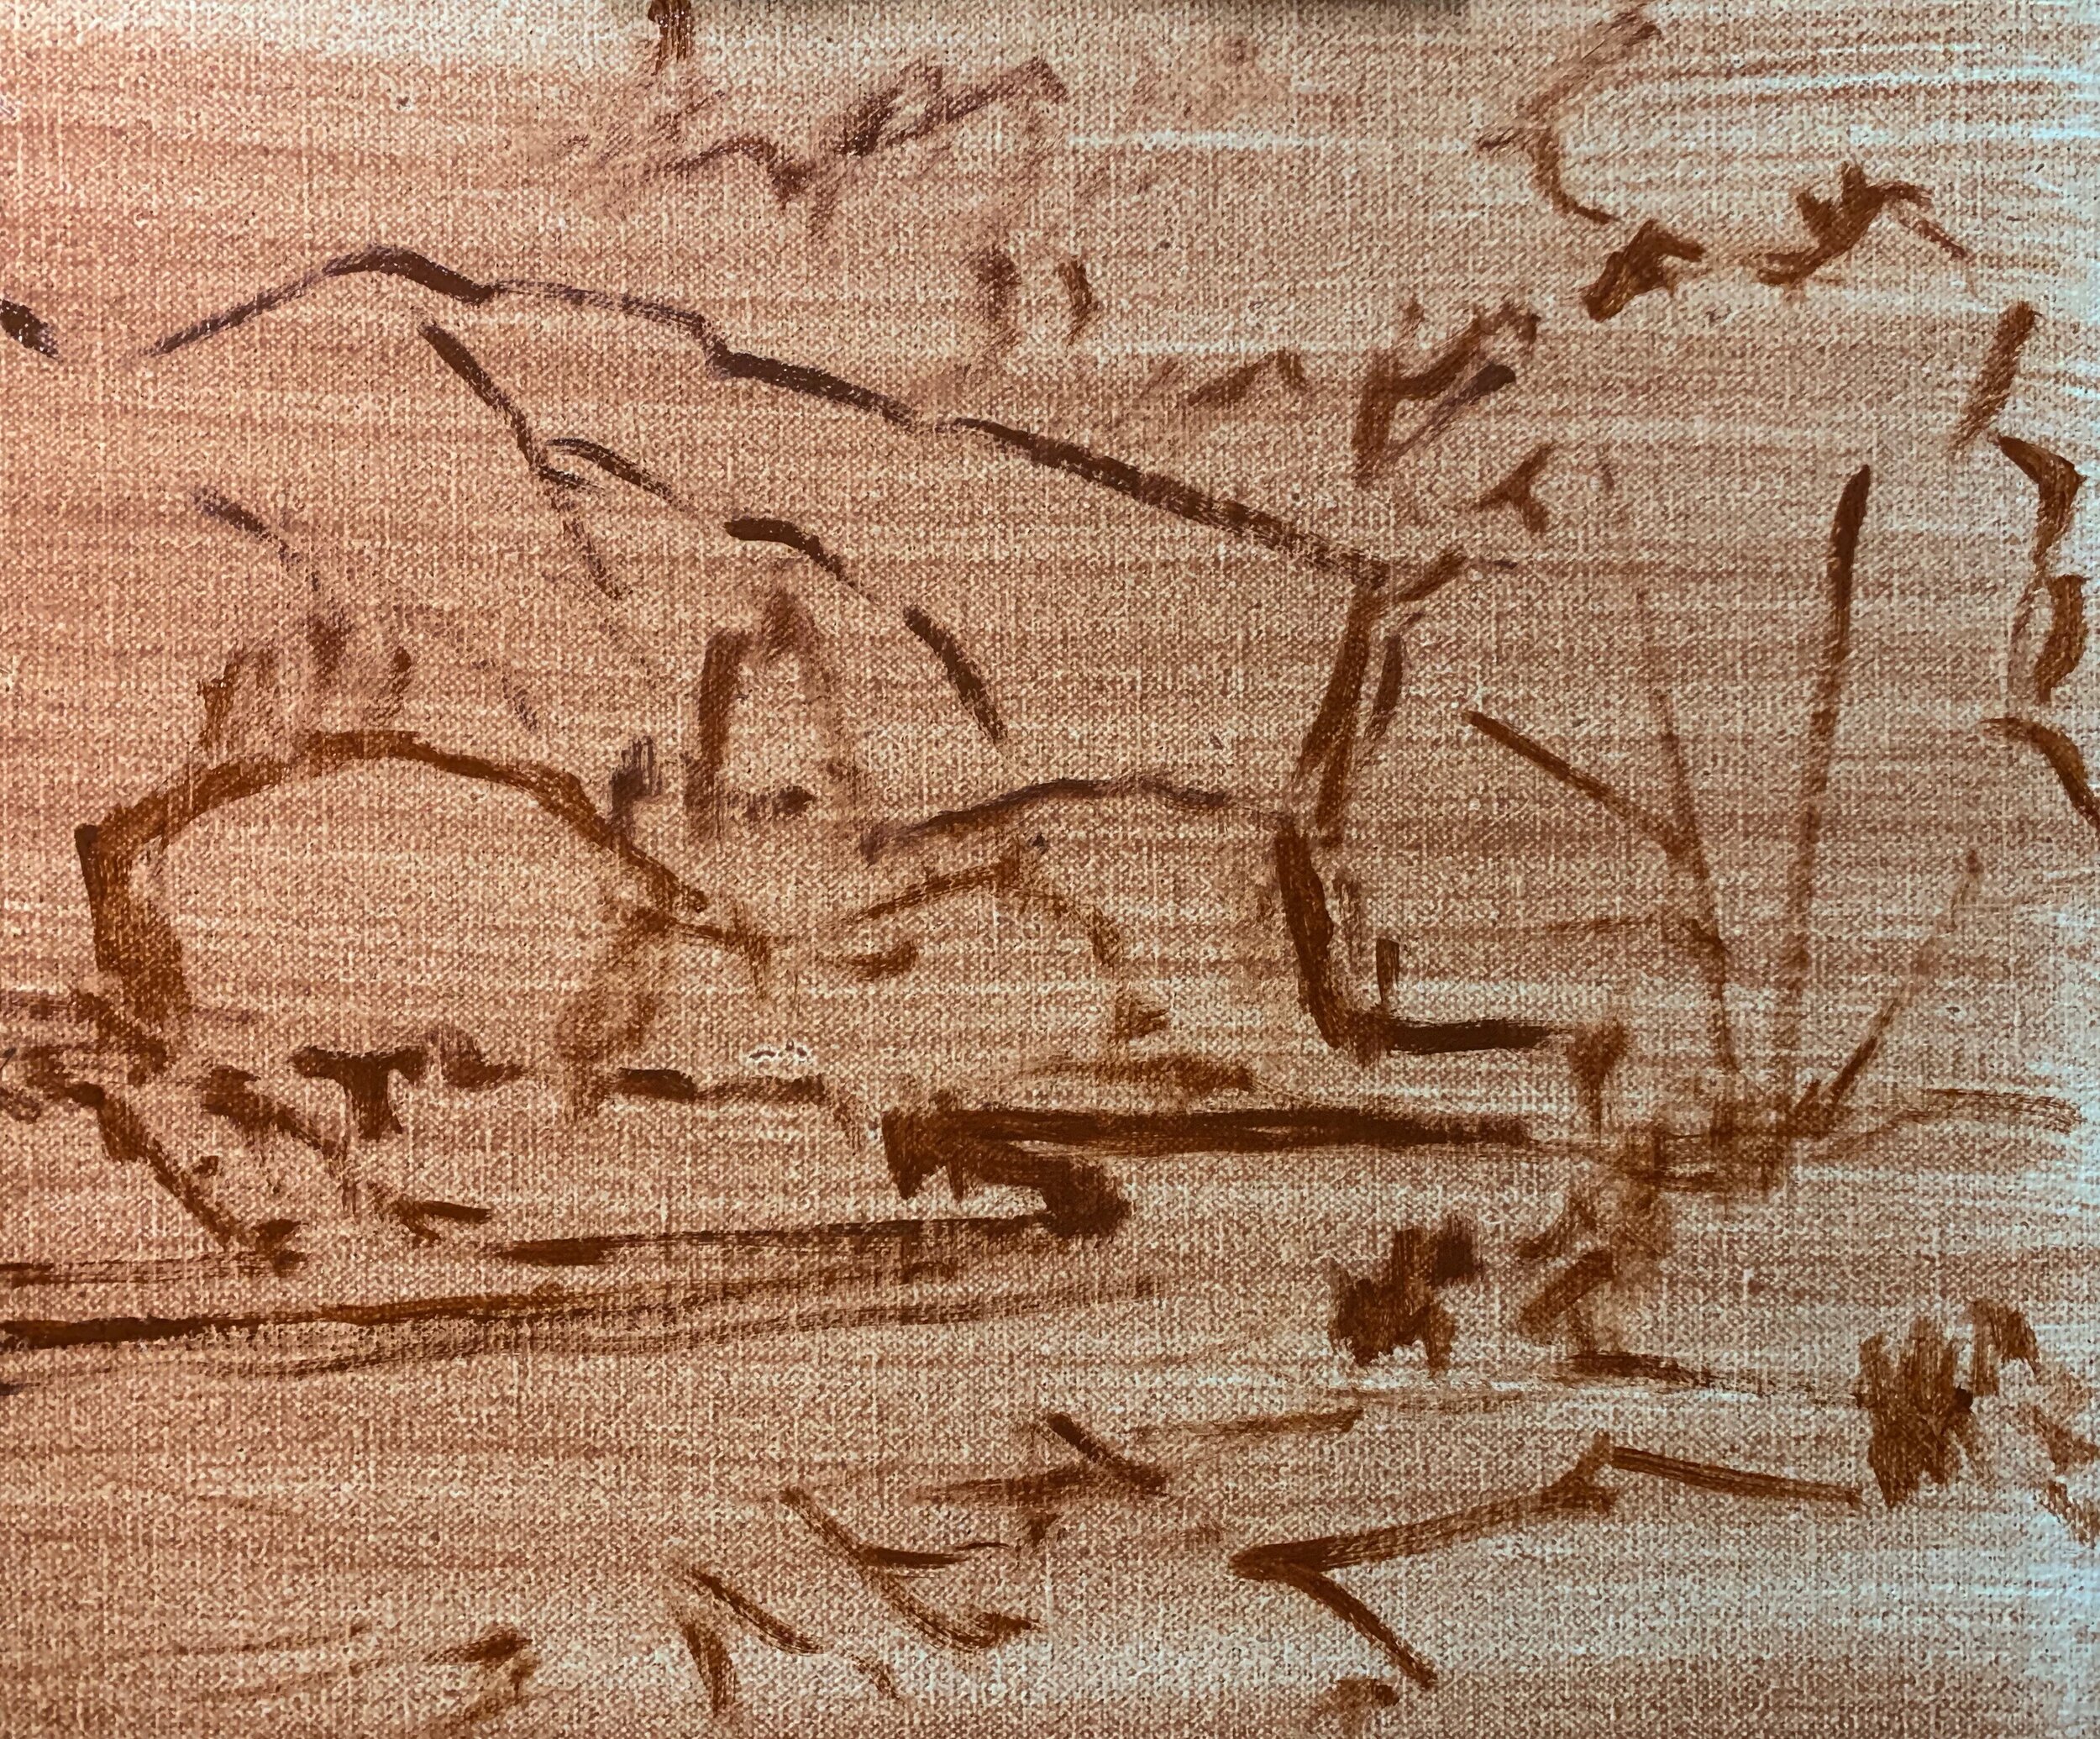
I am painting on an 10” x 12” linen panel which I’ve toned with a thin wash of burnt sienna. This warms up the painting and helps with colour and tone.
I sketched out the composition with a No.1 round brush and burnt sienna. I am using oil paint and I have mixed the burnt sienna with Liquin Original which thins the paint and speeds up the drying time.
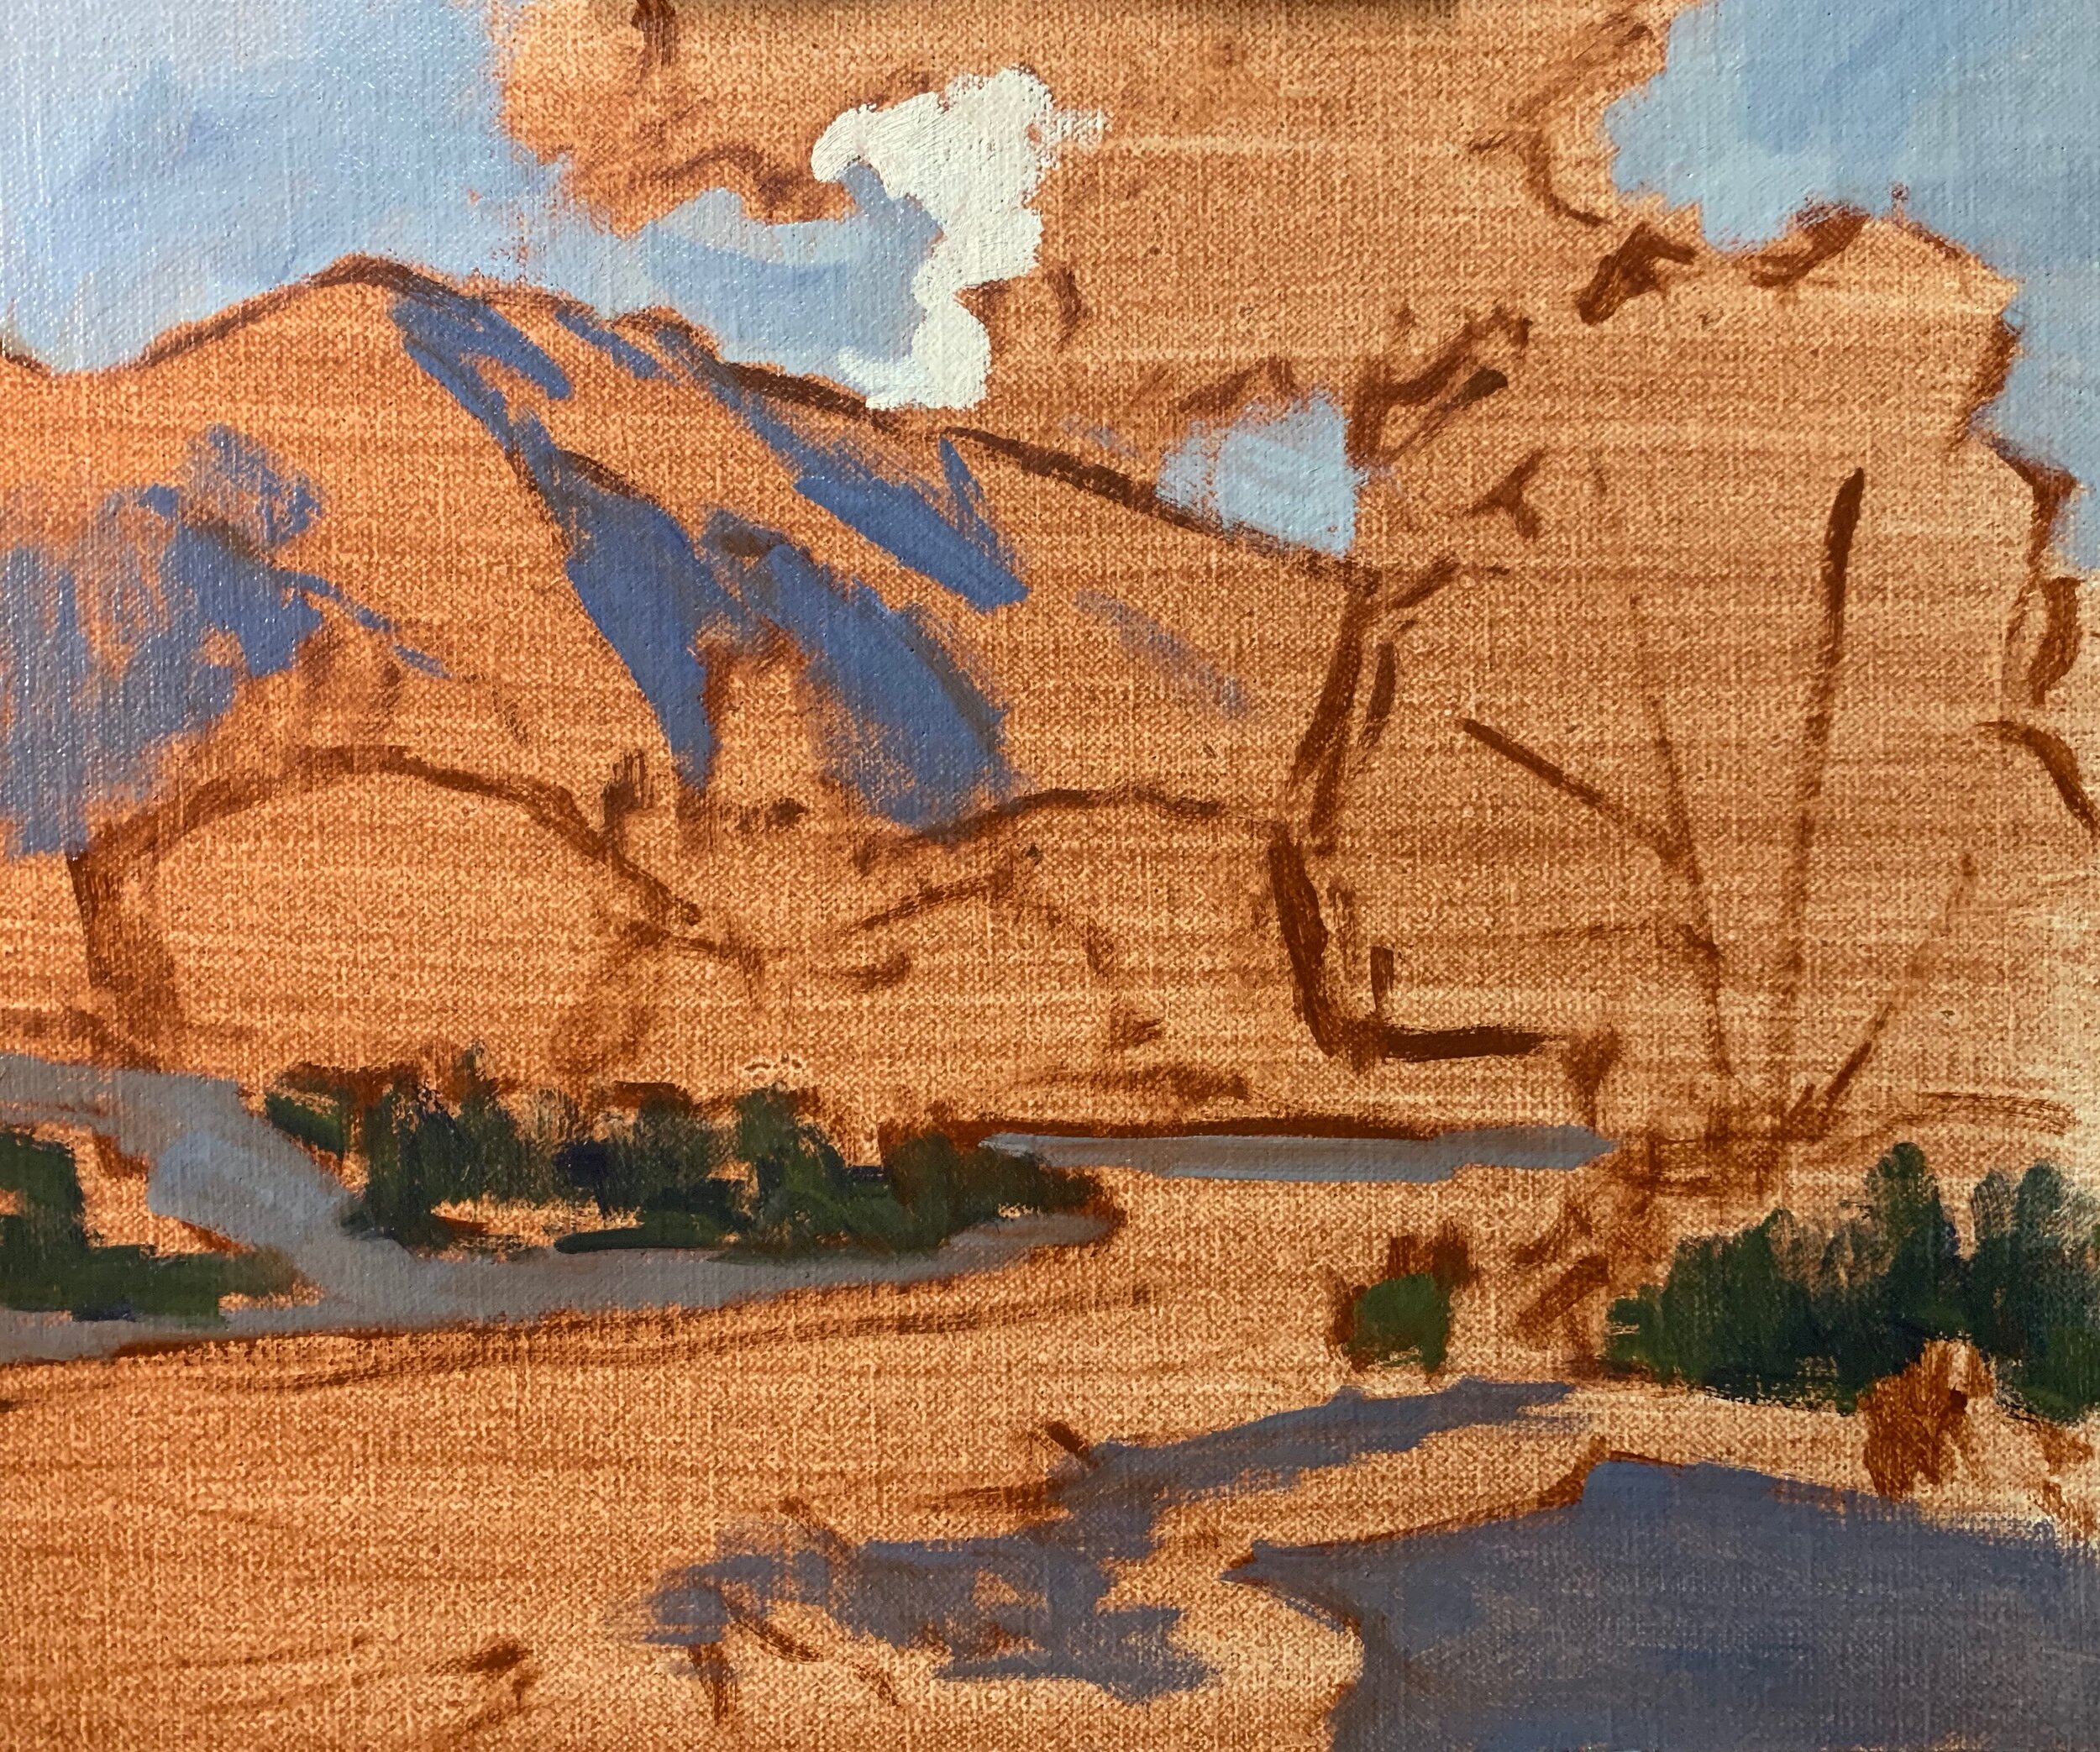
Whenever I start a painting I always establish my dark values and shadows first. Value refers to how light or dark a subject is and it is an important part of creating a successful landscape painting. By painting the dark values first it make it much easier to paint the areas in light and get those colours and values in harmony with the shadow areas.
I begin by painting the cloud shadows which are the lightest of the shadows in the painting. I mix ultramarine blue, burnt sienna and titanium white and I use a No.5 flat brush.
The shadows in the background hill are the next darkest values and they have a blue cast to them. I use the same colours as I did for the cloud shadows, a mix of ultramarine blue, burnt sienna and titanium white, but I use less titanium white in the mix to make the value darker. I also use the same colours for the silty sand along the river bank.
The plants growing along the river bank are some of the darkest values in the painting and for this I mix ultramarine blue with a little yellow oxide.
Once I have painted my main shadow areas I start with the furthest zone away and thats the sky and clouds. I begin painting the cloud highlights, a mix of titanium white and a little burnt sienna. I paint the cloud edges with the highlight mix and I blend some of this mix in with the cloud shadows.
I paint the trees on the hill with a mix of ultramarine blue and yellow oxide for the tree shadows, adding in some titanium white for the trees in the sunlight. The trees with yellow leaves are a mix of yellow oxide, cadmium yellow, ultramarine blue, quinacridone magenta and titanium white. I desaturate the colour a little so it sits back in the landscape.
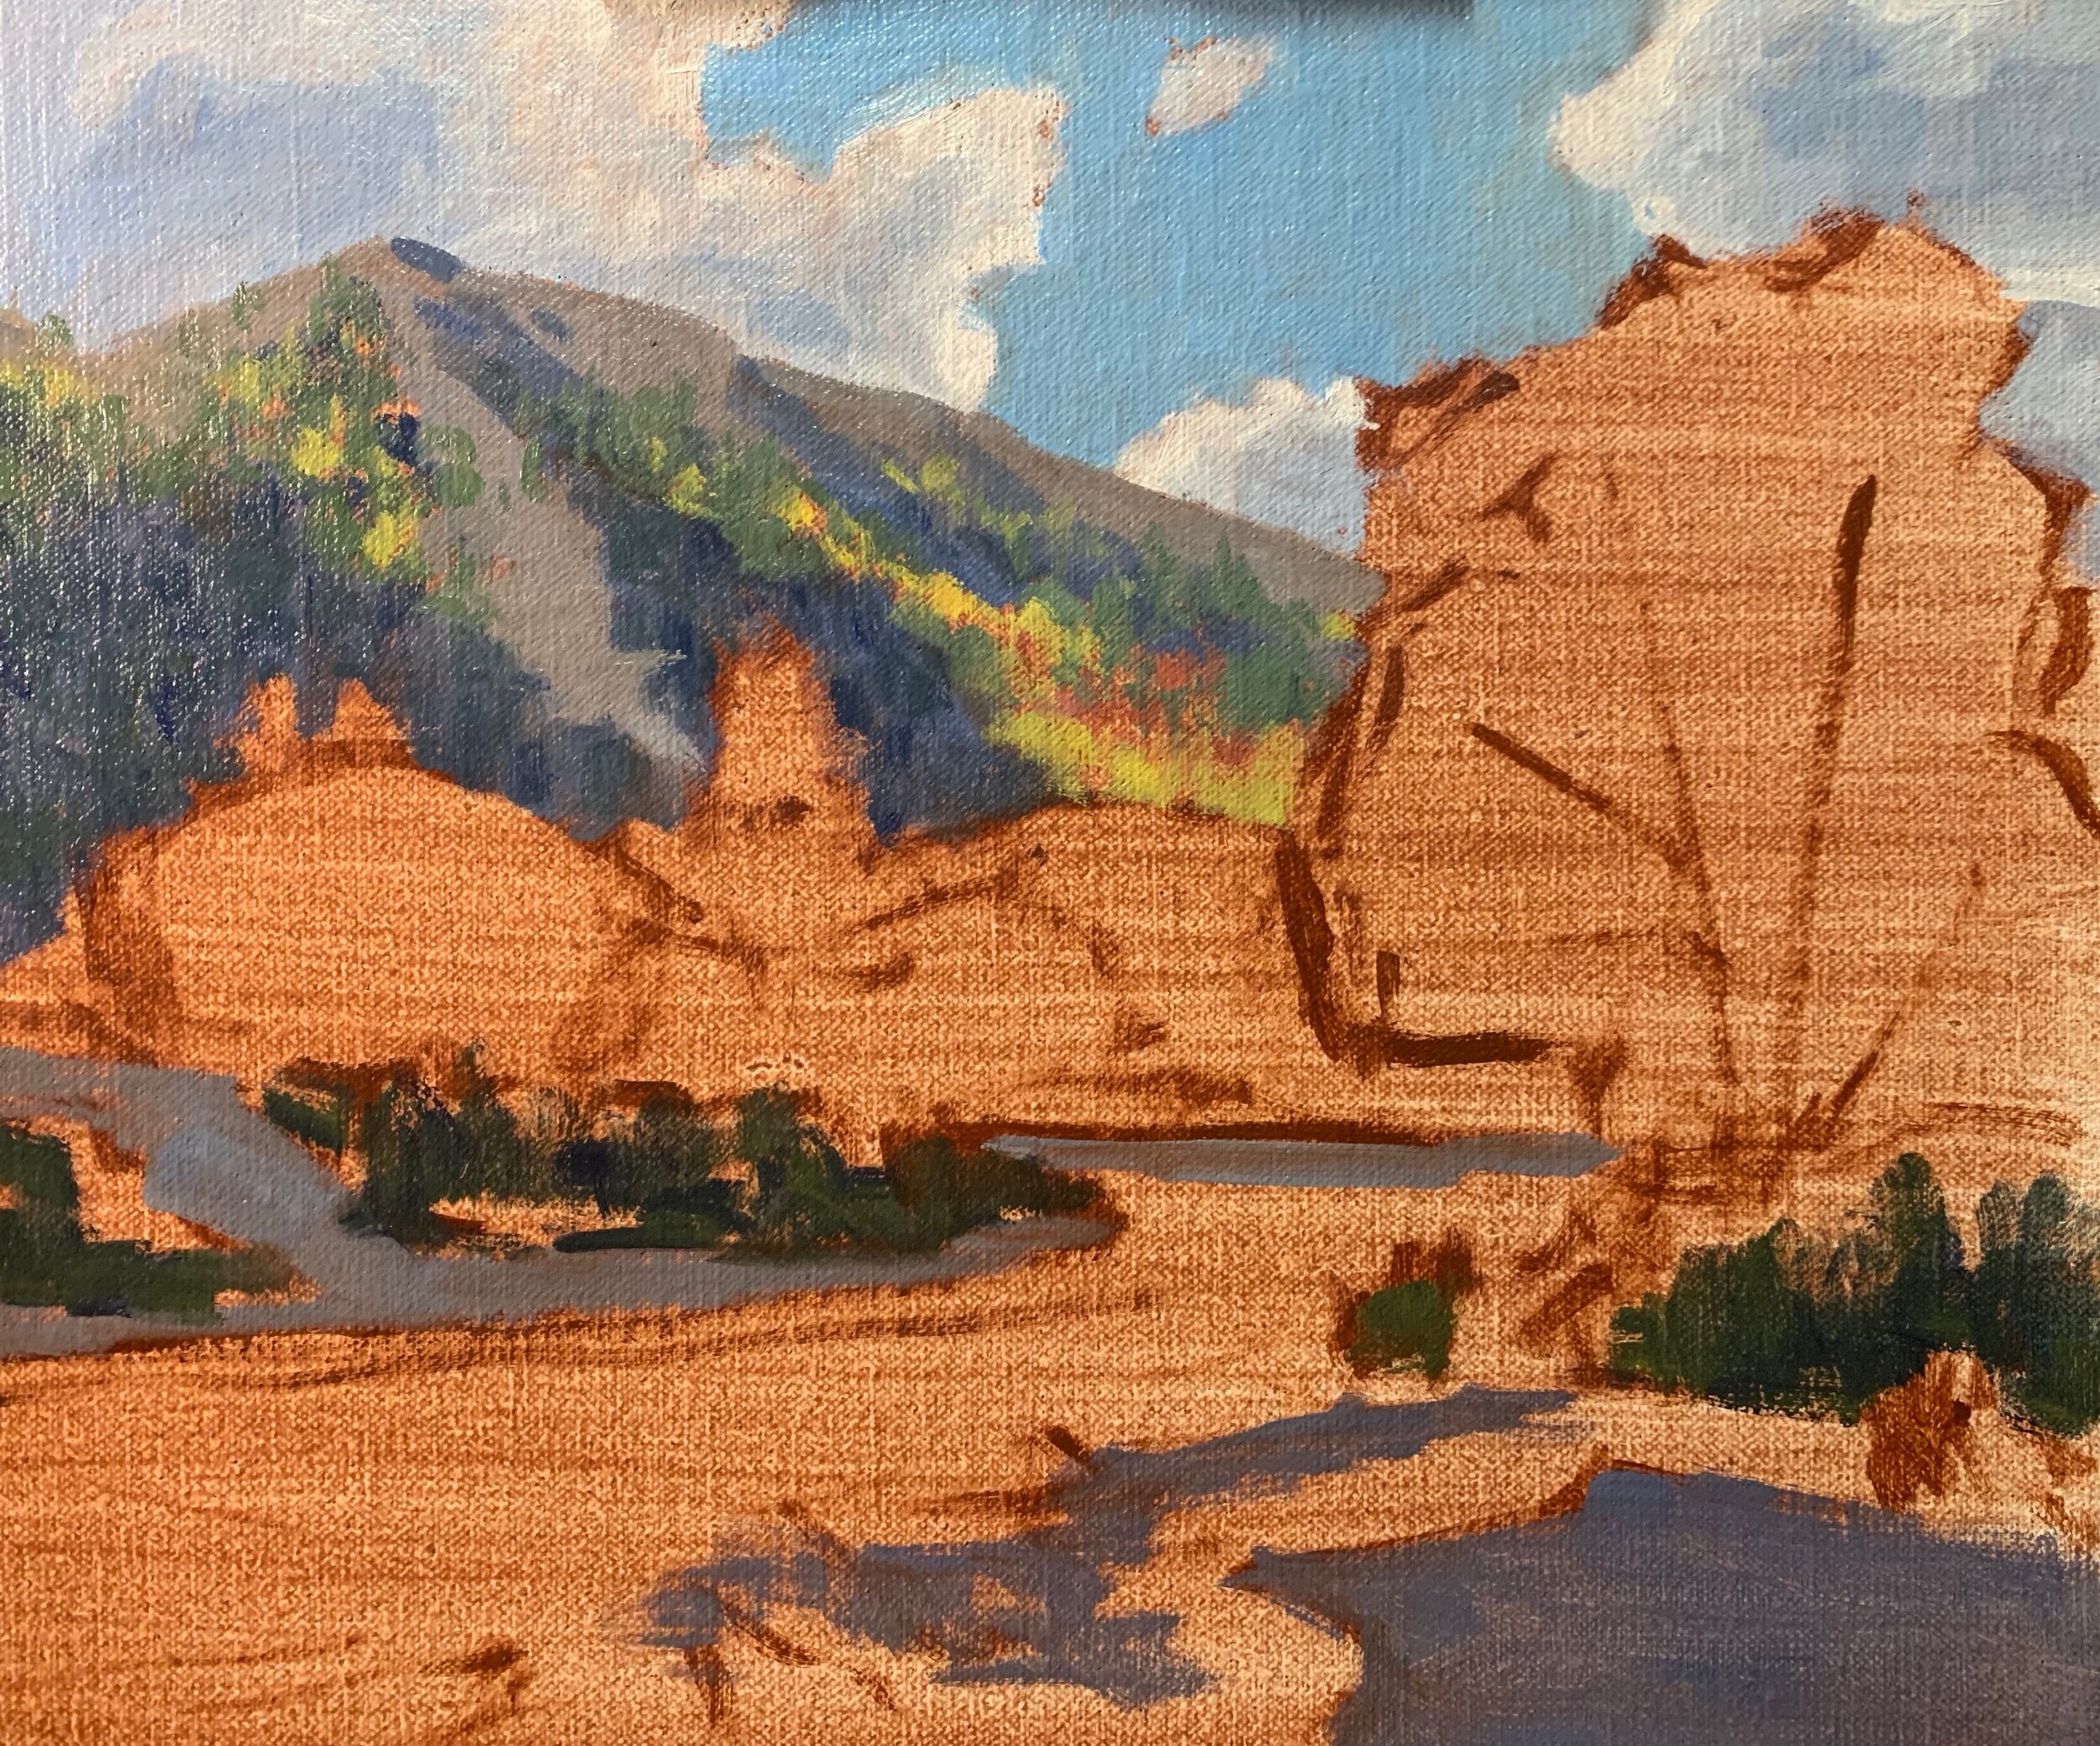
Next I start marking in the tree canopy shadows. The shadows in this yellow foliage are lighter in value than they would be if the leaves were still green. I mix a greenish brown with a combination of yellow oxide, ultramarine blue and quinacridone magenta and I apply the paint with a No.5 flat brush.
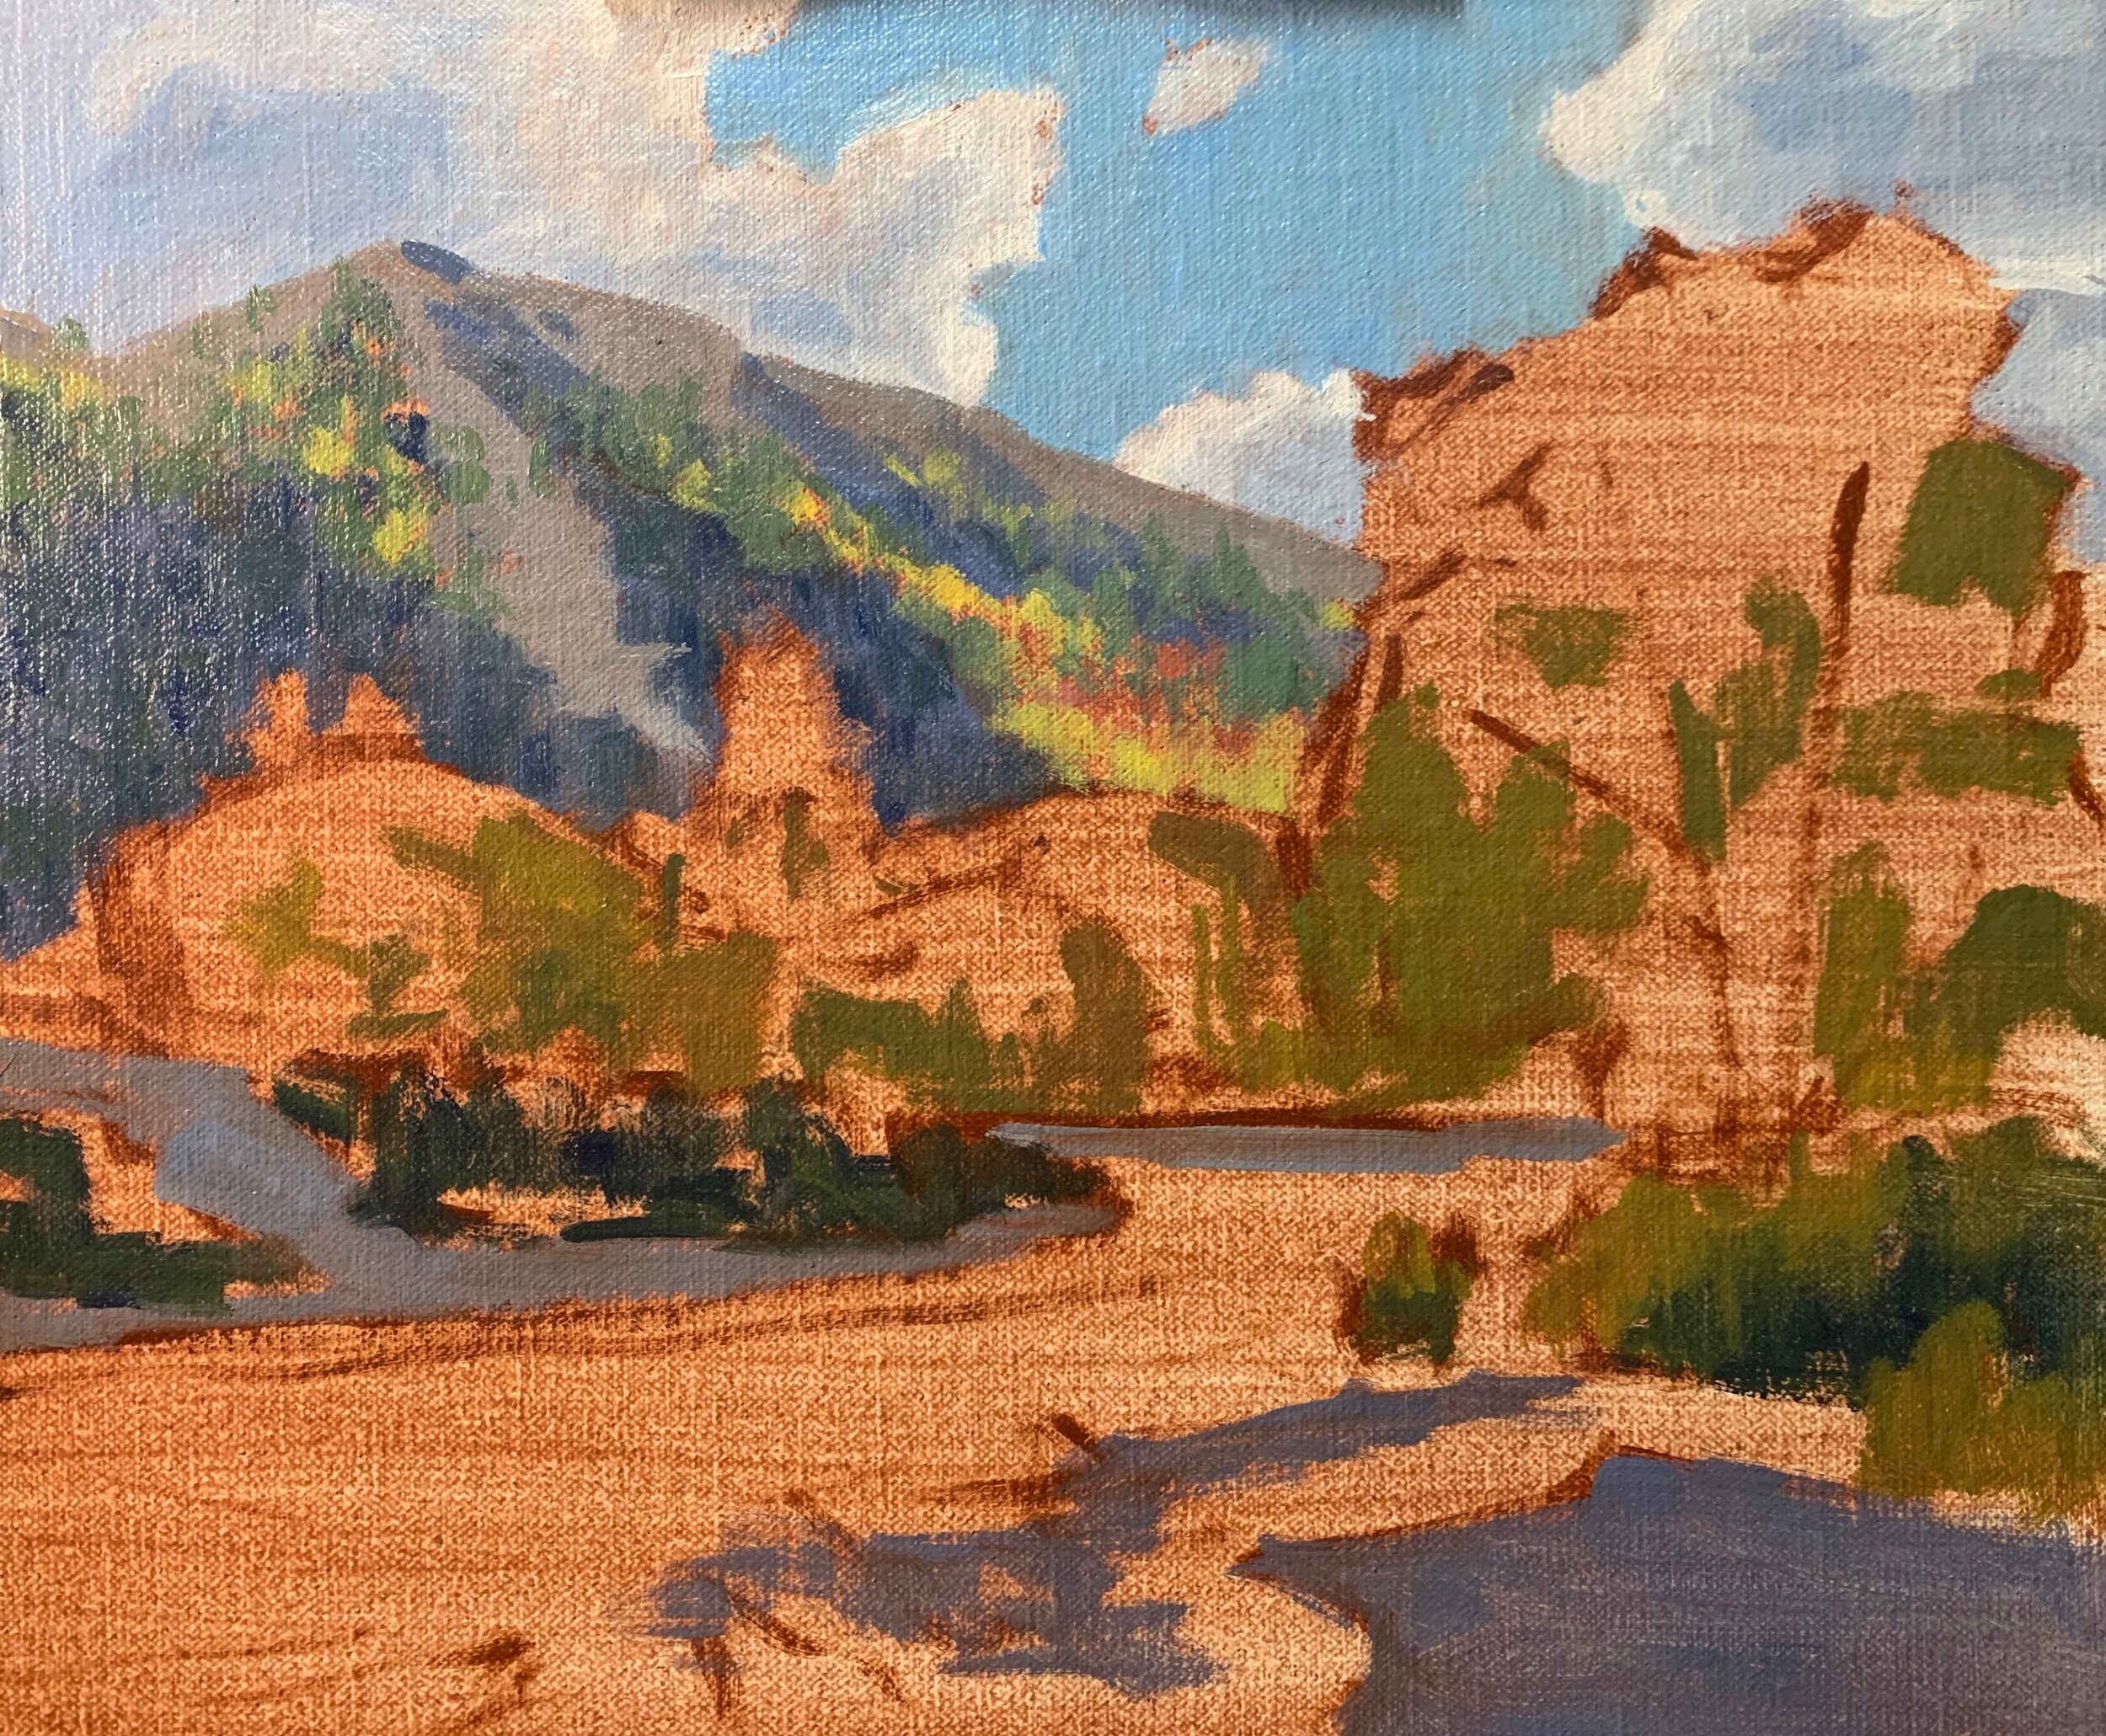
I paint the foliage of the tree with a mix of yellow oxide, cadmium yellow, a little quinacridone magenta and titanium white. The tree canopies are some of the most saturated colours in this landscape.
I introduce a little green into the willow tree on the right side of the painting as not all of its leaves have turned yellow. I use my existing yellow mix and add a little cobalt teal into the mix.
I paint some of the reflections of the trees in the water using my tree foliage light and shadow mixes.
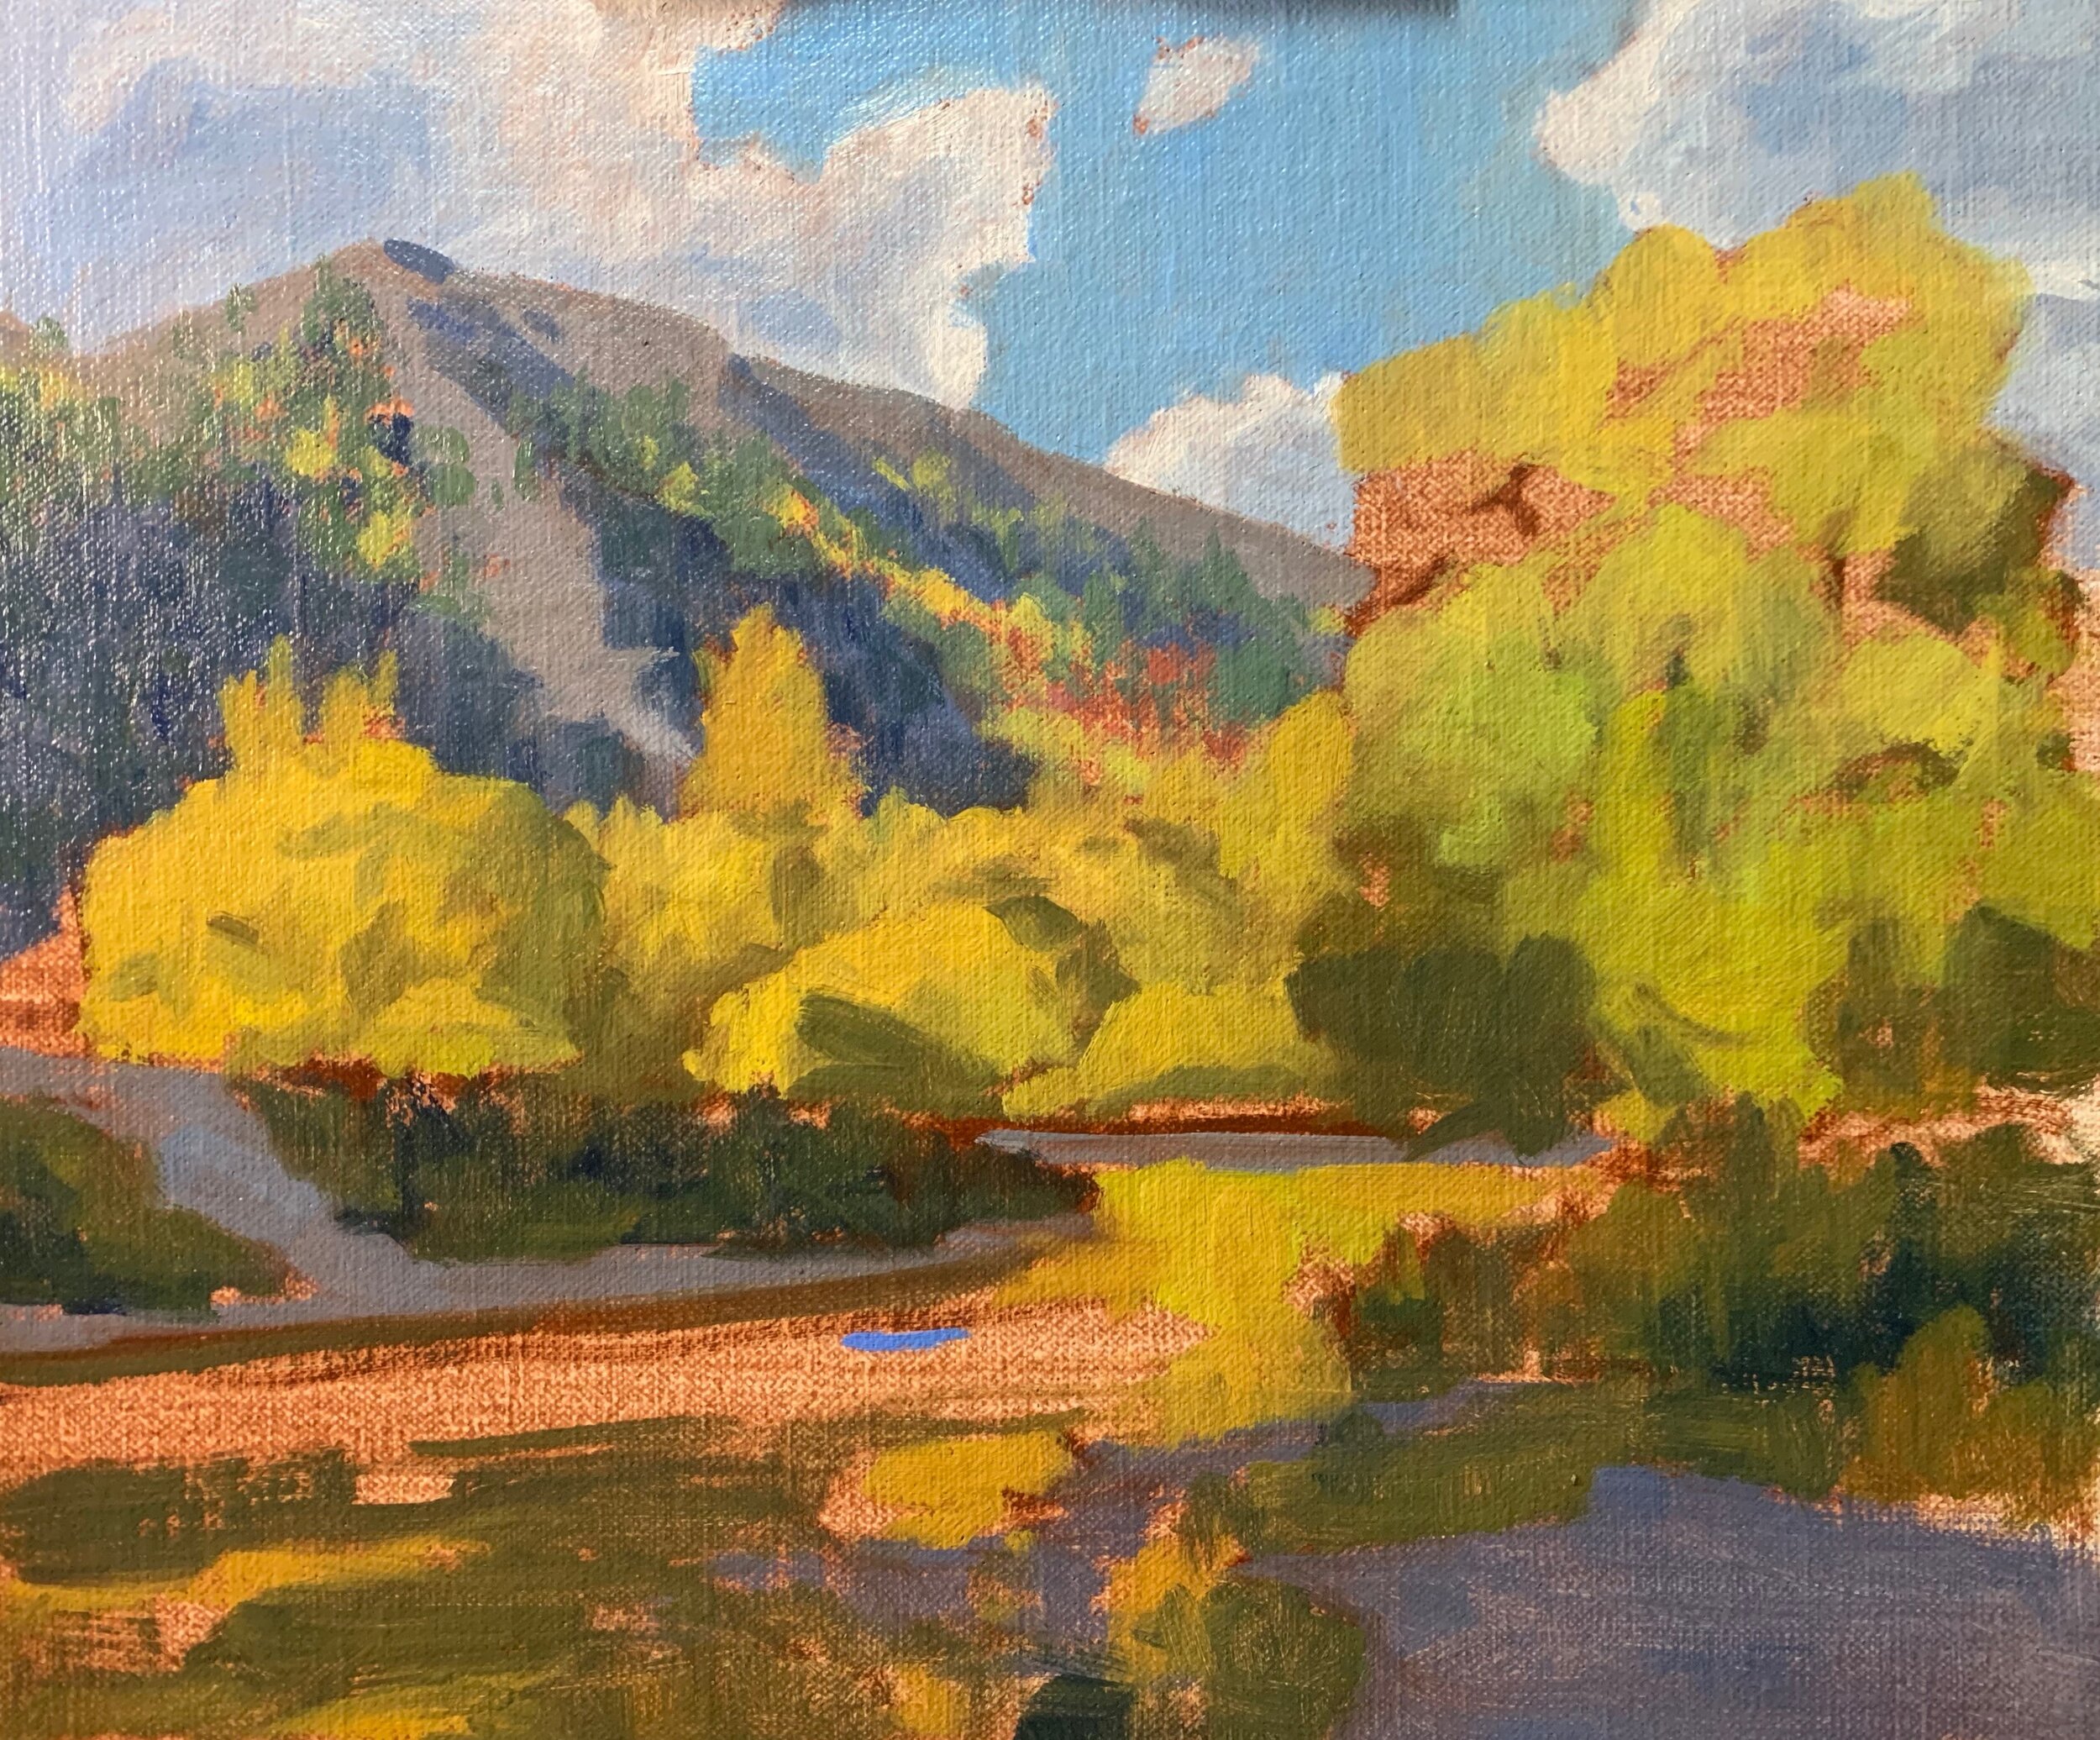
The fast-flowing water in the stream is mostly reflecting the sky and for this I mix ultramarine blue and titanium white.
Once I’ve finished blocking in the painting I allow it to dry so I can begin modelling the paint and adding details.
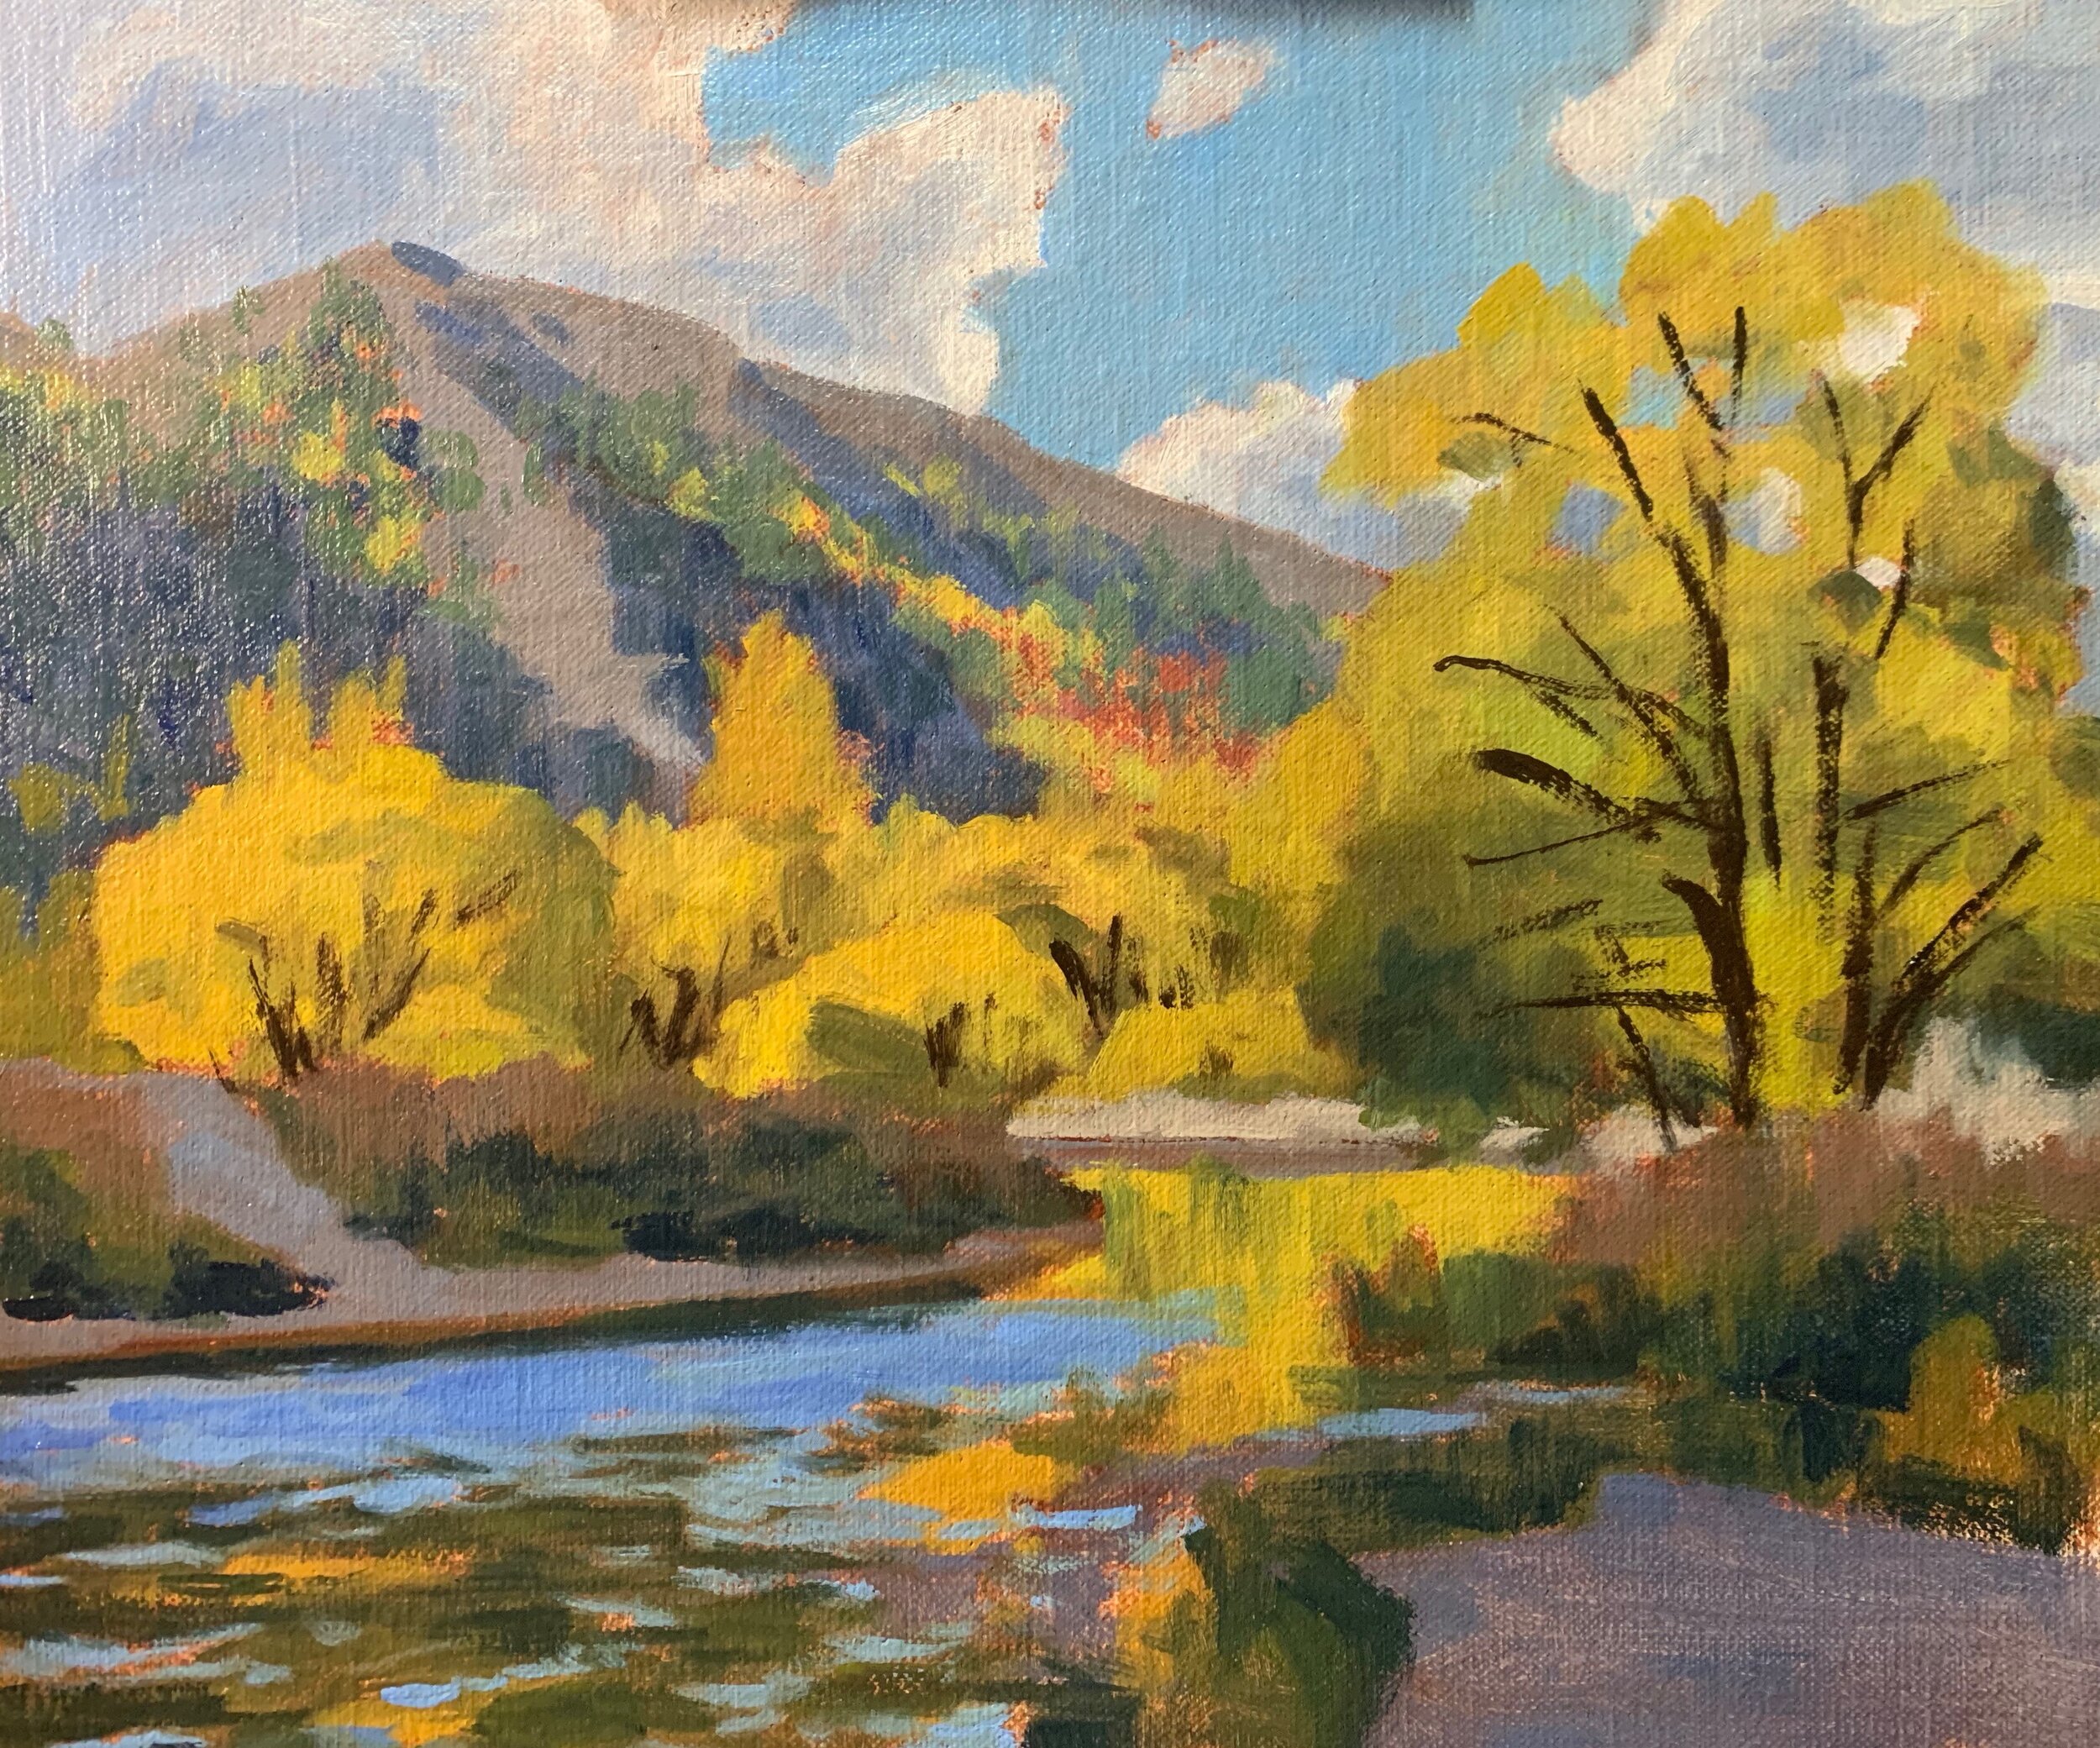
Modelling and Adding Details
Now the painting is dry I can start adding details. I work on the sky adding a few more highlights to the clouds. Following this I then start building up the details in the background hill. I need to be careful not to make it too detailed as I don’t want it confusing the eye and for this reason I maintain more loose brush work.
I am mostly using No.2 flat brushes and using the same colours for the trees as I did during the blocking-in stage and I am making some of the values in these colours a little lighter.
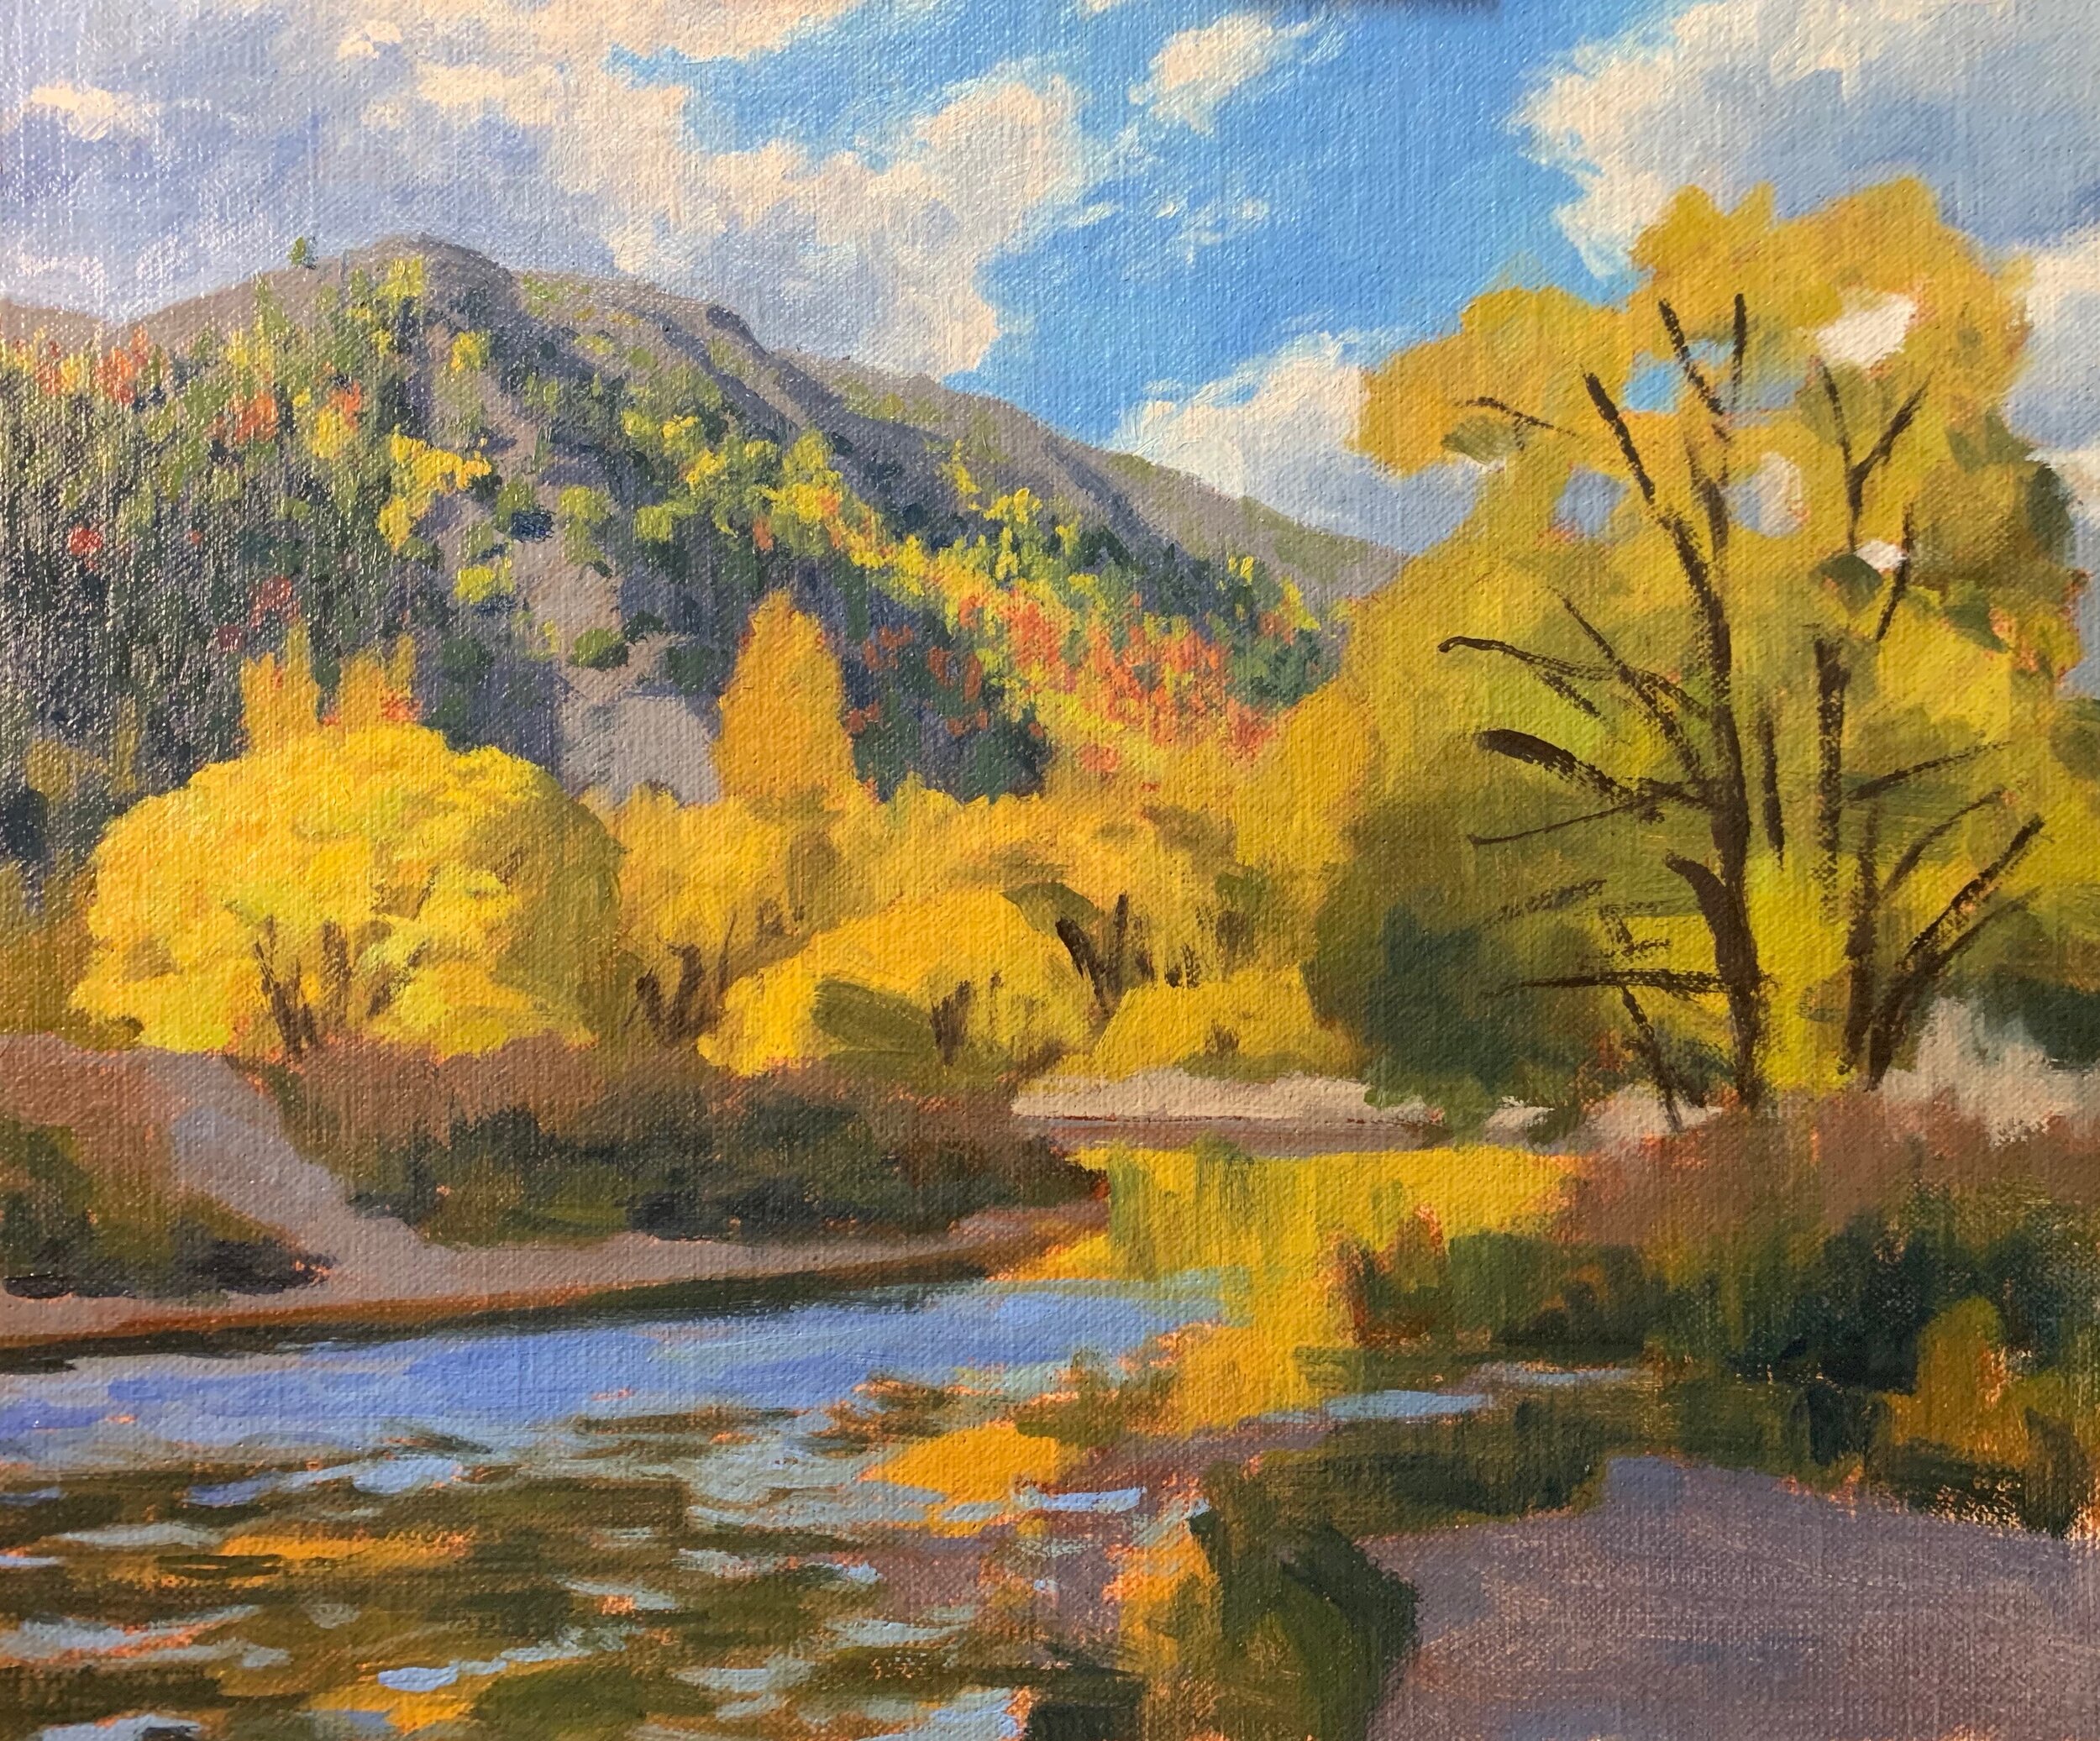
I start building up the details in the mid ground trees. The colours I am using are lighter in value than the previous layer which is going to help build up that three dimensional form in the trees.
I use the same colour mix as I did during the block in stage, a mix of yellow oxide, cadmium yellow, quinacridone magenta, titanium white. For the subtle areas of light green foliage I mix in some cobalt teal.
I use a No.2 flat brush to start layering in the foliage on the large willow tree on the right side of the painting.
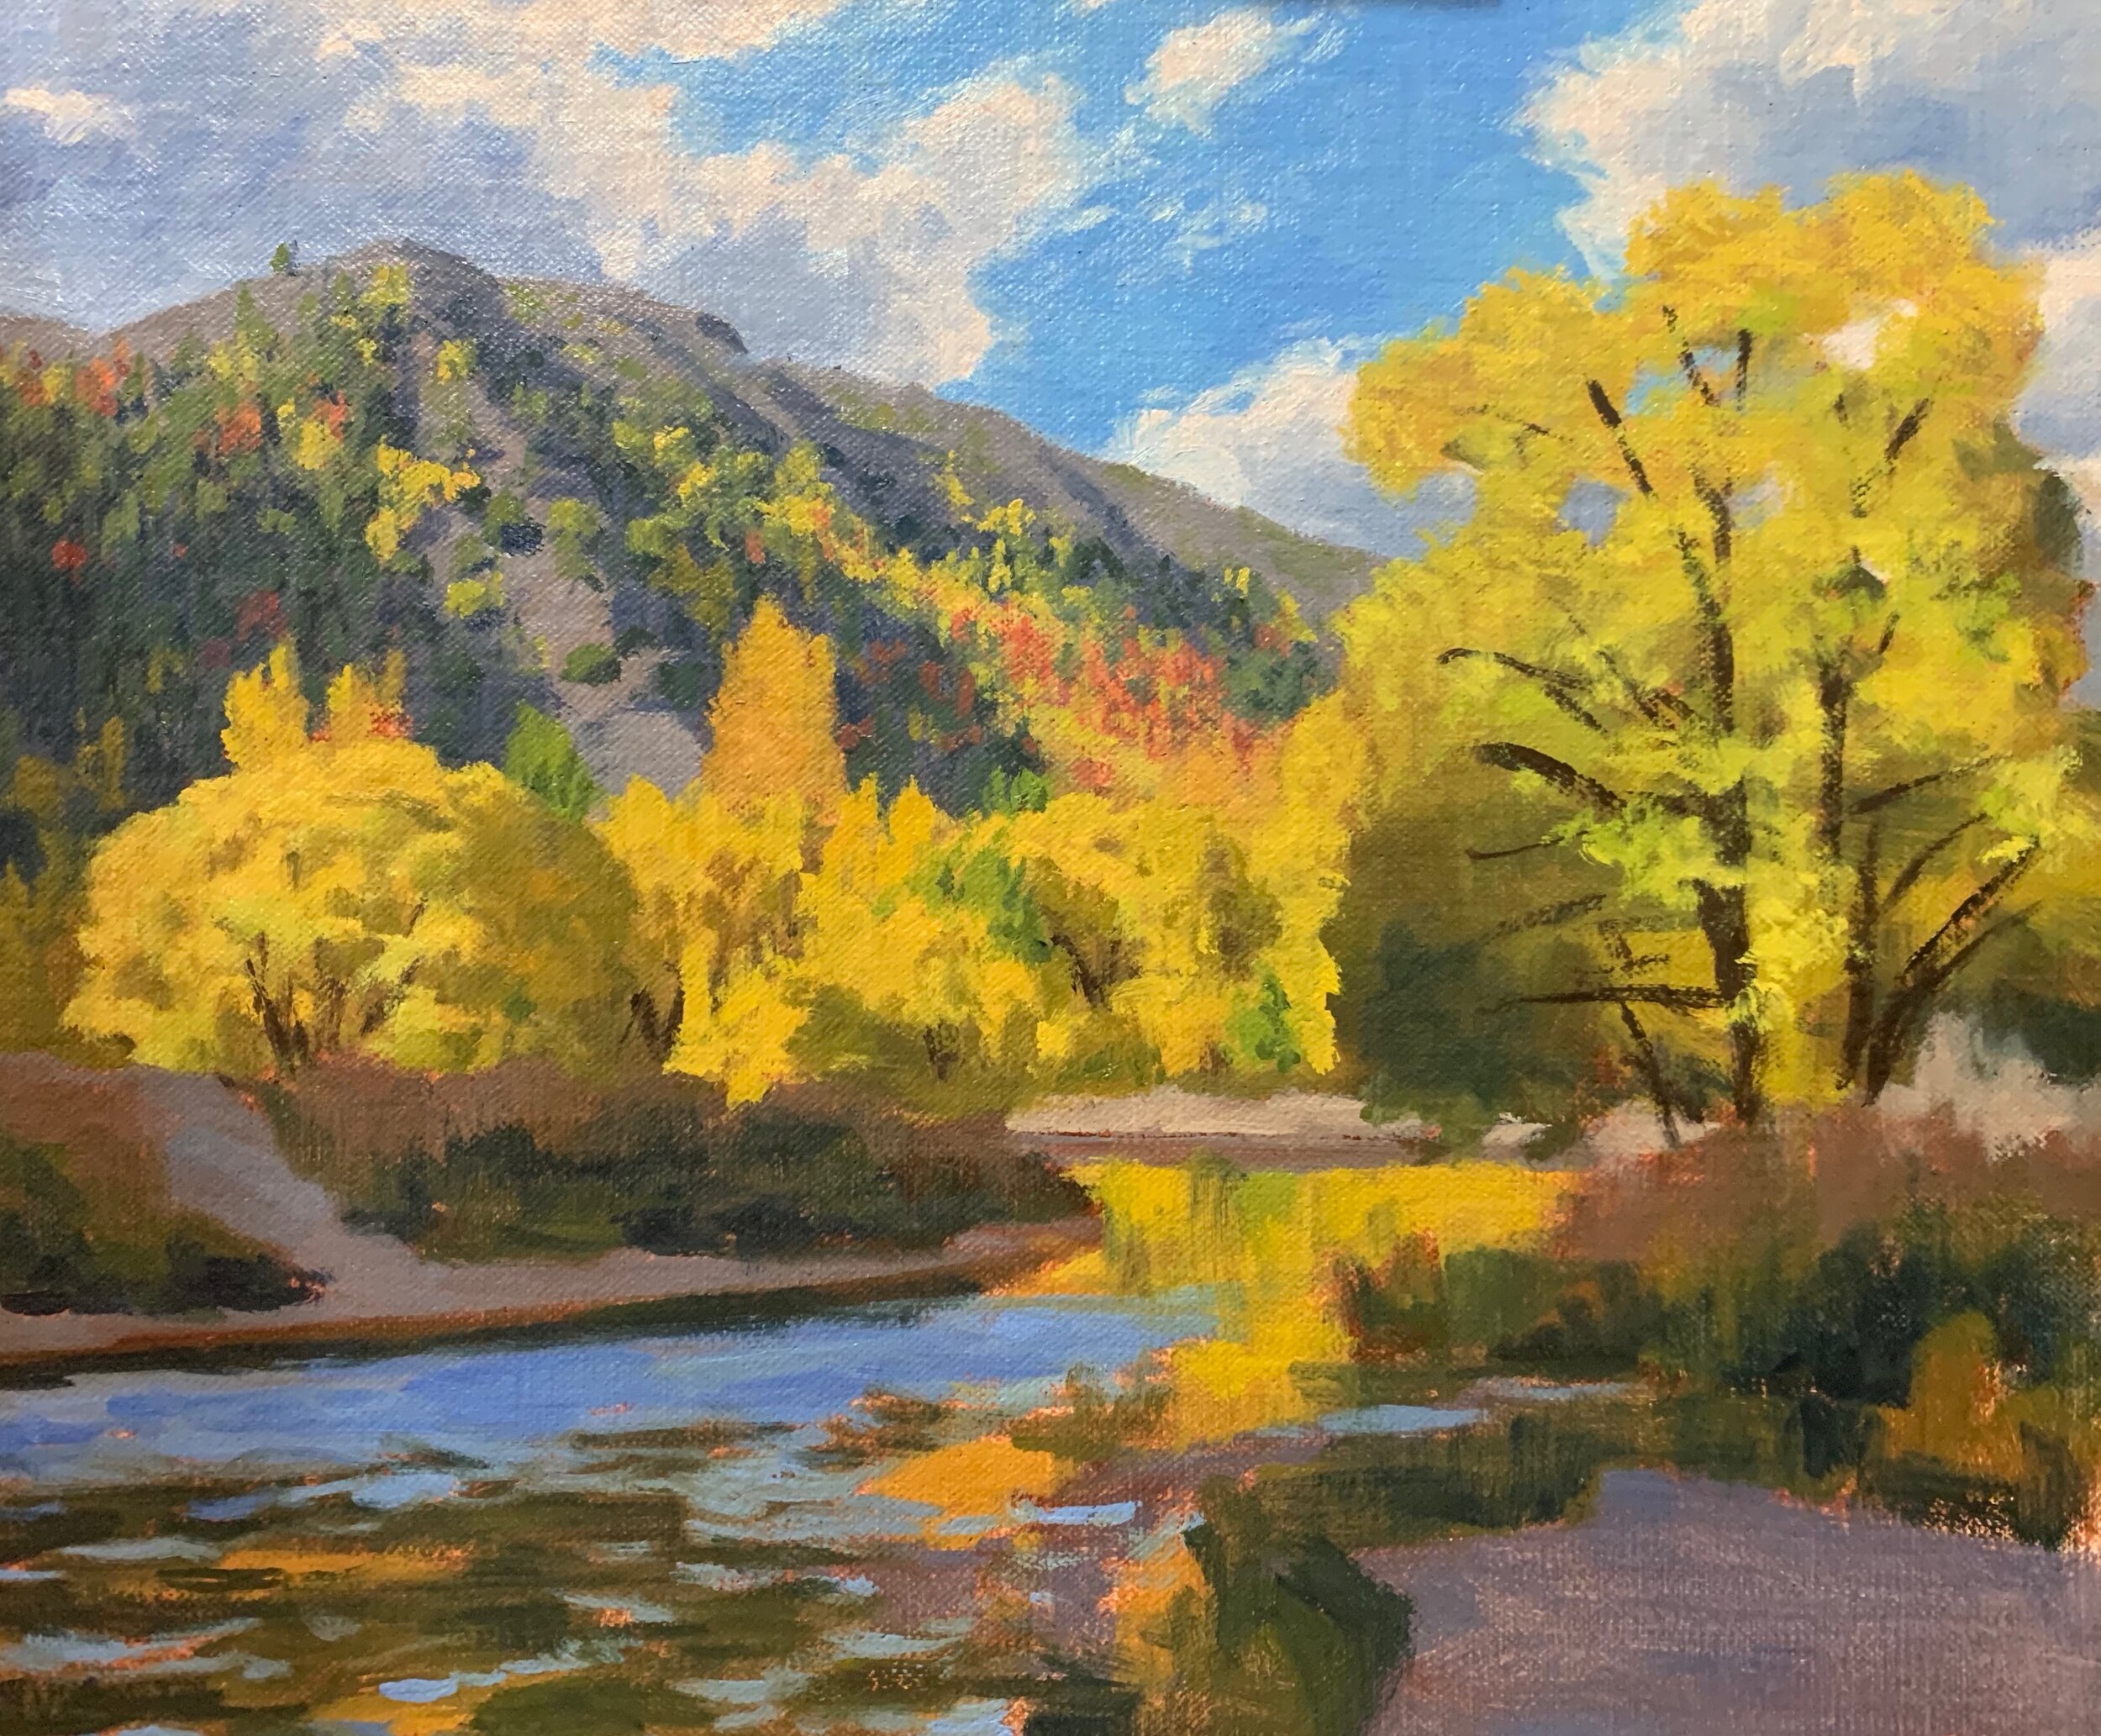
The foreground is in shadow so there are darker tones especially in the still water and the river bank. I add more details to the plants using a 1/4 bristle dagger brush. I am mainly using a mix of ultramarine blue, yellow oxide and quinacridone magenta.
The water is mostly reflecting the shadows along the river bank and the sky. For this I mix ultramarine blue, yellow oxide and burnt sienna and for the highlights on the fast flowing water which is reflecting the sky I mix ultramarine blue and titanium white.
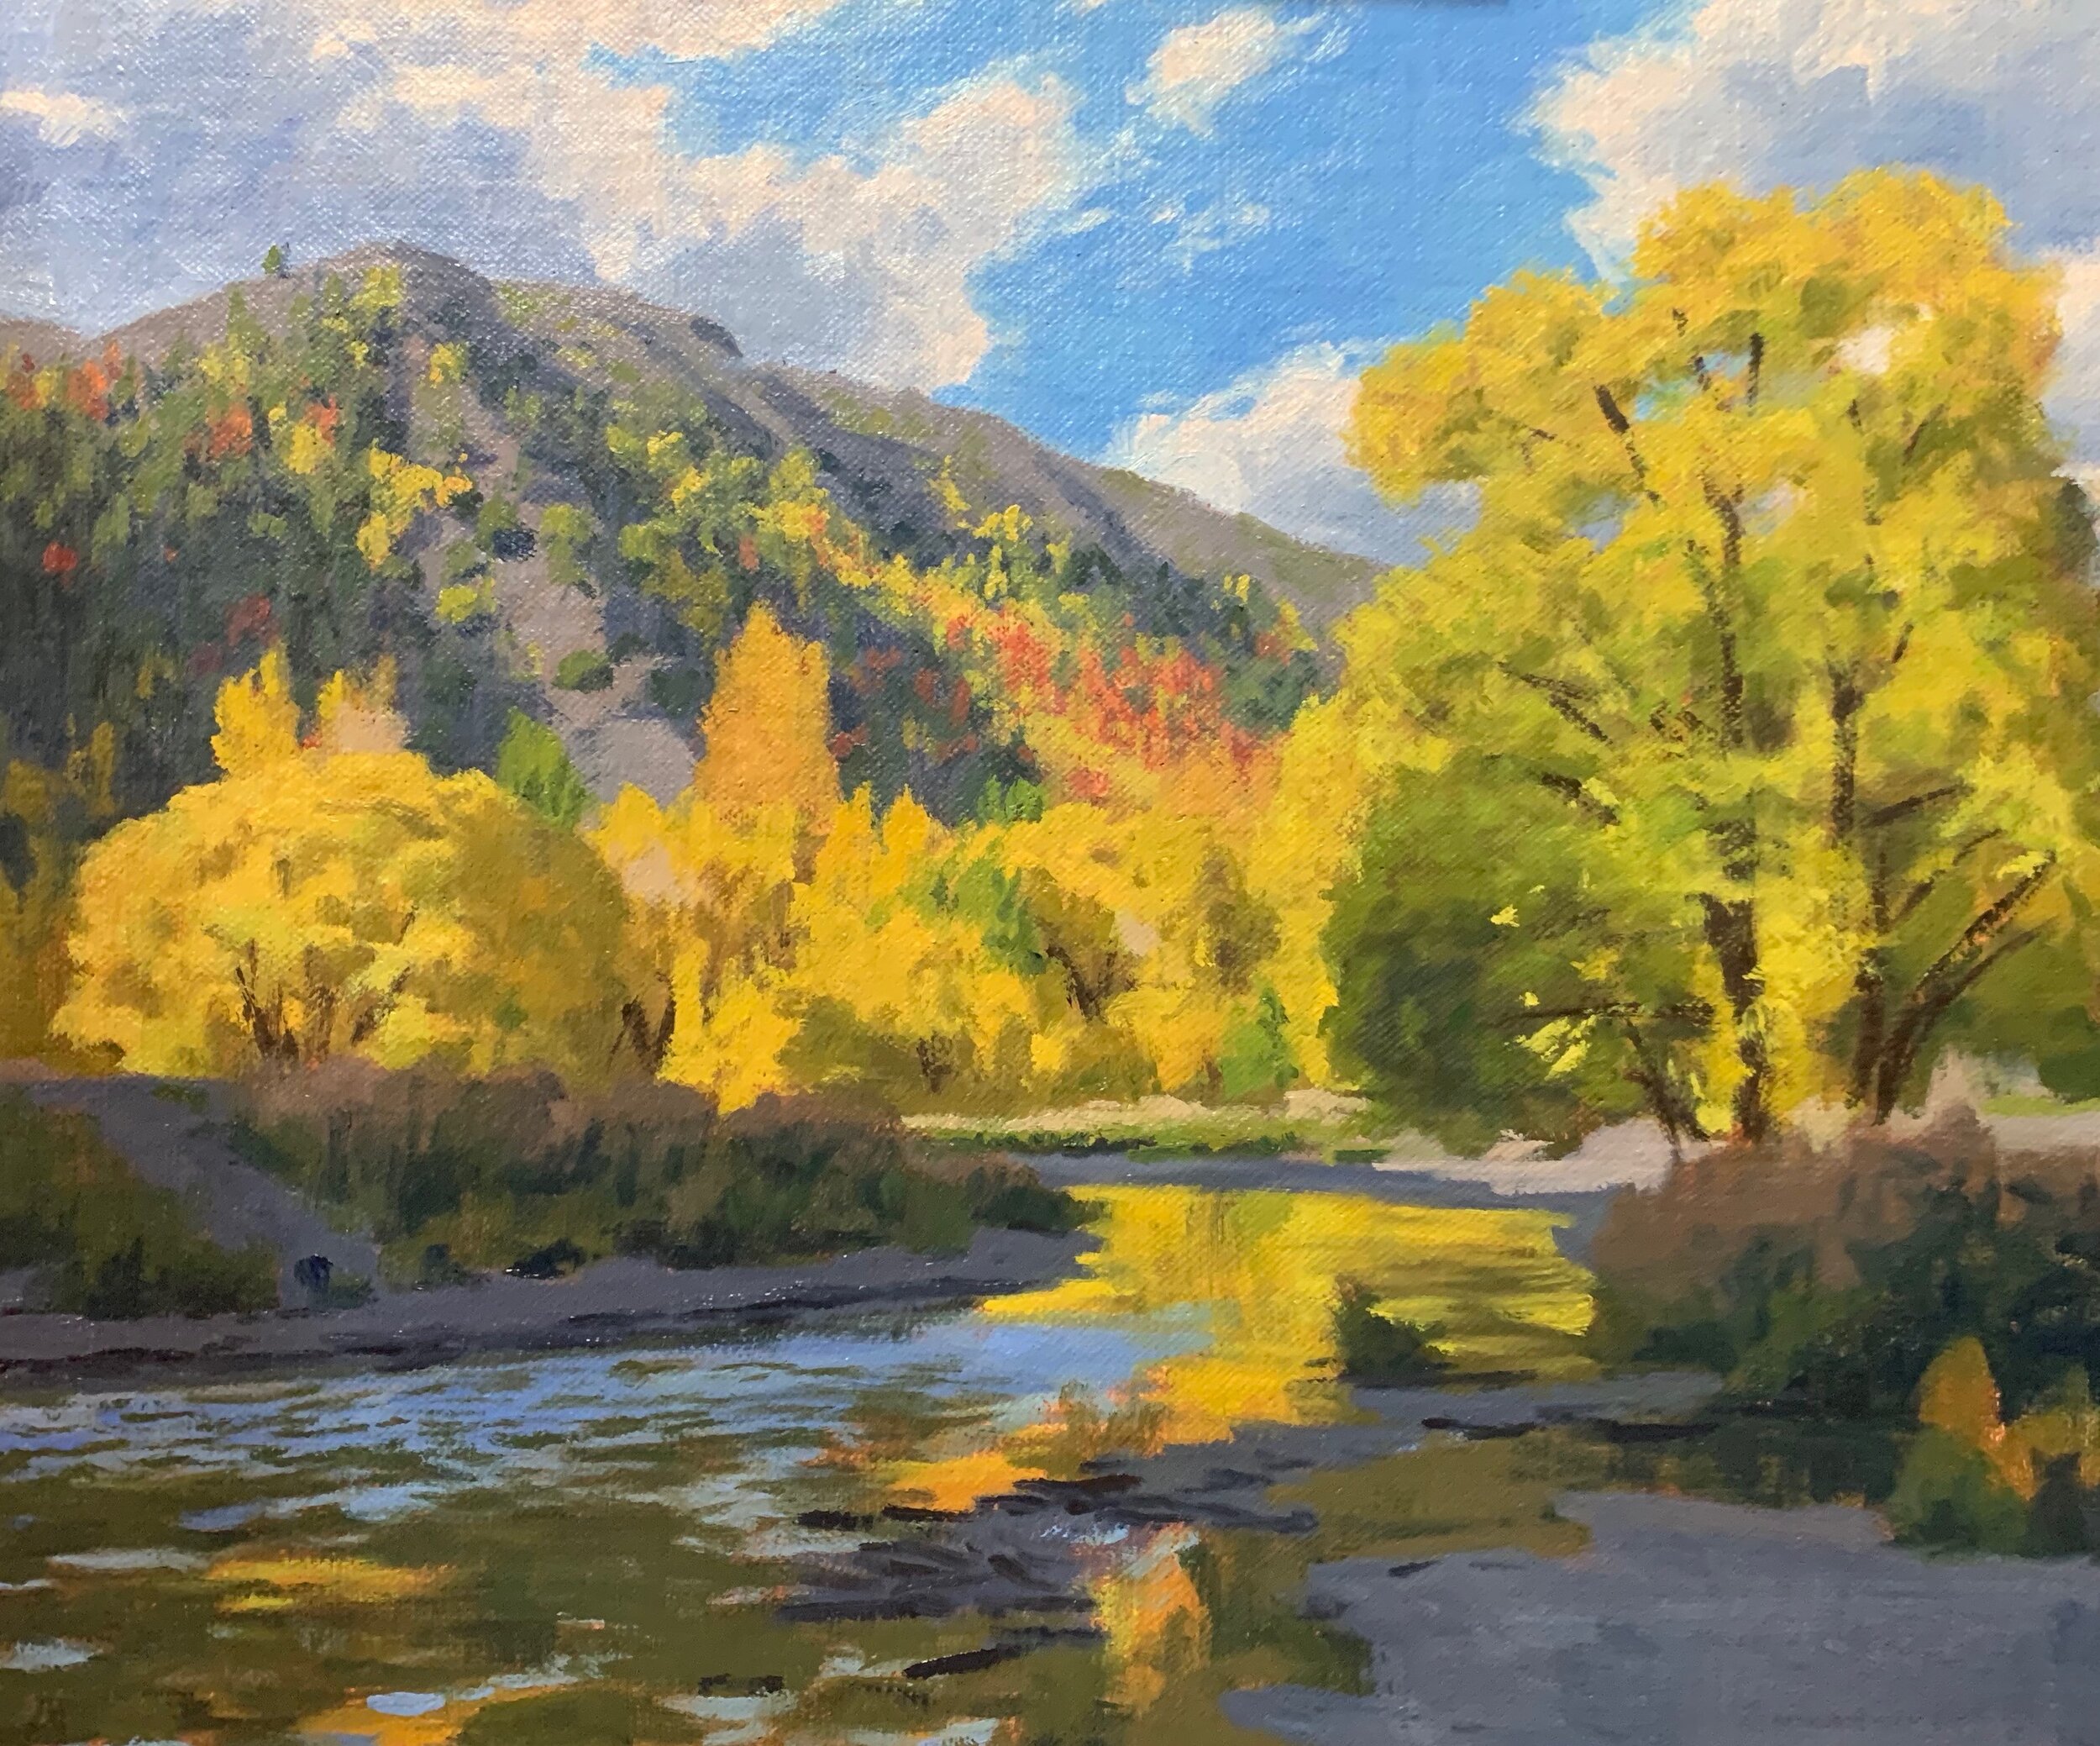
At this point in the painting I let it dry once again so I could add more details to the trees in the mid ground as well as the large willow tree in the foreground.
For the mid ground trees I use the same colours as before but mix a lighter value colour and I load the end of my 1/4” bristle dagger brush with paint. I then dab some of the paint over the tree crown using the bristles to communicate the suggestion of individual leaves.
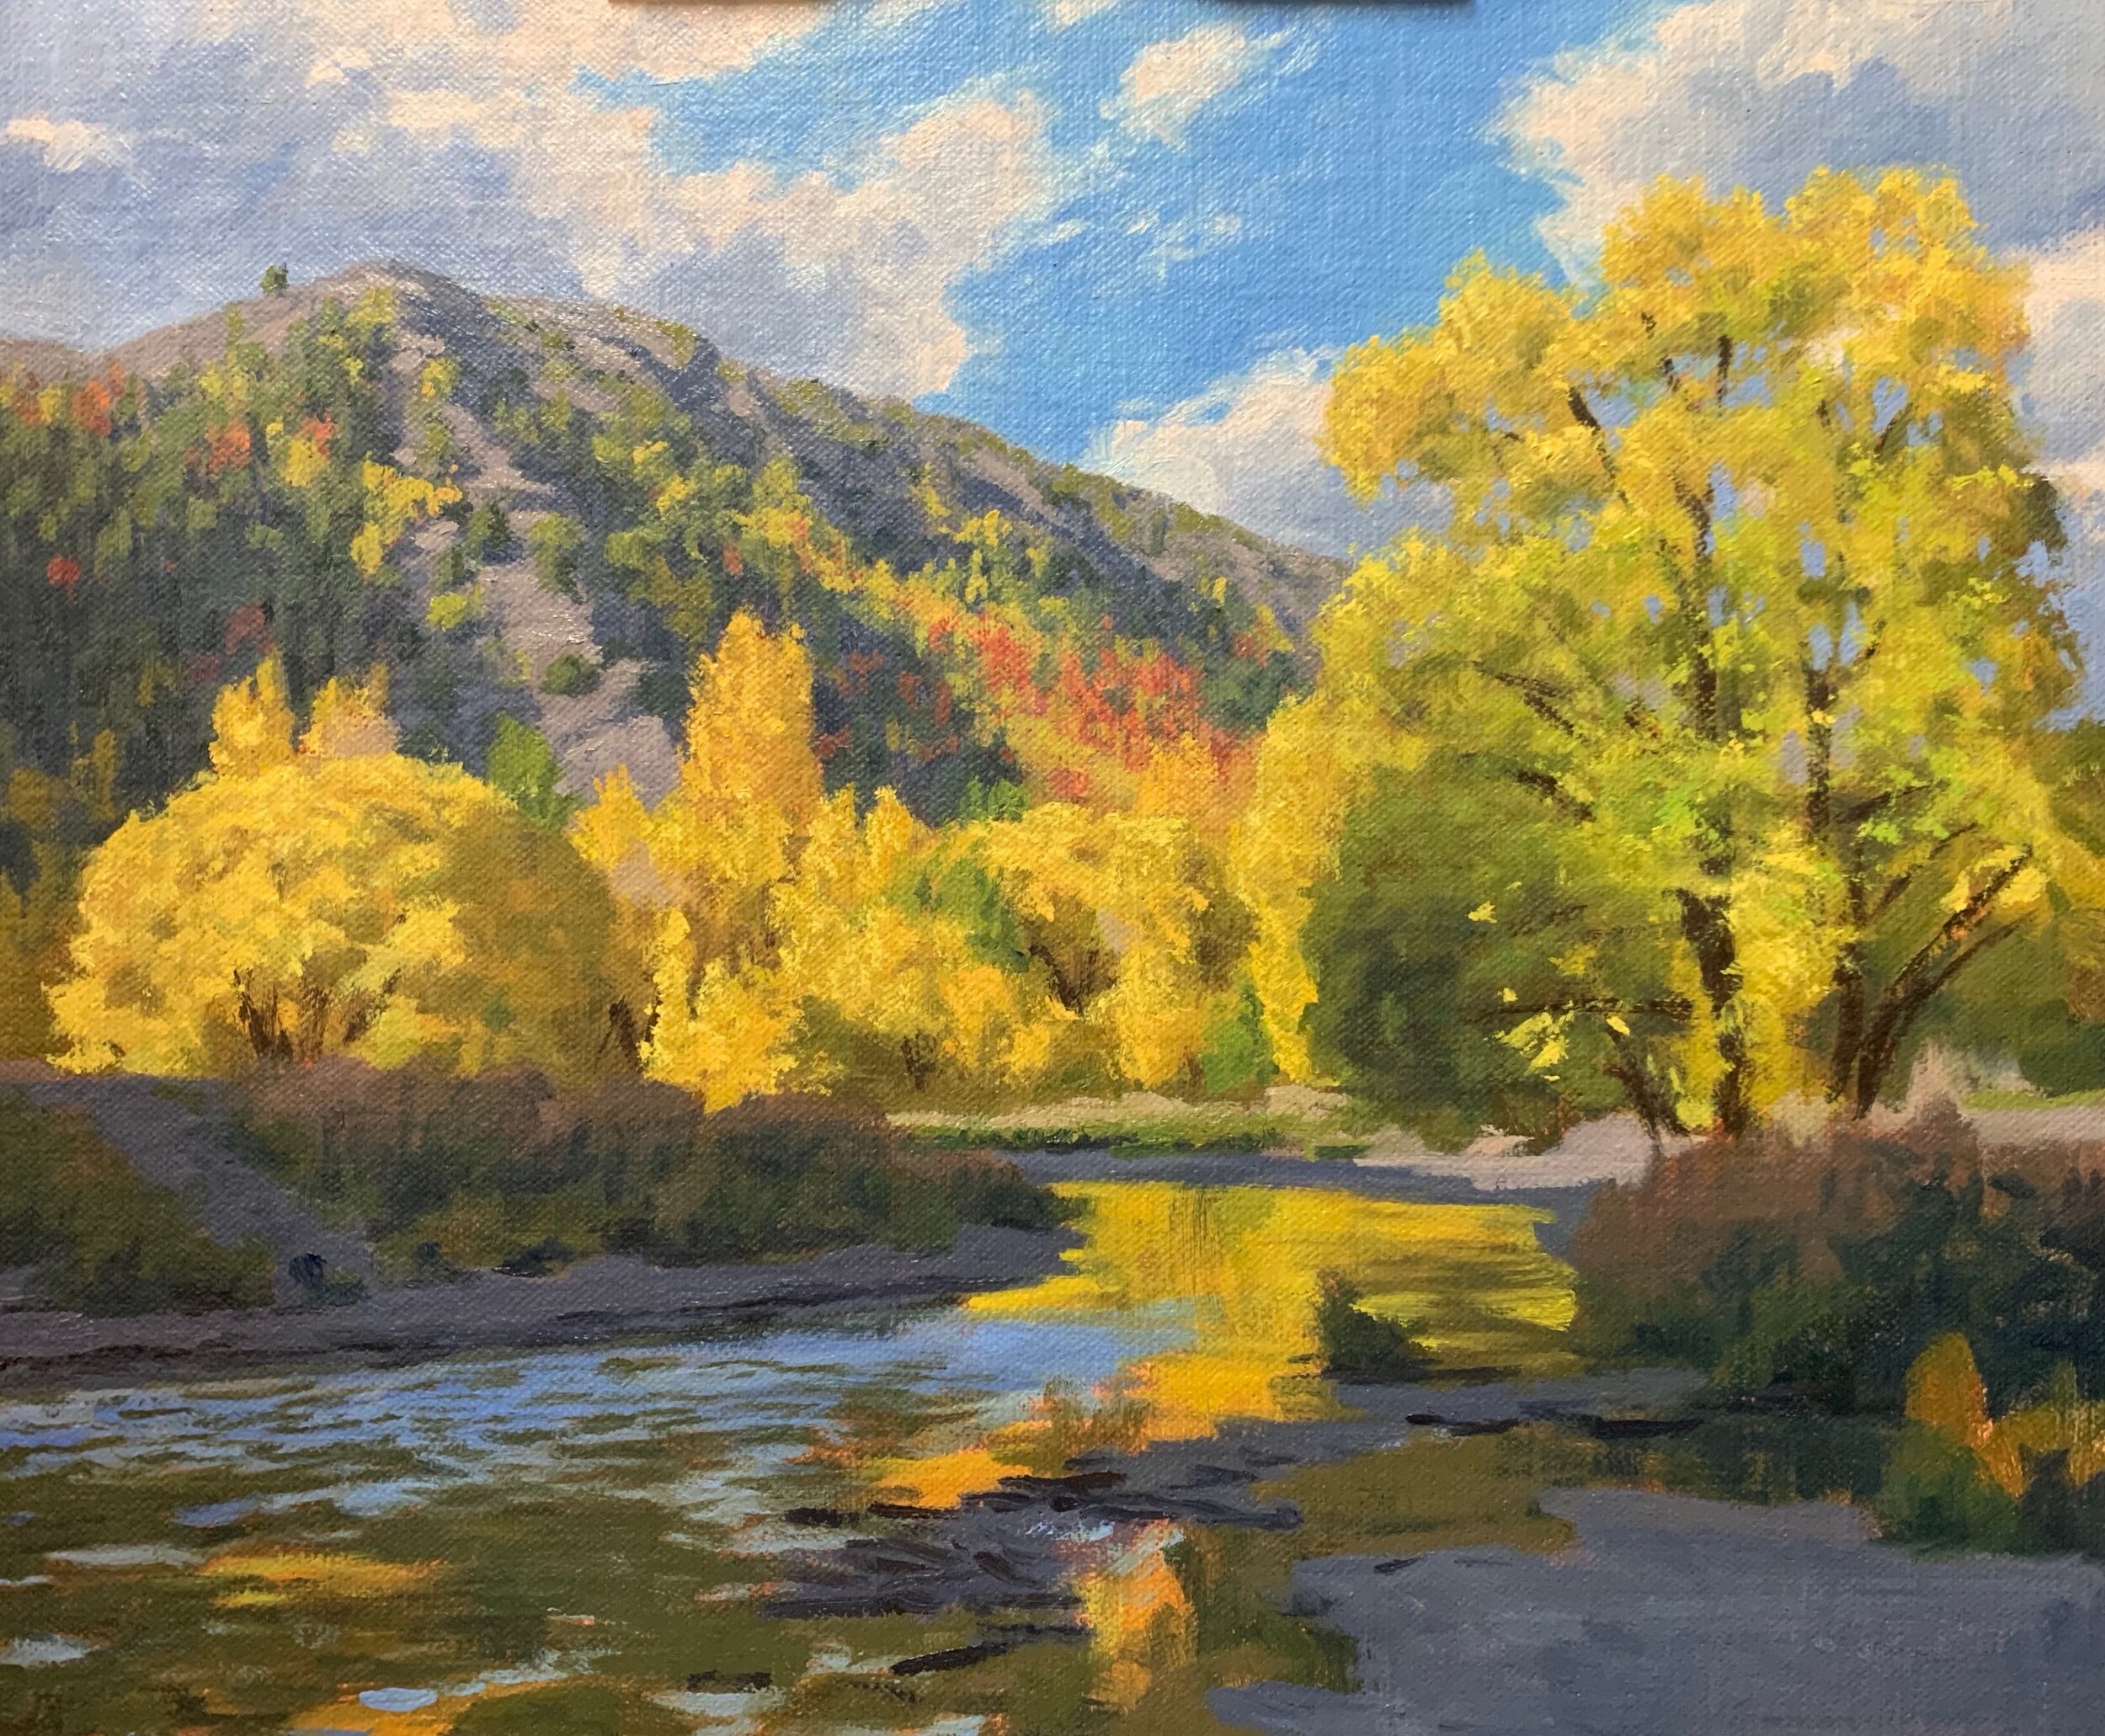
I paint the suggestion of individual leaves in the large willow tree again using a 1/4” bristle dagger brush and the same colours I used before but a little lighter in value. I also use a No.0 synthetic round brush to communicate a few individual leaves within the tree’s crown.
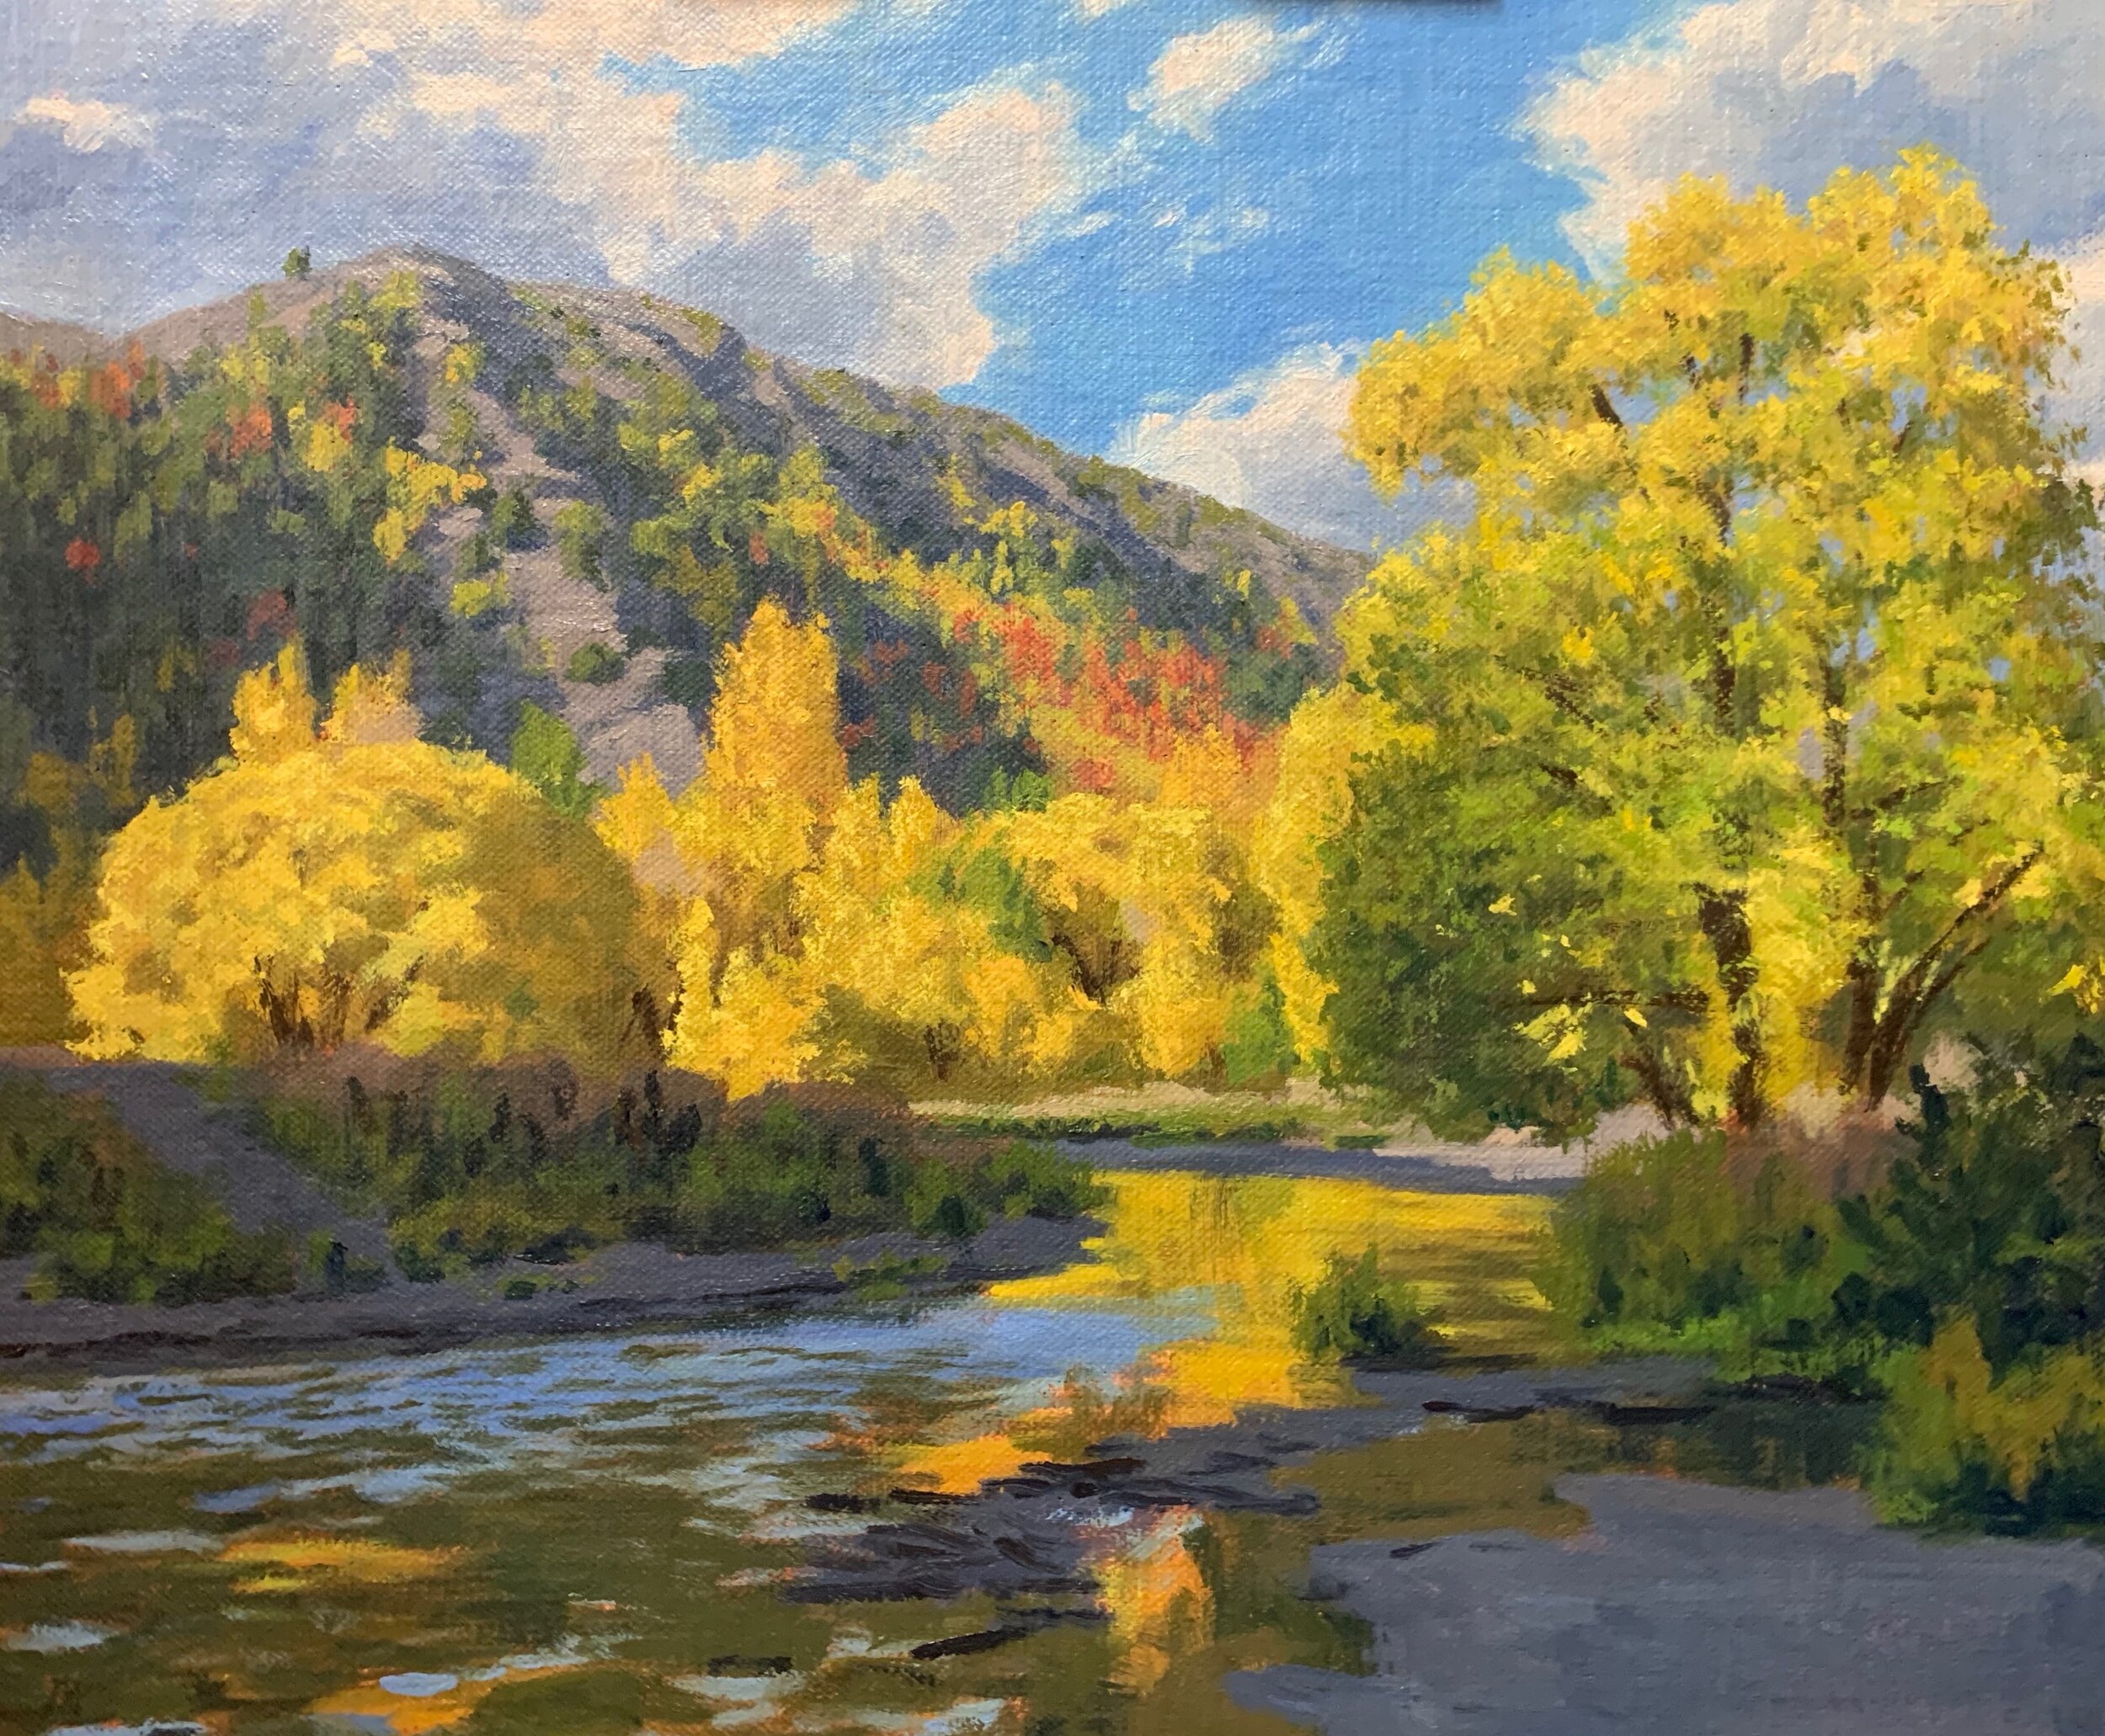
I have been building up the details in the tree canopies in the mid ground and foreground. I then added finer details to the fast flowing water using a 1/4” synthetic dagger brush and a No.0 synthetic round brush. I used the 1/4” synthetic dagger brush for the ripples and reflections on the water as these brushes hold their shape much better than the bristle brushes do. I am still using a mix of ultramarine blue and titanium white.
For the finer highlights on the fast flowing water I use a No.0 synthetic round brush. I also paint some of the twigs and branches washed up at the side of the river bank.
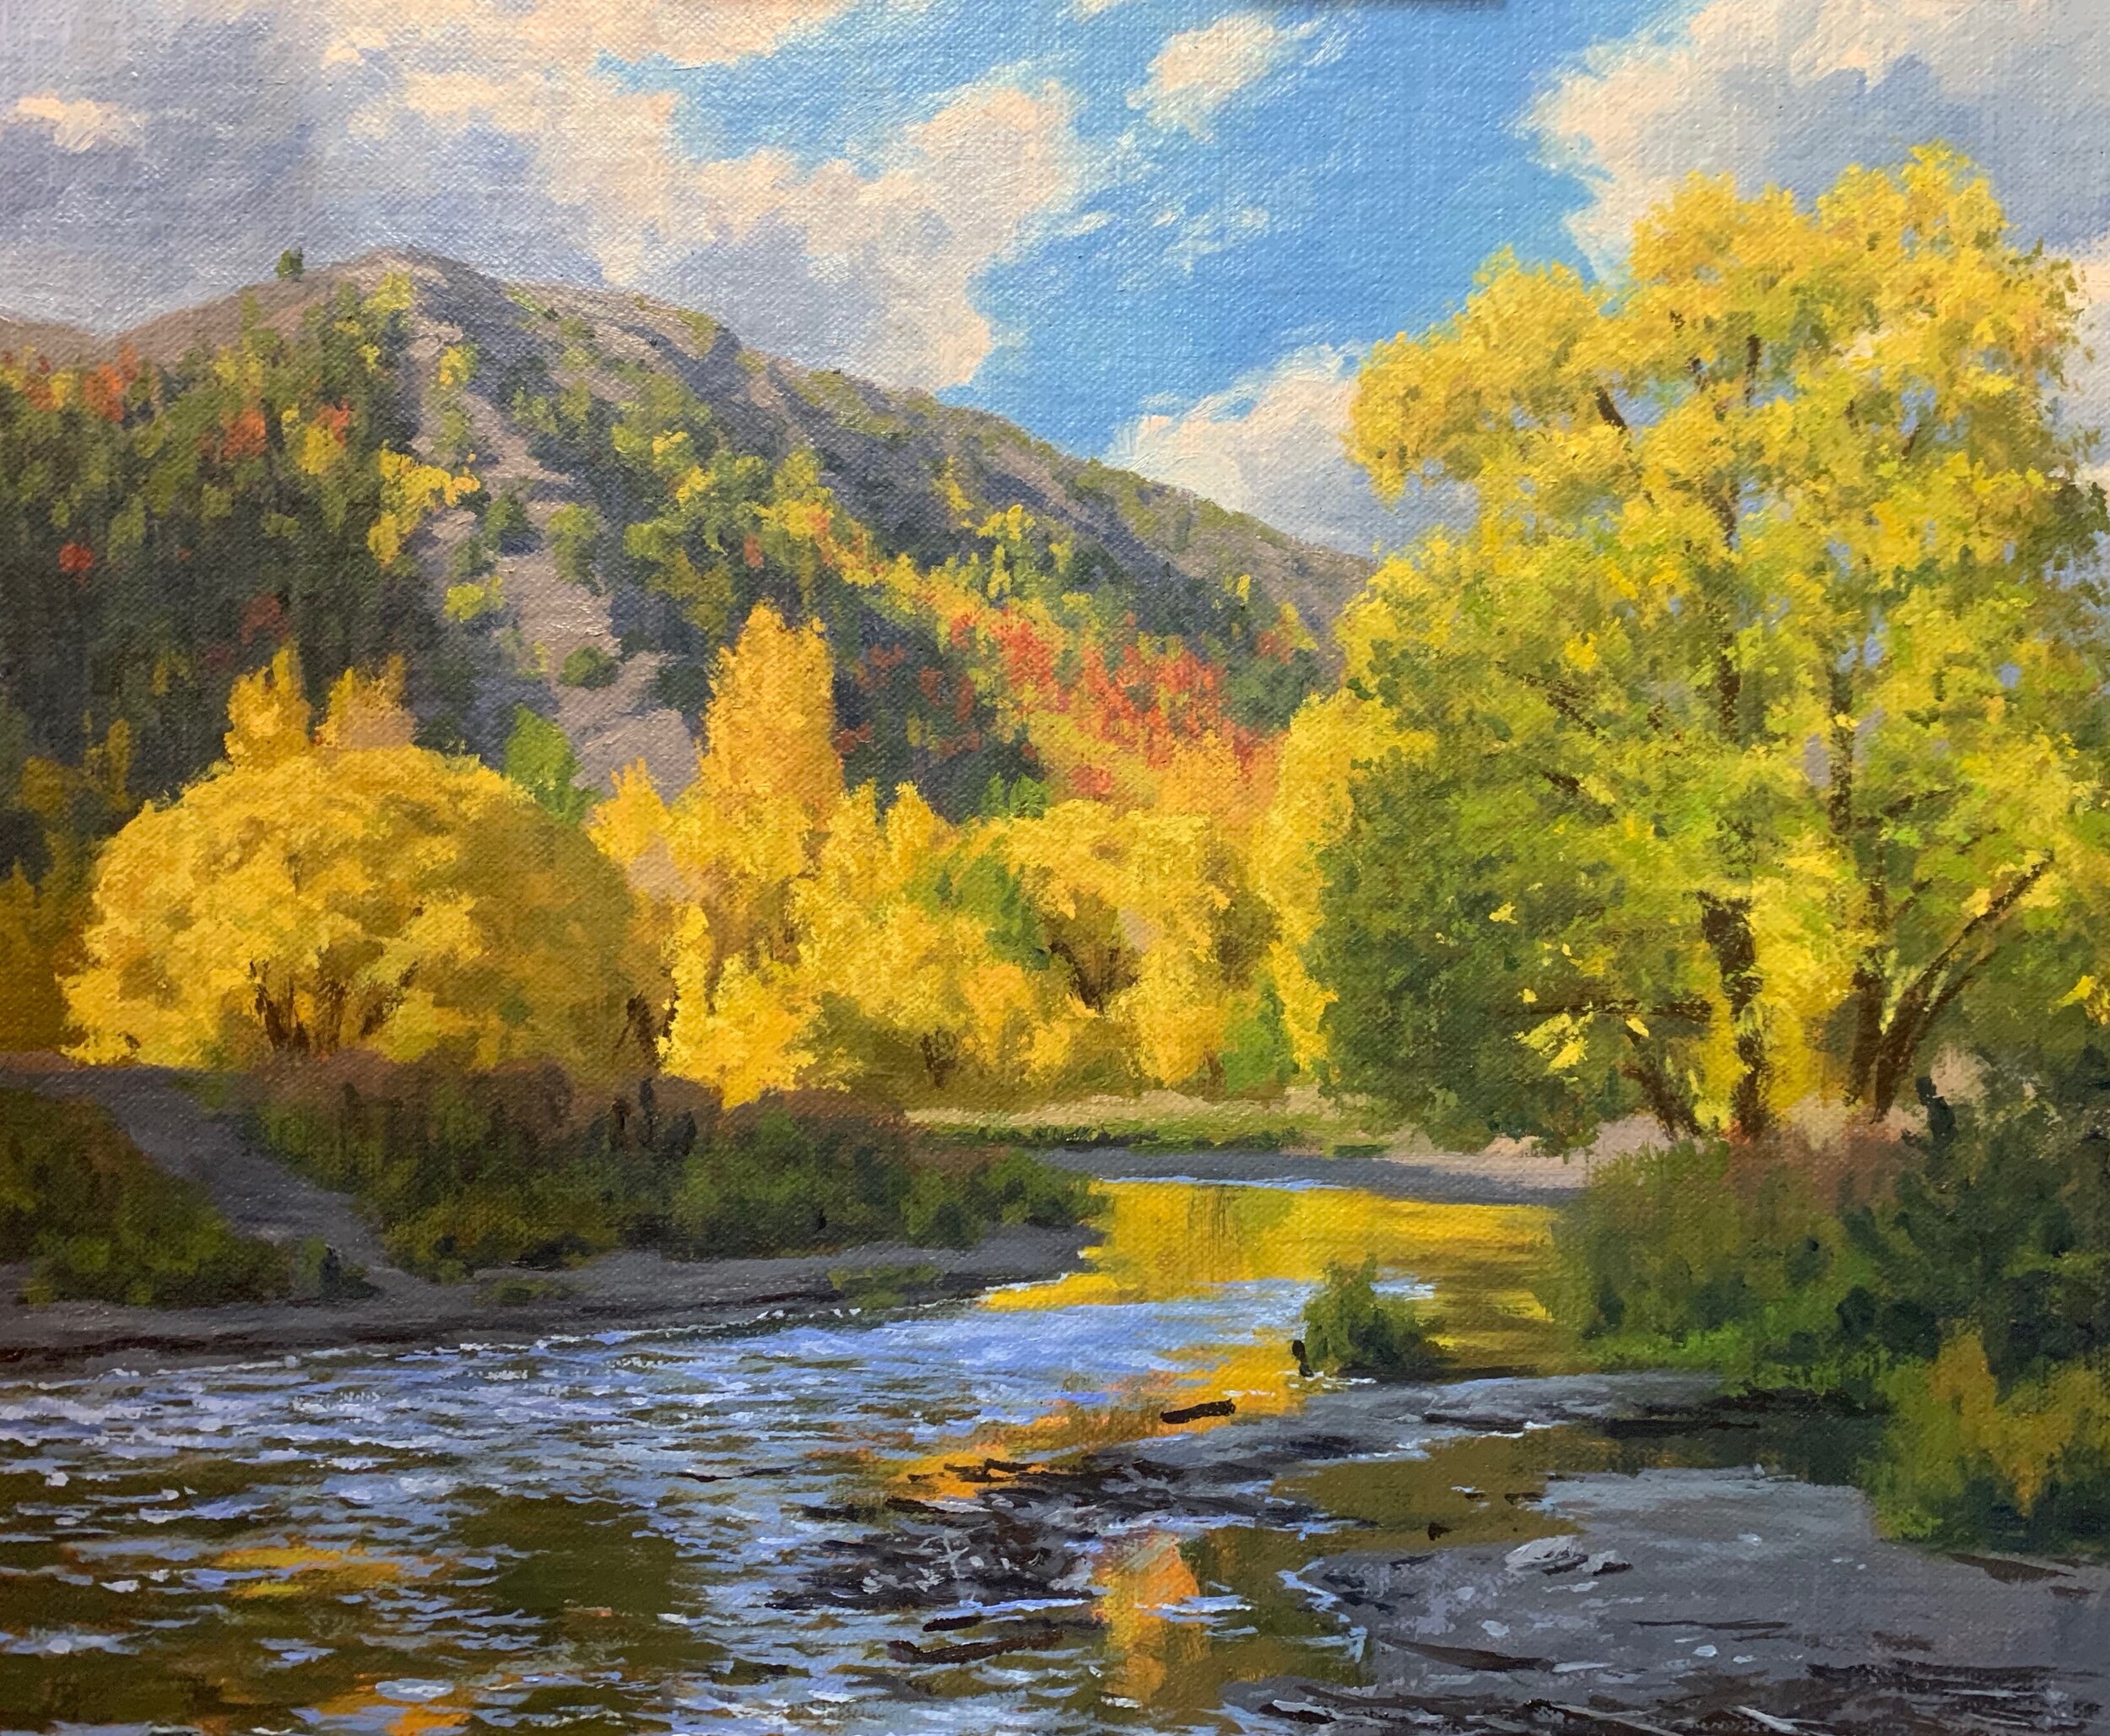
Final Details
I finish up the painting by adding a few final details to the tree foliage. I also paint the suggestion of some leaves on the suckers produced by the willow tree at the side of the river bank.
I paint the highlights on the stems and branches of the willow tree using a mix of titanium white with a little burnt sienna and ultramarine blue.

Thanks for reading 😊
