This article may contain affiliate links, please read my affiliate disclosure for more information
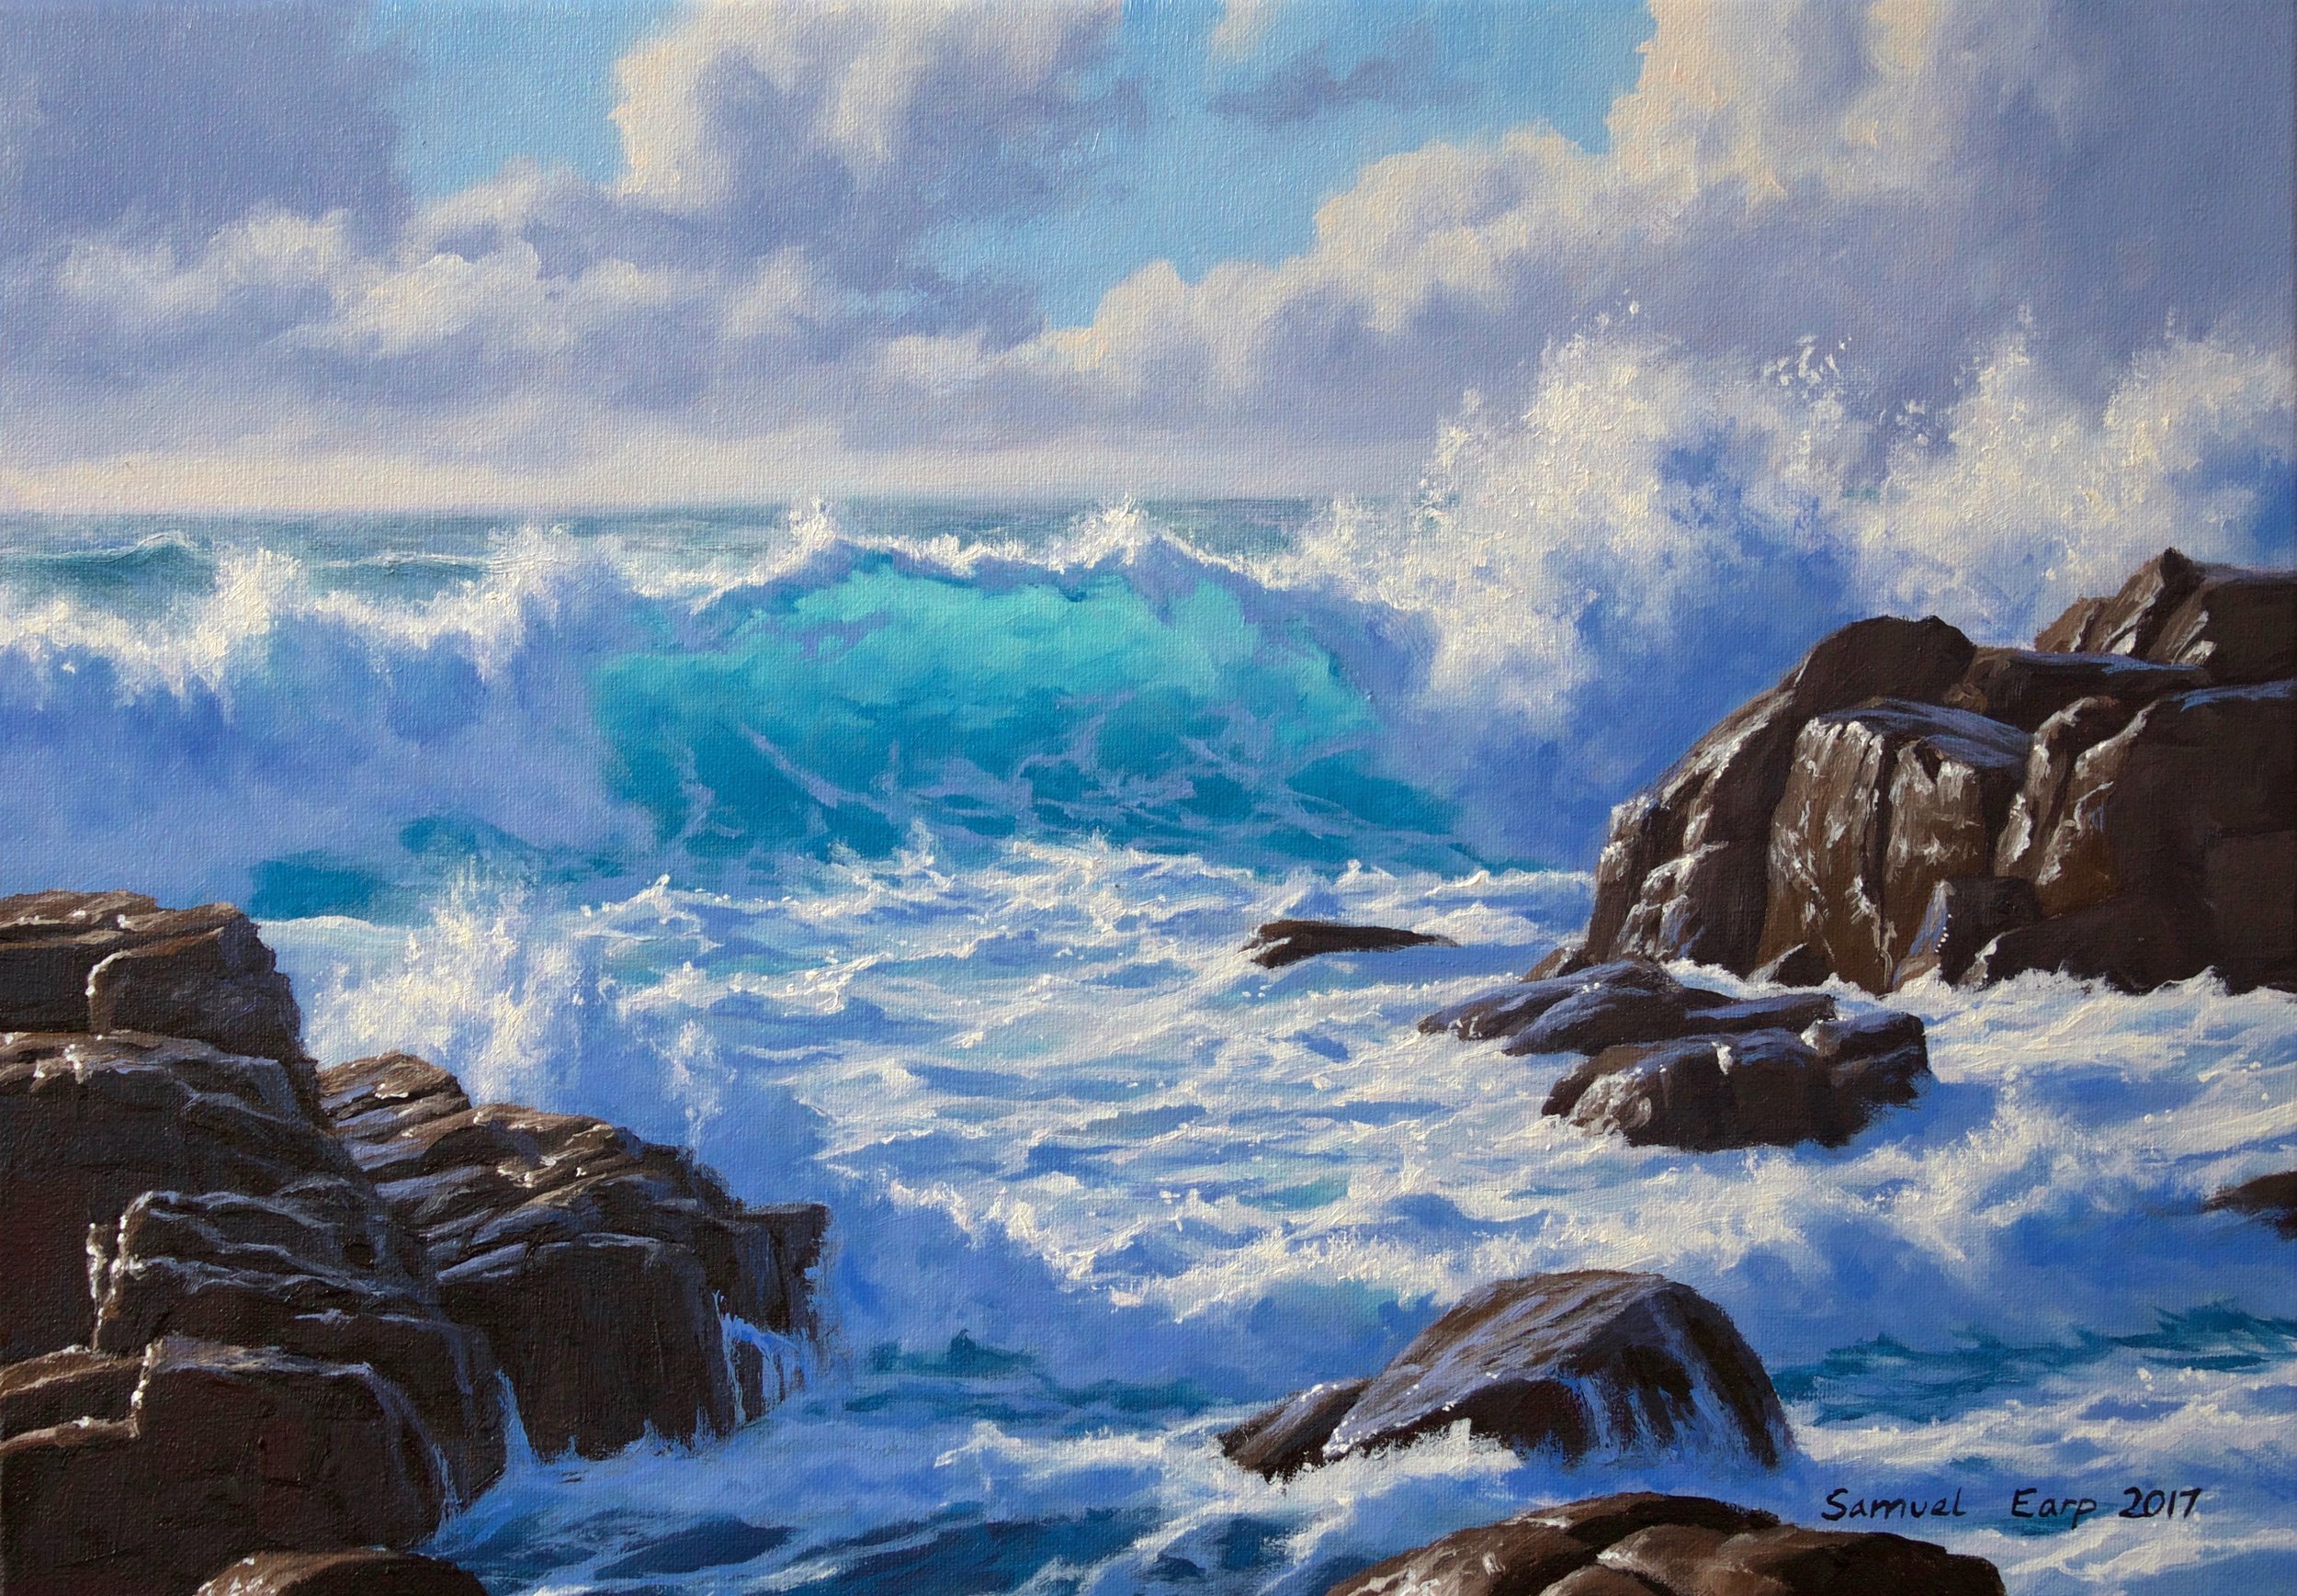
I love to paint the sea, in fact, it’s one of my favourite things to paint! In this blog post, I will show you how to paint a dramatic seascape in five easy steps.
Suitable for oils and acrylics
1. CREATING THE COMPOSITION
This painting began with me taking photos from a place called Port Soif on the island of Guernsey, UK. The sea was rough and there was lots of light and atmosphere.
Port Soif is a great place for getting photo references for seascapes, especially in the evening as the light is behind the waves which means you get contrast between the shadows of the breaking waves but sharp highlights in the wave crests and white water. These are all ingredients for epic seascape paintings!
These are two of the photos I used to create this painting, feel free to copy or use them.

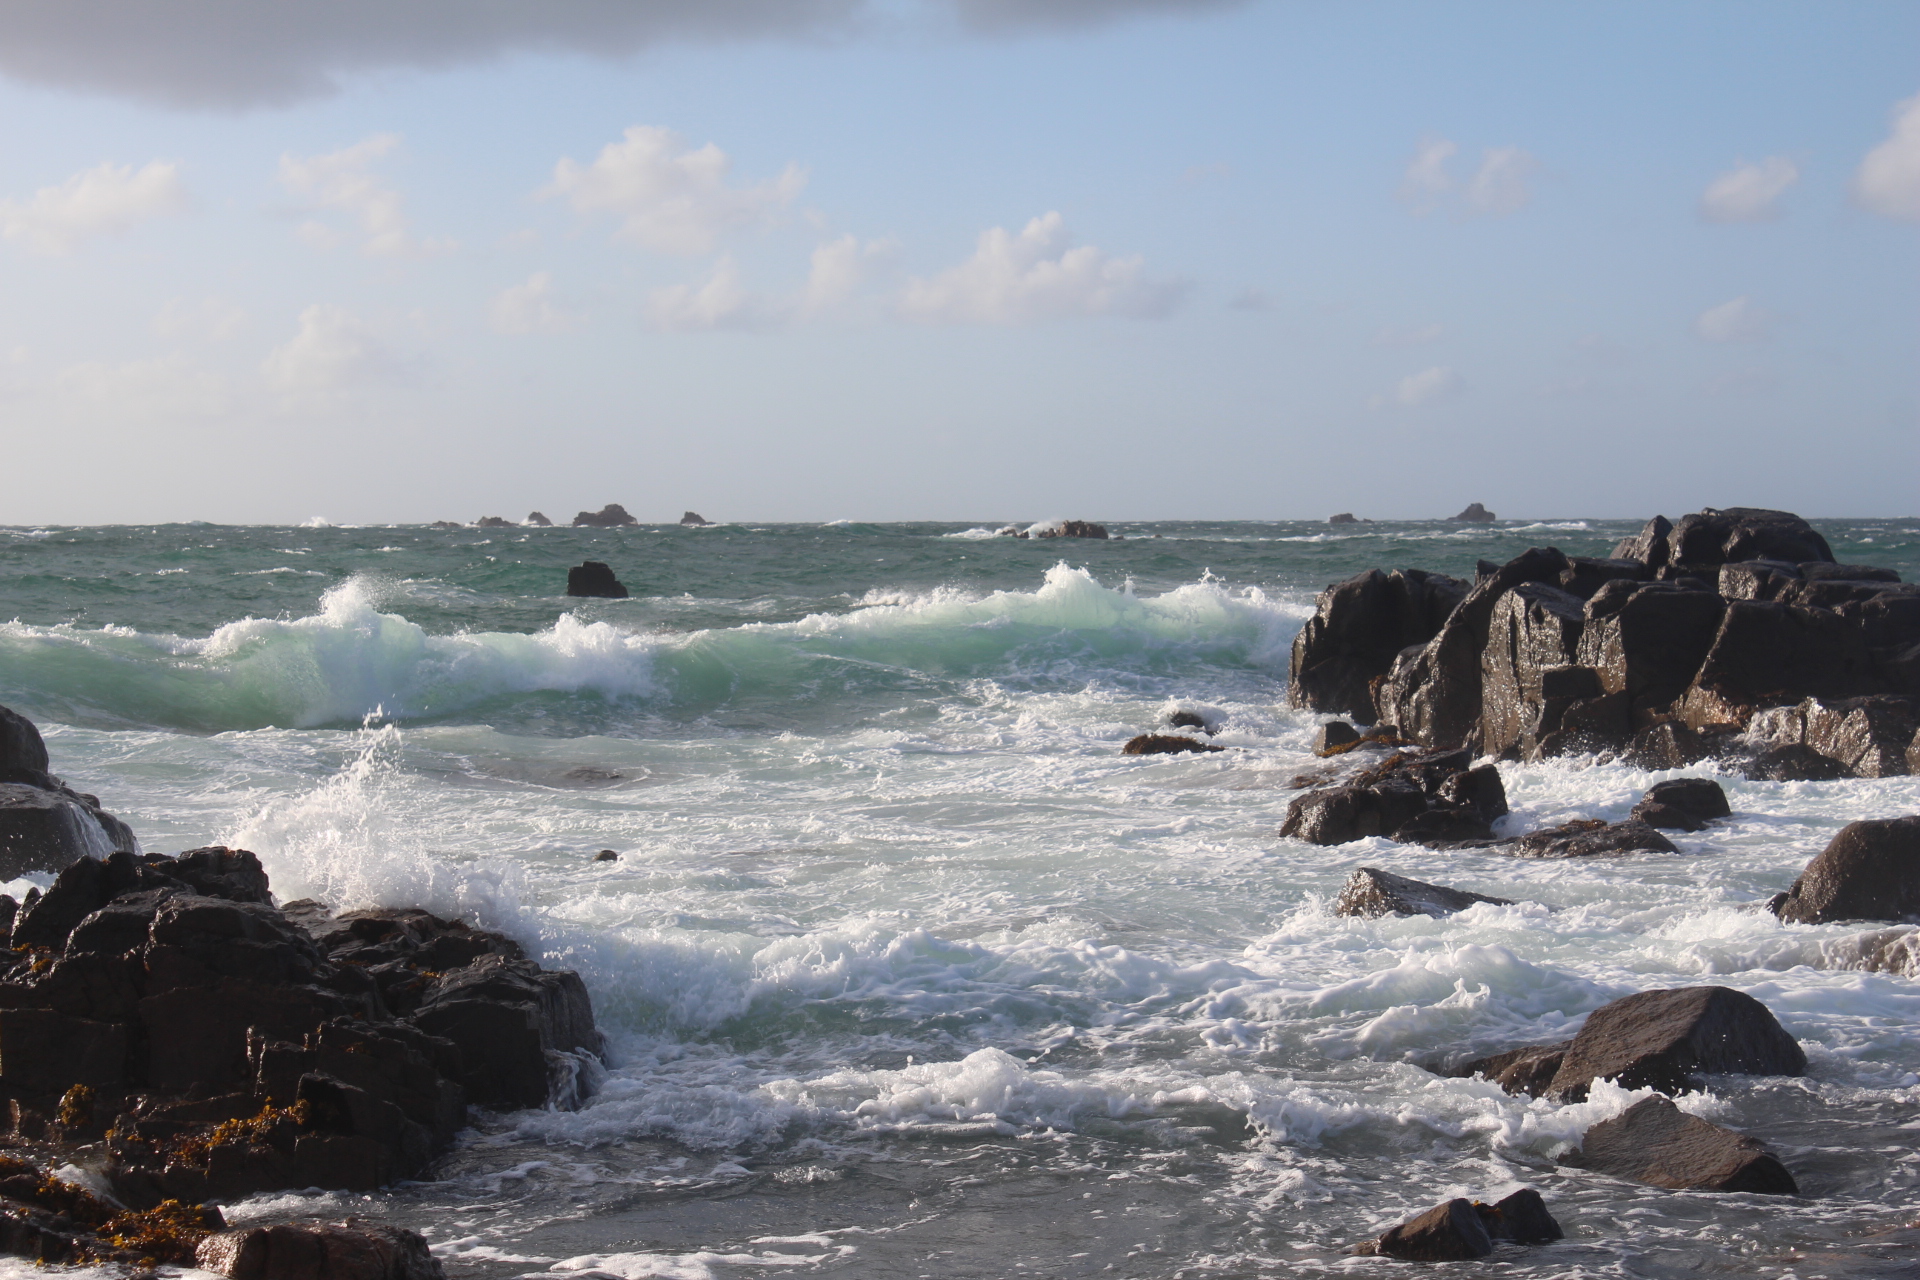
So we have a few ingredients here to create a dramatic seascape, the first is some large waves and heavy swells. We have light shining on the rocks and the back of the waves. Seascapes look very dramatic and are easier to paint when the light is coming from behind and to the side of our subject.
We have some jagged rocks, which always adds more drama to a seascape especially when there are spills and water hitting the rocks causing foam bursts. And finally, we have shadows, which help to add more drama to our painting by adding contrast between light and dark and it helps to make the painting look more three-dimensional.
Sketching
After I get my photo reference I sit down with my sketchbook and draw some small thumbnail sketches which results in a final sketch which I refer to when painting my seascape. I would thoroughly recommend you do some sketches before you get into a painting, it’ll make it so much easier.
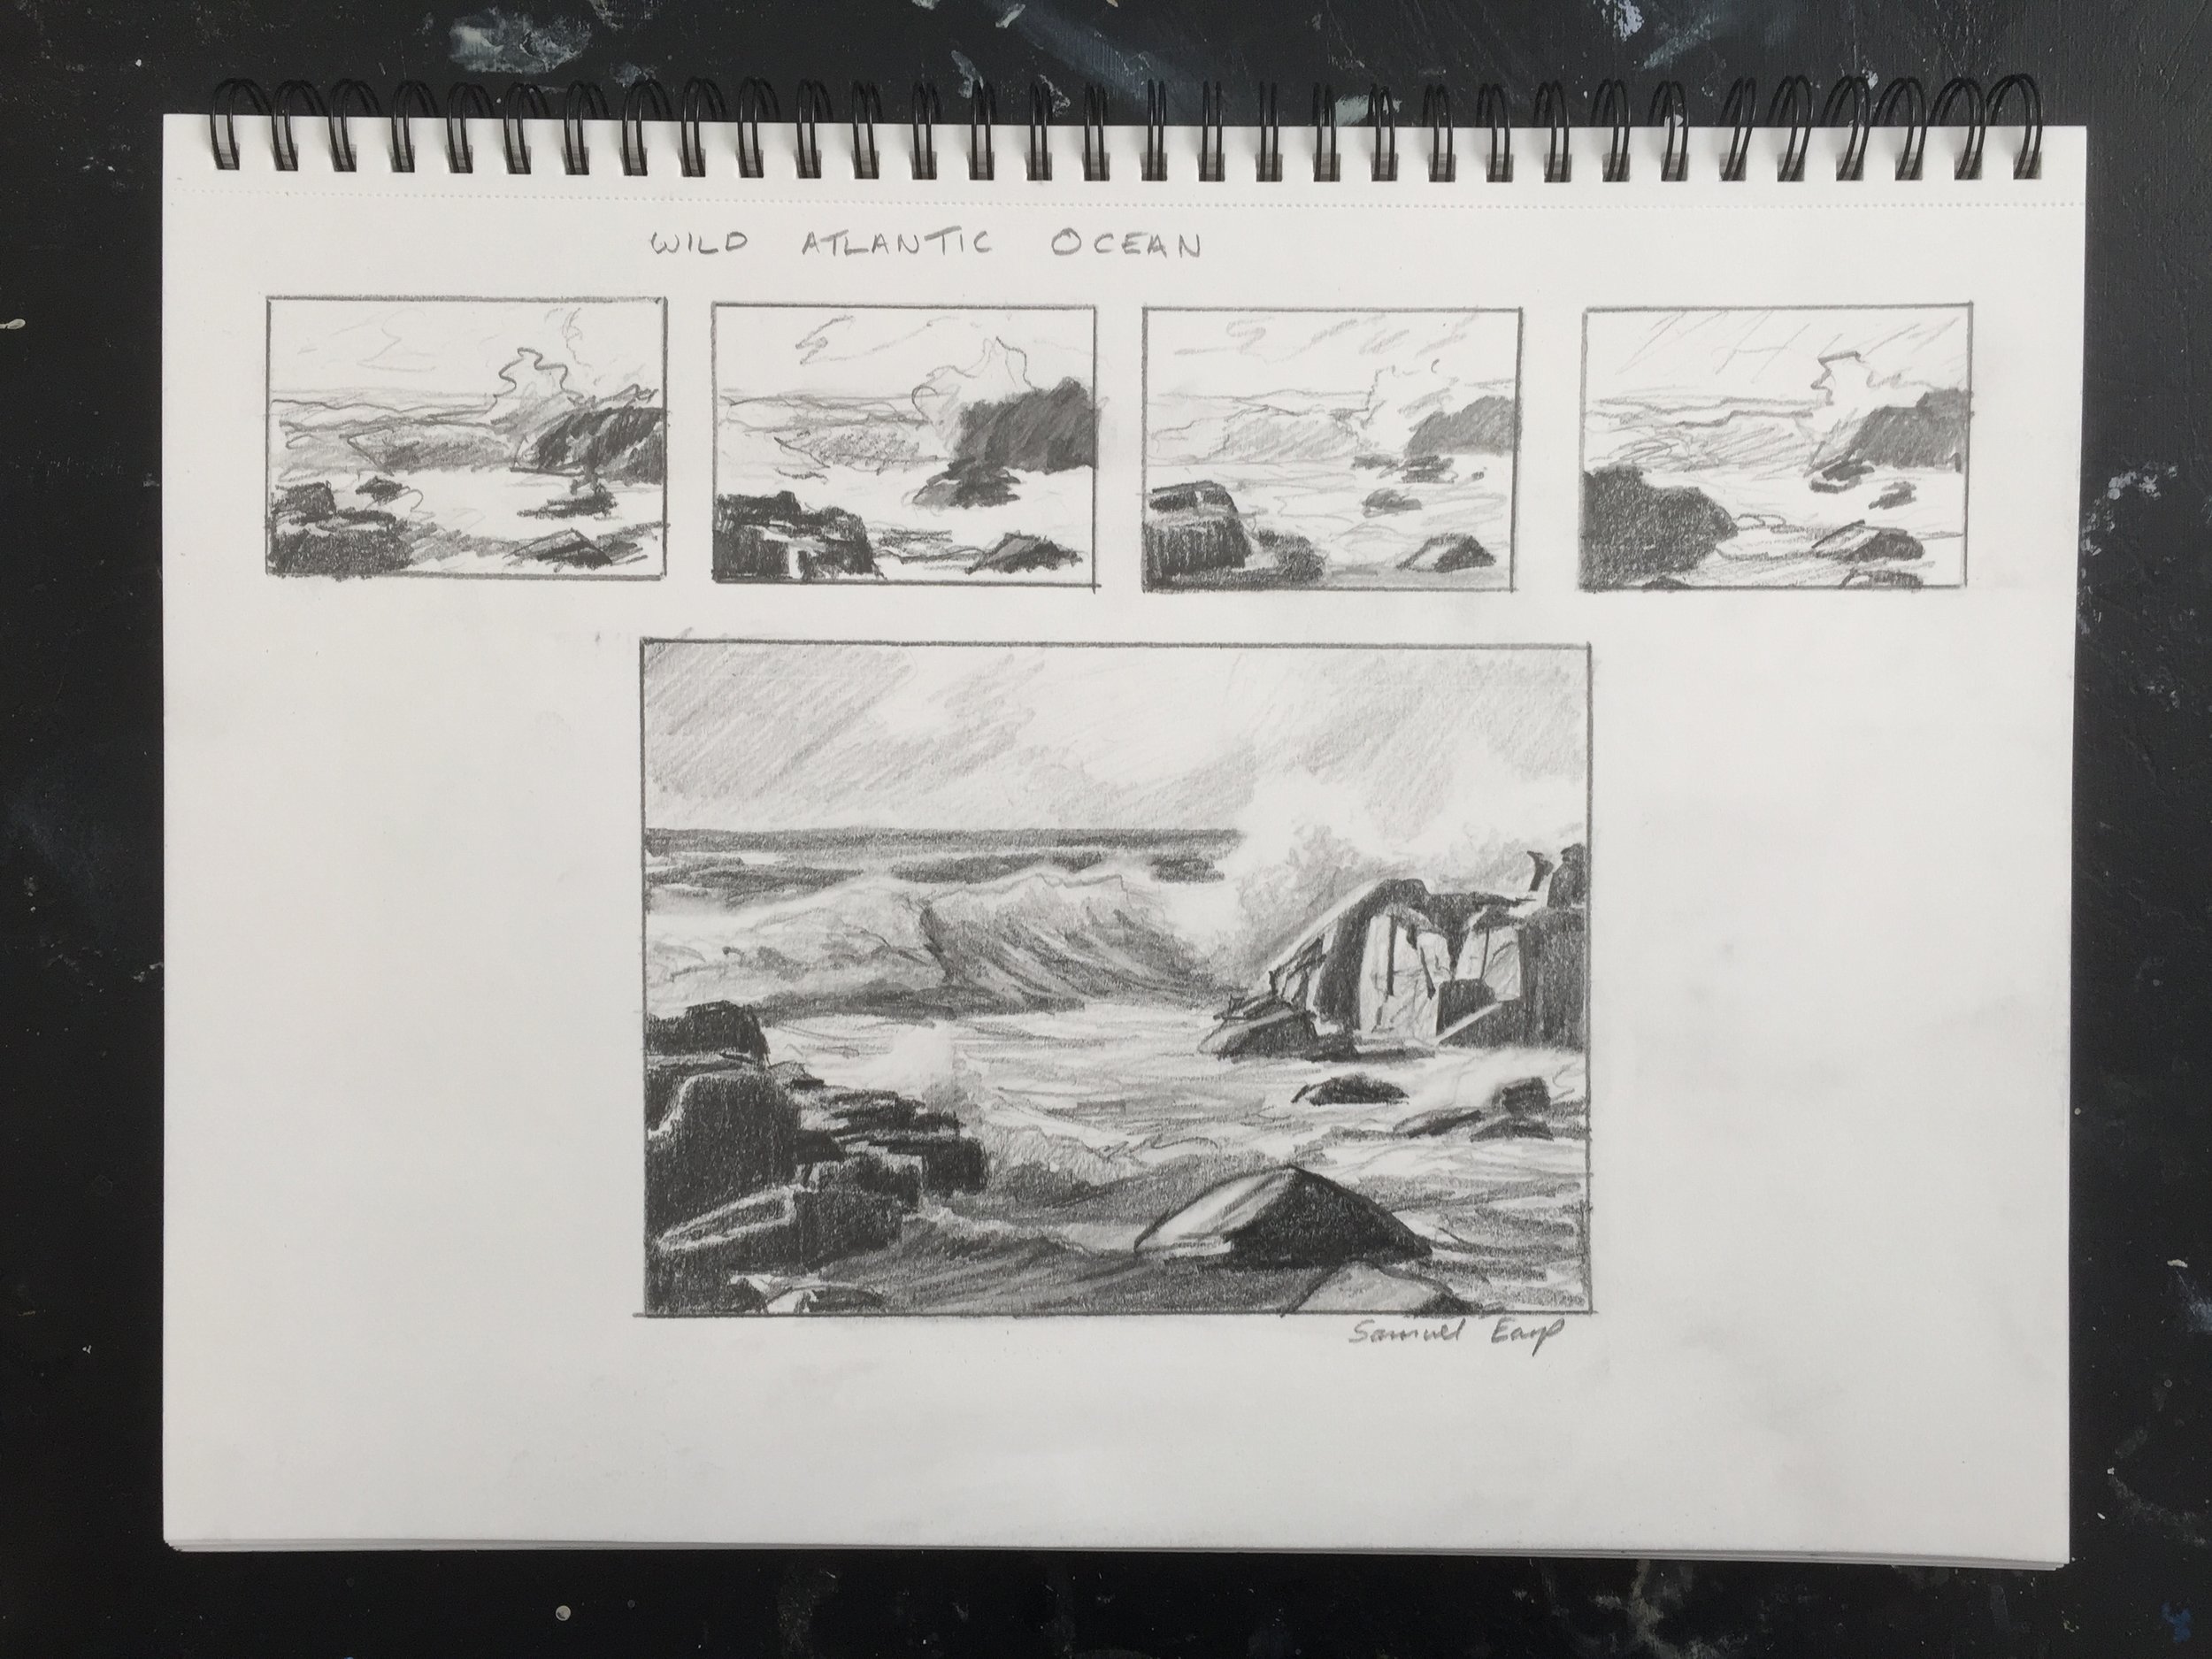
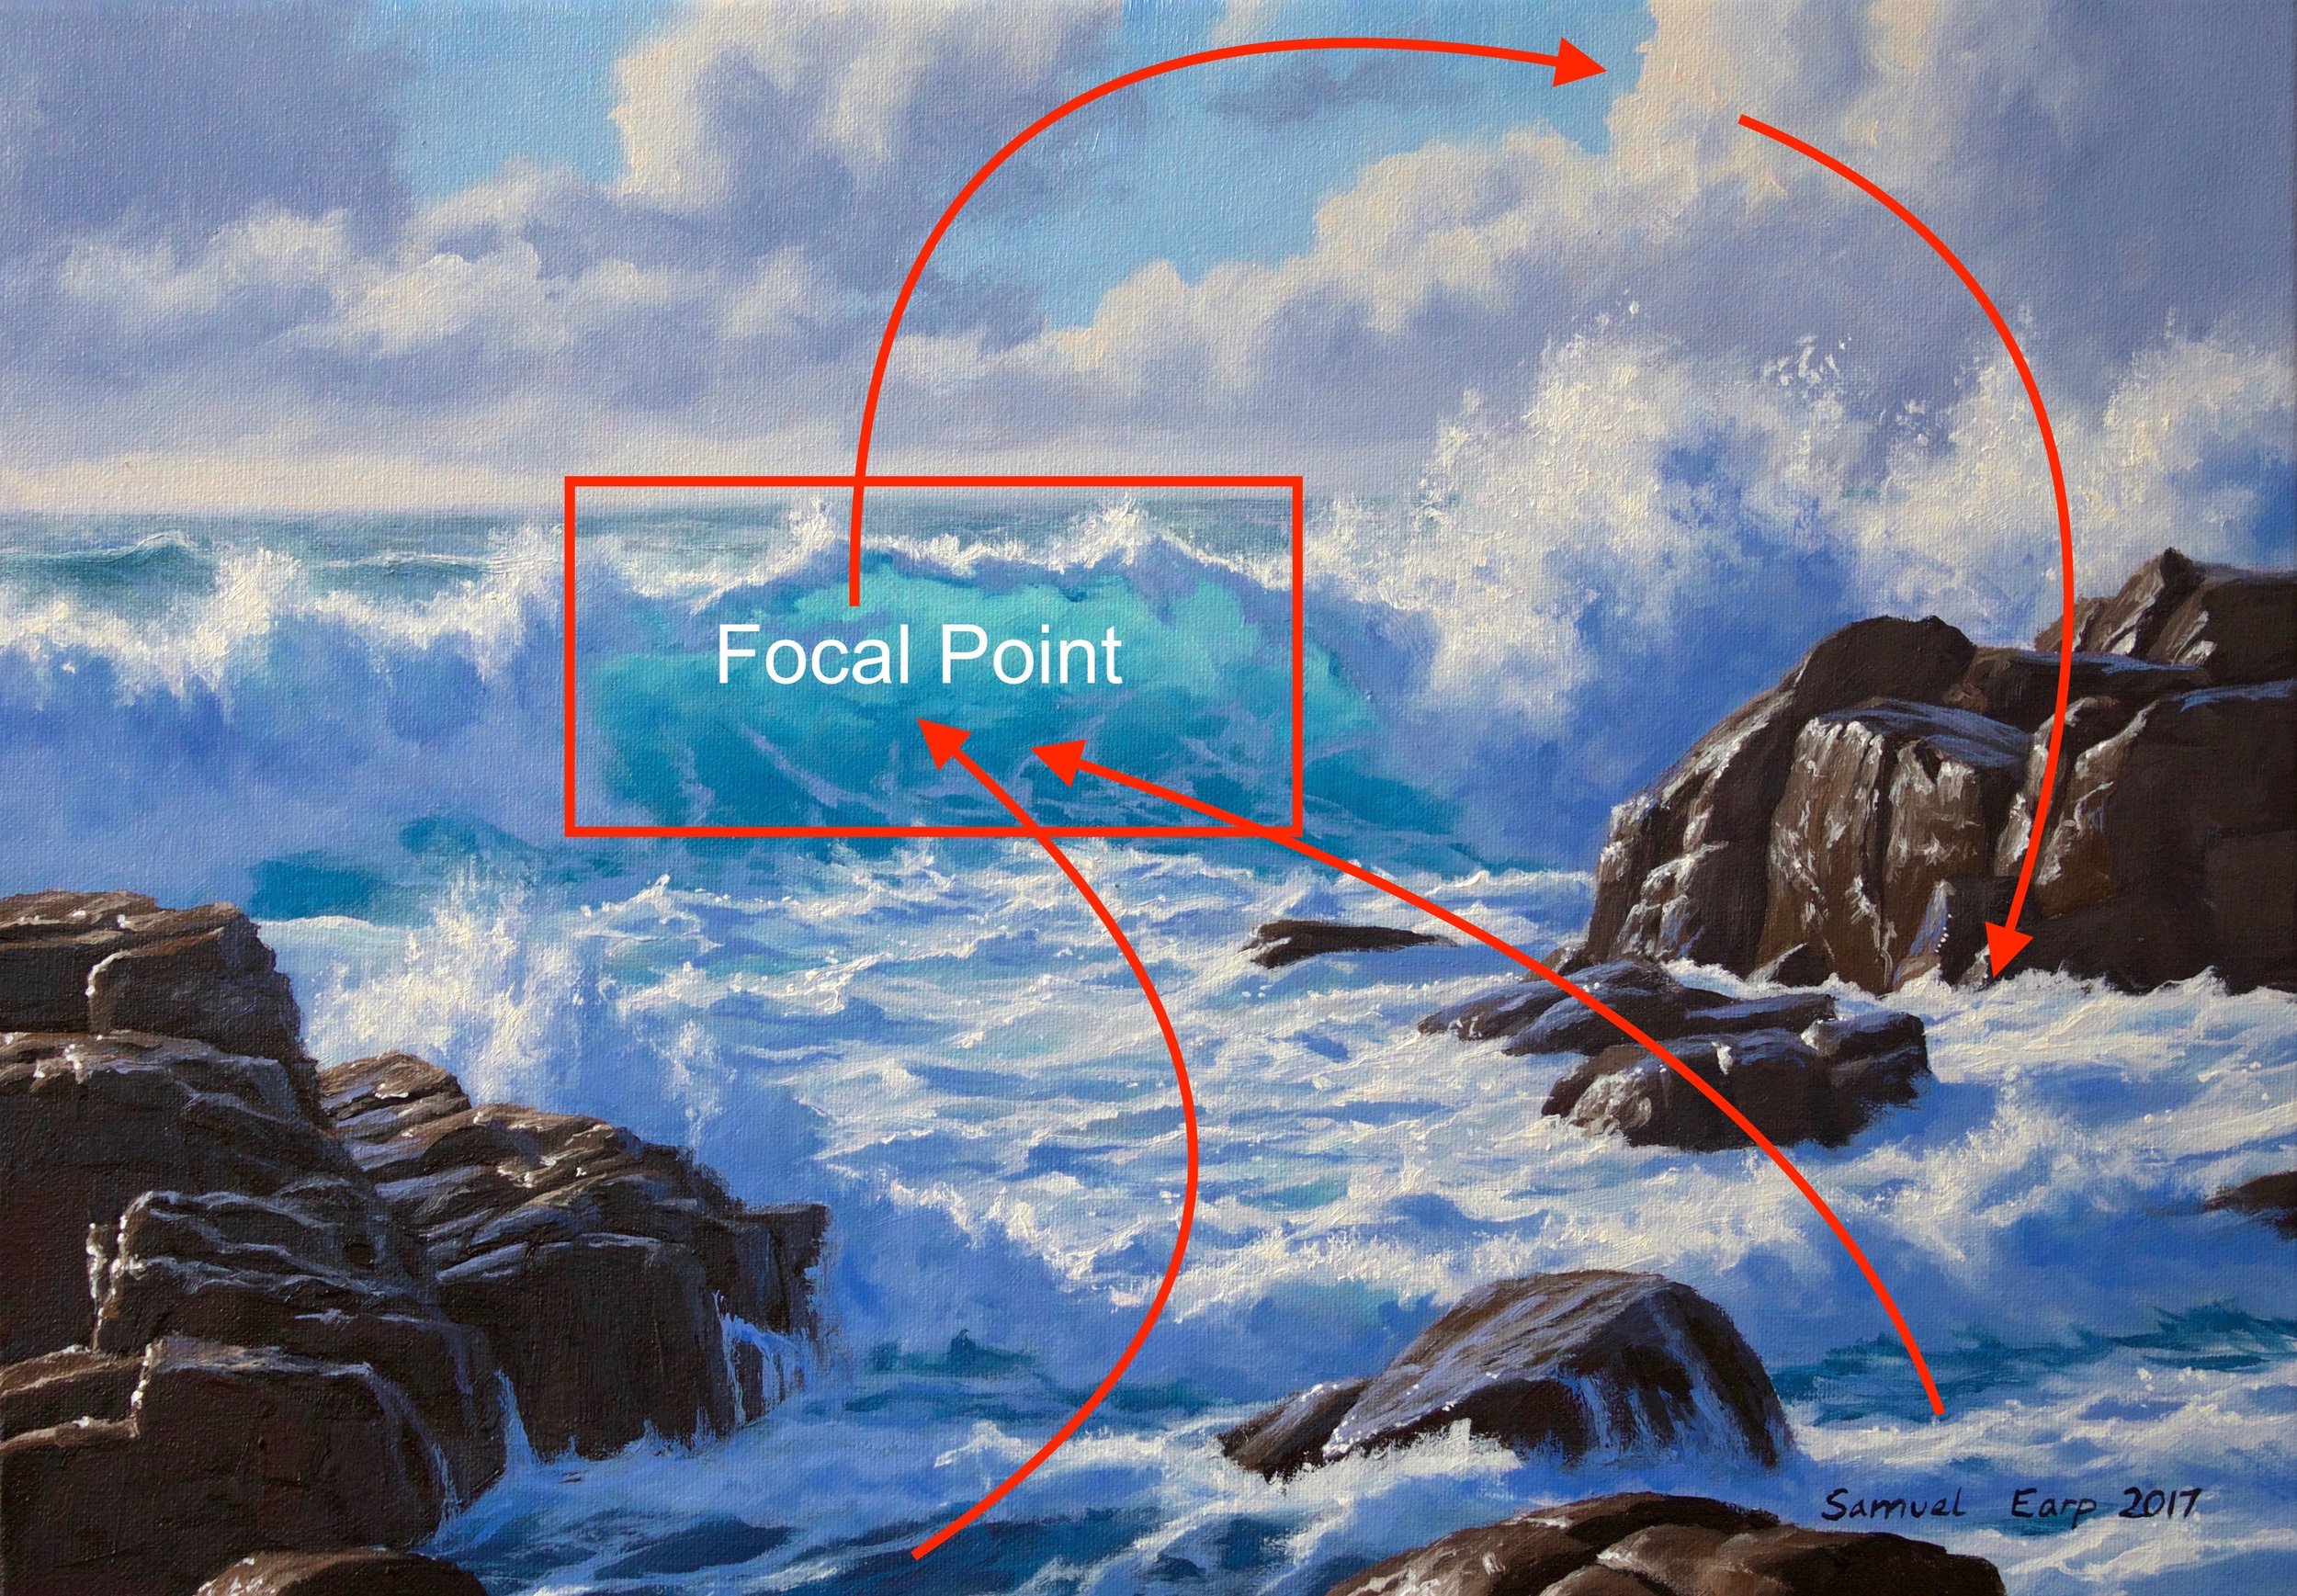
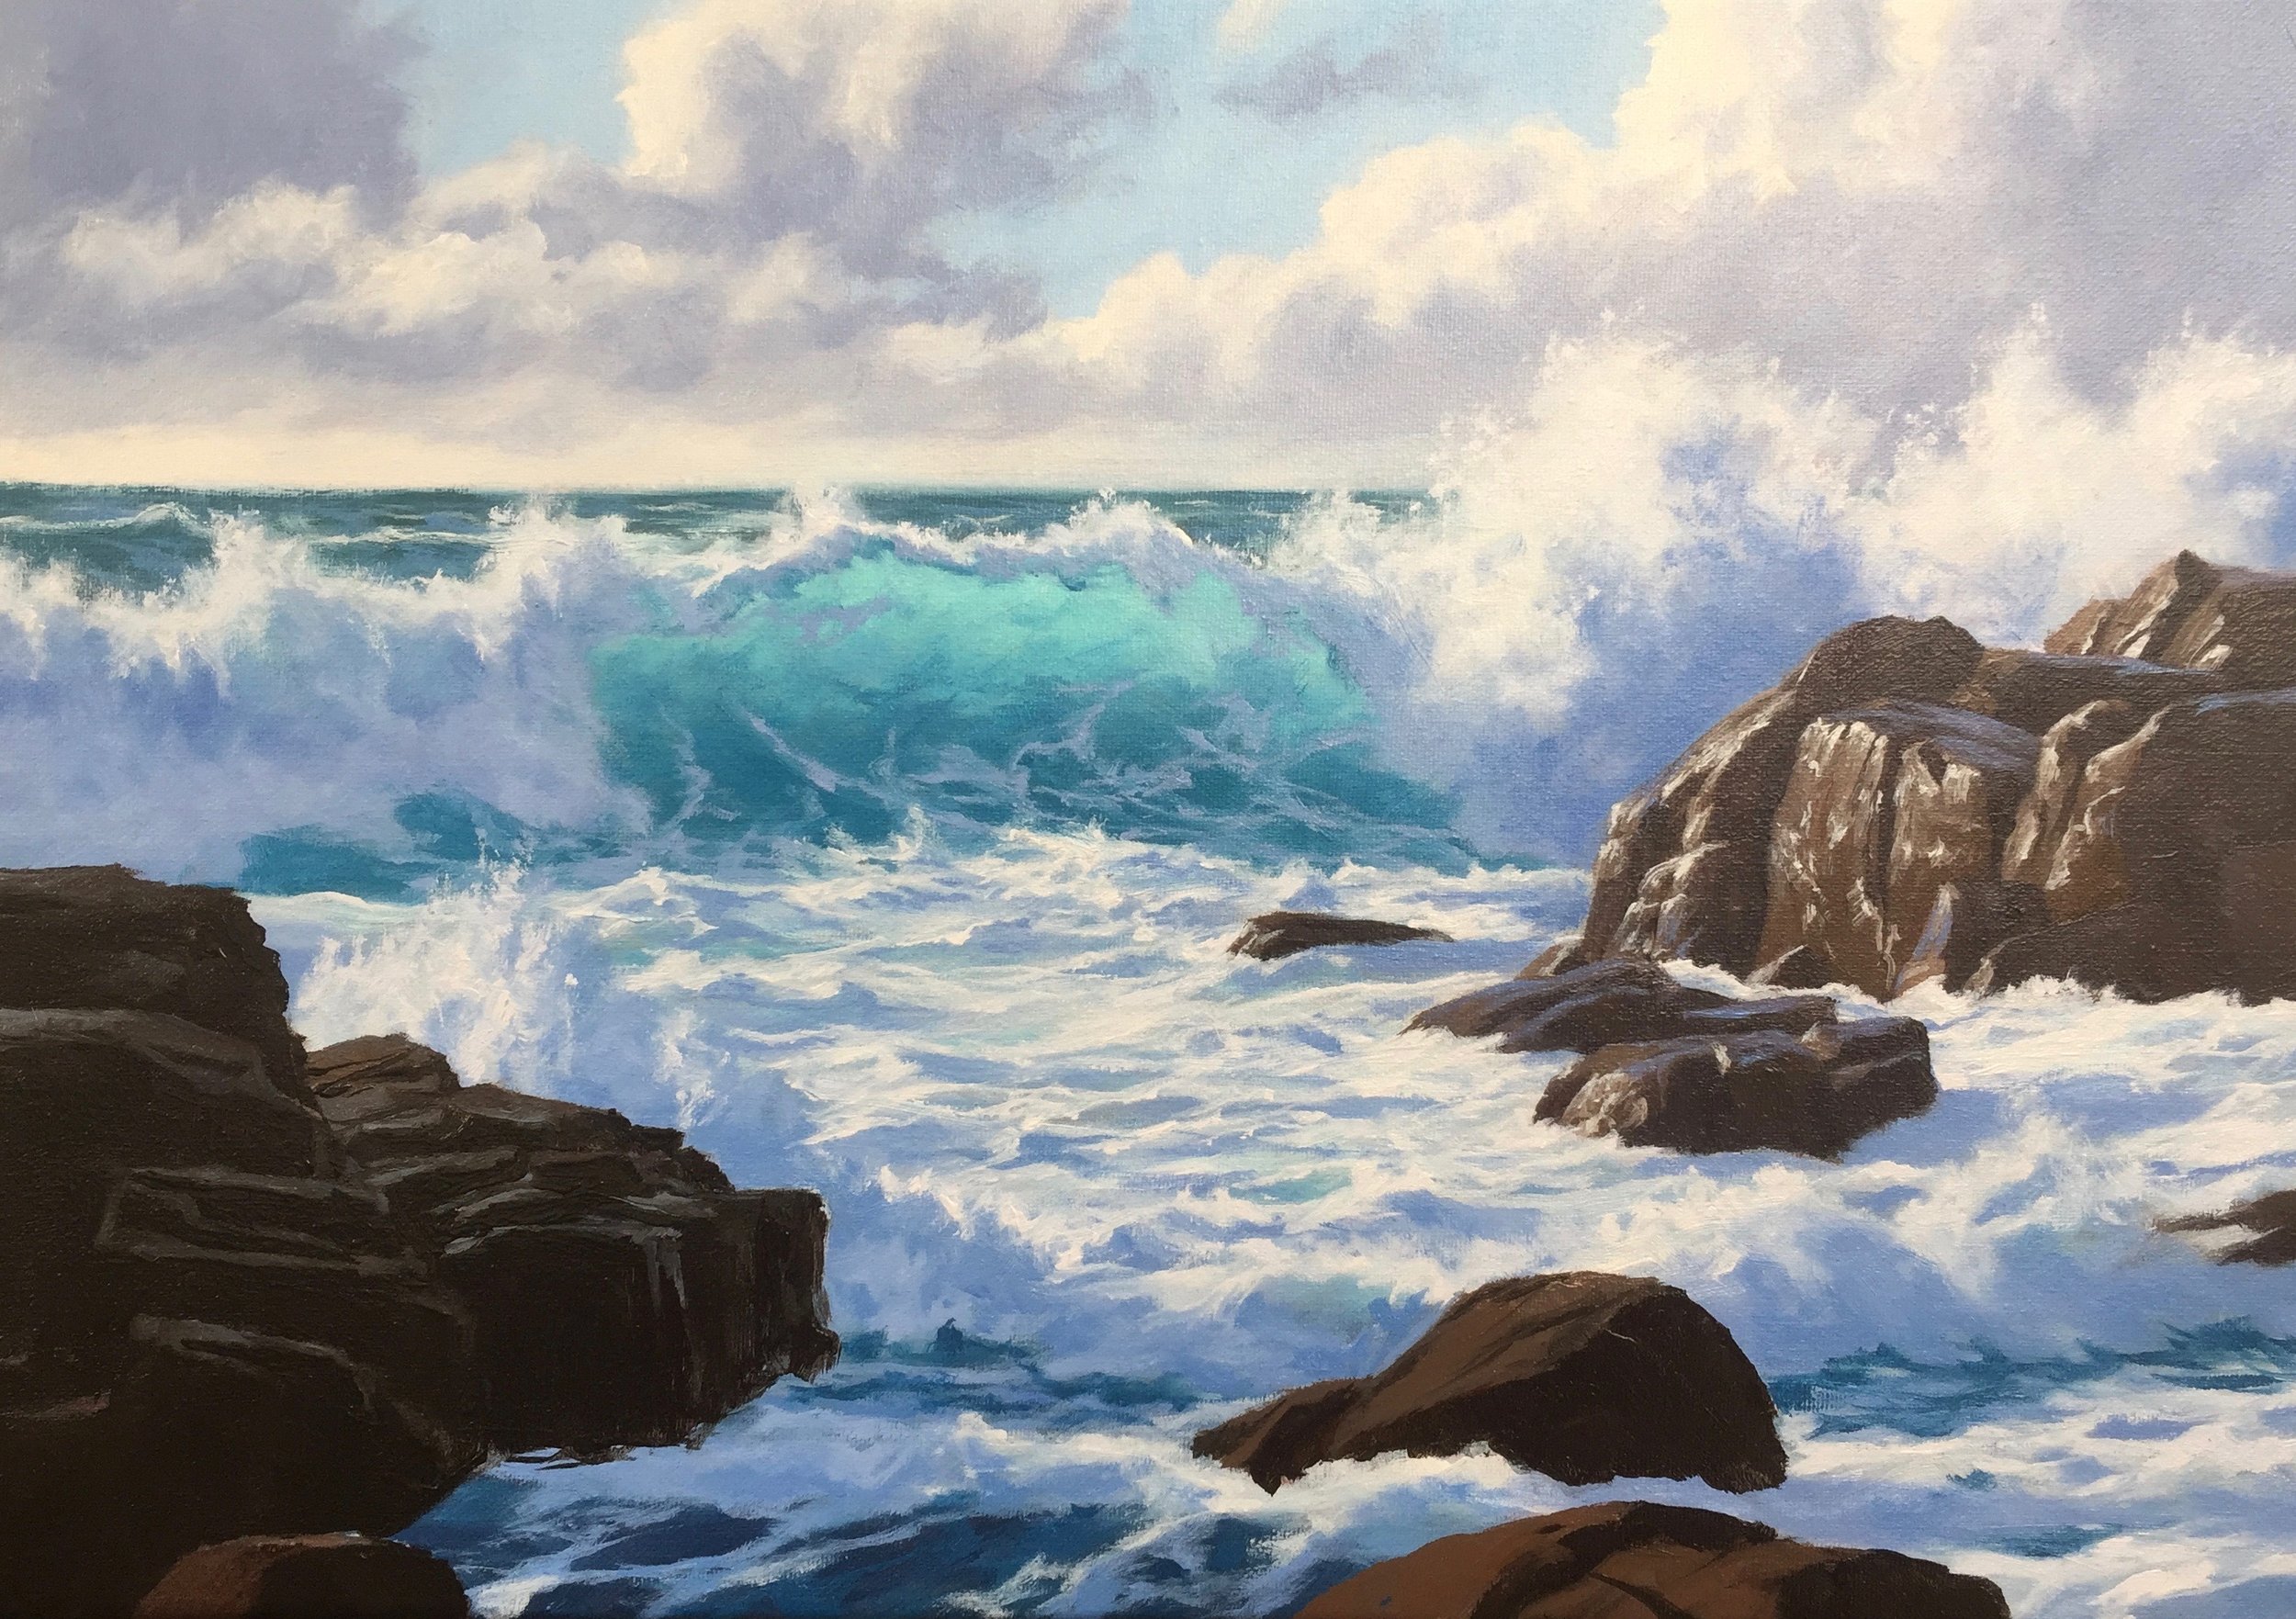
The composition I have created for this seascape is an ‘S’ composition, where the breaking wave is the focal point and the direction of the rocks in the foreground leads the eye towards the wave. The direction of the clouds then leads the eye across to the right to form an ‘S’ shape before leading the eye back down towards the rocks on the right.
The other rocks in the foreground also point in the direction of the breaking wave.
Colours

I painted this artwork in oils but you could also paint it in acrylics as well. I used the following colours in this painting:
- Titanium white
- Yellow oxide
- Burnt Sienna
- Burnt Umber
- Cadmium red light
- Quinacridone magenta
- Ultramarine blue
- Cobalt blue
- Cobalt teal
- Pthalo green
Artists!!! Are you in need of oil paints but not sure where to start?
Are you a beginner painter or a professional artist that is looking to try using oil paints or switch to a different brand but is not sure which brand to choose?
Then look no further. Check out this guide to the best oil paints on the market.
Whether you’re an aspiring artist or a seasoned painter, this blog post is your ultimate resource. Click the button below.
Brushes
Here is a list of the brushes I used in this painting:
- No.6 bristle flat
- No.2 bristle flat
- No.3 bristle filbert
- No.1 bristle round
- No.0 synthetic round
- No.00 synthetic round
- 3/8 synthetic dagger
- 1/4 synthetic dagger
2. BLOCKING IN THE PAINTING
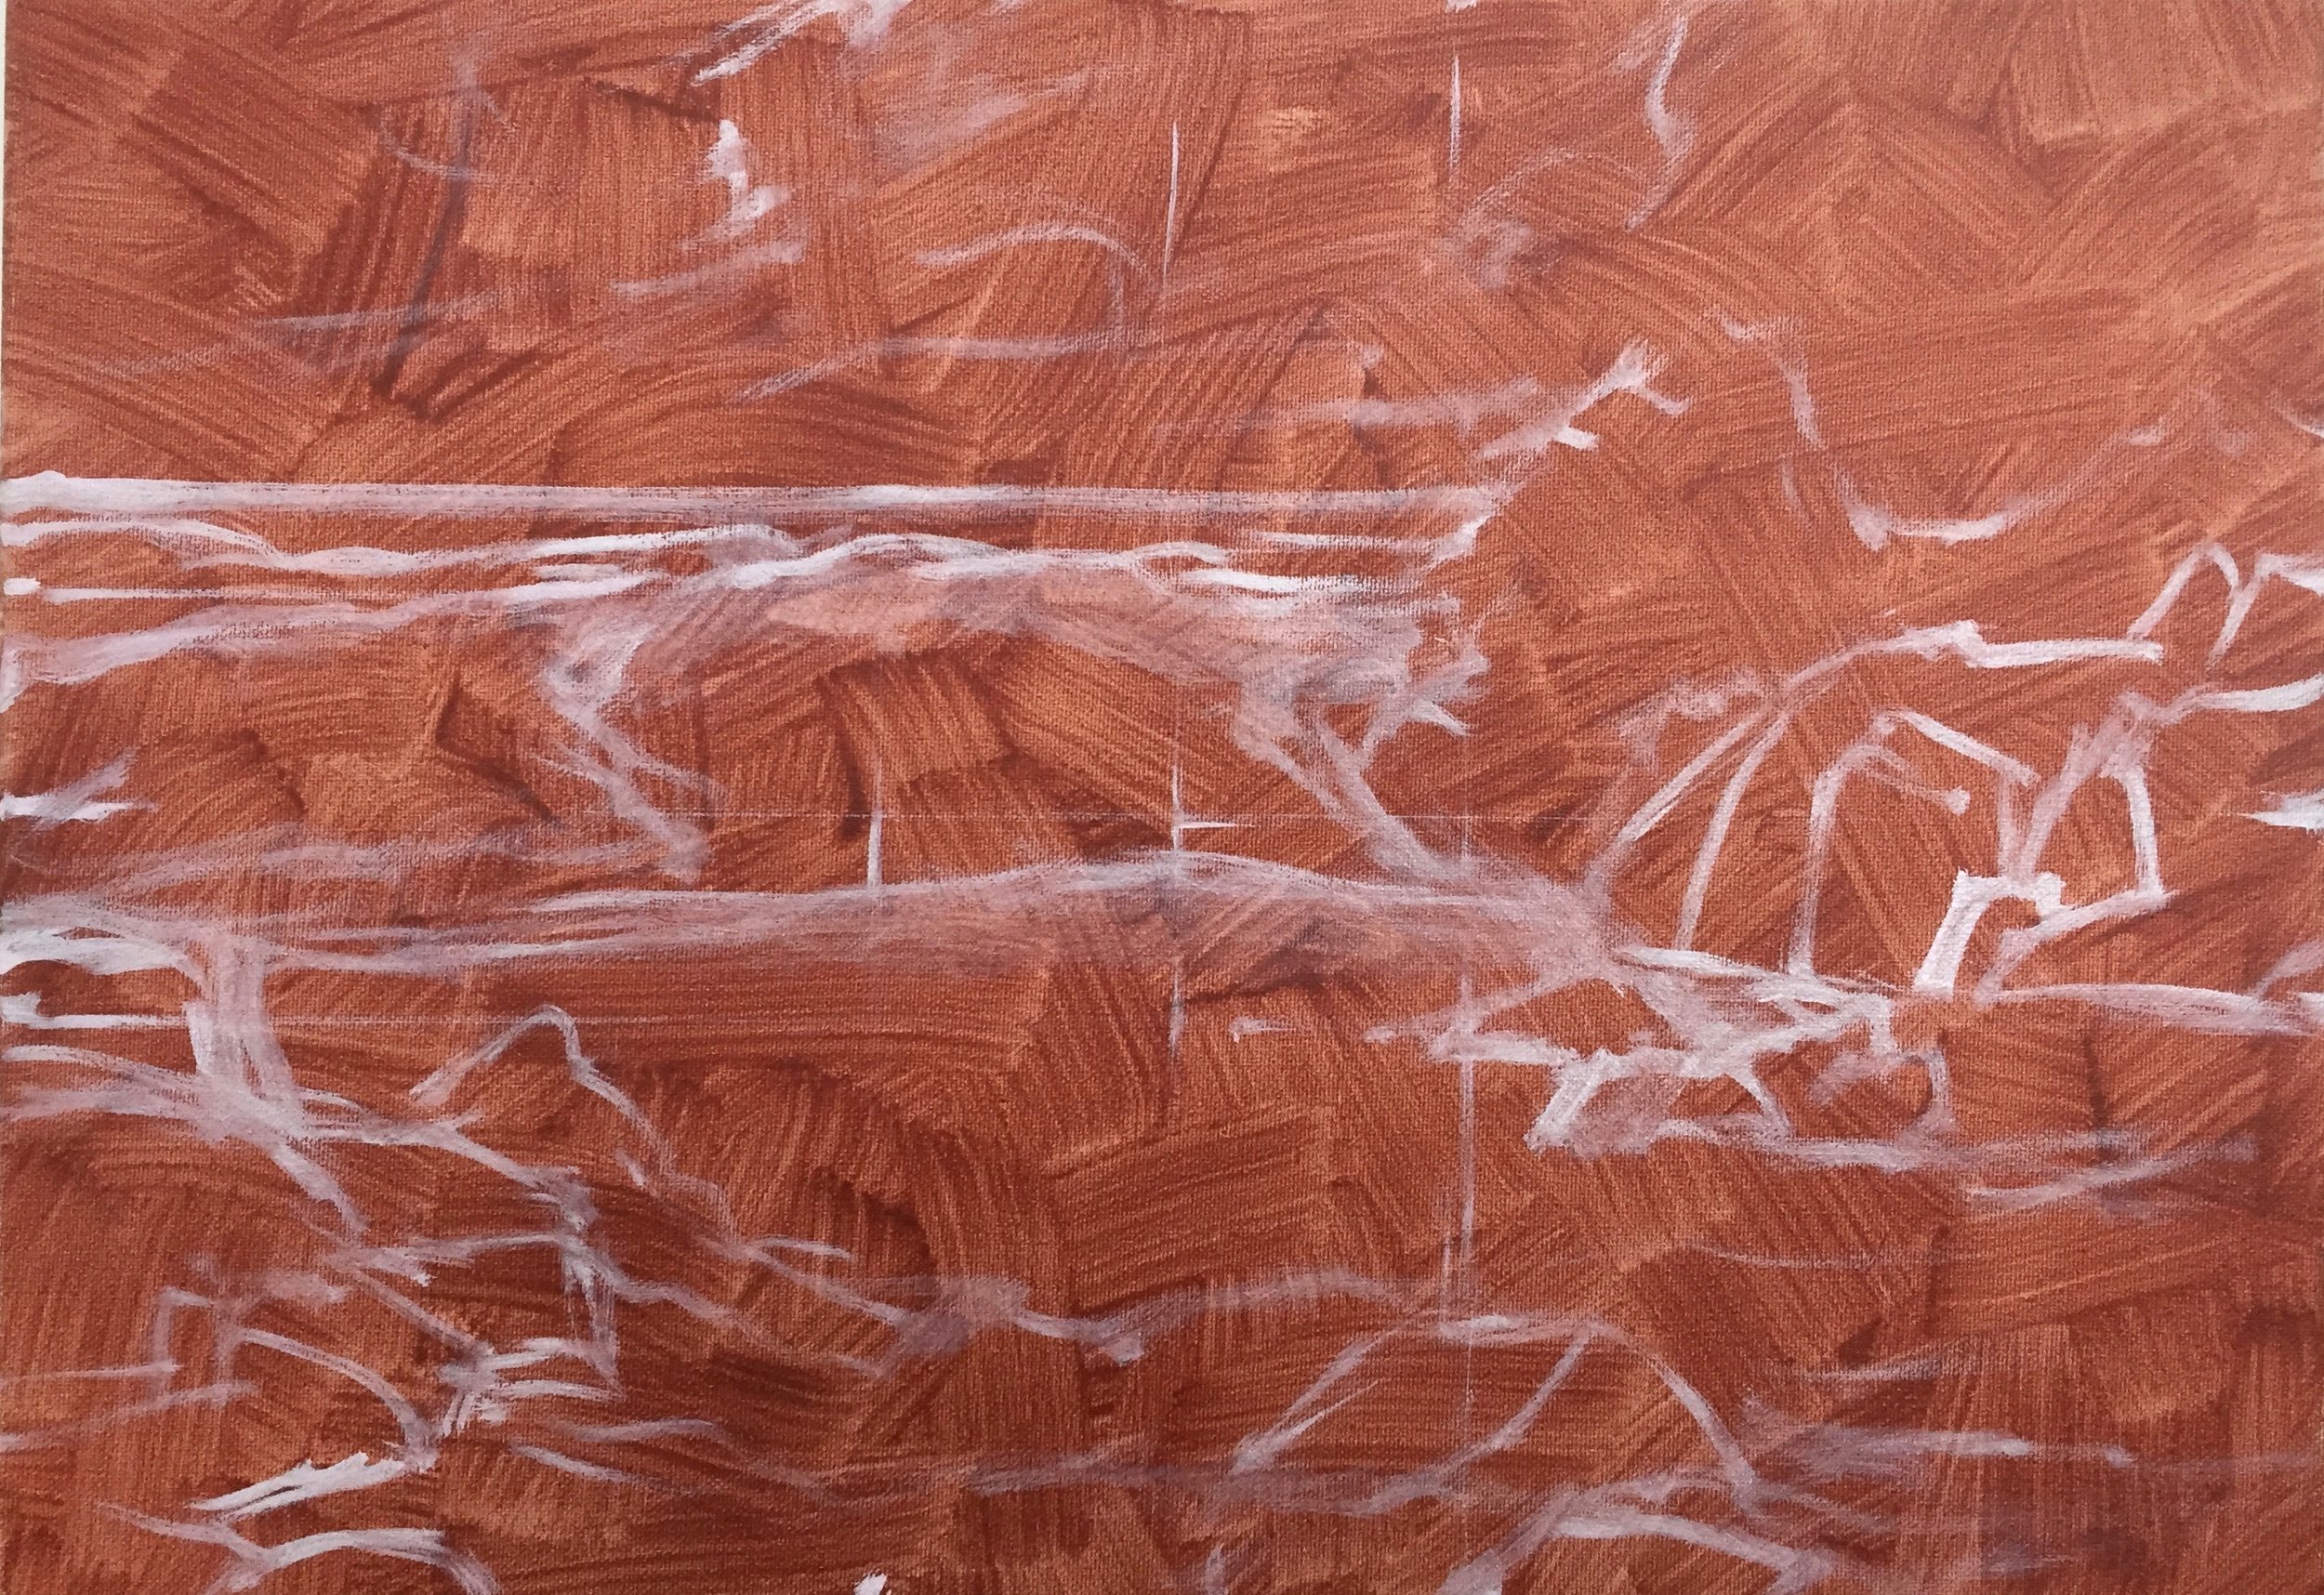
I begin my painting by sketching out the scene with titanium white mixed with quinacridone magenta and Liquin Original which is a medium that thins the paint and speeds up the drying.
You’ll notice I am not painting on a white canvas, instead, I previously applied a layer of burnt sienna which gives vibrancy to the painting as it comes through the paint layers.
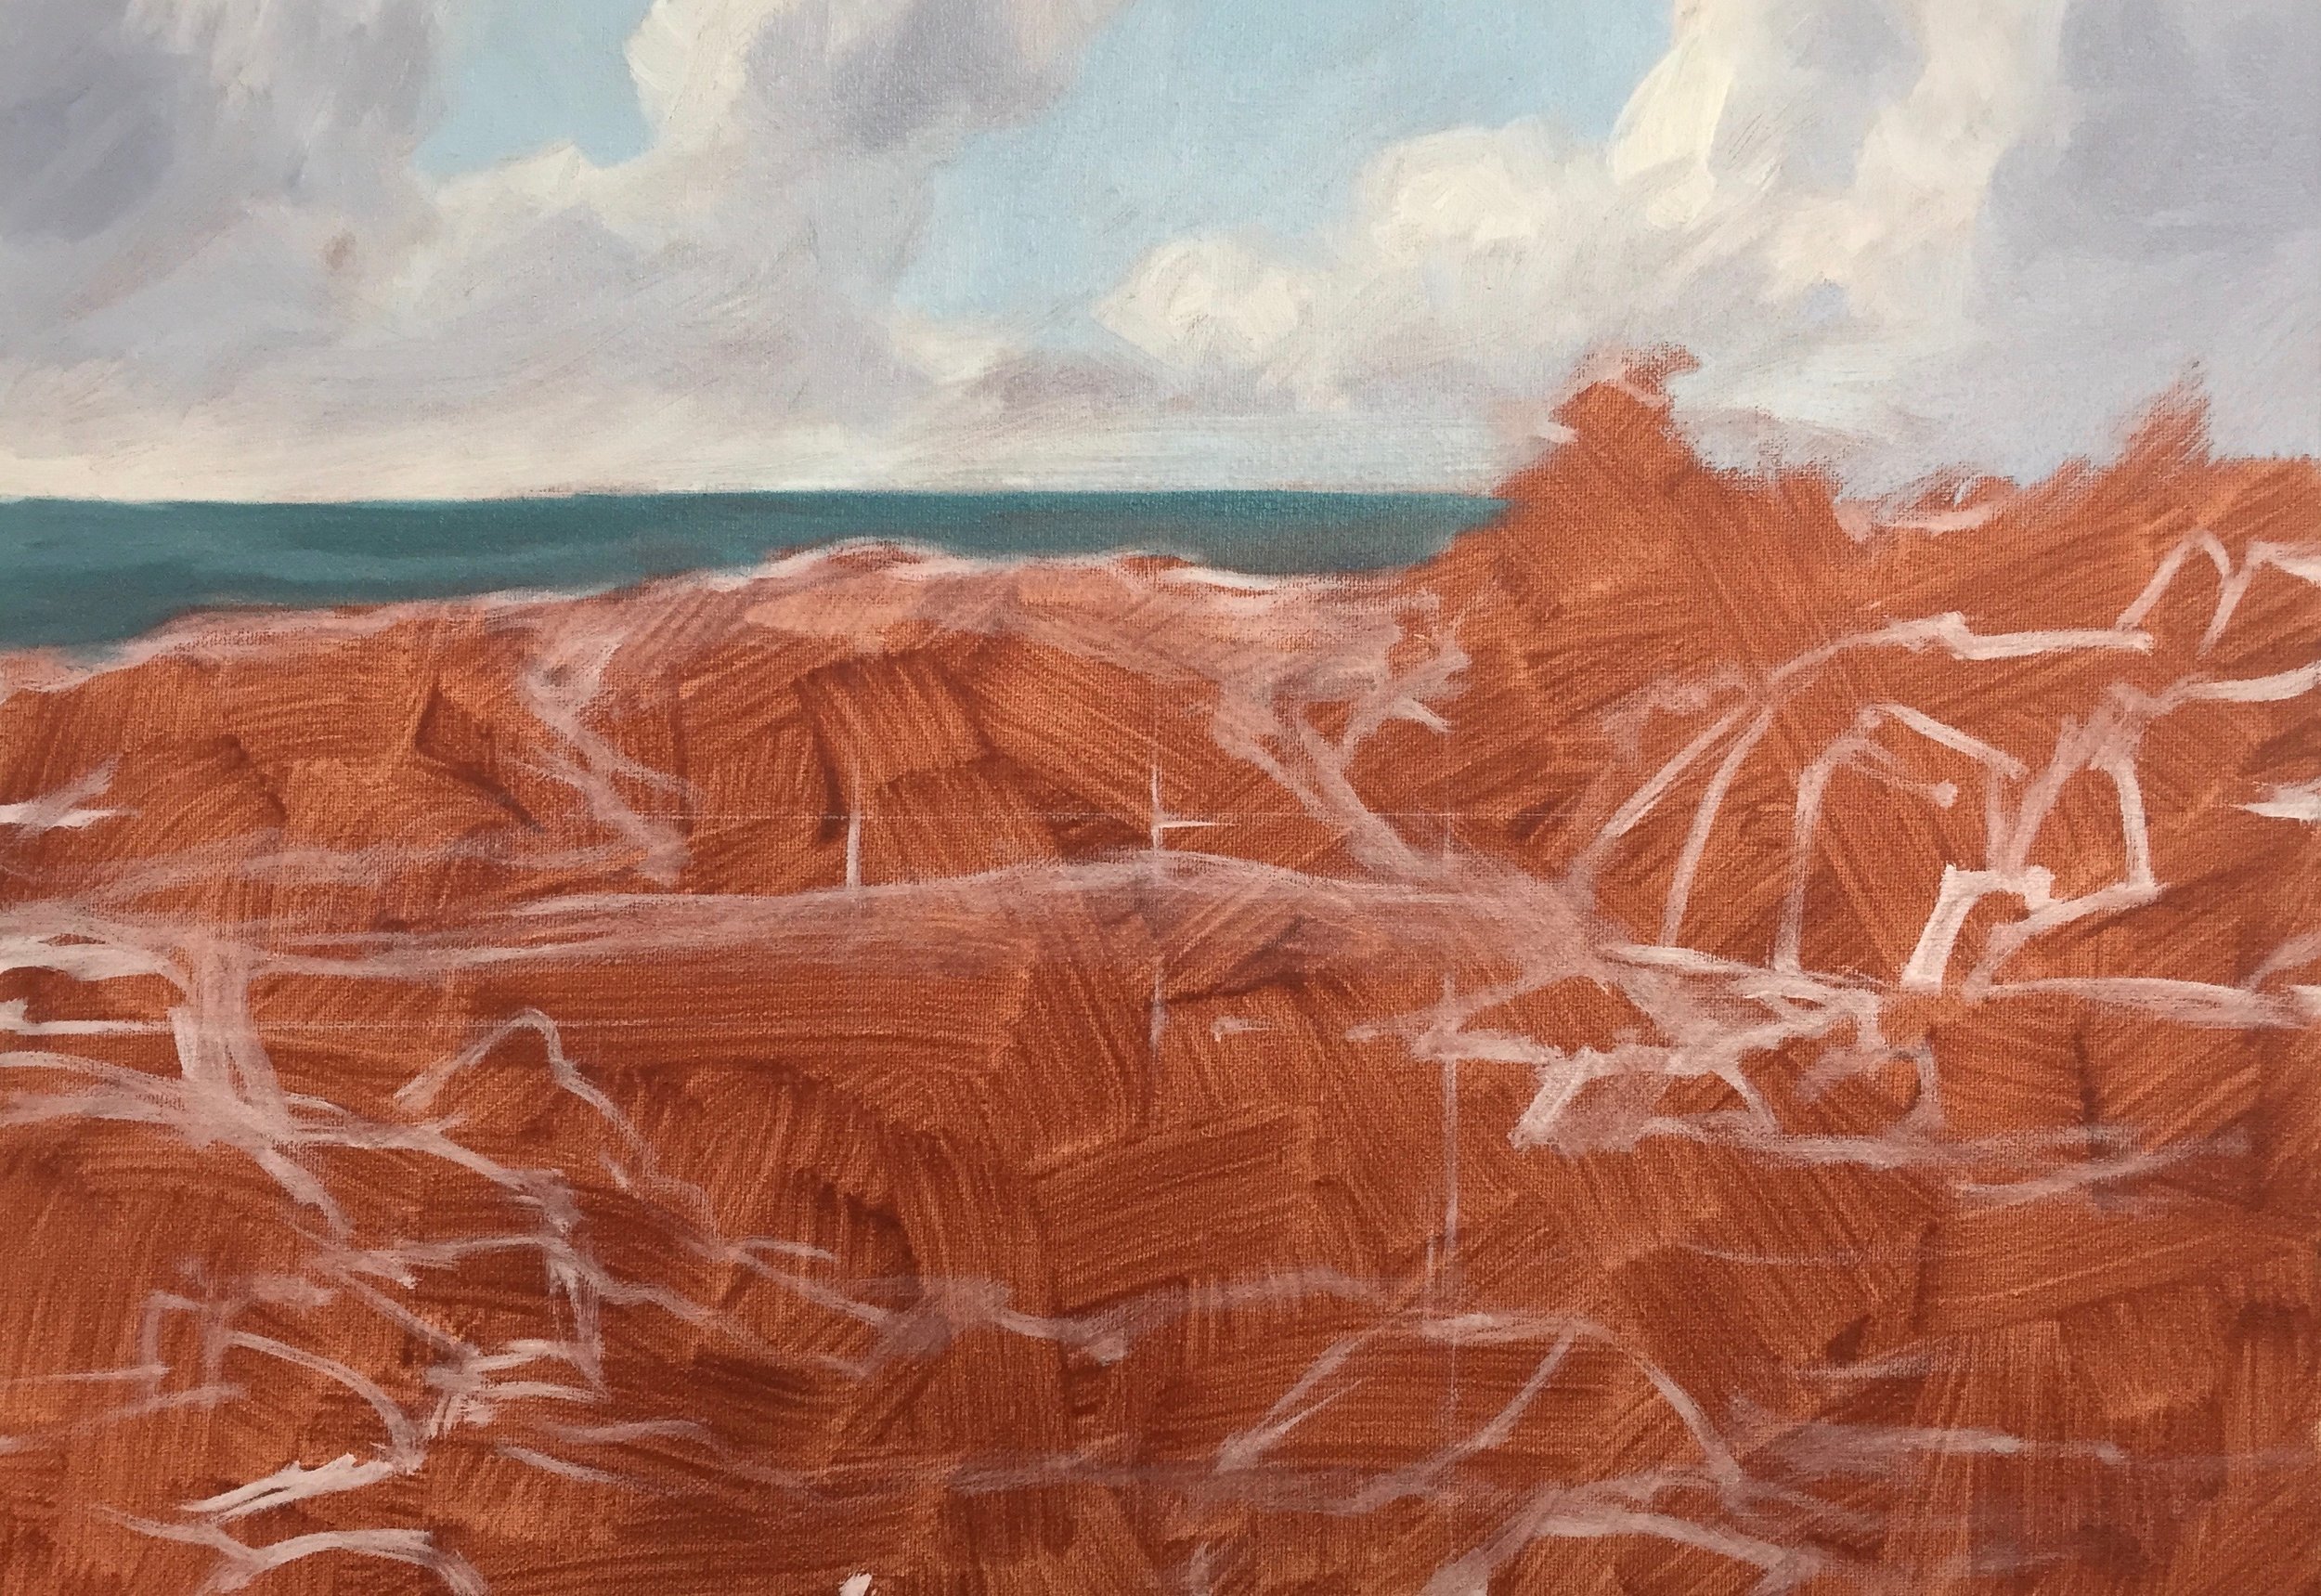
I always begin by painting the sky as this is the furthest away, I mix the colours in the sky with cobalt blue, cobalt teal, a little ultramarine blue and titanium white.
For the clouds I paint the highlights with pure titanium white, knowing that the shadow colours will mix in and that I’ll be returning to it later on in the painting.
For the cloud shadows, I mix ultramarine blue with burnt umber which knocks out the saturation of the blue. I then add a little quinacridone magenta to tip the mixture on the violet side and then add titanium white to lighten the tone.
I paint the horizon of the sea taking care to desaturate my blue mix so it doesn’t come forward in the painting.
Whenever you paint a seascape or indeed a landscape go for either a high horizon or a low horizon, never in the middle of the painting as it is distracting to the composition.
Paint Stunning Seascapes Step-by-Step
4 x Step-by-Step Painting Tutorial Videos – $27

I use pure titanium white to roughly mark the areas where the highlights of the waves and white water will go, again I am not worried it’s come straight from the tube as it’ll soon mix with the other shadow colours I am going to use.
I paint the translucency of the wave by mixing cobalt teal, pthalo green and titanium white. As I paint the main body of the wave I start introducing cobalt blue and ultramarine blue. I also use the colours to roughly mark out the shadows in the foreground white water.
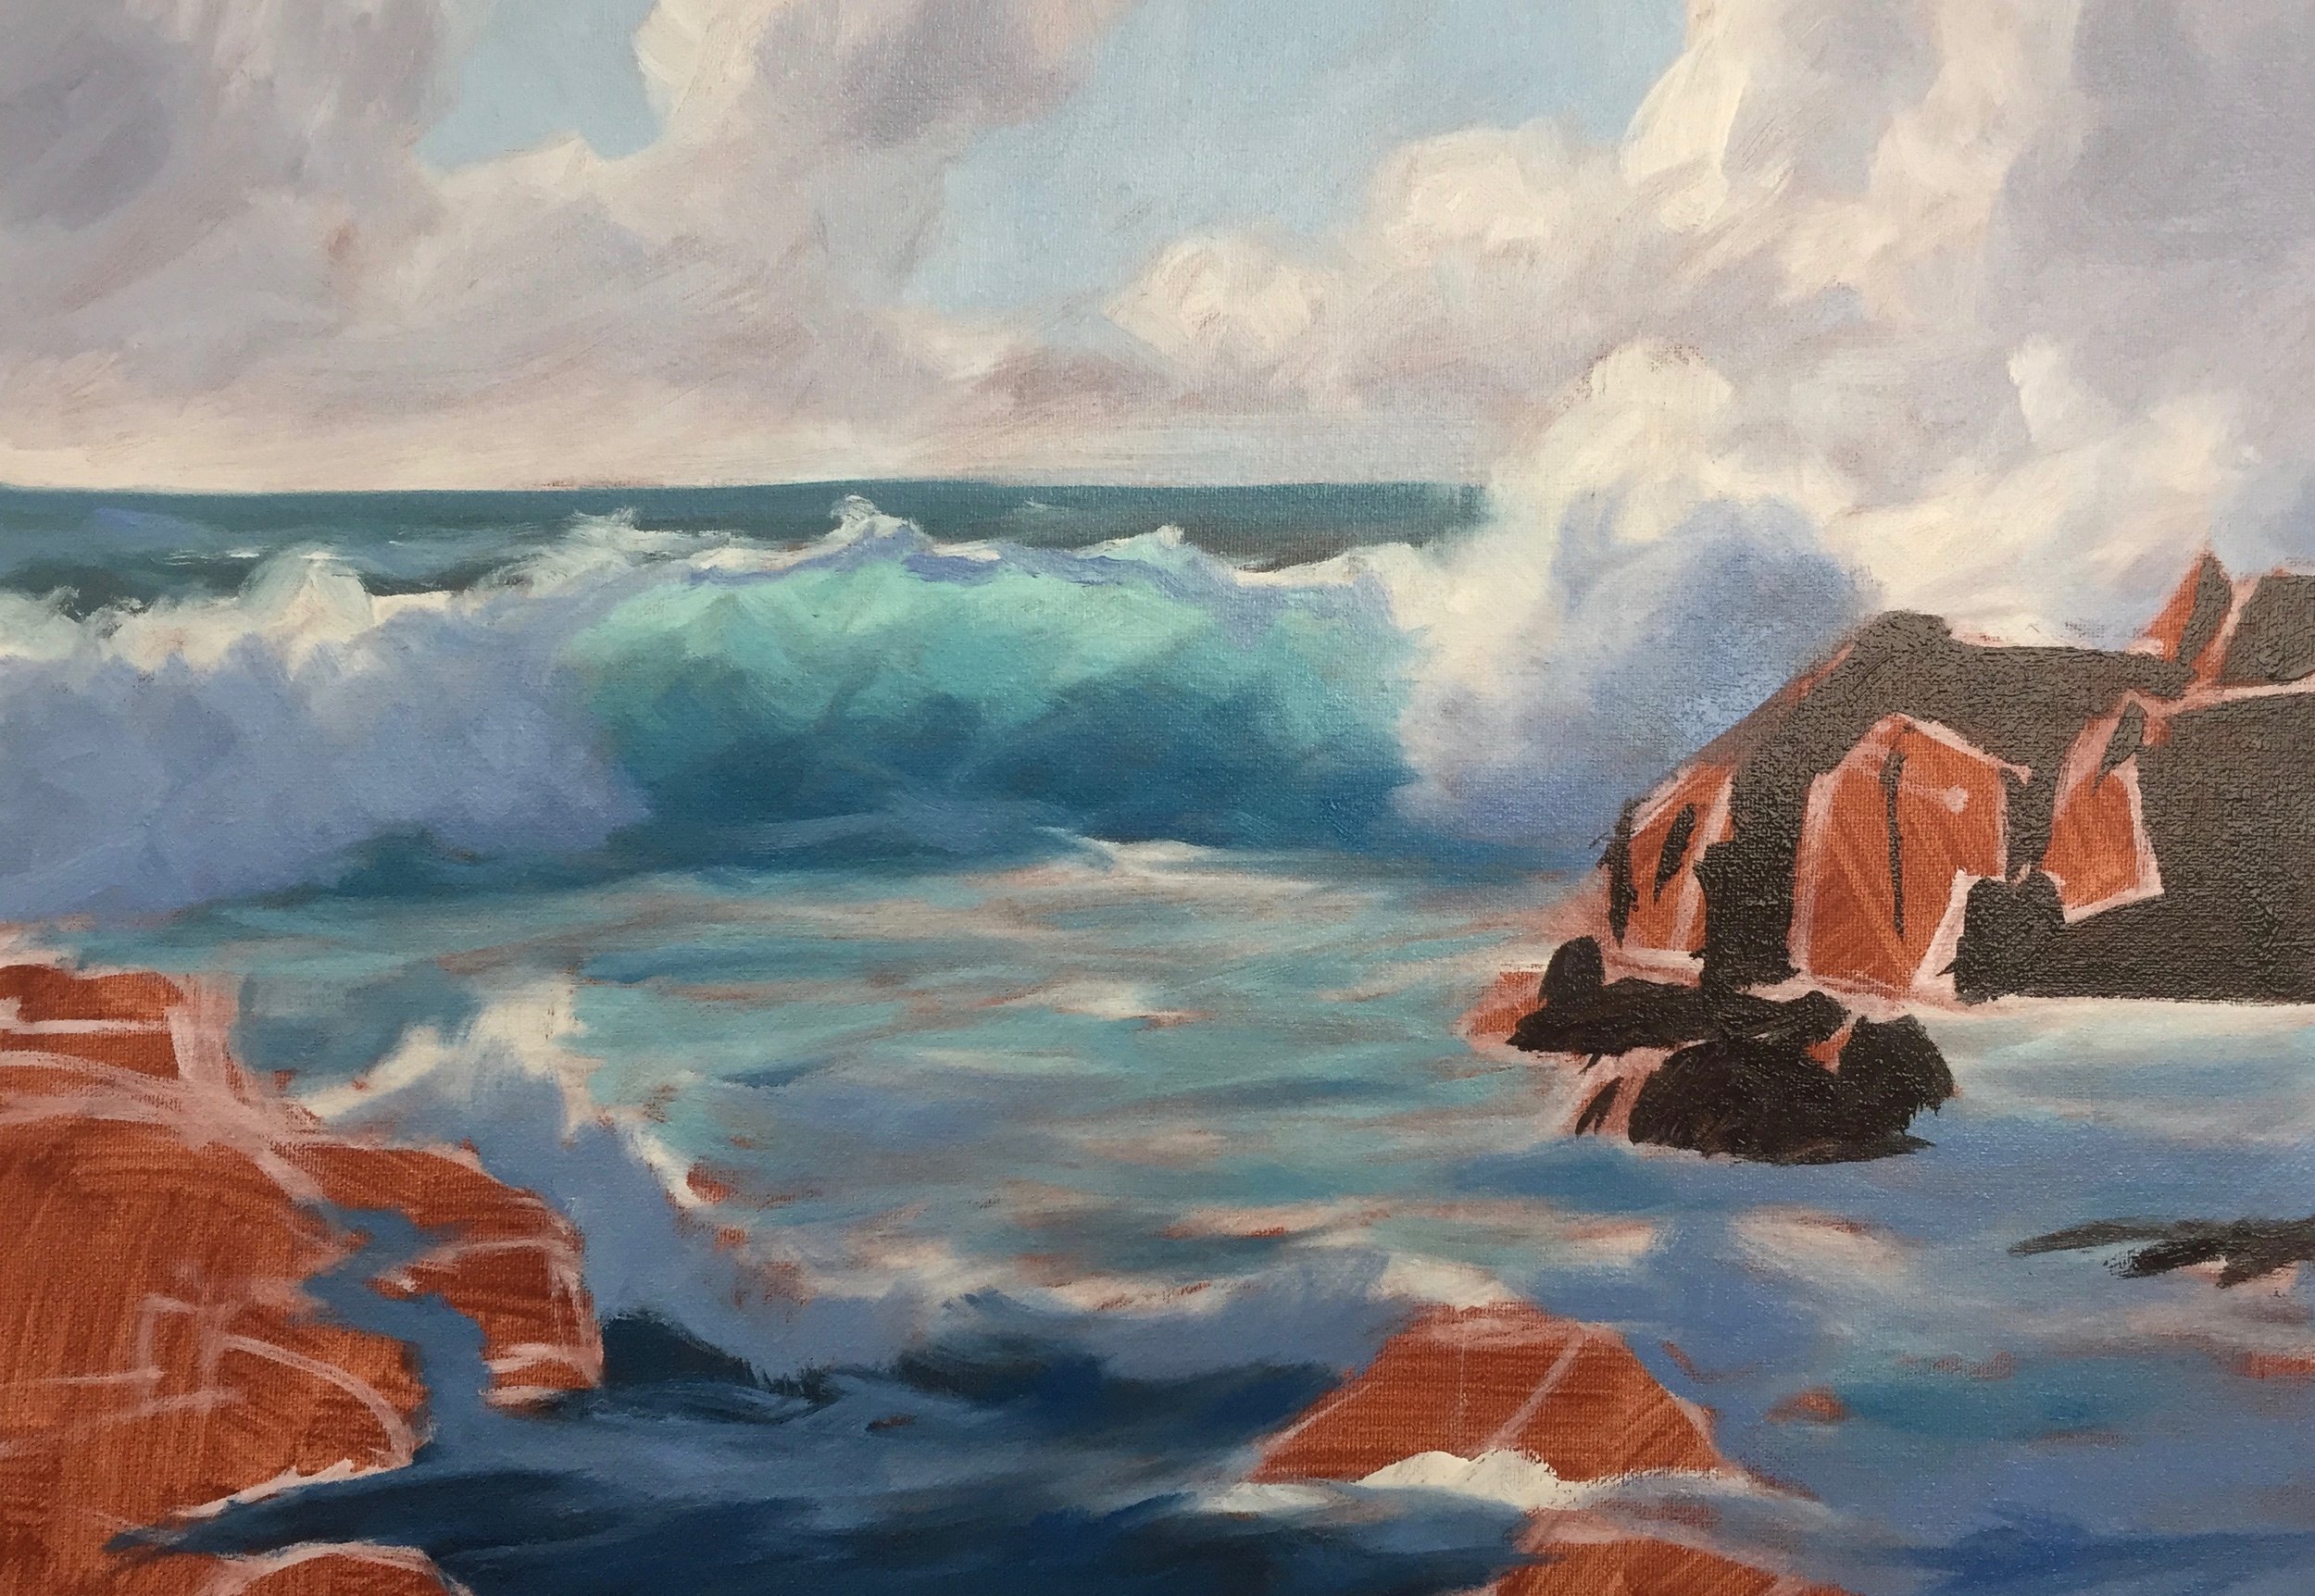
I paint the shadows of the breaking waves by mixing ultramarine, cobalt blue and titanium white.
I use my trio of blues for the sea at the bottom of the painting and I also add a little quinacridone magenta and pthalo green to darken the tone.
I block in the shadows of the rocks by mixing burnt umber with ultramarine blue which creates a near-black.
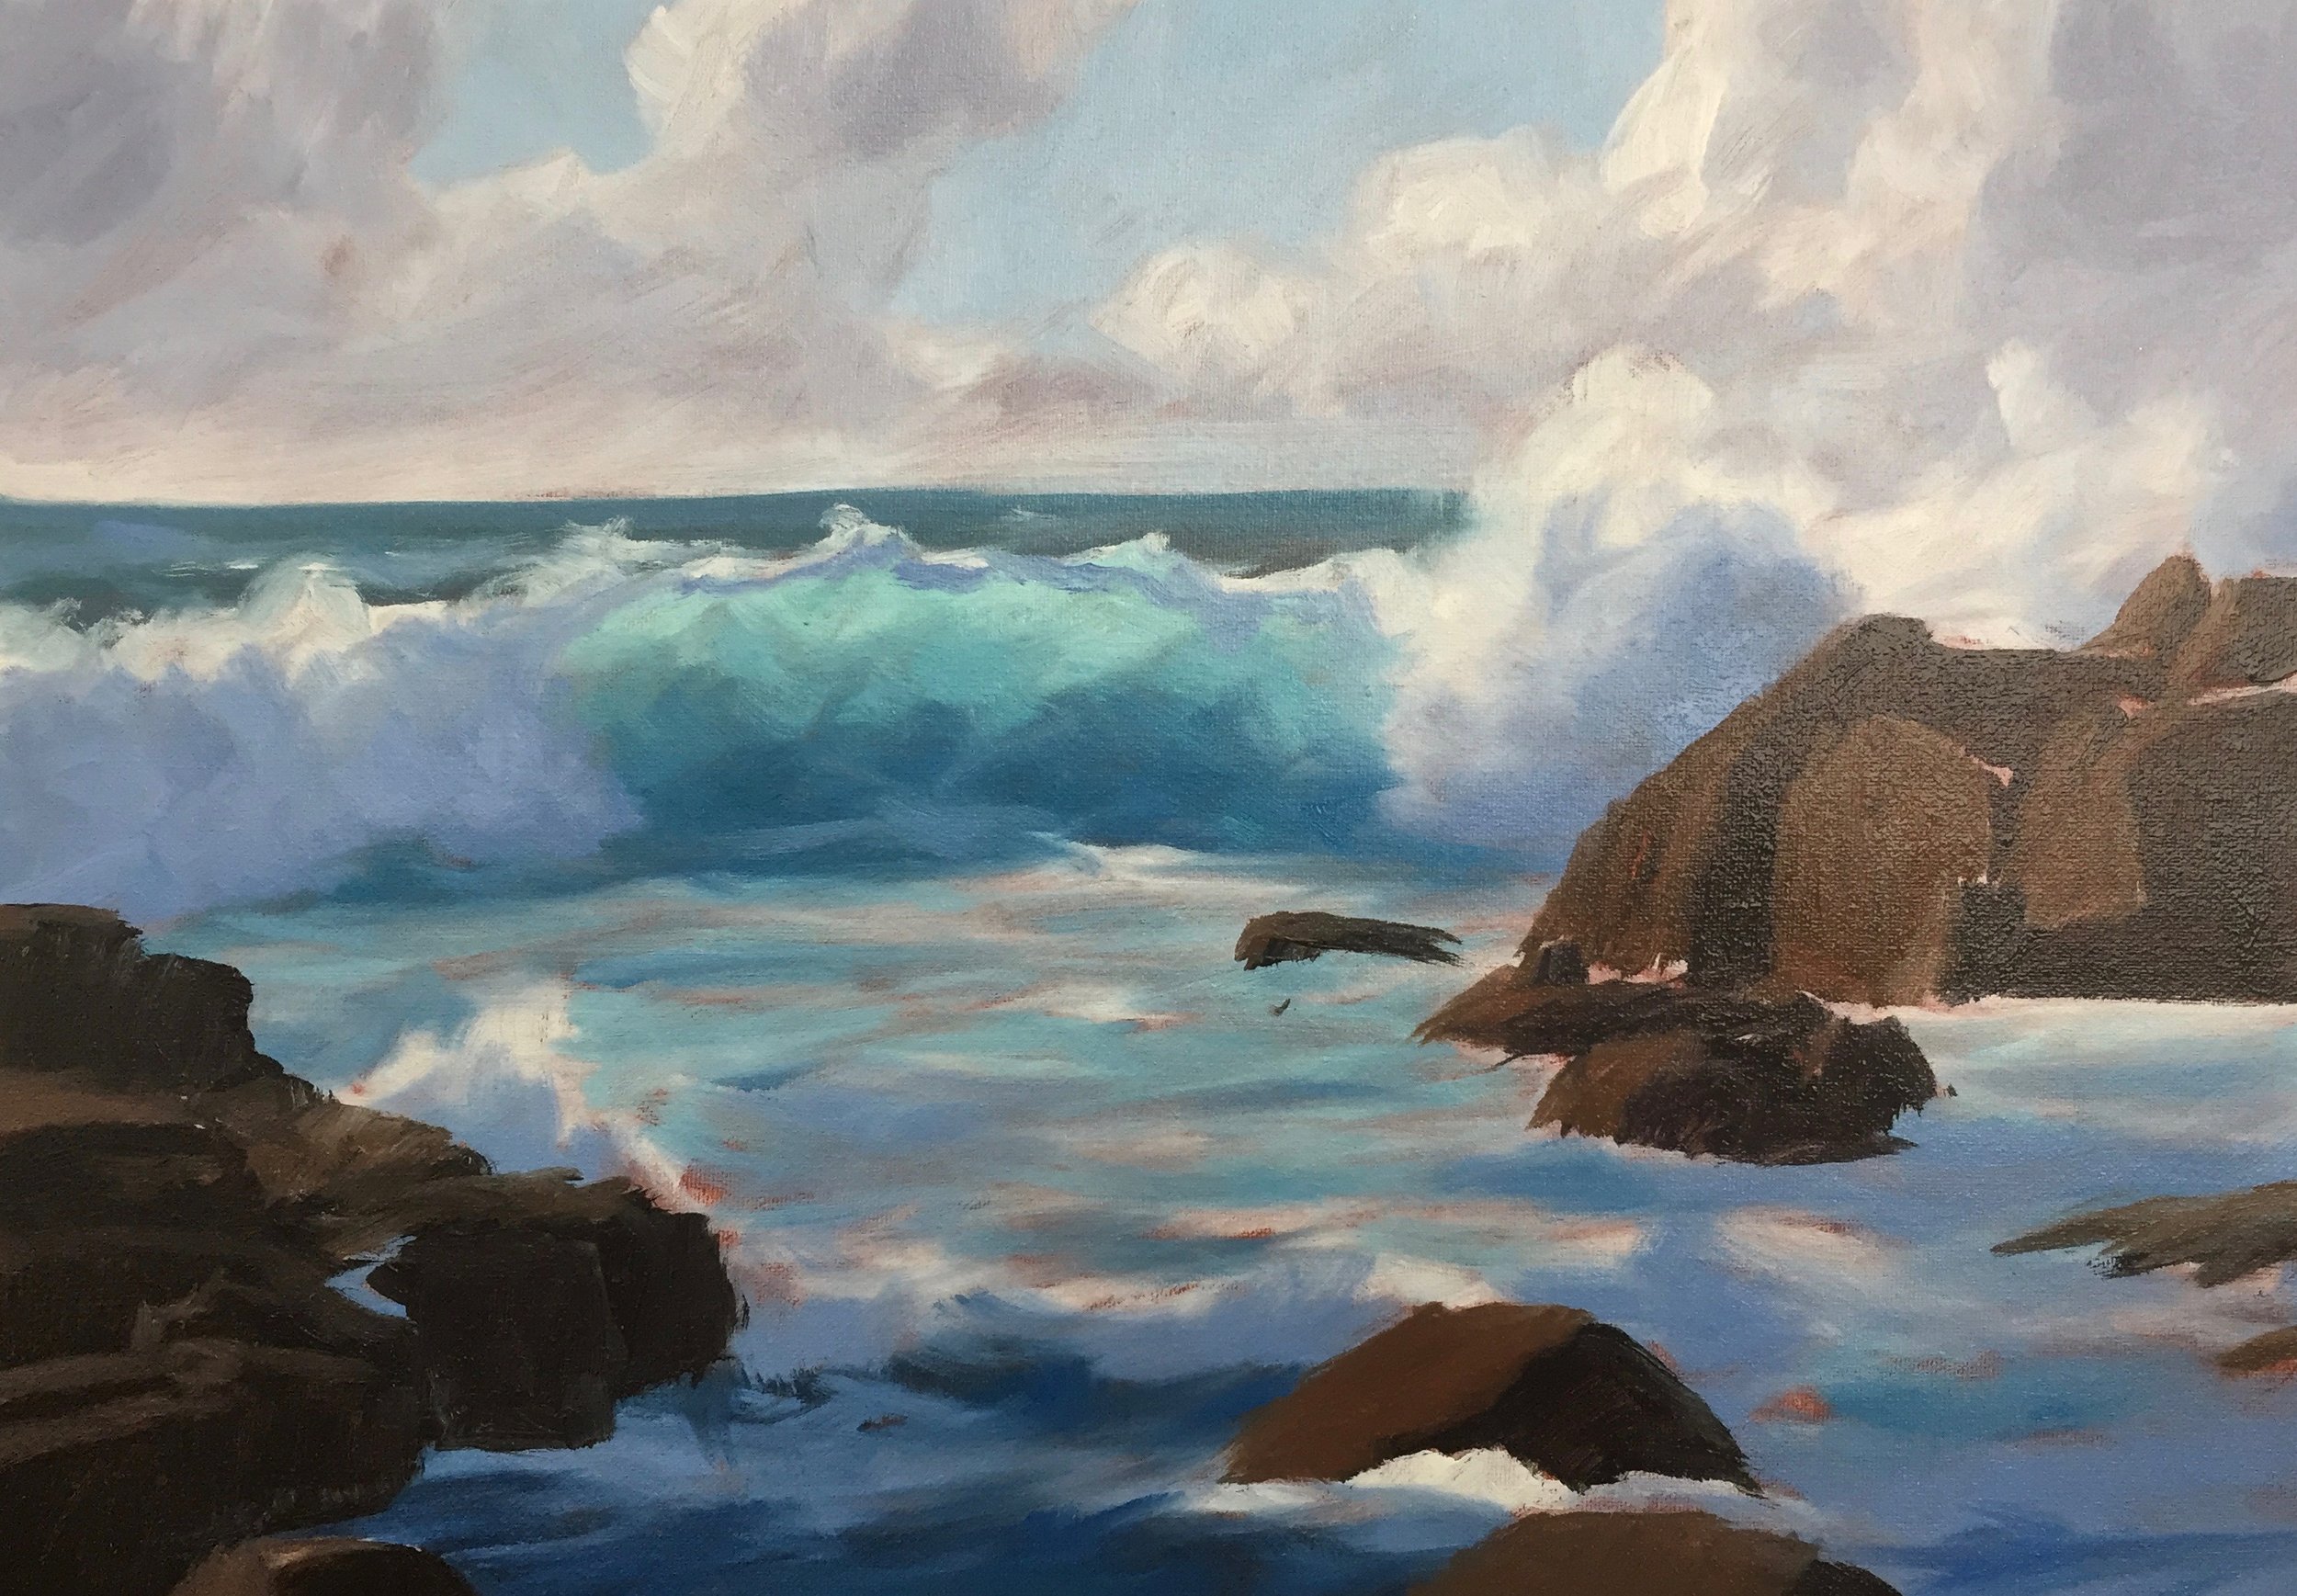
To complete the blocking in stage I paint the areas of the rocks that are in light using a combination of burnt umber, burnt sienna, yellow oxide and titanium white. I form the basic shapes with an ivory dagger brush.
With the blocking in stage complete, I allow the painting to dry before beginning the next stage of the painting.
3. BUILDING UP THE DETAIL
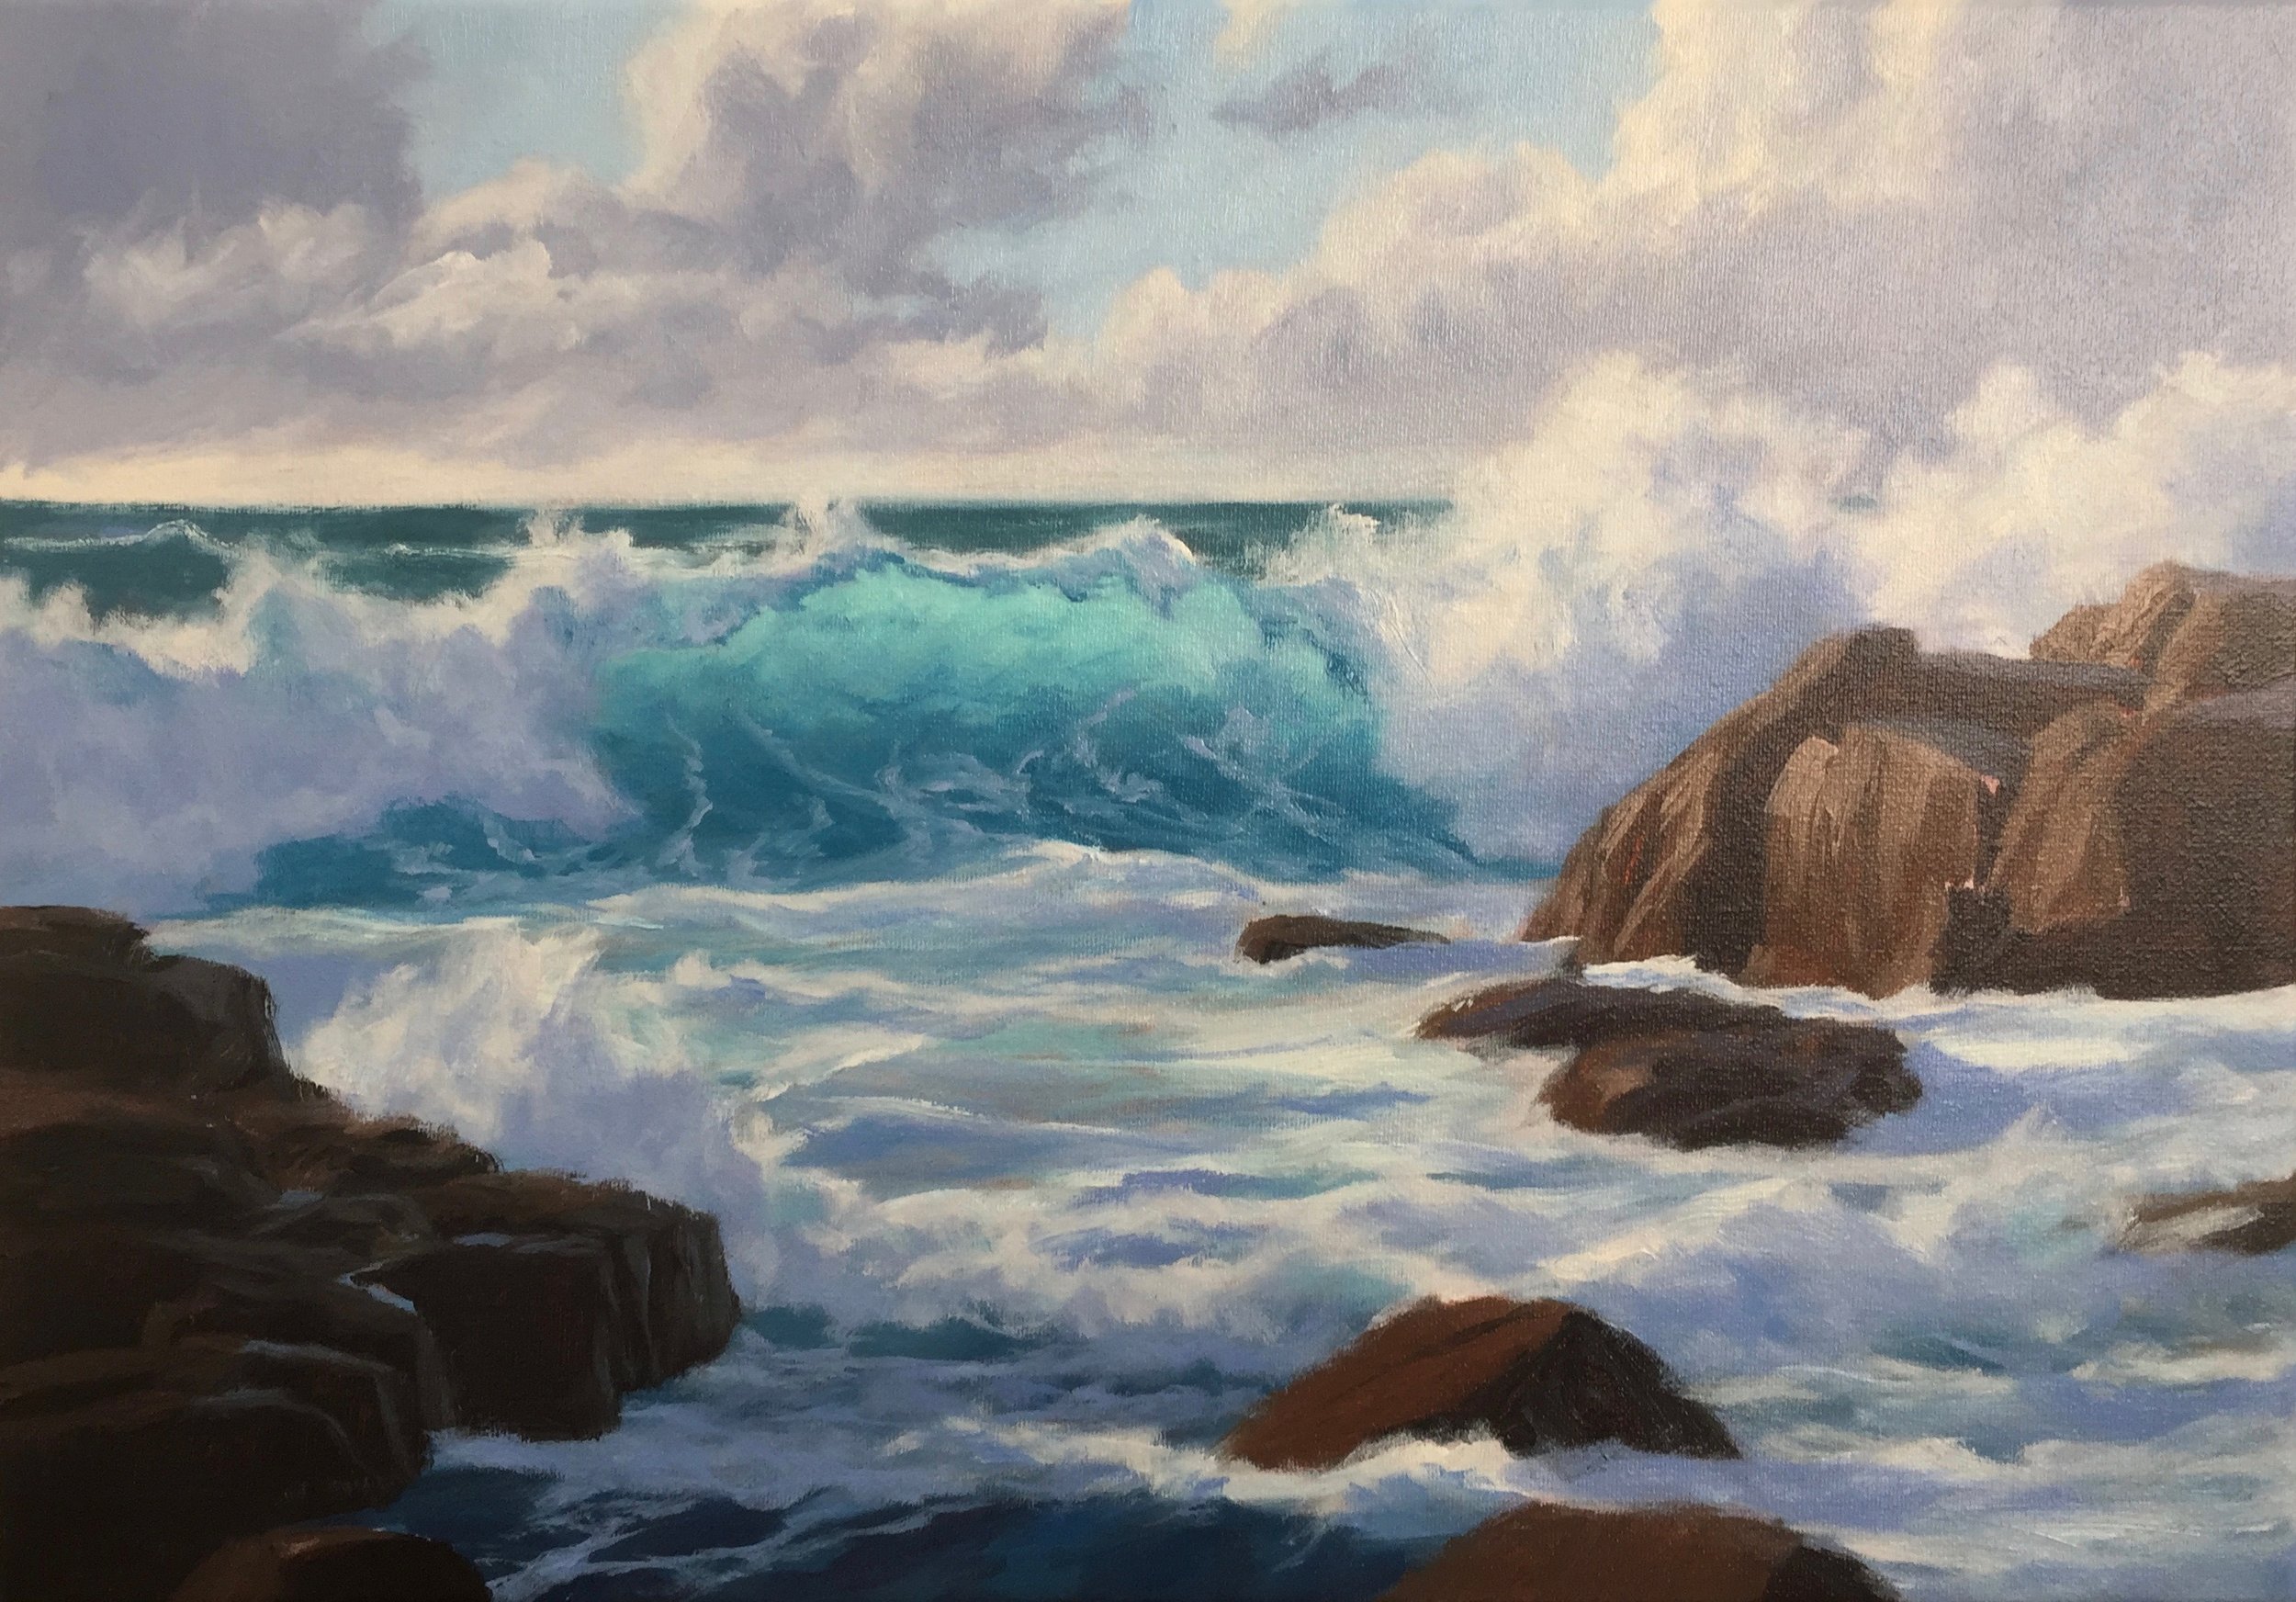
So now that the painting is dry I start adding detail to the sky and clouds and refining their shapes. Many areas need repainting and I use the colours in the sky that I used in the blocking-in process.
I add more highlight into the clouds with titanium white but still dropped the tone a little by mixing in a tiny amount of ultramarine blue, burnt umber and quinacridone magenta. Using a flat bristle brush I add wispy bits to the cloud edges to make it look like turbulent clouds you get in bad weather.
Using a flat bristle brush I begin working on the areas of light on the wave crest, foam burst and white water. I am not using pure titanium white as I need to keep the tone darker so I can paint highlights and sparkles at the end, so I add a little ultramarine blue, burnt umber and quinacridone magenta into the mix.
I start to add highlights to the rocks by mixing burnt umber and titanium white to the mix. I ultimately want to give the illusion of wet rocks.
I define the shapes of the rocks in the foreground on the left side in preparation for adding more details when they are dry. I felt these rocks need to occupy more space in the composition so I made them bigger.
I introduce foam patterns in the breaking waves by mixing ultramarine blue, quinacridone magenta and titanium white. These are also the same colours I am using for the foamy water in the breaking wave.
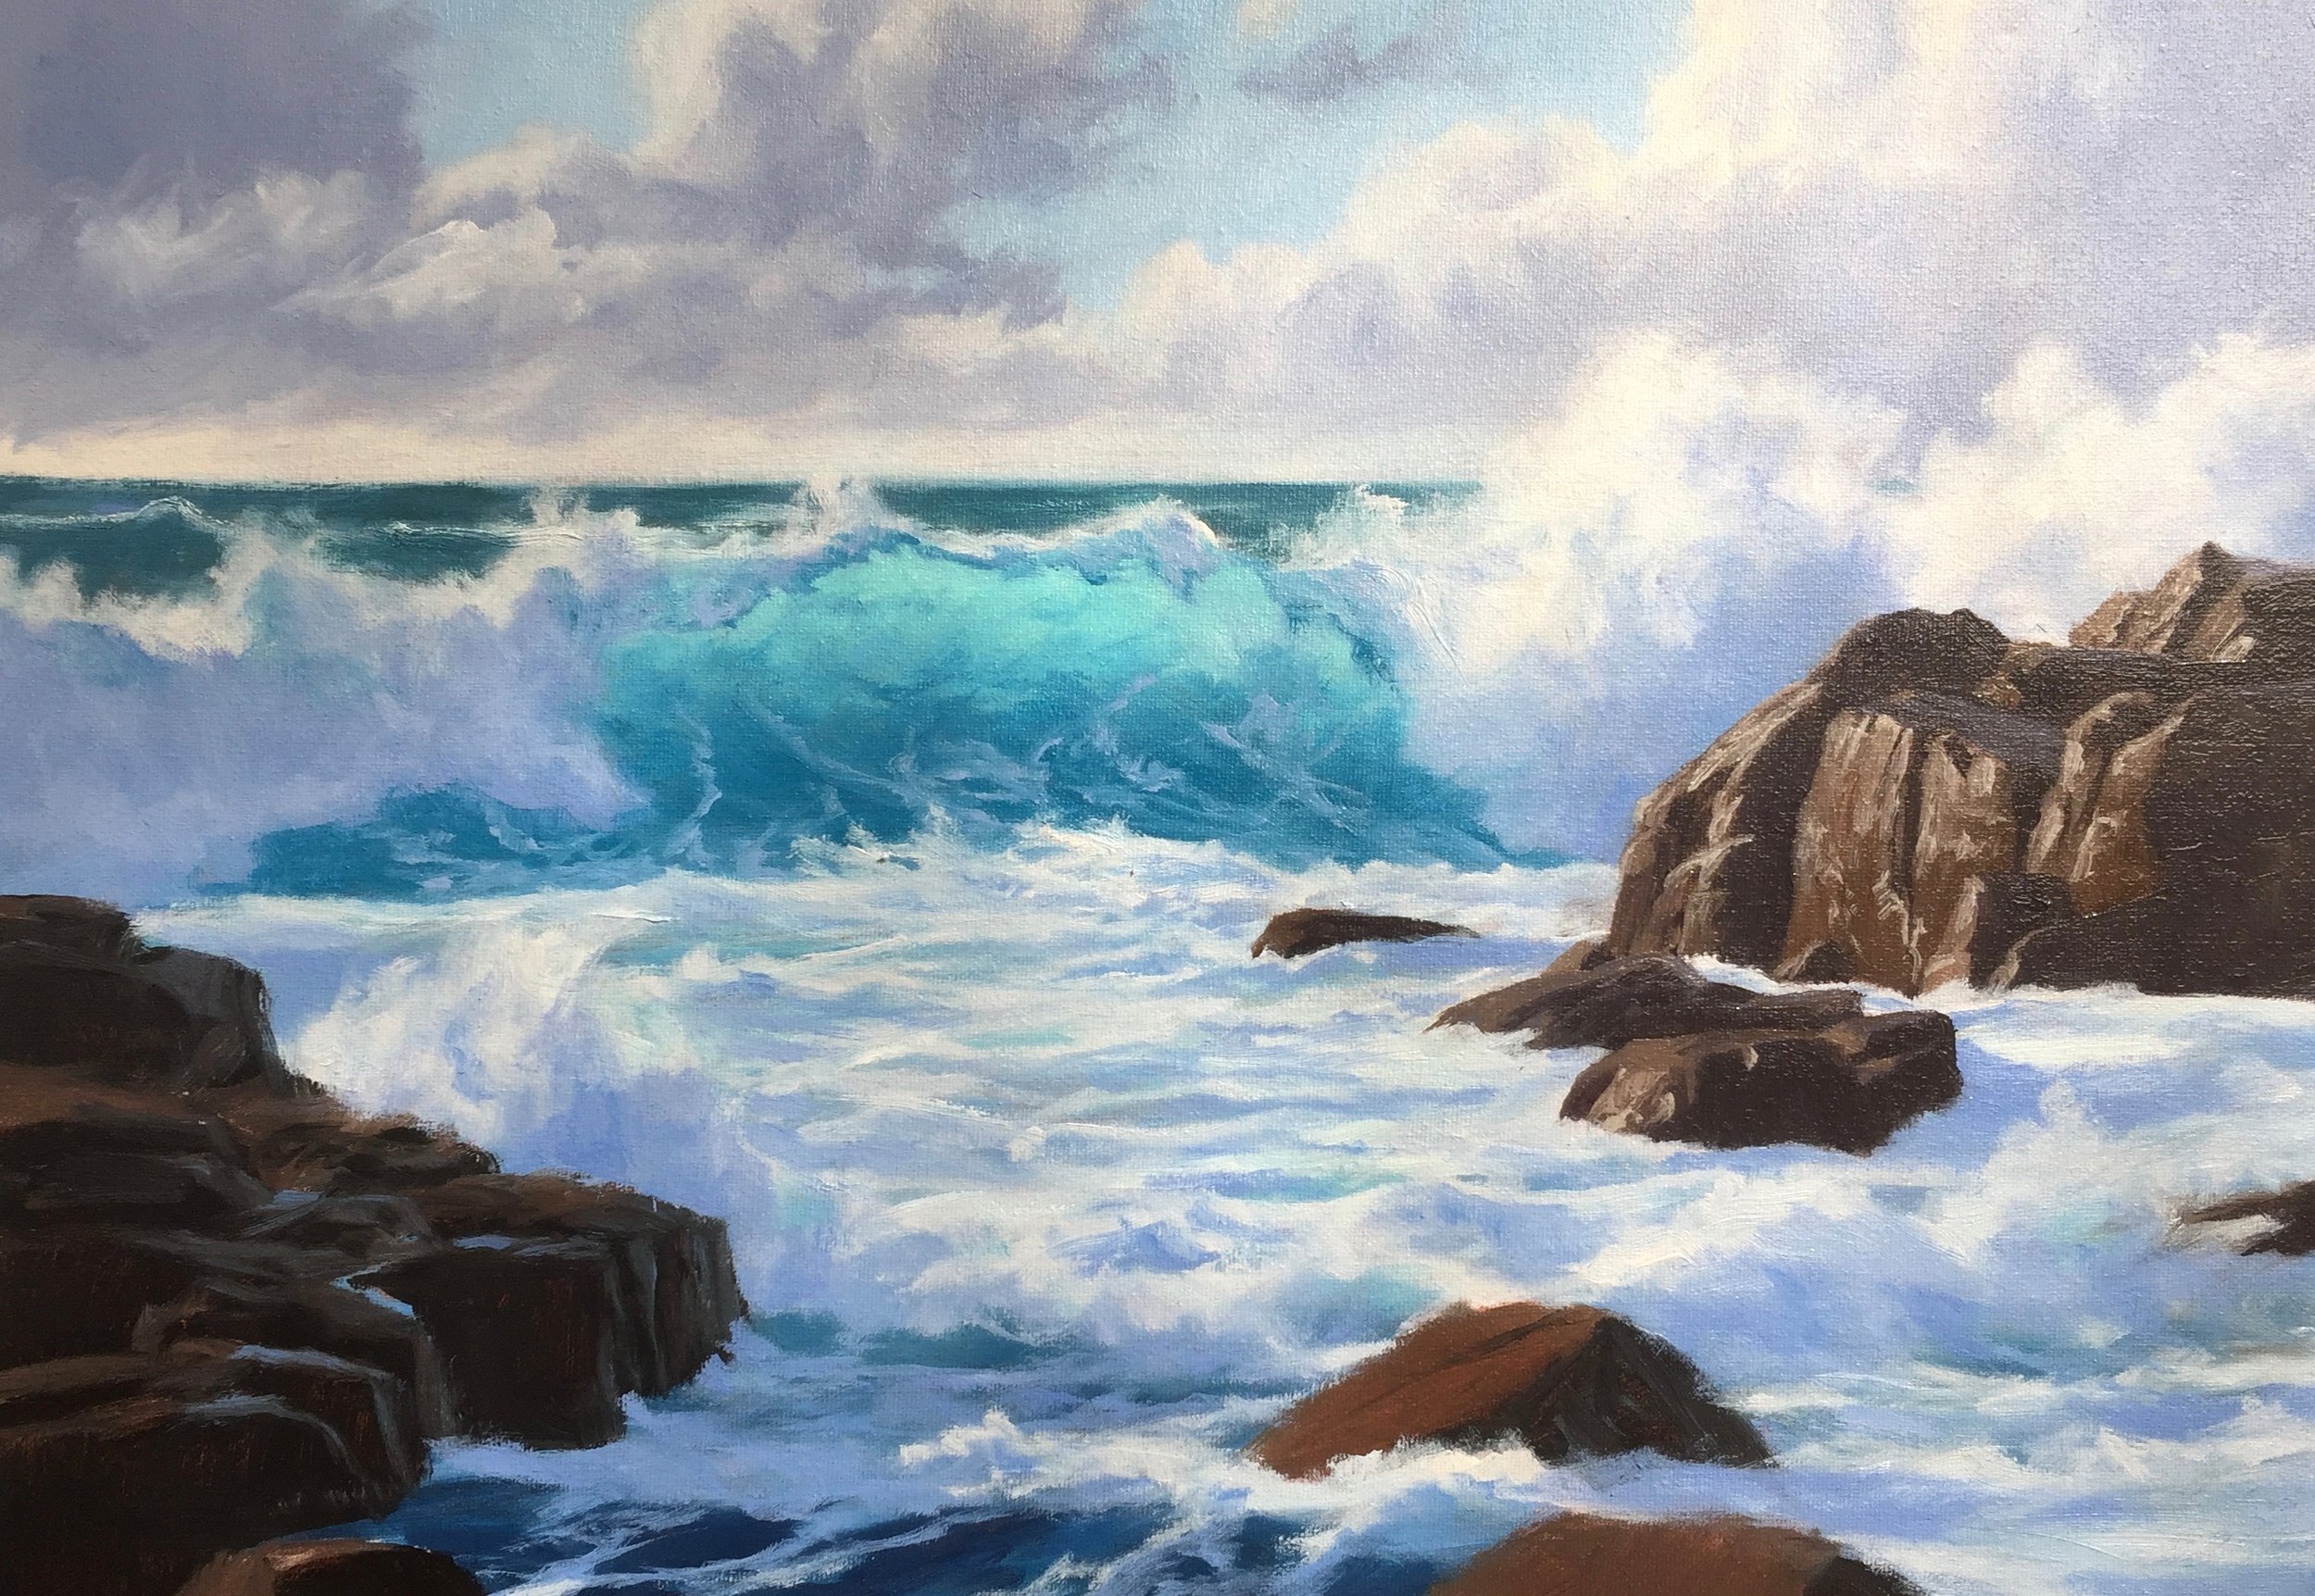
4. REFINING THE PAINTING
At this stage of the painting, I am refining the highlights in the white water in the foreground taking care not to make it completely white as I still need to keep it tonally a little darker so that when I add the highlights at the end with pure titanium white it will really pop.
Using a dagger brush I paint the shadows in the white water using the same colours I used in the shadow areas of the foam in the breaking wave.
I paint the glistening water in the rocks on the right of the painting using titanium white with a tiny amount of burnt umber mixed with it.
Using an old fan brush where I had removed some of the bristles with some scissors I paint water droplets in the foam burst on the right side of the painting.
Next, I focus on painting the reflected light on top of the rocks but also in a manner that gives the illusion that the rocks are wet. To do this I mix cobalt teal with quinacridone magenta and titanium white which creates a really nice violet hue, I round off the mixture with cobalt blue and desaturate the mix a little by mixing in some burnt umber.
Using a dagger brush I mix ultramarine blue with burnt umber and define the shape of the rocks in the foreground in preparation for adding the areas in light. I make marks to indicate cracks in the rocks.
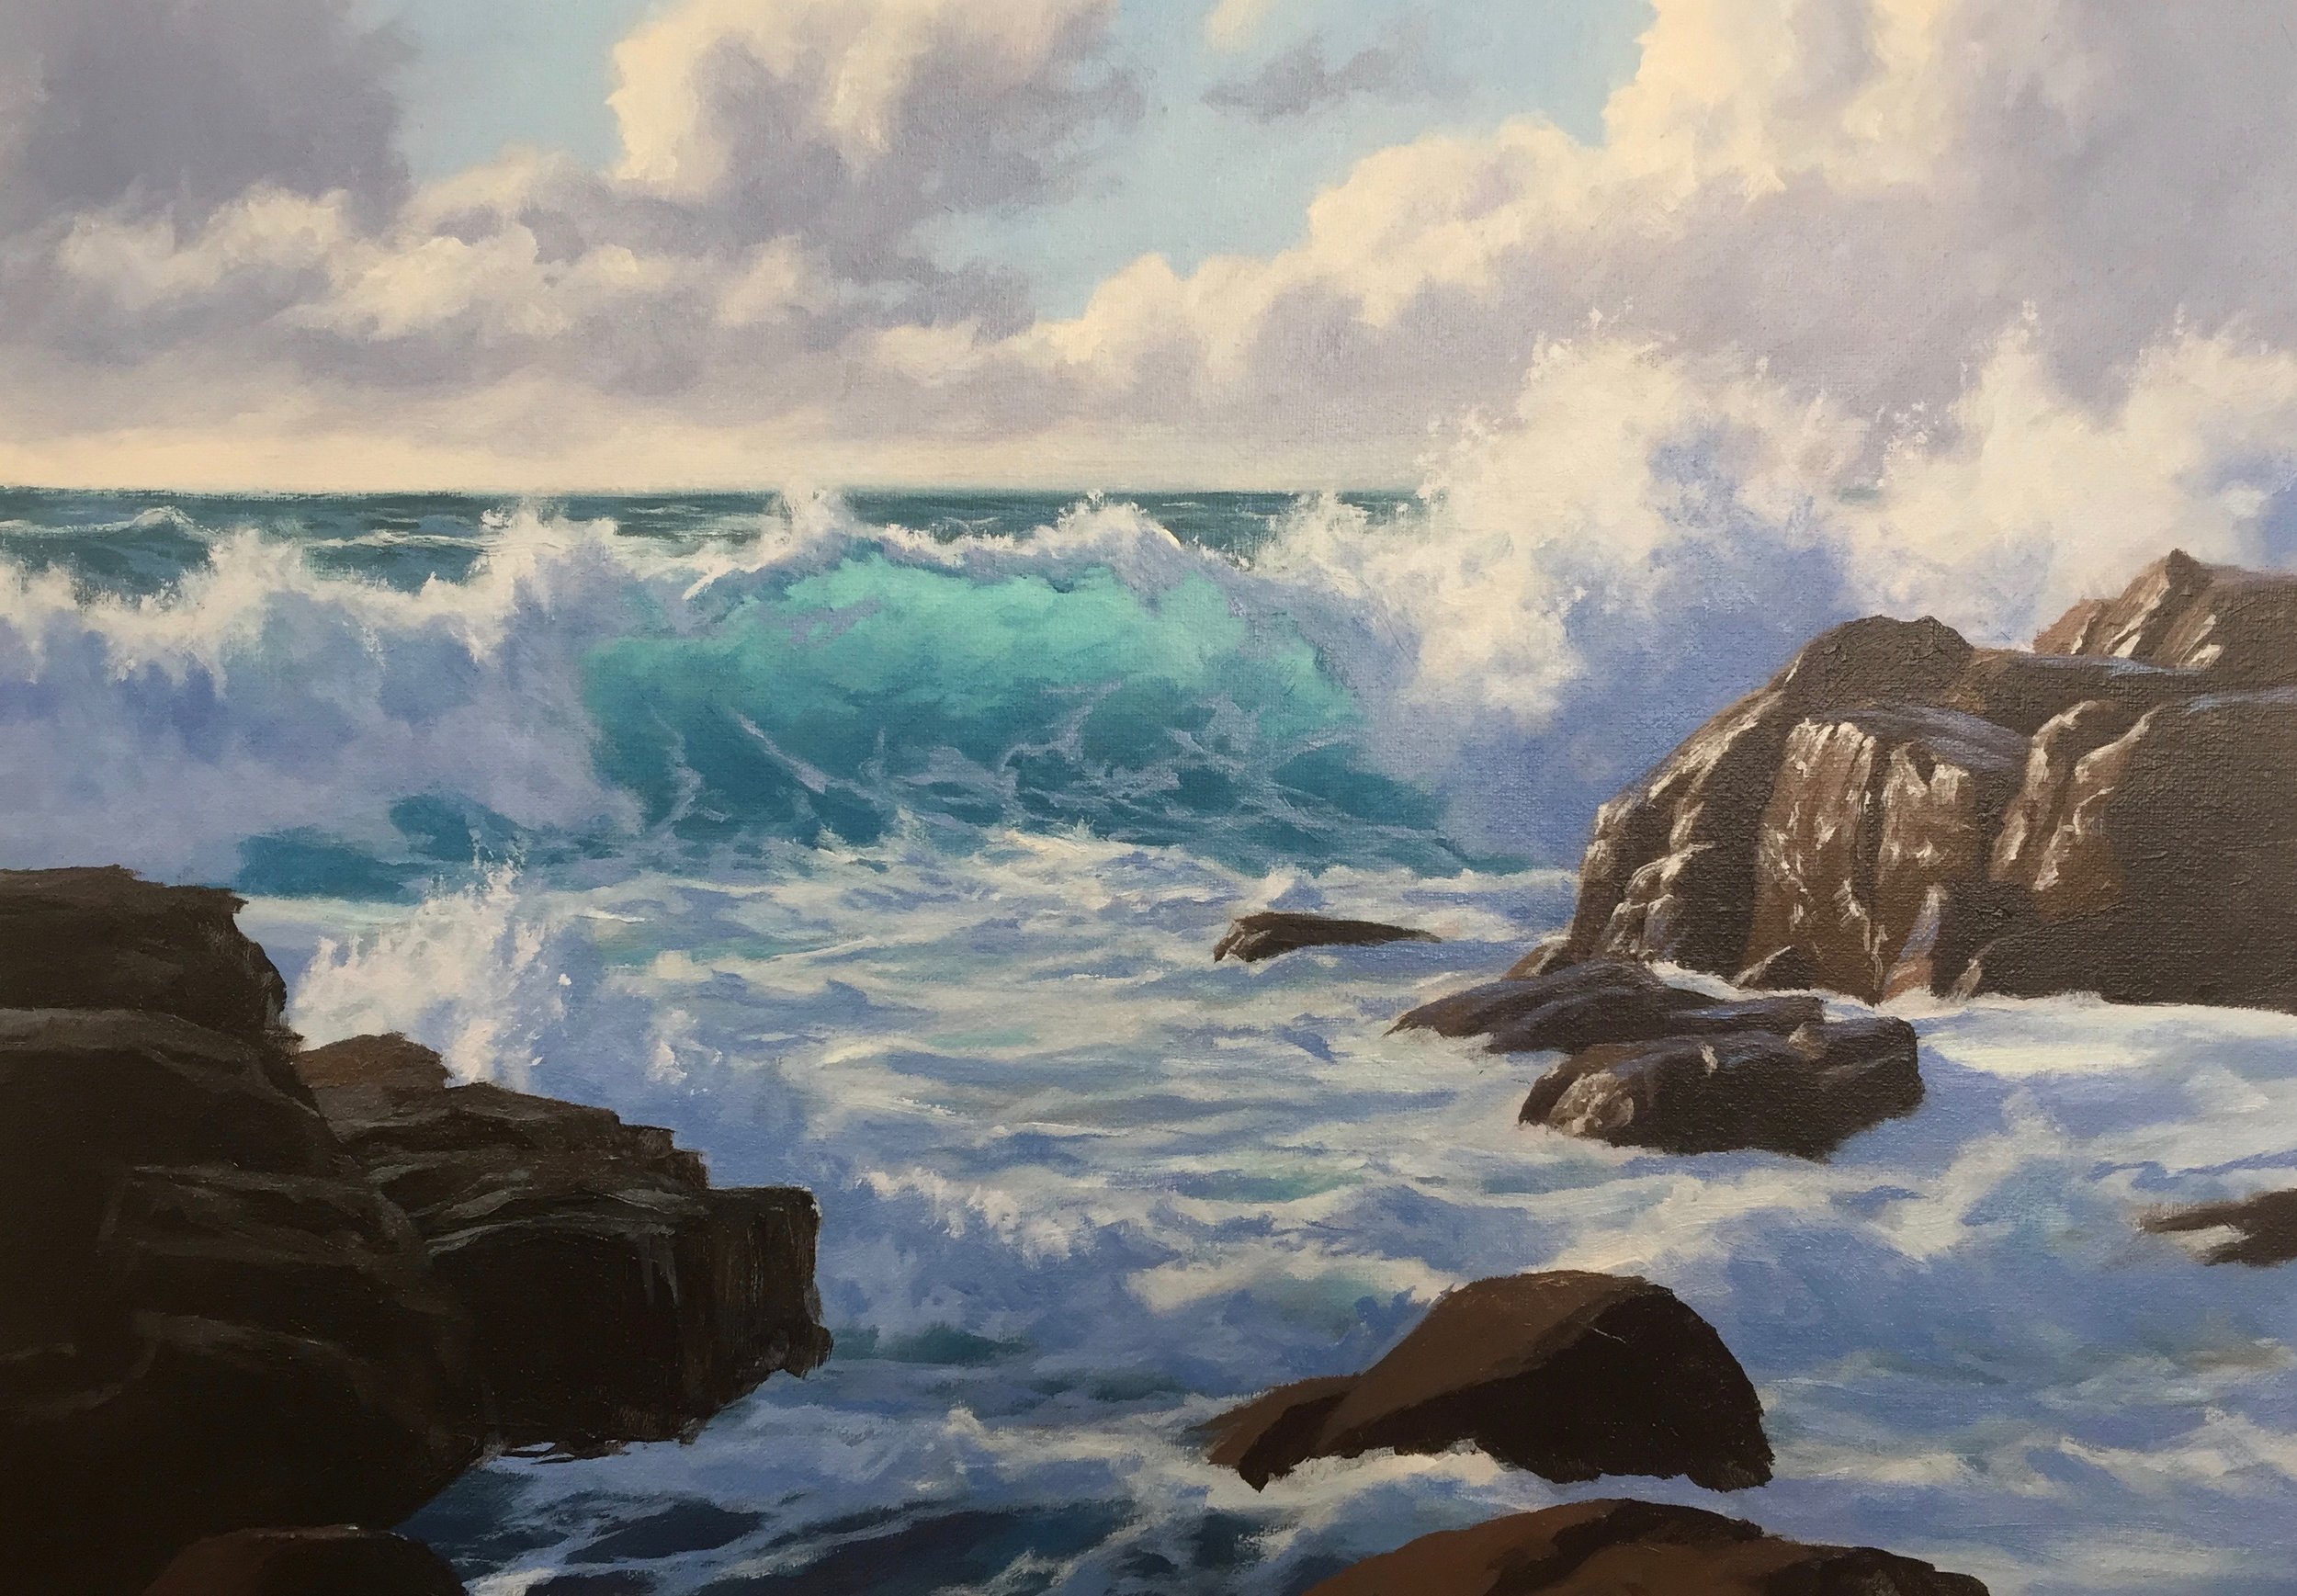
5. FINAL DETAILS
To complete this painting I add sparkles and highlights to the white water and foam bursts in the sea by using pure titanium white straight from the tube. As this is my lightest tone in the whole painting, it pops when juxtaposed against anything behind that is darker.
I focus my attention on adding the final details to the rocks in the foreground, painting the reflected light in the shadow areas using the same colours I used in my other rocks to create the illusion of wet rocks.
Using burnt umber mixed with titanium white and a little yellow oxide I paint the areas of the rocks that are in full sunlight and then add pure titanium to give the illusion of glistening wet rocks.
I give the illusion of a little heat in the shadow areas of the rocks by mixing burnt umber, quinacridone magenta and a little cadmium red light.
I complete the painting by adding spills on the rocks, something which always adds more drama to a seascape.
Want to Learn How to Paint Seascapes?
Paint Stunning Seascapes Step-by-Step
